
The Juiciest Taco Meat Recipe Ready in a Flash
Whipping up a delectable taco meat in just 20 minutes sounds like a culinary dream come true.
Weeknight dinners demand quick solutions that don’t compromise on flavor.
Lean ground beef sizzles and seasons perfectly with simple spices and herbs.
Mexican-inspired ingredients dance together, creating a mouthwatering protein base for tacos, burritos, or nachos.
Smart home cooks know that speed doesn’t mean sacrificing taste or quality.
Minimal prep work means you can have a delicious meal on the table faster than ordering takeout.
Let’s dive into this speedy recipe that promises to become your new go-to dinner solution.
Taco Meat Ready in Just 20 Minutes
Ingredients to Make Quick and Tasty Taco Meat
Protein Base:Aromatics:Seasoning and Liquid:How to Prepare Taco Meat Fast and Flavorful
Step 1: Prep the Aromatics
Finely chop the onion into small, uniform pieces and mince the garlic by crushing and chopping it into tiny bits. This will help distribute the flavors evenly throughout the meat.
Step 2: Sizzle and Soften
Heat olive oil in a large skillet over medium heat. Toss in the chopped onions and minced garlic, stirring frequently until they become translucent and release their aromatic oils, which takes about 3 minutes.
Step 3: Brown the Protein
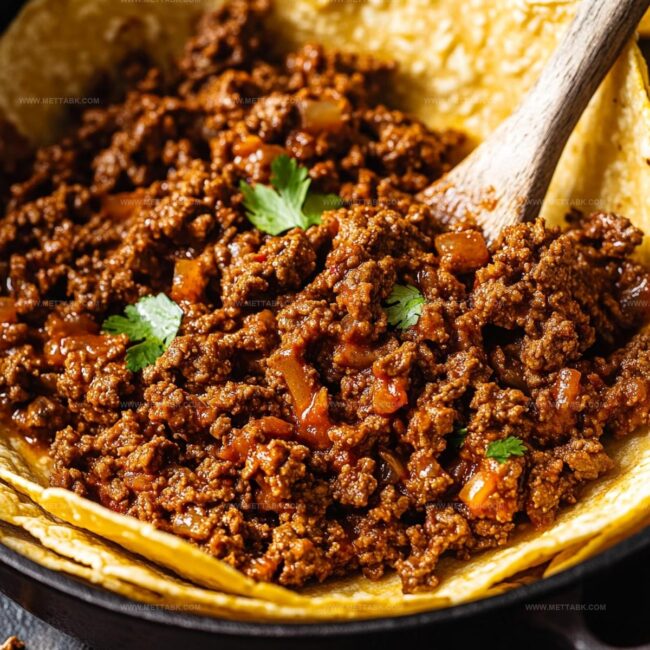
Add ground beef to the skillet, using a wooden spoon or spatula to break it into small crumbles. Cook the meat, continuously stirring and breaking it apart, until it turns a rich brown color and no pink remains, which typically takes around 5-7 minutes.
Step 4: Season and Simmer
Sprinkle taco seasoning over the browned meat:Mix the seasoning thoroughly to coat every piece of meat. Pour in water and stir to combine.
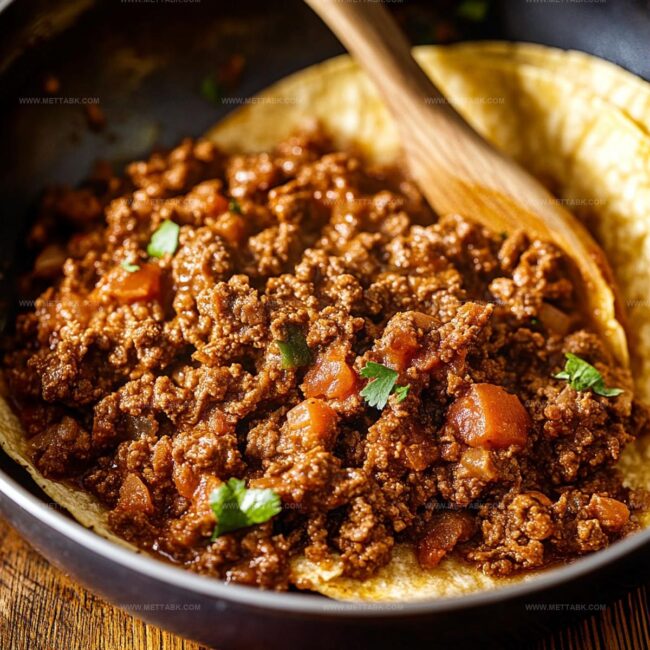
Reduce the heat to low and let the mixture simmer, allowing the flavors to meld and the sauce to thicken slightly, about 5 minutes.
Step 5: Final Check and Serve
Ensure the meat is fully cooked and the sauce has reached a desirable consistency.
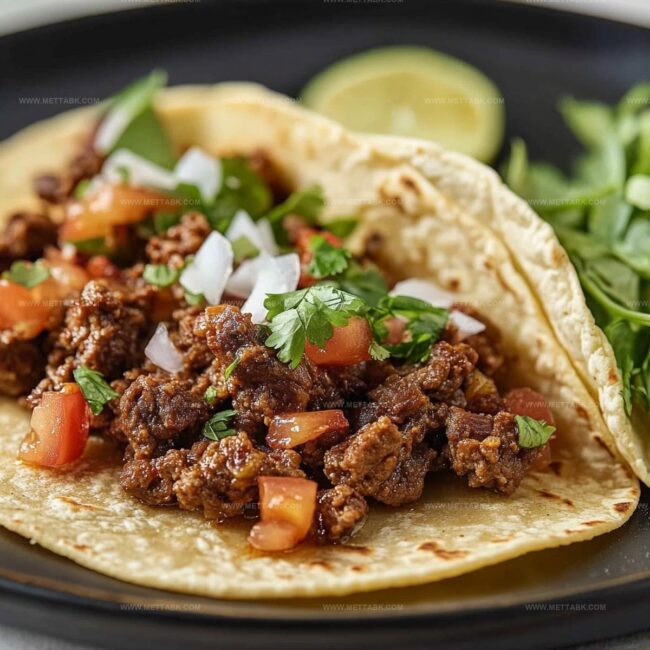
Remove from heat and serve immediately in tacos, burritos, or over rice.
Handy Tips for Perfect Taco Meat Every Time
Flavorful Twists on Quick Taco Meat to Enjoy
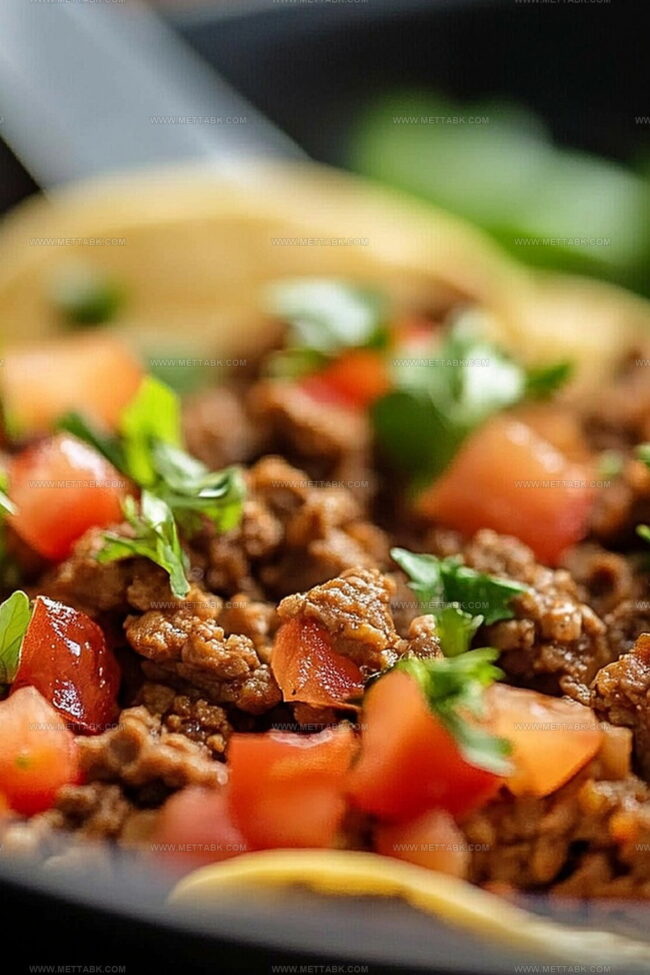
Pairings That Go Well with Quick Taco Meat

Best Storage Tips for Taco Meat That Lasts
FAQs
The seasoning mix determines the heat level. You can control spiciness by using mild or hot taco seasoning, or by adding extra chili powder or red pepper flakes to increase warmth.
Absolutely! Ground turkey is a lean alternative that works perfectly in this recipe. Just ensure it’s fully cooked and seasoned well to maintain similar flavor and texture.
The meat should be browned with no pink visible and reach an internal temperature of 160°F. Break the meat into small, even pieces while cooking to ensure uniform doneness.
Print
20-Minute Taco Meat Recipe
- Total Time: 16 minutes
- Yield: 4 1x
Description
Sizzling Mexican-style taco meat emerges as a quick weeknight dinner solution packed with robust flavors. Home cooks can prepare this spicy protein-rich dish in less than 30 minutes with simple pantry ingredients you’ll savor.
Ingredients
- 1 lb (454 g) ground beef, lean (80/20)
- 2 tbsp taco seasoning (store-bought or homemade)
- 1 tbsp olive oil
- 2/3 cup (160 ml) water
- 1/2 onion, finely chopped
- 2 garlic cloves, minced
Instructions
- Prepare the aromatics by finely dicing onions and crushing garlic cloves to release their robust flavors.
- Warm olive oil in a spacious skillet over medium-high heat, creating a sizzling cooking surface.
- Gently sauté onions and garlic until translucent and fragrant, approximately 2-3 minutes.
- Introduce ground beef to the skillet, using a spatula to crumble and distribute meat evenly.
- Cook meat for 5-6 minutes, stirring occasionally, until it transforms from pink to a rich, brown color.
- Eliminate excess grease by carefully draining fat from the skillet.
- Sprinkle taco seasoning across the meat, thoroughly mixing to ensure each morsel is coated with zesty spices.
- Incorporate water, reducing heat to low, and allow the mixture to simmer for 4-5 minutes until the sauce thickens and clings to the meat.
- Remove from heat and let the taco meat rest for a moment to absorb final flavors before serving.
Notes
- Customize the seasoning blend by mixing your own spices for a personalized flavor profile that reduces sodium and eliminates preservatives.
- Make the recipe leaner by choosing ground turkey or chicken instead of beef, which cuts down on fat content while maintaining delicious taco taste.
- Prep ingredients beforehand to streamline cooking process, ensuring quick and efficient meal preparation during busy weeknights.
- Store leftover taco meat in airtight containers for up to 3-4 days, creating versatile protein for salads, nachos, or quick lunch bowls.
- Prep Time: 5 minutes
- Cook Time: 11 minutes
- Category: Lunch, Dinner, Snacks
- Method: Sautéing
- Cuisine: Mexican
Nutrition
- Serving Size: 4
- Calories: 275 kcal
- Sugar: 1 g
- Sodium: 450 mg
- Fat: 18 g
- Saturated Fat: 7 g
- Unsaturated Fat: 8 g
- Trans Fat: 0.5 g
- Carbohydrates: 3 g
- Fiber: 1 g
- Protein: 22 g
- Cholesterol: 70 mg
Clara Bennett
Contributing Recipe Developer & Food Writer
Expertise
Baking and Pastry Development, Gluten-Free and Allergy-Friendly Recipe Creation, Culinary Storytelling and Food Journalism, Recipe Testing and Standardization, Southern Comfort Foods and Modern Twists
Education
Sullivan University – National Center for Hospitality Studies
Associate Degree in Culinary Arts
Focus: Baking and Pastry Arts, Recipe Testing, and Culinary Journalism.
Clara specialized in crafting desserts that blend classic Southern comfort with modern techniques, while developing strong writing skills to tell the story behind every dish.
Lane Community College (Certificate Program)
Certificate in Food Writing and Photography
Focus: Culinary storytelling, recipe formatting, food styling, and visual presentation.
Clara’s love of baking started young, powered by homemade pies, biscuits, and stories passed around the family table.
After earning her degree at Sullivan University and a food writing certificate at Lane Community College, she turned her passion into a craft: sharing recipes that are simple, soulful, and always full of heart.
She’s big on bold flavors, flexible ideas, and creating sweets that fit any table (yes, even if you’re gluten-free). When she’s not baking, you’ll find her wandering farmers’ markets, styling food for the next photo shoot, or working on her ever-growing recipe journal.