
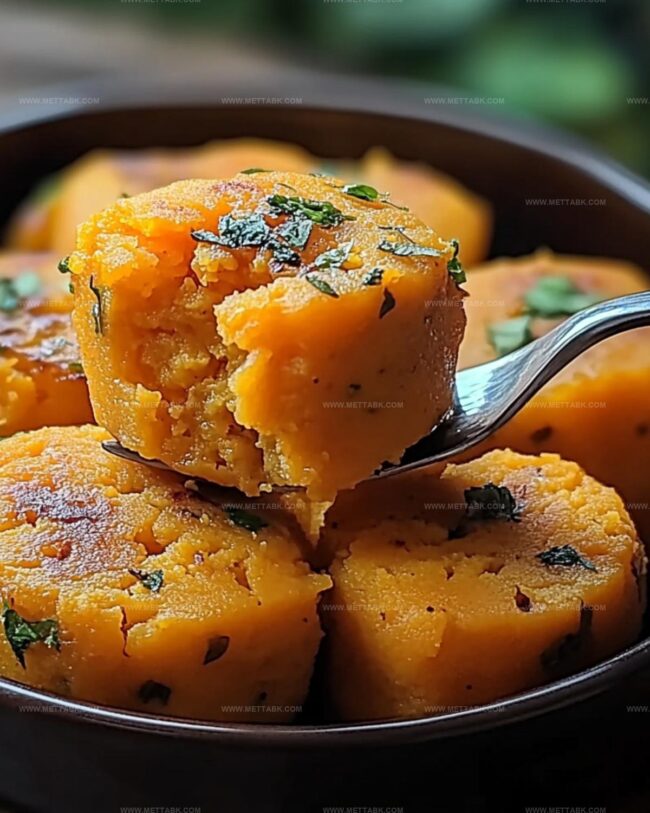
The Fluffiest 2-Ingredient Sweet Potato Rolls Recipe Ever
Crafting delightful sweet potato rolls with just two ingredients sounds like a kitchen magic trick that surprises everyone.
Simplicity meets deliciousness in this unexpected culinary adventure.
Soft, pillowy textures emerge from minimal ingredients, challenging traditional baking expectations.
Minimal effort creates maximum flavor in these remarkable rolls.
Pantry staples transform into something extraordinary with smart techniques.
Curious cooks will love how quickly these rolls come together.
Come explore this foolproof recipe that makes you look like a baking genius.
Sweet Potato Rolls Using Just Two Ingredients
Everything That Goes Into These Potato Rolls
For the Main Ingredients:For the Baking Essentials:For the Optional Finishing Touches:Directions to Make These Rolls With Ease
Step 1: Warm Up The Oven
Crank your oven to a toasty 400°F (200°C). Grab a baking sheet and line it with parchment paper for easy cleanup.
Step 2: Crush Those Sweet Potatoes
Grab your sweet potatoes and transform them into a silky smooth mash in a spacious mixing bowl. Use a potato masher or fork to break down any stubborn lumps.
Step 3: Create Magical Dough
Sprinkle flour into the mashed sweet potatoes. Mix and blend until a shaggy, rustic dough starts to take shape.
Don’t worry about perfection – deliciousness is the goal!
Step 4: Knead With Love
Dust your work surface with a light coating of flour.
Gently knead the dough for about a minute, transforming it from a messy mix to a smooth, cohesive ball of potential deliciousness.
Step 5: Shape Your Rolls
Divide the dough into 12 equal pieces.
Roll each piece into a cute little ball, creating uniform rolls that will make your kitchen smell amazing. Arrange these beauties on your prepared baking sheet.
Step 6: Bake To Golden Perfection
Slide the baking sheet into the preheated oven. Bake for 15-20 minutes, watching for that gorgeous golden-brown color that signals crispy, tender rolls are ready to devour.
Baking Tips for Two-Ingredient Sweet Rolls
Flavor Add-Ons to Try With Potato Rolls
Great Sides With Sweet Potato Roll
Storing Sweet Potato Rolls After Baking
Store rolls in an airtight container for up to 3 days. Wrap each roll individually in plastic wrap to maintain moisture and prevent them from drying out.
Place completely cooled rolls in a freezer-safe bag or container. Seal tightly, removing as much air as possible. They’ll stay fresh for 1-2 months.
Preheat oven to 350F, wrap rolls in aluminum foil to prevent over-browning, and warm for 5-7 minutes until heated through.
Wrap rolls in a damp paper towel, microwave for 15-20 seconds to restore softness and warmth.
FAQs
Sweet potato rolls are nutritious, packed with vitamins A and C, fiber, and complex carbohydrates. They’re a healthier alternative to traditional bread rolls with added nutritional benefits from sweet potatoes.
Yes, you can substitute all-purpose flour with whole wheat flour, gluten-free flour, or self-rising flour. Each flour type might slightly change the texture and rise of the rolls.
Look for a golden-brown color on the exterior and a light, soft texture when touched. When tapped, the rolls should sound slightly hollow, indicating they’re baked through.
Print
2-Ingredient Sweet Potato Rolls Recipe
- Total Time: 35 minutes
- Yield: 8 1x
Description
Savory sweet potato rolls blend comforting Southern hospitality with simple, hearty ingredients. Home cooks can quickly craft these warm, golden pillows of goodness that promise delightful flavor in every delectable bite.
Ingredients
Main Ingredients:
- 2 cups mashed sweet potatoes (about 4 medium potatoes, cooked)
- 2 cups (260 grams) self-rising flour
Measurement Conversions:
- 2 cups = 473 milliliters
- 260 grams = 9.2 ounces
Instructions
- Warm the oven to 400F (200C) and prepare a baking sheet with parchment paper for optimal roll placement.
- Transform sweet potatoes into a velvety, uniform texture by thoroughly mashing them in a spacious mixing bowl.
- Incorporate flour into the mashed sweet potatoes, stirring until a rough, uneven dough begins to take shape.
- Transfer the dough to a flour-dusted surface and gently manipulate it with quick, light kneading motions to create a cohesive, smoother consistency.
- Partition the dough into 12 equal segments, carefully rolling each portion into a uniform spherical shape.
- Arrange the rounded dough balls evenly across the prepared baking sheet, ensuring adequate spacing between each roll.
- Position the baking sheet in the preheated oven and bake for 15-20 minutes, monitoring until the rolls develop a rich, golden-brown exterior.
Notes
- Swap sweet potatoes for pumpkin or butternut squash to create delightful seasonal variations with similar textures.
- Use gluten-free flour blend for a celiac-friendly version that maintains the soft, pillowy roll consistency.
- Brush rolls with melted butter or olive oil before baking to enhance golden-brown color and add extra flavor depth.
- Allow sweet potatoes to cool slightly before mixing to prevent overworking the dough and ensure tender, light rolls.
- Prep Time: 20 minutes
- Cook Time: 15 minutes
- Category: Lunch, Dinner, Snacks
- Method: Baking
- Cuisine: American
Nutrition
- Serving Size: 8
- Calories: 156
- Sugar: 3 g
- Sodium: 150 mg
- Fat: 0.5 g
- Saturated Fat: 0.1 g
- Unsaturated Fat: 0.3 g
- Trans Fat: 0 g
- Carbohydrates: 33 g
- Fiber: 2.5 g
- Protein: 3 g
- Cholesterol: 0 mg
Clara Bennett
Contributing Recipe Developer & Food Writer
Expertise
Baking and Pastry Development, Gluten-Free and Allergy-Friendly Recipe Creation, Culinary Storytelling and Food Journalism, Recipe Testing and Standardization, Southern Comfort Foods and Modern Twists
Education
Sullivan University – National Center for Hospitality Studies
Associate Degree in Culinary Arts
Focus: Baking and Pastry Arts, Recipe Testing, and Culinary Journalism.
Clara specialized in crafting desserts that blend classic Southern comfort with modern techniques, while developing strong writing skills to tell the story behind every dish.
Lane Community College (Certificate Program)
Certificate in Food Writing and Photography
Focus: Culinary storytelling, recipe formatting, food styling, and visual presentation.
Clara’s love of baking started young, powered by homemade pies, biscuits, and stories passed around the family table.
After earning her degree at Sullivan University and a food writing certificate at Lane Community College, she turned her passion into a craft: sharing recipes that are simple, soulful, and always full of heart.
She’s big on bold flavors, flexible ideas, and creating sweets that fit any table (yes, even if you’re gluten-free). When she’s not baking, you’ll find her wandering farmers’ markets, styling food for the next photo shoot, or working on her ever-growing recipe journal.