
The Perfect Air Fryer Peanut Butter Cookies Recipe for Snack Time
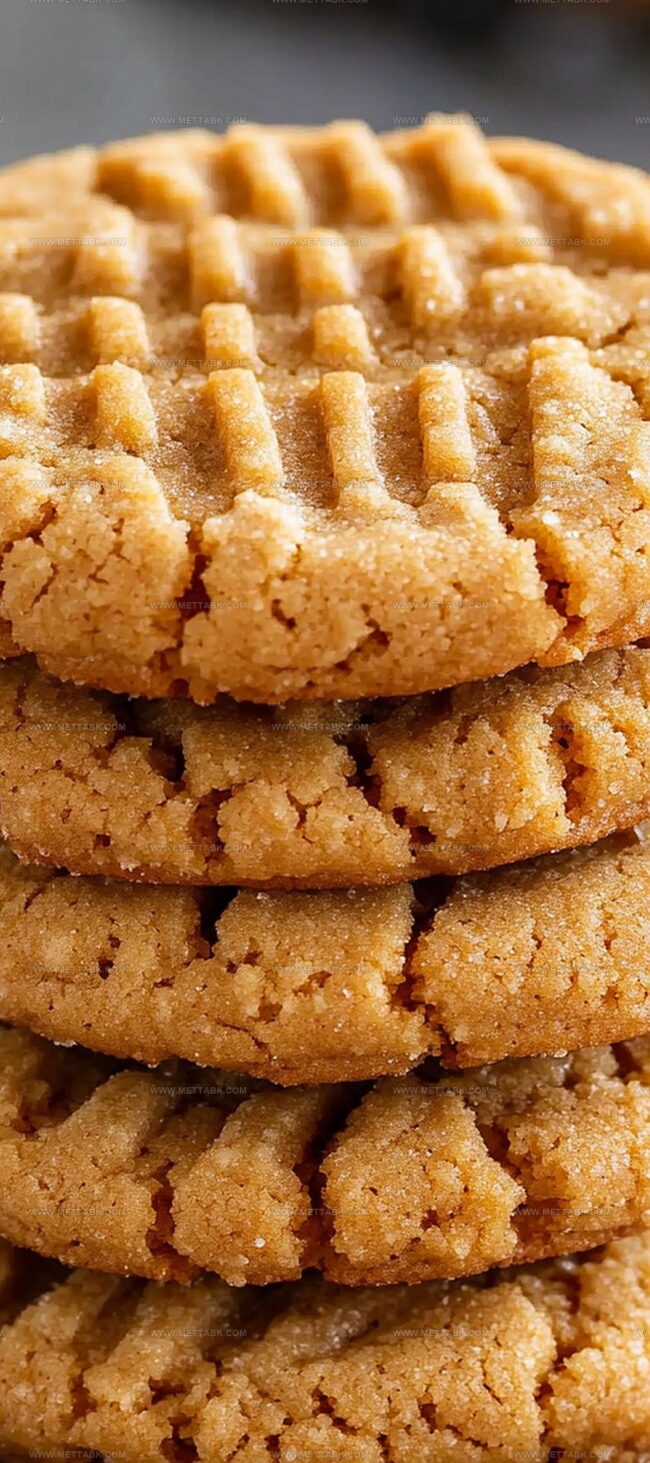
Crispy and golden, these air fryer peanut butter cookies capture a delightful twist on a classic treat.
Soft centers complement their perfectly crunchy edges with minimal effort.
Sweet nutty flavors melt in your mouth, creating an instant comfort sensation.
Nobody can resist the rich aroma wafting through the kitchen during baking.
Simple ingredients blend seamlessly for a quick dessert that impresses everyone.
Minimal prep means you can enjoy fresh, warm cookies in minutes.
Brace yourself for a mouthwatering experience that will make you fall in love with this effortless recipe.
Air Fryer Peanut Butter Cookies Overview

Ingredients for Air Fryer Peanut Butter Cookies
Instructions for Air Fryer Peanut Butter Cookies
Step 1: Mix Cookie Dough
Grab a large mixing bowl and combine the egg, sugar, and peanut butter. Use a whisk or spatula to blend everything together until the mixture looks smooth and well combined.
Make sure there are no lumps in the dough.
Step 2: Shape Cookie Balls
Scoop out small portions of the dough using a spoon.
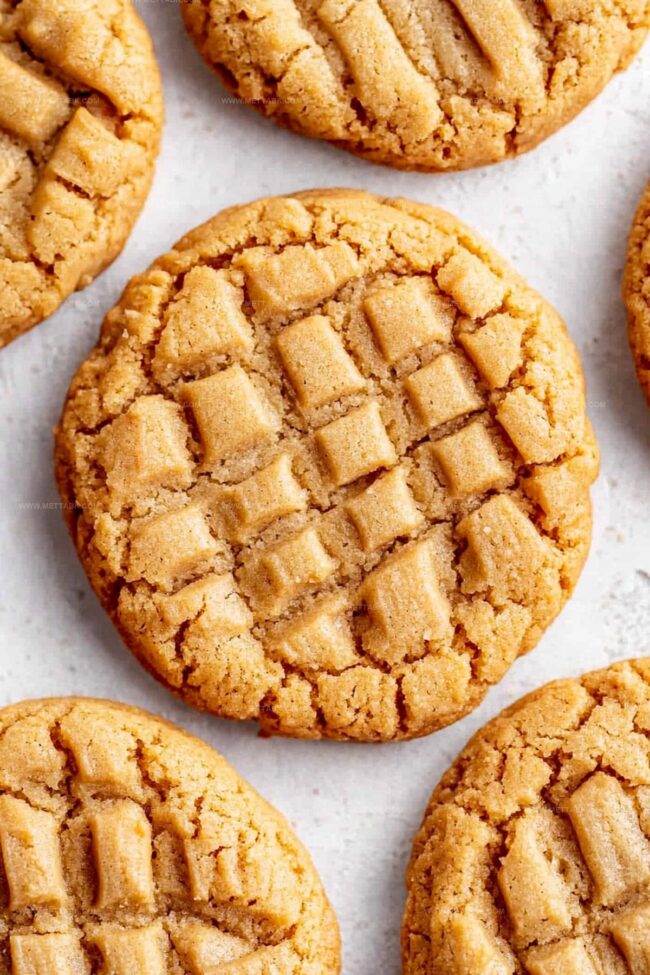
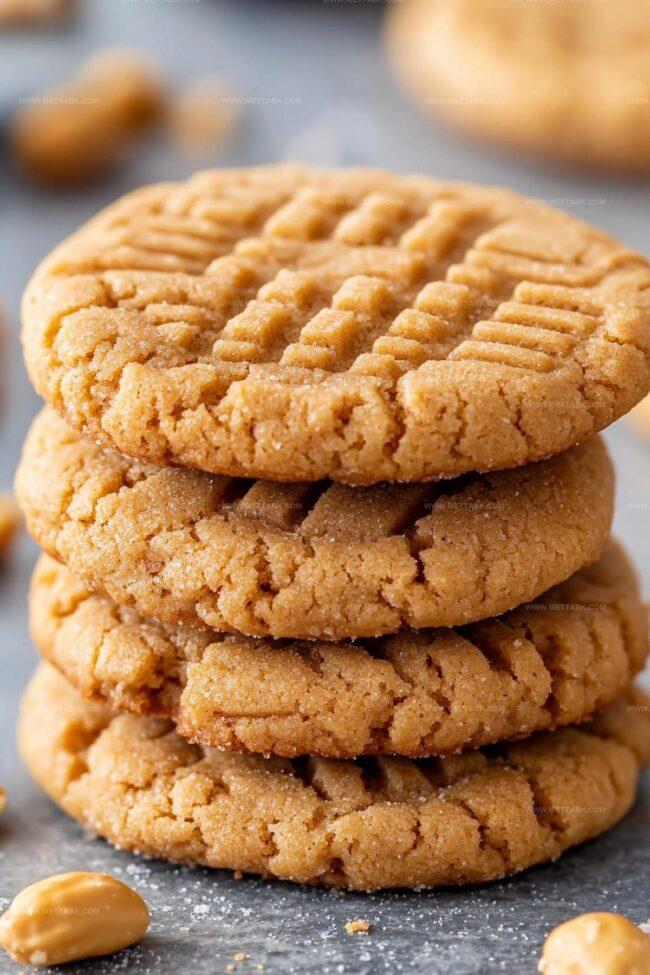
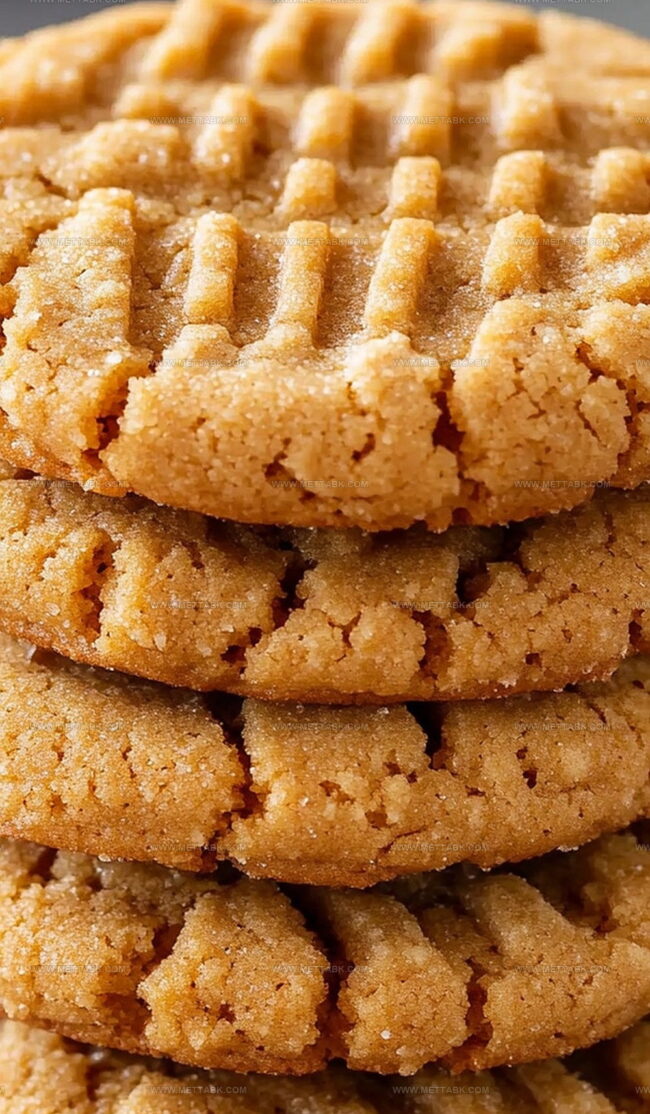
Roll each portion between your palms to create perfect round balls. Take a fork and gently press down on each ball, creating a classic crisscross pattern.
This helps flatten the cookies and gives them that traditional peanut butter cookie look.
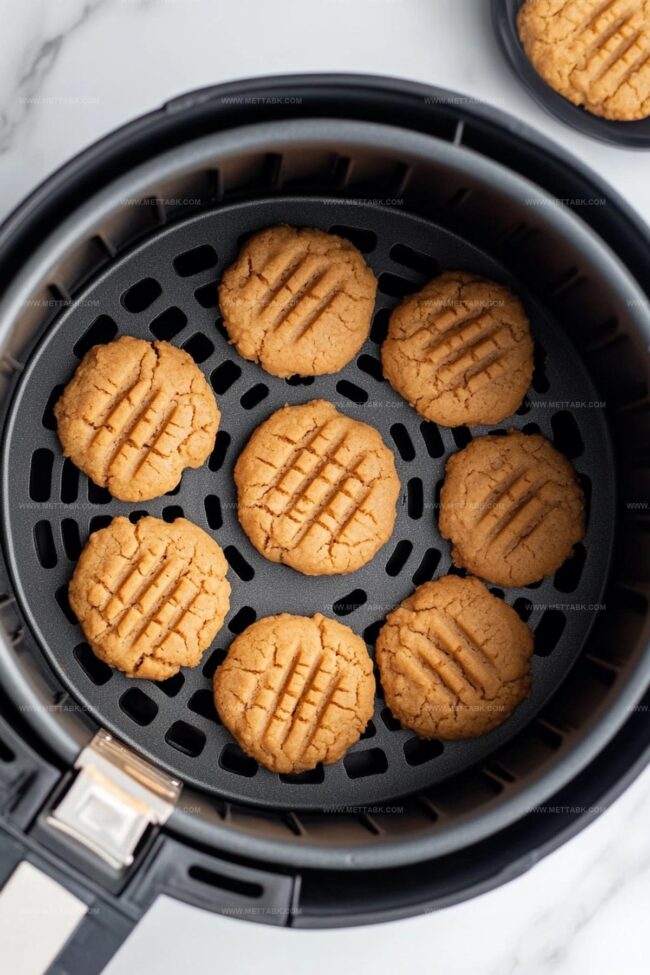
Step 3: Prepare Air Fryer
Turn on your air fryer and set the temperature to 400°F.
Lightly spray the air fryer basket with cooking spray or brush with a thin layer of oil to prevent sticking. This will make sure your cookies don’t get stuck and break when you remove them.
Step 4: Cook Cookies
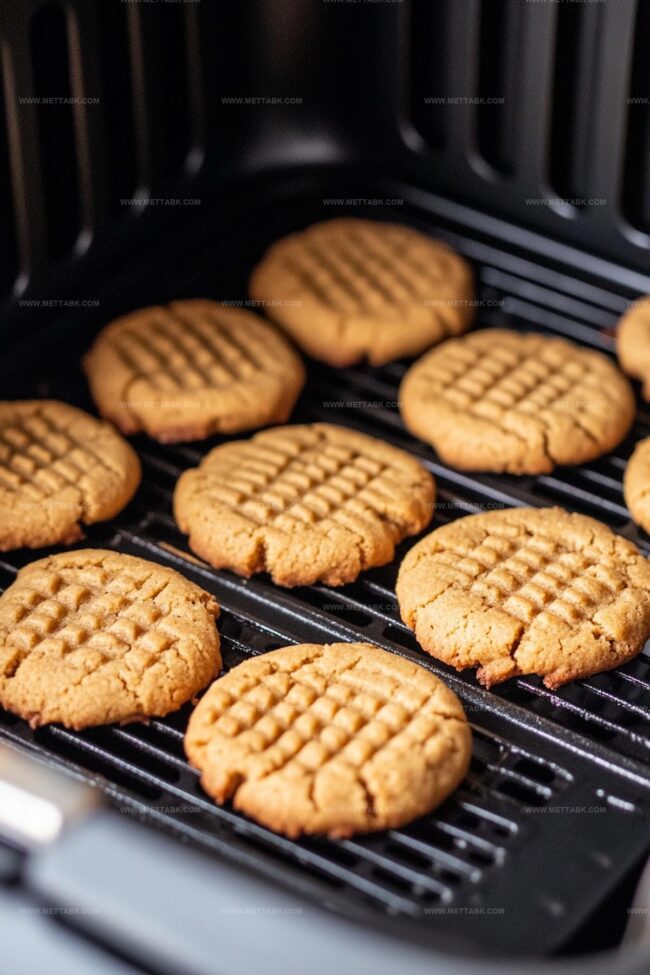
Carefully place the shaped cookie dough balls into the air fryer basket. Leave some space between each cookie so hot air can circulate properly.
Cook the cookies for 3-4 minutes. Keep an eye on them to make sure they don’t burn.
You want them to turn golden brown with slightly crispy edges.
Step 5: Cool and Serve
Once the cookies are done, remove them from the air fryer and let them cool on a wire rack for a few minutes.
This helps them set and become firm. Enjoy your warm, freshly baked peanut butter cookies while they’re still slightly soft in the middle!
Tips for Air Fryer Peanut Butter Cookies
Variations of Air Fryer Peanut Butter Cookies
Pairing Suggestions for Air Fryer Peanut Butter Cookies
Storage Guidelines for Air Fryer Peanut Butter Cookies

FAQs
Not automatically. This recipe requires flour, which contains gluten. To make them gluten-free, you’ll need to substitute regular flour with gluten-free flour alternatives like almond flour or a certified gluten-free baking mix.
Absolutely! Crunchy peanut butter works perfectly and will add extra texture to your cookies. The recipe will remain the same, and the taste will be just as delicious with added peanut chunks.
Look for light browning around the edges and a slight firmness. The cookies should appear set but not dark. They’ll continue to firm up slightly while cooling, so avoid overcooking to maintain a soft, chewy texture.
Print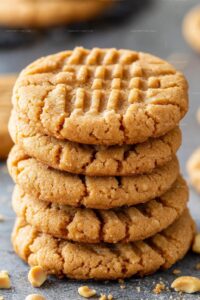
Air Fryer Peanut Butter Cookies Recipe
- Total Time: 14 minutes
- Yield: 12 1x
Description
Delightful air fryer peanut butter cookies blend classic comfort with modern convenience. Crisp edges and rich flavor make these treats irresistible for quick dessert cravings you can enjoy effortlessly.
Ingredients
- 1 cup smooth peanut butter
- 1 cup granulated sugar
- 1 large egg (at room temperature, thoroughly beaten)
Instructions
- In a large mixing bowl, whisk together the egg, sugar, and peanut butter until the mixture becomes smooth and fully integrated, creating a uniform consistency.
- Scoop out uniform portions of the dough using a tablespoon, then gently roll each portion into round balls with your palms.
- Create a distinctive crisscross pattern on each cookie ball by pressing down with a fork, which will flatten the cookies and provide an attractive textured surface.
- Prepare the air fryer by preheating to 400°F and lightly coating the basket with cooking spray to prevent sticking.
- Carefully arrange the cookie dough balls in the air fryer basket, spacing them approximately one inch apart to ensure proper hot air circulation.
- Cook the cookies for 3-4 minutes, watching carefully until they develop a golden-brown color and achieve a slightly crisp edge.
- Remove the cookies from the air fryer and let them rest briefly in the basket to stabilize their structure.
- Transfer the cookies to a wire cooling rack, allowing them to cool completely and set their texture before serving or storing.
Notes
- Customize the sweetness by adjusting sugar levels, using alternative sweeteners like honey or maple syrup for a different flavor profile.
- Experiment with crunchy or natural peanut butter to add unique texture and depth to the cookies.
- Consider adding chocolate chips, chopped nuts, or a sprinkle of sea salt for extra flavor complexity and personal touch.
- Ensure even spacing in the air fryer basket to promote consistent cooking and prevent cookies from sticking together.
- Prep Time: 10 minutes
- Cook Time: 4 minutes
- Category: Desserts, Snacks
- Method: Air Frying
- Cuisine: American
Nutrition
- Serving Size: 12
- Calories: 203 kcal
- Sugar: 12 g
- Sodium: 142 mg
- Fat: 13 g
- Saturated Fat: 3 g
- Unsaturated Fat: 9 g
- Trans Fat: 0 g
- Carbohydrates: 16 g
- Fiber: 2 g
- Protein: 7 g
- Cholesterol: 19 mg
Clara Bennett
Contributing Recipe Developer & Food Writer
Expertise
Baking and Pastry Development, Gluten-Free and Allergy-Friendly Recipe Creation, Culinary Storytelling and Food Journalism, Recipe Testing and Standardization, Southern Comfort Foods and Modern Twists
Education
Sullivan University – National Center for Hospitality Studies
Associate Degree in Culinary Arts
Focus: Baking and Pastry Arts, Recipe Testing, and Culinary Journalism.
Clara specialized in crafting desserts that blend classic Southern comfort with modern techniques, while developing strong writing skills to tell the story behind every dish.
Lane Community College (Certificate Program)
Certificate in Food Writing and Photography
Focus: Culinary storytelling, recipe formatting, food styling, and visual presentation.
Clara’s love of baking started young, powered by homemade pies, biscuits, and stories passed around the family table.
After earning her degree at Sullivan University and a food writing certificate at Lane Community College, she turned her passion into a craft: sharing recipes that are simple, soulful, and always full of heart.
She’s big on bold flavors, flexible ideas, and creating sweets that fit any table (yes, even if you’re gluten-free). When she’s not baking, you’ll find her wandering farmers’ markets, styling food for the next photo shoot, or working on her ever-growing recipe journal.