
Easy Almond Joy Cookies Recipe: Sweet Paradise in Every Bite
Sweet memories of childhood treats inspire this delightful Almond Joy cookies creation that brings nostalgia right to your kitchen.
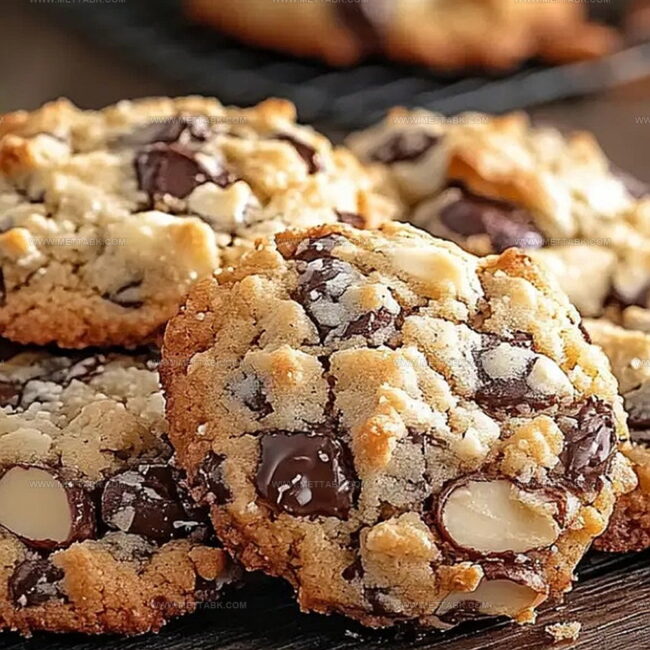
Coconut, chocolate, and almonds dance together in a magical blend of flavors.
Crunchy nuts and smooth chocolate create an irresistible combination everyone adores.
Each bite promises a delectable journey through texture and taste.
Light, crisp, and perfectly balanced, these cookies offer comfort and excitement in one simple treat.
Indulgent yet simple, they connect childhood happiness with grown-up culinary creativity.
Bake these and watch smiles bloom around your table.
Almond Joy Cookies Rundown
Ingredients for Almond Joy Cookies
Base Ingredients:Nut Ingredient:Baking Preparation:How to Make Almond Joy Cookies

Step 1: Warm Up the Oven
Set your oven to 325°F. Line a baking sheet with parchment paper to prevent sticking and ensure even baking.
Step 2: Create the Cookie Base
In a large mixing bowl, combine:Pour sweetened condensed milk over the ingredients and mix thoroughly until everything is evenly coated.
Step 3: Shape the Clusters
Use a cookie scoop to form tight clusters.
Pack the mixture firmly to help maintain shape. Place each cluster on the prepared baking sheet, spacing them about an inch apart.
Step 4: Bake to Perfection
Slide the baking sheet into the preheated oven. Bake for 12-14 minutes until edges turn golden brown and tops look set.
Watch carefully to prevent overcooking.
Step 5: Cool and Set
Let the cookies rest on the baking sheet for a few minutes.
Transfer to a wire rack to cool completely. The cookies will become firmer as they cool down.
Step 6: Store and Enjoy
Keep the cooled cookies in an airtight container at room temperature for up to one week. For longer storage, freeze the cookies.
These treats are perfect for sharing with friends or enjoying as a personal indulgence.
Tips for Almond Joy Cookies
Variations on Almond Joy Cookies
Pairing Ideas for Almond Joy Cookies
Complement the cookie’s tropical coconut flavor with a refreshing piña colada mocktail or a creamy coconut milk latte.
Enhance the chocolate chips’ richness by serving alongside a velvety hot chocolate or a smooth espresso martini for adult gatherings.
Elevate the almond essence with a smooth amaretto liqueur or a classic cold brew coffee that highlights the nuttiness of the cookies.
Select a sweet dessert wine like moscato or a late harvest riesling to balance the cookie’s intense sweetness and create a decadent tasting experience.
Storing Almond Joy Cookies Properly
FAQs
While you can use unsweetened coconut, the cookies might be less sweet. If using unsweetened, consider adding a bit more sweetened condensed milk or a tablespoon of sugar to maintain the desired sweetness level.
The basic recipe ingredients are naturally gluten-free. However, always check your chocolate chips and other ingredients for potential gluten cross-contamination if you have celiac disease or gluten sensitivity.
Pack the cookie clusters tightly when forming them and ensure you use the full amount of sweetened condensed milk. This helps bind the ingredients together and creates a more stable cookie structure.
Print
Almond Joy Cookies Recipe
- Total Time: 29 minutes
- Yield: 24 1x
Description
Sweet almond joy cookies blend tropical coconut, rich chocolate, and nutty almonds into irresistible bite-sized delights. Homemade comfort emerges through these simple yet indulgent treats you’ll crave with every delectable crunch.
Ingredients
Main Ingredients:
- 1 14-ounce (396 grams) bag of shredded, sweetened coconut
- 1 12-ounce (340 grams) bag of semi-sweet chocolate chips
- 1 14-ounce (396 grams) can of sweetened condensed milk
Nut Ingredient:
- 3/4 cup (180 milliliters) of roughly chopped lightly salted almonds
Instructions
- Prepare workspace by arranging all ingredients and preheating oven to 325°F with a parchment-lined baking sheet.
- In a large mixing bowl, thoroughly combine shredded coconut, chocolate chips, and chopped almonds until evenly distributed.
- Pour sweetened condensed milk over the dry ingredients, stirring meticulously to ensure complete and uniform coating of all components.
- Using a cookie scoop, compress mixture tightly into compact clusters, ensuring each cookie maintains a consistent shape and density.
- Arrange cookie clusters on prepared baking sheet, spacing them approximately one inch apart to allow proper heat circulation.
- Place in preheated oven and bake for 12-14 minutes, watching carefully until edges turn golden brown and tops appear set and slightly firm.
- Remove from oven and let cookies rest on baking sheet for 3-4 minutes to stabilize their structure.
- Carefully transfer cookies to a wire cooling rack, allowing them to cool completely and achieve optimal texture.
- Once thoroughly cooled, store cookies in an airtight container at room temperature for up to one week, or freeze for extended preservation.
Notes
- Toast almonds beforehand to enhance their nutty flavor and create a more complex taste profile for the cookies.
- Experiment with dark or milk chocolate chips to customize the sweetness level and create unique flavor variations.
- For gluten-free options, ensure all ingredients are certified gluten-free and check chocolate chip packaging carefully.
- Use parchment paper or silicone baking mats to prevent sticking and ensure easy cookie removal without breaking.
- Prep Time: 15 minutes
- Cook Time: 14 minutes
- Category: Snacks, Desserts
- Method: Baking
- Cuisine: American
Nutrition
- Serving Size: 24
- Calories: 147
- Sugar: 13 g
- Sodium: 29 mg
- Fat: 8 g
- Saturated Fat: 4 g
- Unsaturated Fat: 3 g
- Trans Fat: 0 g
- Carbohydrates: 18 g
- Fiber: 2 g
- Protein: 2 g
- Cholesterol: 6 mg
Clara Bennett
Contributing Recipe Developer & Food Writer
Expertise
Baking and Pastry Development, Gluten-Free and Allergy-Friendly Recipe Creation, Culinary Storytelling and Food Journalism, Recipe Testing and Standardization, Southern Comfort Foods and Modern Twists
Education
Sullivan University – National Center for Hospitality Studies
Associate Degree in Culinary Arts
Focus: Baking and Pastry Arts, Recipe Testing, and Culinary Journalism.
Clara specialized in crafting desserts that blend classic Southern comfort with modern techniques, while developing strong writing skills to tell the story behind every dish.
Lane Community College (Certificate Program)
Certificate in Food Writing and Photography
Focus: Culinary storytelling, recipe formatting, food styling, and visual presentation.
Clara’s love of baking started young, powered by homemade pies, biscuits, and stories passed around the family table.
After earning her degree at Sullivan University and a food writing certificate at Lane Community College, she turned her passion into a craft: sharing recipes that are simple, soulful, and always full of heart.
She’s big on bold flavors, flexible ideas, and creating sweets that fit any table (yes, even if you’re gluten-free). When she’s not baking, you’ll find her wandering farmers’ markets, styling food for the next photo shoot, or working on her ever-growing recipe journal.