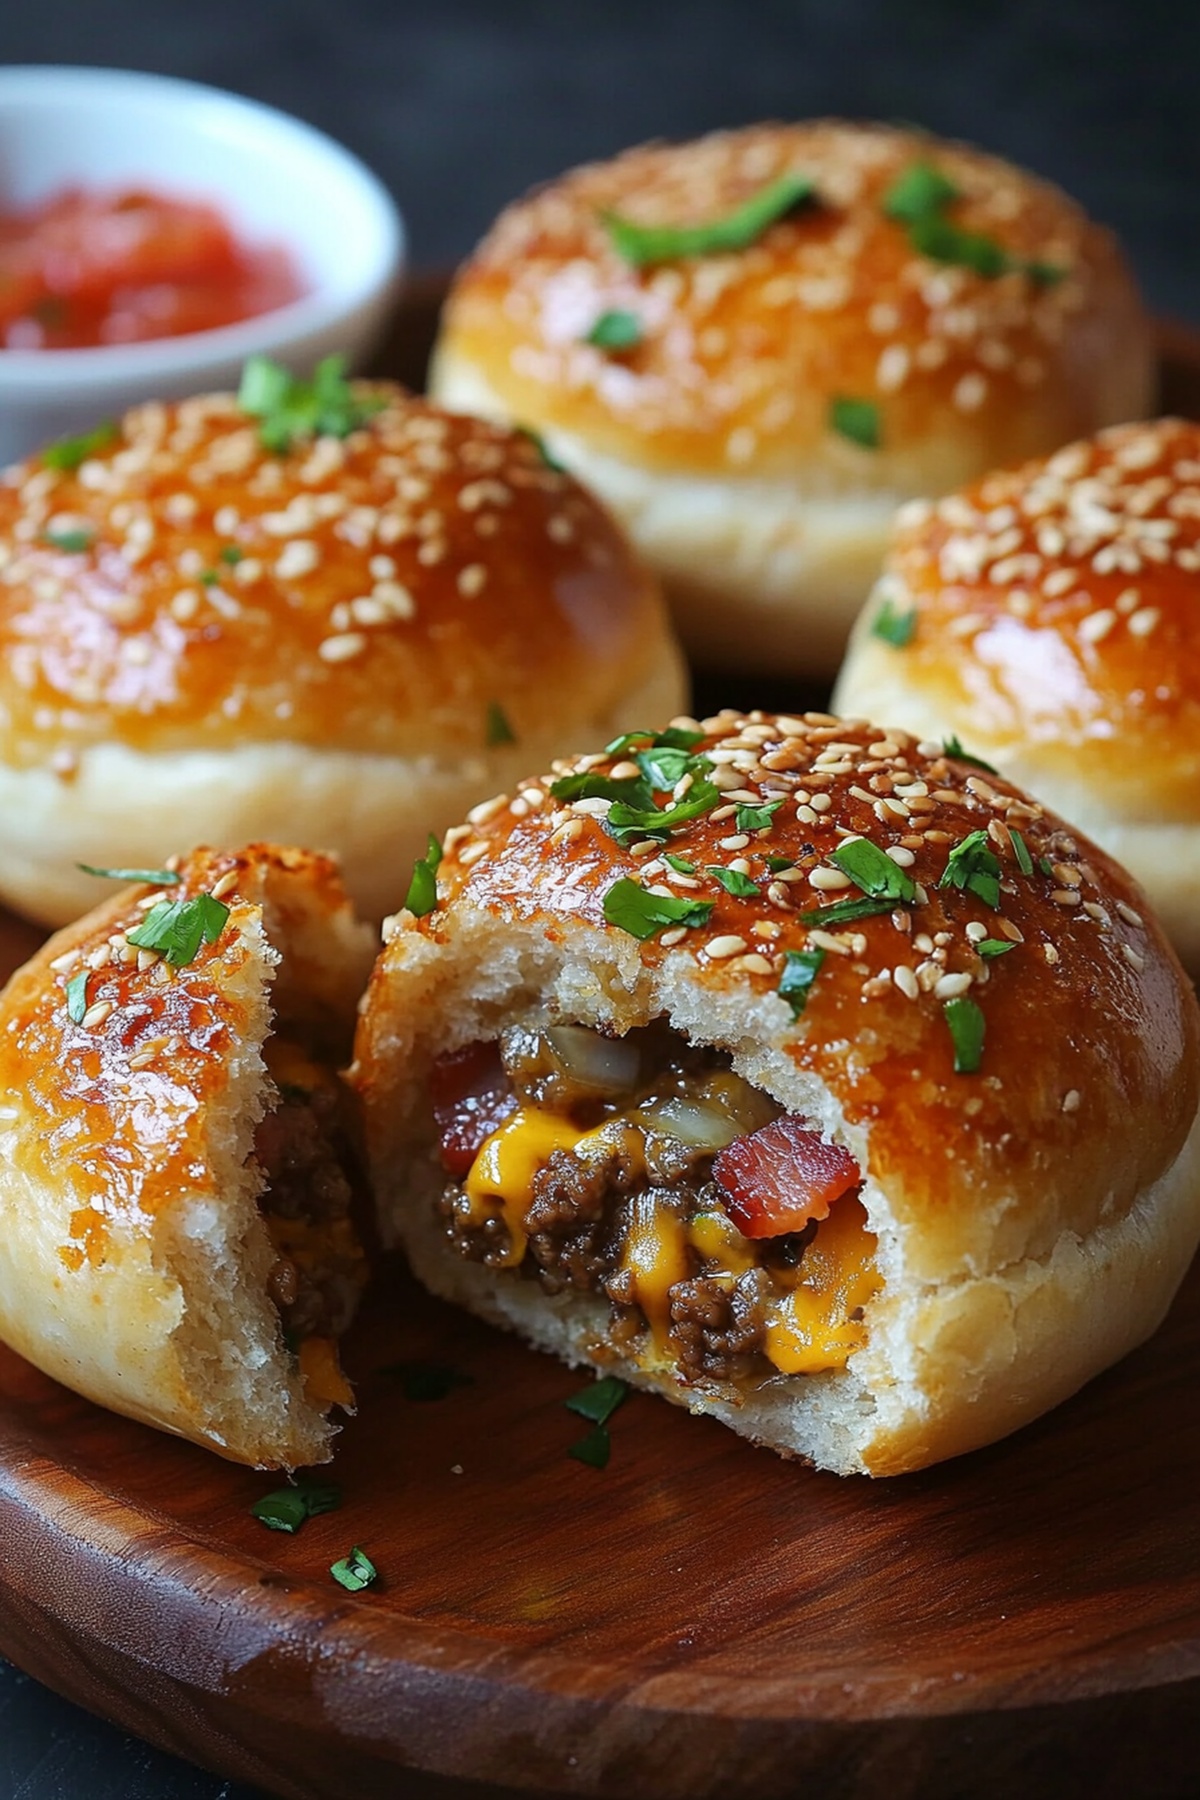
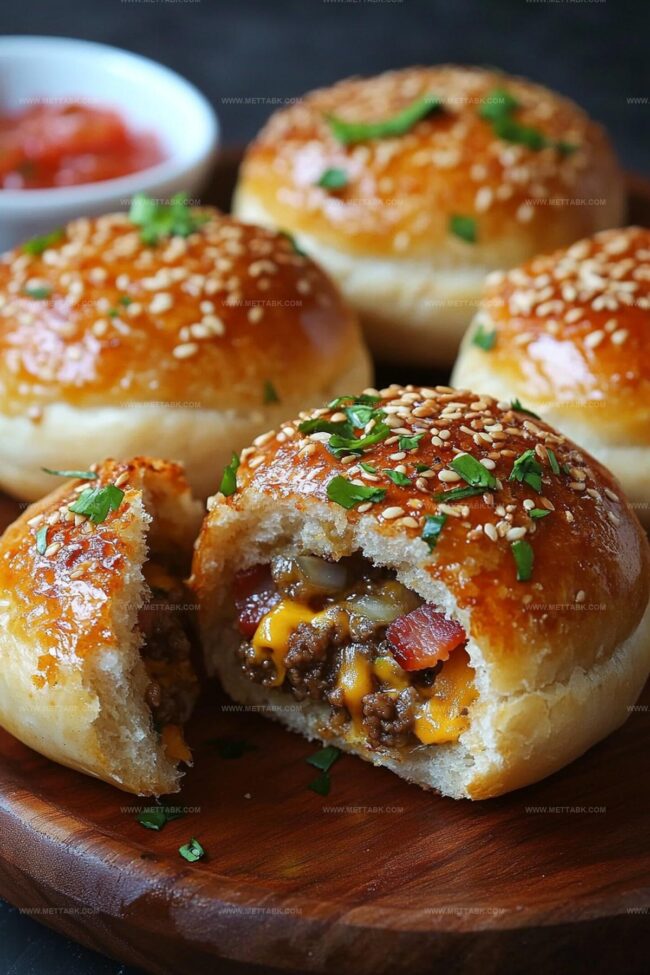
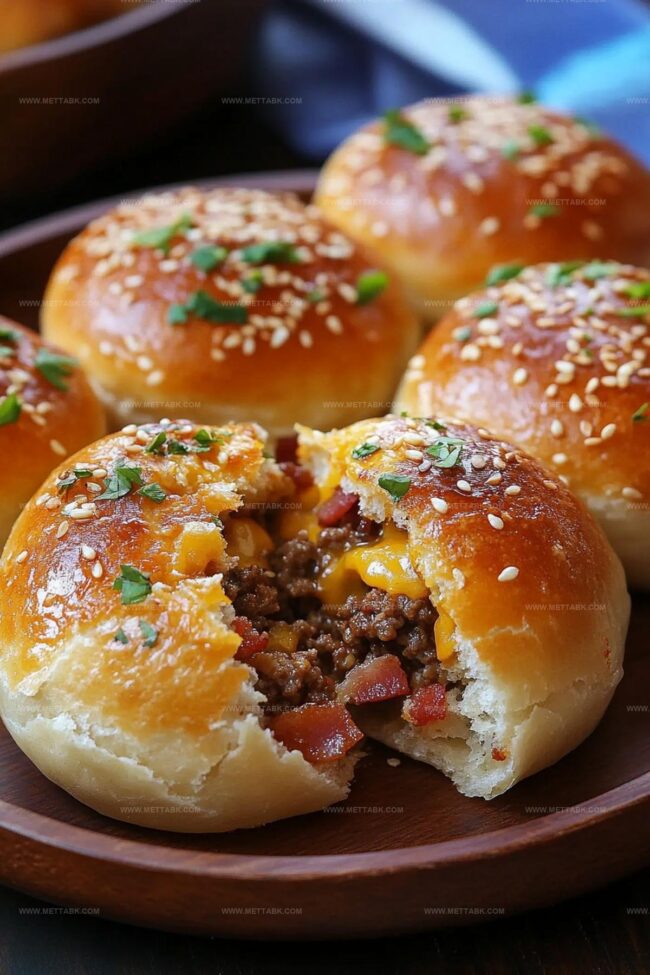
Irresistible Bacon Cheeseburger Bombs Recipe: Bite-Sized Bliss
Who doesn’t crave a delicious bacon cheeseburger bomb that explodes with flavor in every single bite?
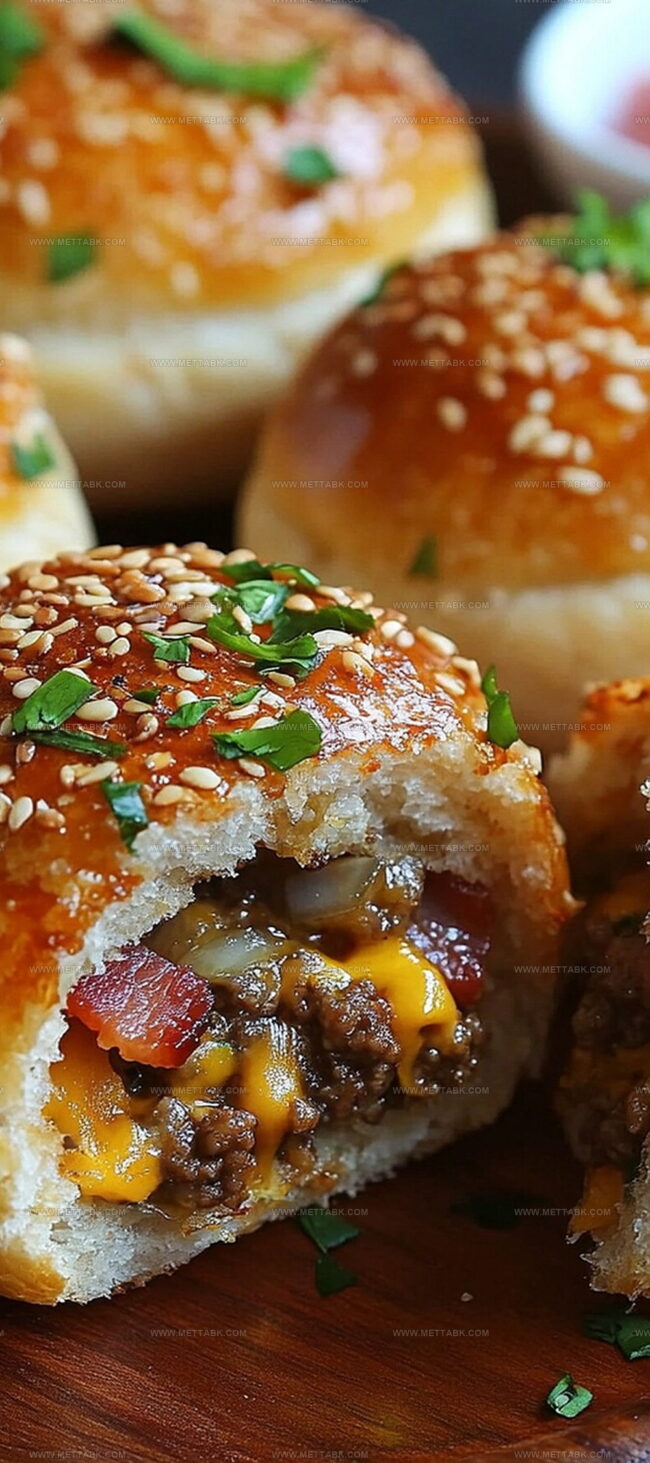
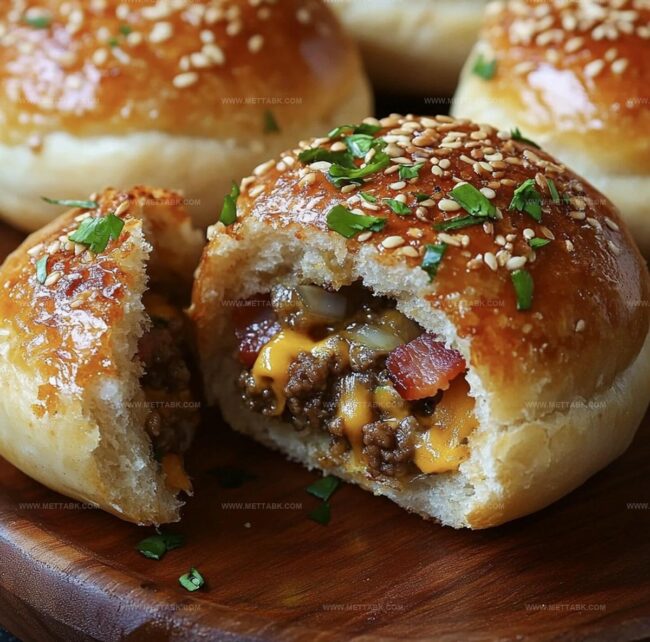
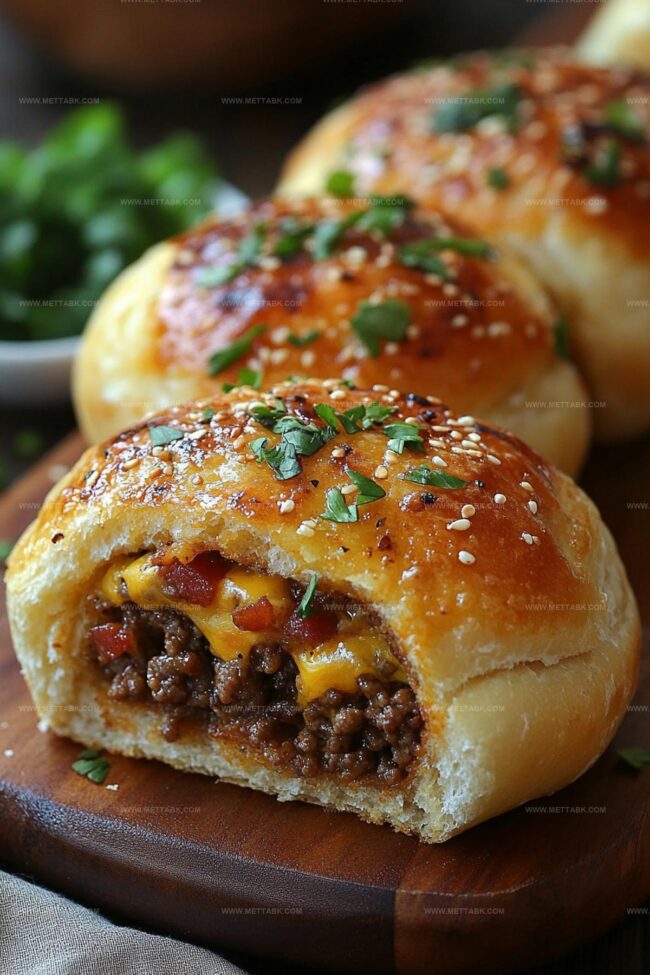
Crispy golden shells conceal molten cheese and savory meat inside these irresistible appetizers.
Packed with classic burger ingredients, these handheld delights promise pure comfort and excitement.
Small bites deliver massive satisfaction without complicated cooking techniques.
Perfectly seasoned ground beef mingles with melted cheese and smoky bacon pieces.
Sharp cheddar adds a tangy punch that makes each morsel memorable.
Dive into this recipe and watch everyone’s eyes light up with pure culinary joy.
Bacon Cheeseburger Bombs Essentials
Ingredients for Bacon Cheeseburger Bombs
Preparation Guide for Bacon Cheeseburger Bombs
Step 1: Warm Up the Oven
Crank the oven to a toasty 375°F. Grab a baking sheet and line it with parchment paper, creating a perfect landing zone for your delicious bombs.
Step 2: Crisp Up the Bacon
Sizzle bacon in a skillet over medium heat until it turns golden and crunchy. Pull out the crispy strips and save 2 tablespoons of that liquid gold (bacon fat).
Chop the bacon into tiny pieces once it’s cooled down.
Step 3: Build the Flavor Base
Use the saved bacon fat to dance those onions around the pan until they’re soft and see-through.
Toss in garlic and let it mingle for a minute. Crank up the heat, add ground beef, and season with salt and pepper.
Break the meat into small crumbles and cook until it’s completely brown. Drain away any extra grease.
Step 4: Create the Bomb Magic
Roll out each biscuit dough into a circular playground about 4 inches wide. Drop beef mixture in the center, then sprinkle with pickles, mustard, cheese, and bacon bits.
Wrap and pinch the dough into cute little sealed packages.
Step 5: Prep for Baking Brilliance
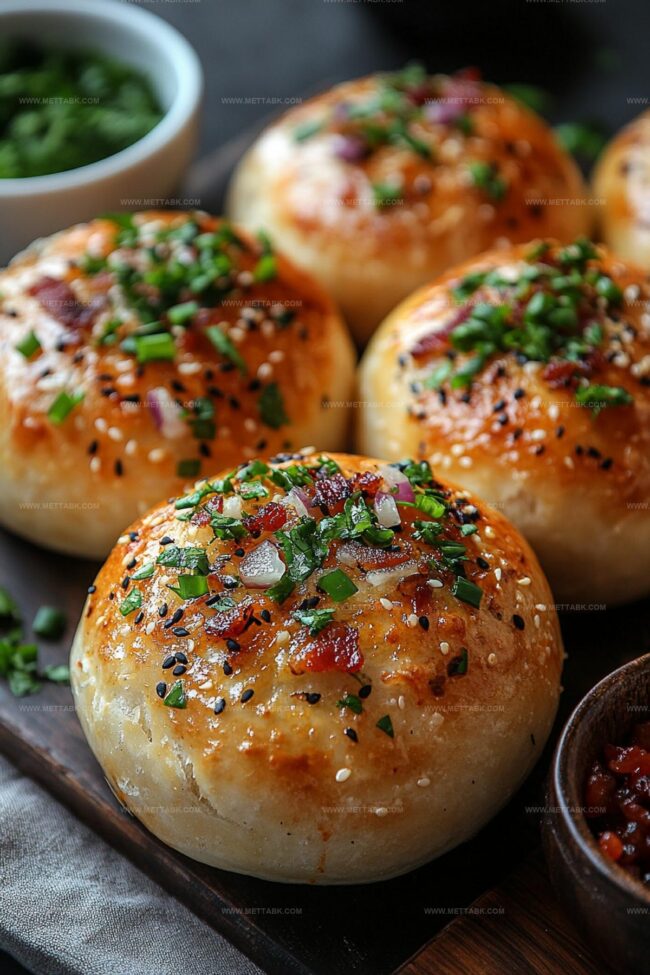
Place the bombs seam-side down on the baking sheet.
Brush them with melted butter and shower with sesame seeds for extra pizzazz.
Step 6: Bake and Devour
Slide the baking sheet into the oven and bake for 18-22 minutes until they turn a gorgeous golden brown.
Let them cool for 5 minutes. Serve with ketchup for dipping and watch everyone’s eyes light up!
Pro Tips on Bacon Cheeseburger Bombs
Variations of Bacon Cheeseburger Bombs
Pairing Ideas for Bacon Cheeseburger Bombs

Storage Guidelines for Bacon Cheeseburger Bombs
FAQs
Yes, you can easily substitute ground beef with ground turkey, chicken, or pork for a different flavor profile while maintaining the same cooking technique.
Ensure you pinch the dough edges tightly and completely seal the filling, with no exposed ingredients. This prevents leakage and helps maintain the bomb’s shape during baking.
You can use pre-cooked bacon crumbles, but fresh bacon provides more flavor and allows you to reserve the bacon fat for sautéing, which adds depth to the beef mixture.
If sesame seeds are unavailable, you can skip them or substitute with everything bagel seasoning for added crunch and flavor.
Print
Bacon Cheeseburger Bombs Recipe
- Total Time: 45 minutes
- Yield: 8 1x
Description
Delectable bacon cheeseburger bombs combine ground beef, crispy bacon, and melted cheese in a golden-brown pastry shell. Irresistible appetizers promise to satisfy hungry guests with their savory, handheld comfort that delivers classic burger flavors in one perfect bite.
Ingredients
- 1 pound (450g) lean ground beef (85/15 recommended)
- 4 slices (4 oz) thick-cut bacon
- 1 cup (4 oz) shredded sharp cheddar cheese
- 1 16-oz tube refrigerated biscuit dough (8-count)
- 1/2 medium yellow onion (finely diced, approx 3/4 cup)
- 2 dill pickles (approx 1/2 cup, finely chopped)
- 4 tbsps unsalted butter (melted)
- 2 cloves garlic (minced)
- 2 tsps yellow mustard
- 1 tbsp sesame seeds
- Ketchup (for serving)
Instructions
- Prepare the oven at 375°F and cover a baking sheet with parchment paper, creating a non-stick surface for the bacon cheeseburger bombs.
- Crisp the bacon in a skillet over medium heat for 6-8 minutes until golden brown. Remove bacon, retain 2 tablespoons of fat, and finely chop the cooled strips.
- Utilize the bacon fat to sauté diced onions until translucent, about 4-5 minutes. Add minced garlic and cook for an additional minute, stirring to prevent burning.
- Increase skillet heat to medium-high, introduce ground beef, and season with salt and pepper. Break meat into small crumbles, cooking until fully browned and no pink remains, approximately 5-6 minutes. Drain excess grease.
- Flatten biscuit dough rounds into 4-inch circles. Center each round with beef mixture, chopped pickles, mustard, cheddar cheese, and bacon pieces.
- Carefully gather and pinch dough edges to seal completely, forming compact spherical shapes with no filling exposed.
- Position bombs seam-side down on the prepared baking sheet, maintaining 2-inch spacing between each.
- Brush bomb surfaces thoroughly with melted butter and sprinkle with sesame seeds for added texture and flavor.
- Bake for 18-22 minutes until the exterior turns golden brown and dough is fully cooked.
- Rest bombs for 5 minutes before serving. Offer ketchup as an optional dipping sauce to complement the rich flavors.
Notes
- Ensure bacon is crispy and crumbled finely for maximum flavor distribution throughout the beef mixture.
- Reserve bacon fat for extra richness and depth in the meat’s seasoning, enhancing overall taste profile.
- Seal dough edges completely to prevent filling from leaking during baking, creating perfect bomb-shaped parcels.
- Experiment with different cheese varieties like pepper jack or smoked gouda for unique flavor variations.
- Prep Time: 20 minutes
- Cook Time: 25 minutes
- Category: Lunch, Dinner, Snacks, Appetizer
- Method: Baking
- Cuisine: American
Nutrition
- Serving Size: 8
- Calories: 352 kcal
- Sugar: 2 g
- Sodium: 580 mg
- Fat: 26 g
- Saturated Fat: 11 g
- Unsaturated Fat: 13 g
- Trans Fat: 0.5 g
- Carbohydrates: 14 g
- Fiber: 1 g
- Protein: 18 g
- Cholesterol: 65 mg
Clara Bennett
Contributing Recipe Developer & Food Writer
Expertise
Baking and Pastry Development, Gluten-Free and Allergy-Friendly Recipe Creation, Culinary Storytelling and Food Journalism, Recipe Testing and Standardization, Southern Comfort Foods and Modern Twists
Education
Sullivan University – National Center for Hospitality Studies
Associate Degree in Culinary Arts
Focus: Baking and Pastry Arts, Recipe Testing, and Culinary Journalism.
Clara specialized in crafting desserts that blend classic Southern comfort with modern techniques, while developing strong writing skills to tell the story behind every dish.
Lane Community College (Certificate Program)
Certificate in Food Writing and Photography
Focus: Culinary storytelling, recipe formatting, food styling, and visual presentation.
Clara’s love of baking started young, powered by homemade pies, biscuits, and stories passed around the family table.
After earning her degree at Sullivan University and a food writing certificate at Lane Community College, she turned her passion into a craft: sharing recipes that are simple, soulful, and always full of heart.
She’s big on bold flavors, flexible ideas, and creating sweets that fit any table (yes, even if you’re gluten-free). When she’s not baking, you’ll find her wandering farmers’ markets, styling food for the next photo shoot, or working on her ever-growing recipe journal.