Irresistible Banana Cream Cheesecake Bars Recipe for Sweet Bliss
Sweet banana cream cheesecake bars combine creamy indulgence with classic comfort in a single bite.
Layers of silky filling meld perfectly between buttery graham cracker crusts.
Ripe bananas provide natural sweetness that dances through each delectable square.
Cream cheese creates a luxurious texture that melts seamlessly on your tongue.
Occasional chocolate chips add delightful crunch and unexpected richness to every slice.
Minimal kitchen skills guarantee success with this simple yet impressive dessert.
You might just become the neighborhood’s most celebrated baker after mastering these irresistible bars.
Banana Cream Cheesecake Bars Highlights

Ingredients for Banana Cream Cheesecake Bars
Crust Ingredients:Cream Cheese Filling Ingredients:Garnish Ingredients:How to Make Banana Cream Cheesecake Bars
Step 1: Prepare Crumbly Crust
Grab a medium bowl and mix Nilla Wafer cookie crumbs with melted butter until well combined. Line an 8×8-inch baking pan with parchment paper, letting extra paper hang over the sides for easy removal.
Press the crumb mixture firmly and evenly into the pan. Chill the crust in the refrigerator or freezer while preparing the next components.
Step 2: Whip Creamy Topping
Take a chilled large metal bowl and use an electric mixer to whip heavy whipping cream with granulated sugar. Beat the mixture until it forms stiff, billowy peaks.
Set the whipped cream aside for later use.
Step 3: Create Banana Cream Filling
In another large bowl, beat softened cream cheese until smooth and creamy.
Gradually add dry banana cream pudding mixes, beating thoroughly after each addition. Gently fold in the previously whipped cream, blending until the mixture is silky and uniform.
Step 4: Assemble and Chill
Spread the cream cheese mixture evenly over the chilled crust. Cover the pan with plastic wrap and refrigerate for at least 8 hours, preferably overnight, to allow the bars to set completely.
Step 5: Serve and Garnish
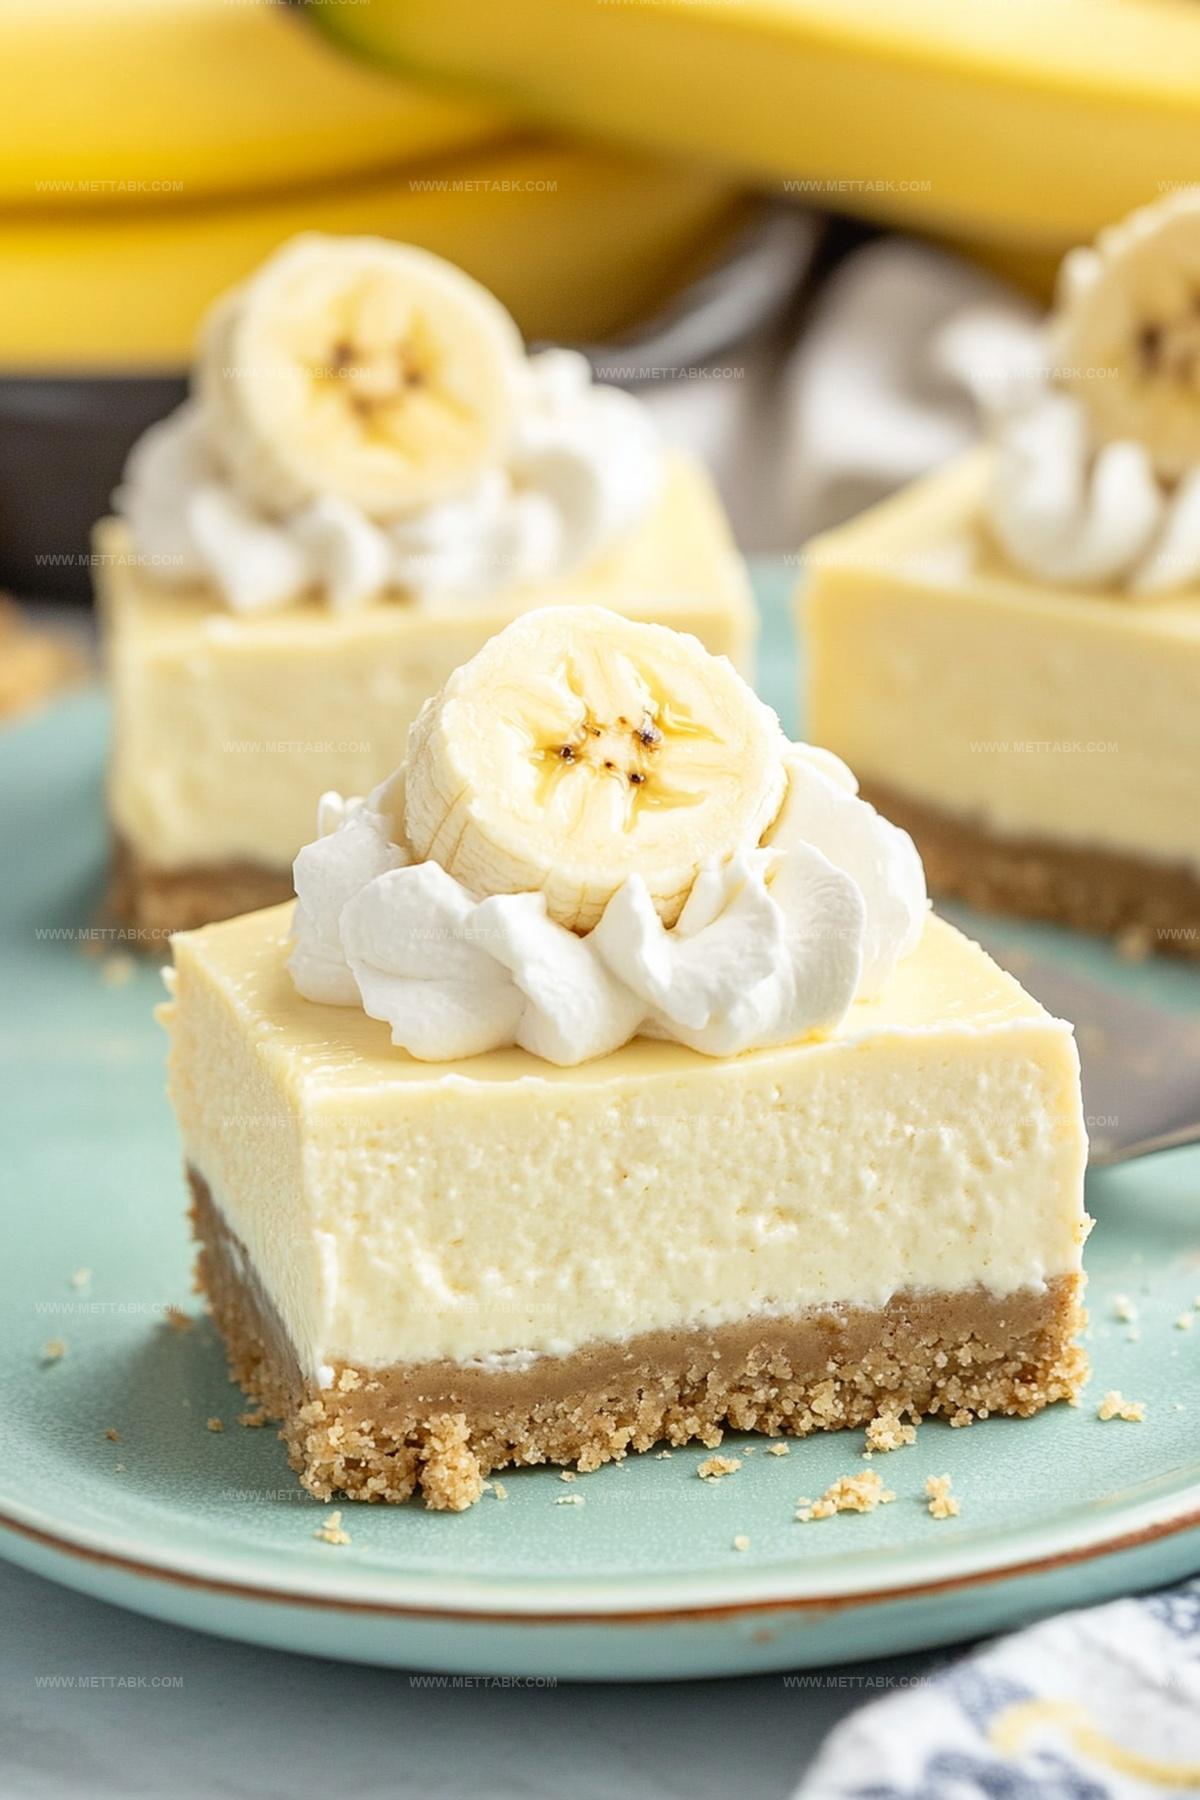
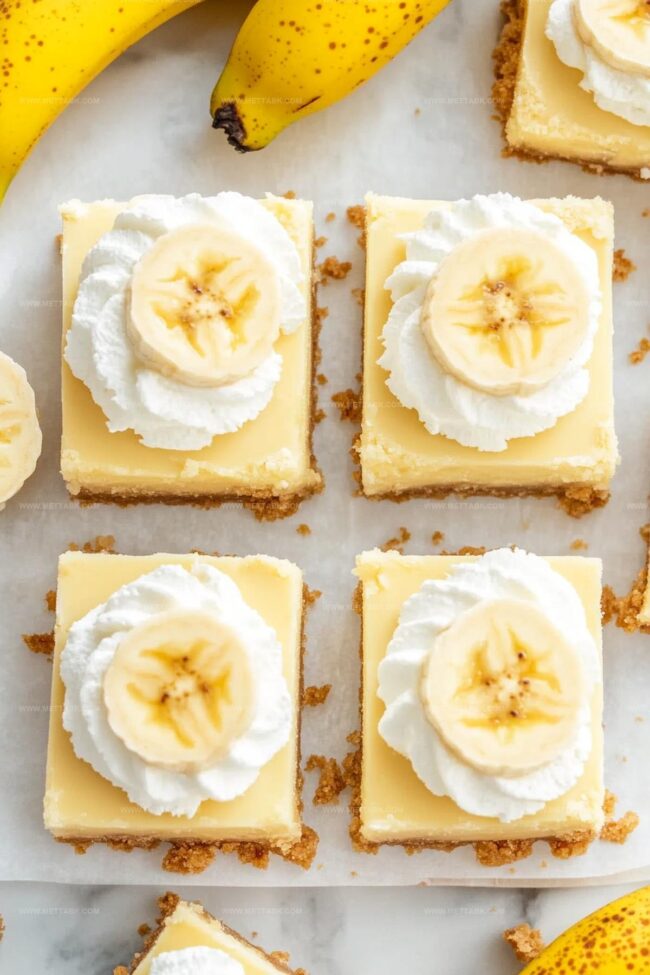
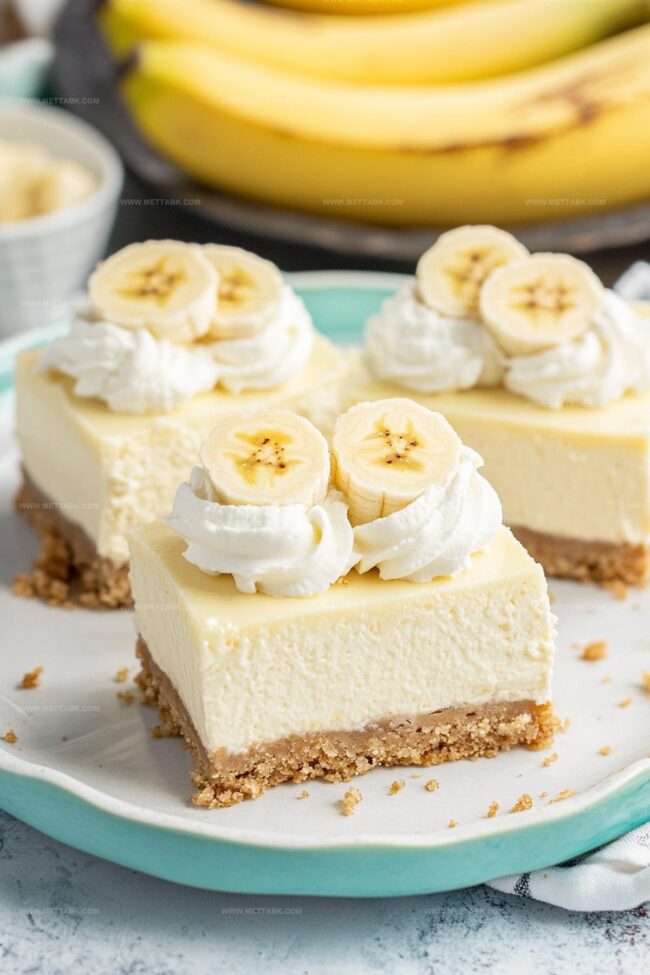
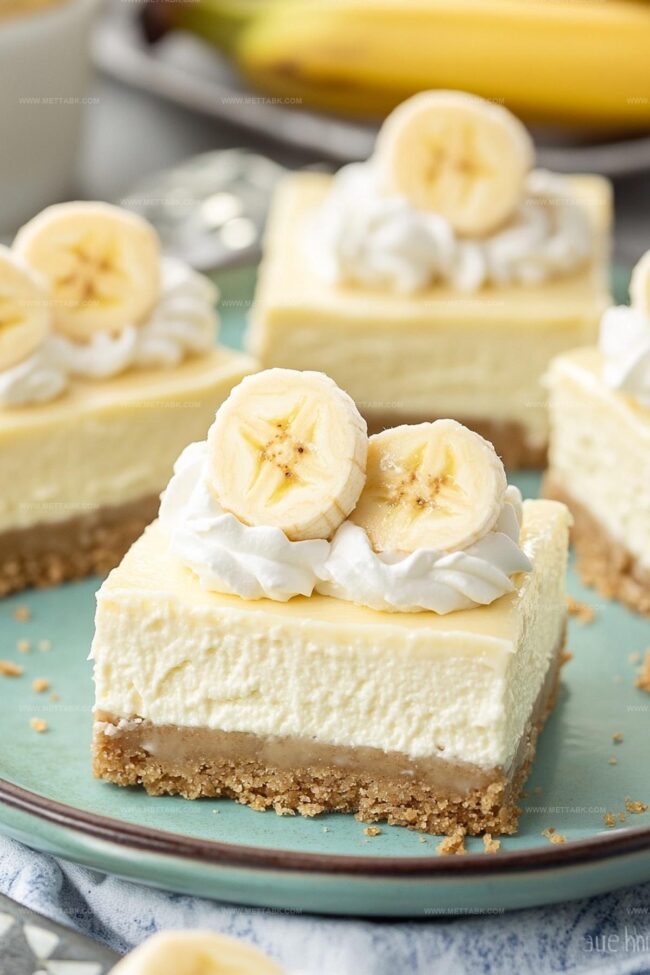
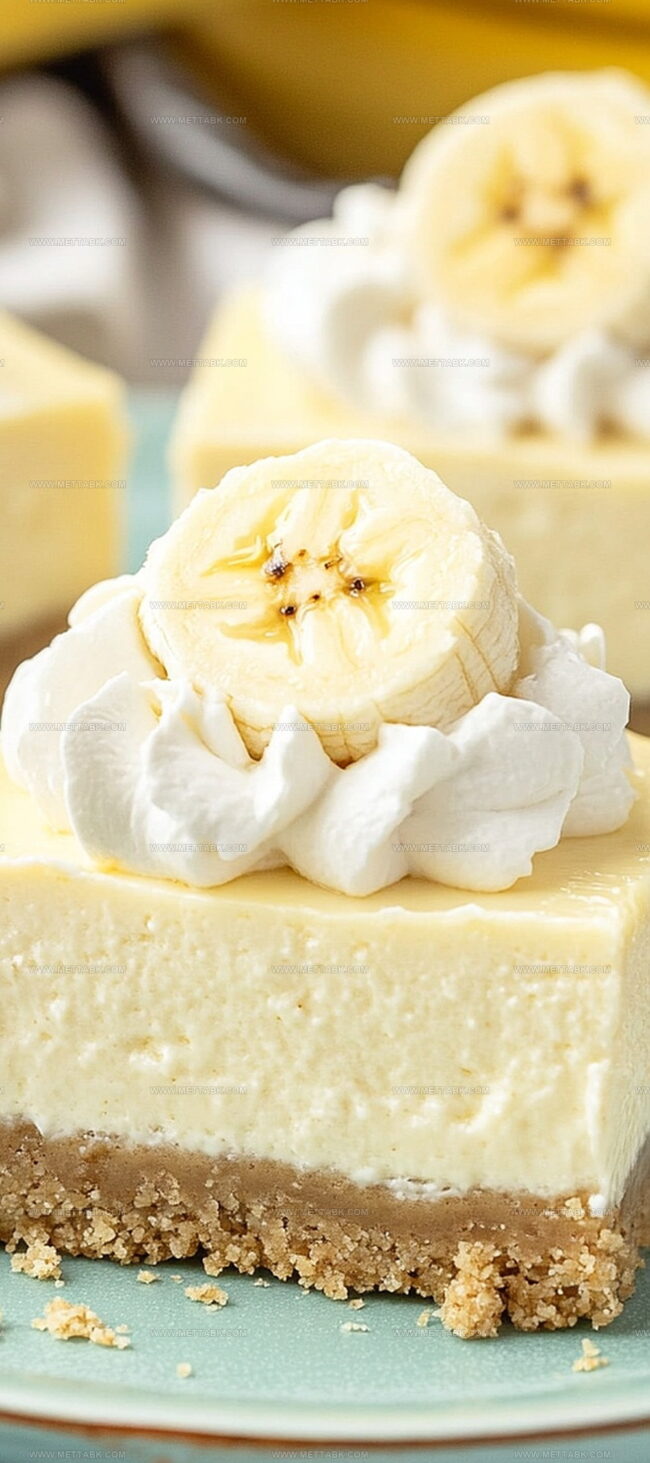
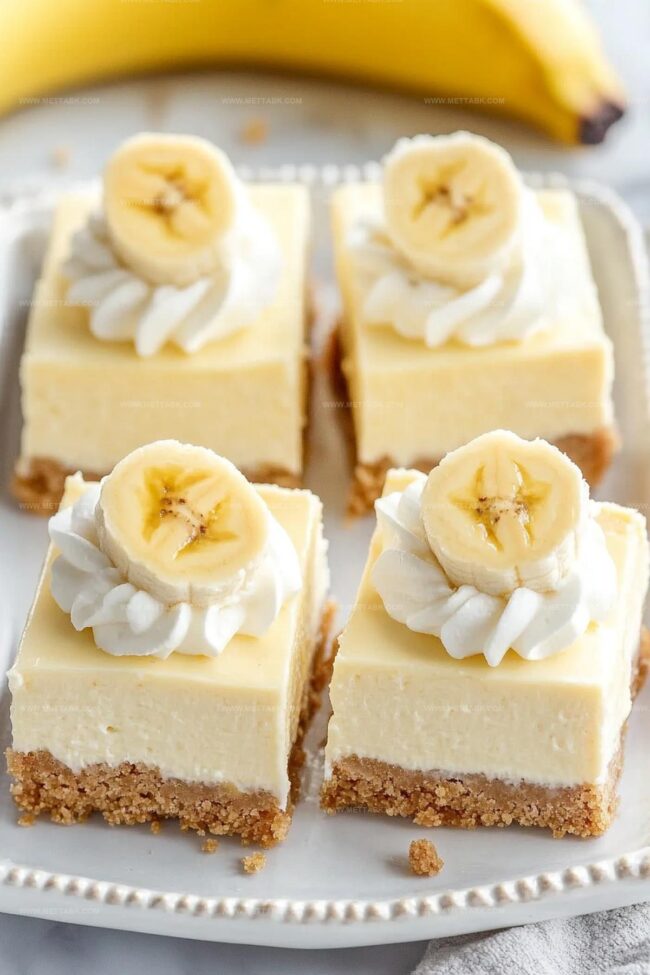
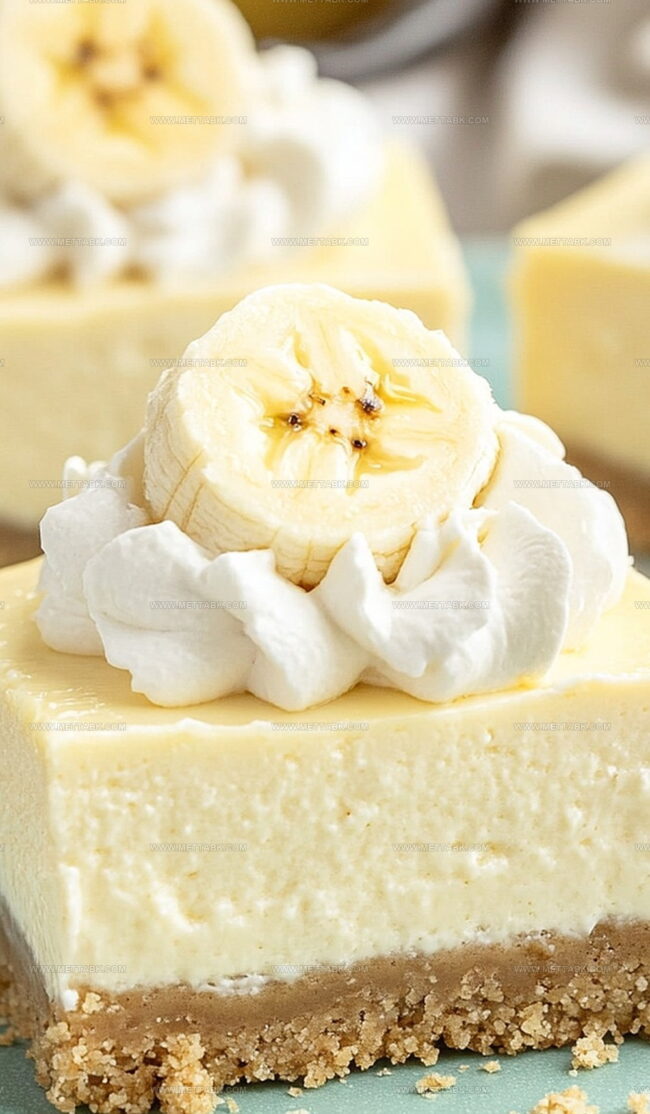
Remove the cheesecake from the refrigerator and slice into nine equal squares using a sharp knife. Optional: Top with dollops of whipped cream and fresh banana slices.
Serve chilled for the most delightful taste and texture.
Expert Tips for Banana Cream Cheesecake Bars
Variations to Explore with Banana Cream Cheesecake Bars
Pairing Ideas for Banana Cream Cheesecake Bars
Storage Tips for Banana Cream Cheesecake Bars
FAQs
Yes, you can substitute Nilla Wafers with graham crackers. Both provide a similar sweet, crumbly base for the cheesecake bars.
The pudding mix is crucial as it adds banana flavor and helps stabilize the cheesecake filling. Without it, the flavor and texture will be different.
Stiff peaks occur when you lift the mixer beaters and the cream stands up straight without falling over. It should look glossy and hold its shape firmly.
Print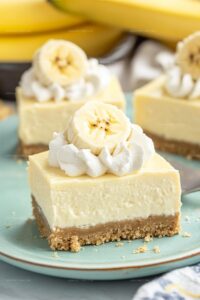
Banana Cream Cheesecake Bars Recipe
- Total Time: 20 minutes
- Yield: 16 1x
Description
Creamy banana cream cheesecake bars blend rich flavors from classic American desserts. Silky layers of graham cracker crust, tangy cream cheese, and ripe bananas create a delightful treat you’ll savor with each indulgent bite.
Ingredients
- 24 oz (680 g) cream cheese (3 packages of 8 oz each, softened to room temperature)
- 3/4 cup (150 g) granulated sugar
- 2 packages instant banana cream pudding mix (3.4 oz each)
- 1 pint (475 ml) heavy whipping cream
- 3 cups (310 g) Nilla Wafer cookie crumbs (approximately 11 oz)
- 1/2 cup (113 g) unsalted butter (melted)
- Whipped cream (optional, for garnish)
- Fresh banana slices (optional, for garnish)
Instructions
- Prepare the crust by pulverizing Nilla Wafer cookies and mixing with melted butter. Press the crumbly mixture into a parchment-lined 8×8-inch baking pan, creating a compact, uniform base. Refrigerate for 15 minutes to solidify.
- Whip heavy cream and sugar in a chilled bowl until stiff, glossy peaks form. Set aside the voluminous mixture.
- Beat cream cheese until silky smooth. Integrate banana cream pudding mix thoroughly, ensuring no lumps remain.
- Gently fold the whipped cream into the cream cheese mixture, creating a light, airy filling with consistent texture.
- Spread the creamy filling evenly over the chilled crust, smoothing the top with a spatula.
- Refrigerate for 8-12 hours, preferably overnight, allowing the cheesecake to set completely and develop rich flavors.
- Remove from refrigerator and slice into nine precise squares using a sharp knife warmed under hot water.
- Optionally garnish with fresh banana slices and additional whipped cream before serving chilled.
Notes
- Swap Nilla Wafers with gluten-free cookies to create a celiac-friendly version without compromising the delicious crust texture.
- Opt for low-fat cream cheese and reduced-fat whipped cream to make a lighter, more diet-conscious dessert while maintaining rich flavor profiles.
- Enhance banana flavor by adding a mashed ripe banana directly into the cream cheese mixture for deeper, more intense fruit notes.
- Prevent watery cheesecake by draining excess liquid from cream cheese and thoroughly patting ingredients dry before mixing, ensuring a firm and creamy consistency.
- Prep Time: 20 minutes
- Cook Time: 0 minutes
- Category: Desserts, Snacks
- Method: Refrigerating
- Cuisine: American
Nutrition
- Serving Size: 16
- Calories: 388
- Sugar: 27 g
- Sodium: 183 mg
- Fat: 30 g
- Saturated Fat: 18 g
- Unsaturated Fat: 10 g
- Trans Fat: 0.5 g
- Carbohydrates: 23 g
- Fiber: 0.5 g
- Protein: 6 g
- Cholesterol: 78 mg
Clara Bennett
Contributing Recipe Developer & Food Writer
Expertise
Baking and Pastry Development, Gluten-Free and Allergy-Friendly Recipe Creation, Culinary Storytelling and Food Journalism, Recipe Testing and Standardization, Southern Comfort Foods and Modern Twists
Education
Sullivan University – National Center for Hospitality Studies
Associate Degree in Culinary Arts
Focus: Baking and Pastry Arts, Recipe Testing, and Culinary Journalism.
Clara specialized in crafting desserts that blend classic Southern comfort with modern techniques, while developing strong writing skills to tell the story behind every dish.
Lane Community College (Certificate Program)
Certificate in Food Writing and Photography
Focus: Culinary storytelling, recipe formatting, food styling, and visual presentation.
Clara’s love of baking started young, powered by homemade pies, biscuits, and stories passed around the family table.
After earning her degree at Sullivan University and a food writing certificate at Lane Community College, she turned her passion into a craft: sharing recipes that are simple, soulful, and always full of heart.
She’s big on bold flavors, flexible ideas, and creating sweets that fit any table (yes, even if you’re gluten-free). When she’s not baking, you’ll find her wandering farmers’ markets, styling food for the next photo shoot, or working on her ever-growing recipe journal.