
Cozy Berry Crumble Cookie Cups Recipe: Sweet Homemade Joy
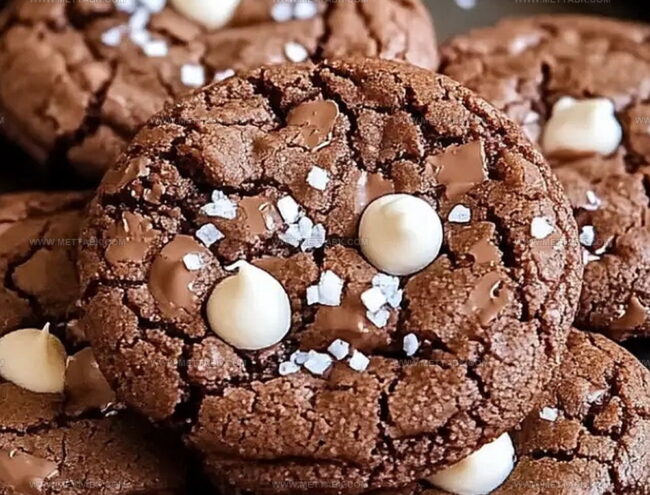
Sweet, golden-edged cookie cups nestled with a vibrant berry crumble promise pure comfort in every delightful bite.
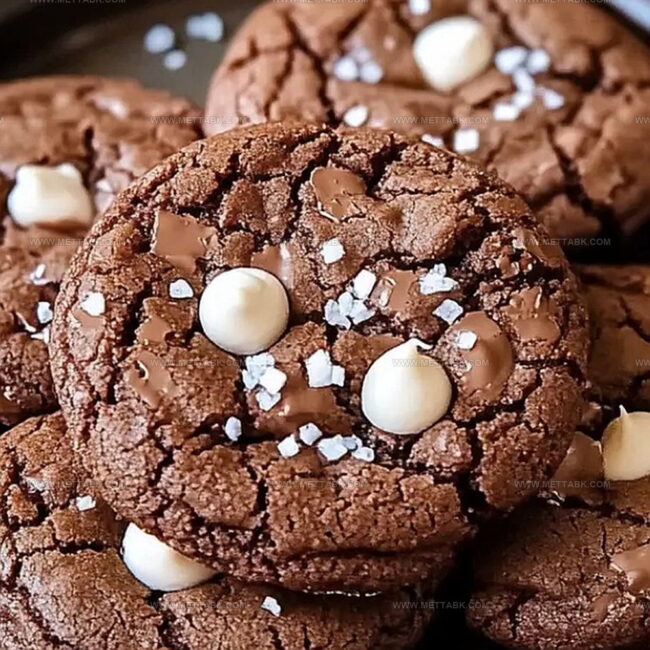
These irresistible berry crumble cookie cups combine tender, buttery cookie bases with a burst of seasonal fruit.
Crisp edges give way to soft, chewy centers that cradle a luscious berry filling.
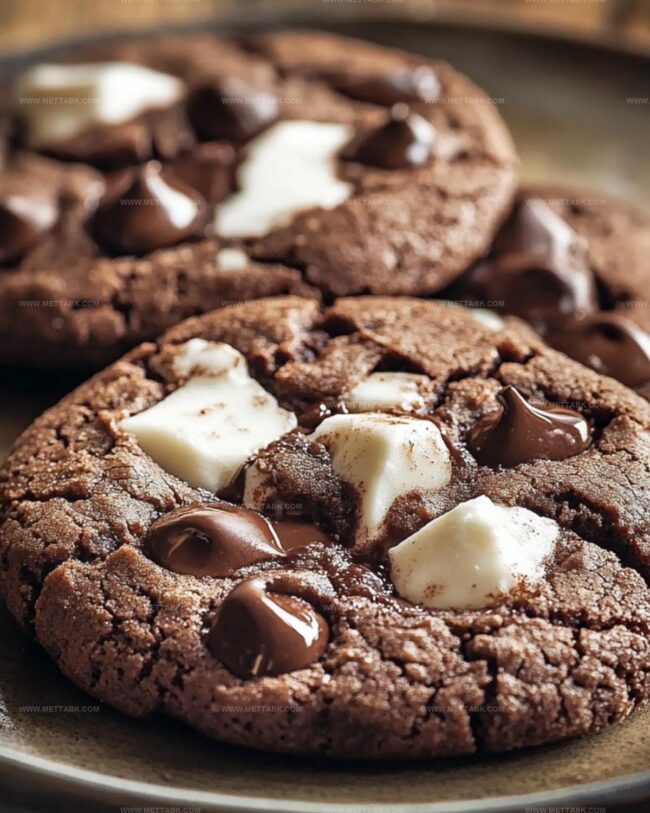
Each miniature dessert delivers a perfect balance of textures and flavors that dance across your palate.
Baked until golden and fragrant, these treats transform simple ingredients into an extraordinary dessert experience.
Fresh berries meld seamlessly with a crumbly, sweet topping that adds delightful crunch.
One taste will have everyone asking for seconds, making these cookie cups an instant crowd-pleaser at any gathering.
Why Berry Crumble Cookie Cups Taste Like Summer
Everything for Berry Crumble Cookie Cup Success
Base Ingredients:Dry Ingredients:Mix-In Ingredients:Baking Accessories:Steps for Baking Berry Crumble Cookie Cups
Step 1: Whip Up the Base
Grab a spacious mixing bowl and combine softened butter, granulated sugar, and brown sugar. Use a standing mixer to blend these ingredients until they transform into a light, airy mixture.
Gently incorporate eggs one at a time, ensuring each is fully mixed before adding the next. Splash in vanilla extract for an extra flavor boost.
Step 2: Create Dry Ingredient Blend
In a separate bowl, whisk together:Slowly fold the dry ingredients into the butter mixture, mixing until everything is perfectly combined.
Step 3: Fold in Delicious Extras
Gently stir in chocolate chips and Mallow Bits.
Cover the dough and refrigerate for 30 minutes to 24 hours, allowing flavors to meld and develop a richer taste.
Step 4: Bake to Perfection
Heat the oven to 350F (175C).
Line baking sheets with silicone mats or parchment paper. Scoop dough into rounded portions, placing them 2 inches apart.
Bake for 9-11 minutes until edges turn a delicate golden brown.
Step 5: Cool and Enjoy
Let cookies rest on baking sheets for 5 minutes.
Transfer to a wire rack to cool completely. These treats are delicious warm or can be stored in an airtight container for up to 5 days.
Notes for Soft and Fruity Cookie Fans
Twists for Berry Crumble Cookie Combos
Pairings for Berry Cookie Cup Plates
Storing Cookie Cups for Later Enjoyment
FAQs
Hot cocoa mix adds a rich chocolate flavor and subtle sweetness to the cookies, creating a unique and delicious taste profile that sets these cookies apart from traditional recipes.
Yes, you can replace Mallow Bits with mini marshmallows or chopped regular marshmallows. Just be aware that they might melt differently during baking, potentially changing the texture slightly.
Chill the dough for at least 30 minutes before baking. This helps prevent spreading and creates a softer, chewier cookie. Also, be careful not to overbake – remove the cookies when the edges are just lightly browned.
Print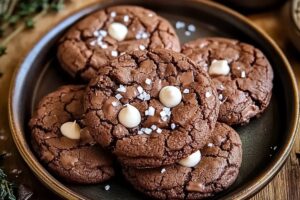
Berry Crumble Cookie Cups Recipe
- Total Time: 56 minutes
- Yield: 24 1x
Description
Sweet berry crumble cookie cups blend classic dessert magic into perfectly portioned handheld treats. Homemade goodness meets irresistible flavor, promising delightful moments of pure indulgence you can savor with friends and family.
Ingredients
Dry Ingredients:
- 3 1/4 cups all-purpose flour
- 1 teaspoon salt
- 1 teaspoon baking soda
- 2 teaspoons baking powder
- 4 packages hot cocoa mix (or 3/4 cup hot cocoa mix, not sugar-free)
Wet Ingredients:
- 1 cup (226 grams) butter, softened
- 2 large eggs
- 1 teaspoon vanilla extract
Sweeteners and Mix-ins:
- 1 cup granulated sugar
- 2/3 cup brown sugar
- 1 cup chocolate chips
- 1 cup Mallow Bits (mini marshmallows are not recommended as they can become sticky)
Instructions
- Cream butter, granulated sugar, and brown sugar in a mixer until airy and pale, creating a smooth base for the cookie dough.
- Incorporate eggs individually, mixing thoroughly after each addition to ensure even distribution and a consistent texture.
- Blend vanilla extract into the butter mixture, infusing a rich aromatic flavor throughout the dough.
- Sift together flour, hot cocoa mix, salt, baking soda, and baking powder in a separate bowl to eliminate potential lumps and ensure even ingredient integration.
- Gradually fold dry ingredients into the wet mixture, mixing until a uniform dough forms without overmixing.
- Gently fold chocolate chips and Mallow Bits into the dough, distributing them evenly for consistent flavor in each bite.
- Refrigerate the dough for 30 minutes to 24 hours, allowing flavors to meld and enhance the cookie’s texture.
- Preheat oven to 350F (175C) and prepare baking sheets with silicone mats or parchment paper.
- Portion dough into 2-tablespoon rounds, spacing them 2 inches apart to prevent spreading during baking.
- Bake for 9-11 minutes until edges turn golden brown and centers appear slightly soft.
- Rest cookies on baking sheets for 5 minutes to stabilize their structure.
- Transfer to a wire rack for complete cooling, then store in an airtight container for up to 5 days.
Notes
- Chill the dough thoroughly to enhance flavor development and prevent excessive spreading during baking.
- Try different hot cocoa mixes to create unique flavor variations and personalize the cookie cups.
- Use room temperature ingredients for smoother mixing and more consistent cookie texture.
- For gluten-free option, substitute all-purpose flour with a 1:1 gluten-free baking blend to maintain similar consistency.
- Prep Time: 45 minutes
- Cook Time: 11 minutes
- Category: Desserts, Snacks
- Method: Baking
- Cuisine: American
Nutrition
- Serving Size: 24
- Calories: 188
- Sugar: 14 g
- Sodium: 143 mg
- Fat: 9 g
- Saturated Fat: 5 g
- Unsaturated Fat: 3 g
- Trans Fat: 0.1 g
- Carbohydrates: 26 g
- Fiber: 1 g
- Protein: 2 g
- Cholesterol: 22 mg
Clara Bennett
Contributing Recipe Developer & Food Writer
Expertise
Baking and Pastry Development, Gluten-Free and Allergy-Friendly Recipe Creation, Culinary Storytelling and Food Journalism, Recipe Testing and Standardization, Southern Comfort Foods and Modern Twists
Education
Sullivan University – National Center for Hospitality Studies
Associate Degree in Culinary Arts
Focus: Baking and Pastry Arts, Recipe Testing, and Culinary Journalism.
Clara specialized in crafting desserts that blend classic Southern comfort with modern techniques, while developing strong writing skills to tell the story behind every dish.
Lane Community College (Certificate Program)
Certificate in Food Writing and Photography
Focus: Culinary storytelling, recipe formatting, food styling, and visual presentation.
Clara’s love of baking started young, powered by homemade pies, biscuits, and stories passed around the family table.
After earning her degree at Sullivan University and a food writing certificate at Lane Community College, she turned her passion into a craft: sharing recipes that are simple, soulful, and always full of heart.
She’s big on bold flavors, flexible ideas, and creating sweets that fit any table (yes, even if you’re gluten-free). When she’s not baking, you’ll find her wandering farmers’ markets, styling food for the next photo shoot, or working on her ever-growing recipe journal.