
Easy Caramel Slice Recipe: Golden Goodness in Every Bite
Sweet cravings for a caramel slice have haunted my kitchen adventures for years.
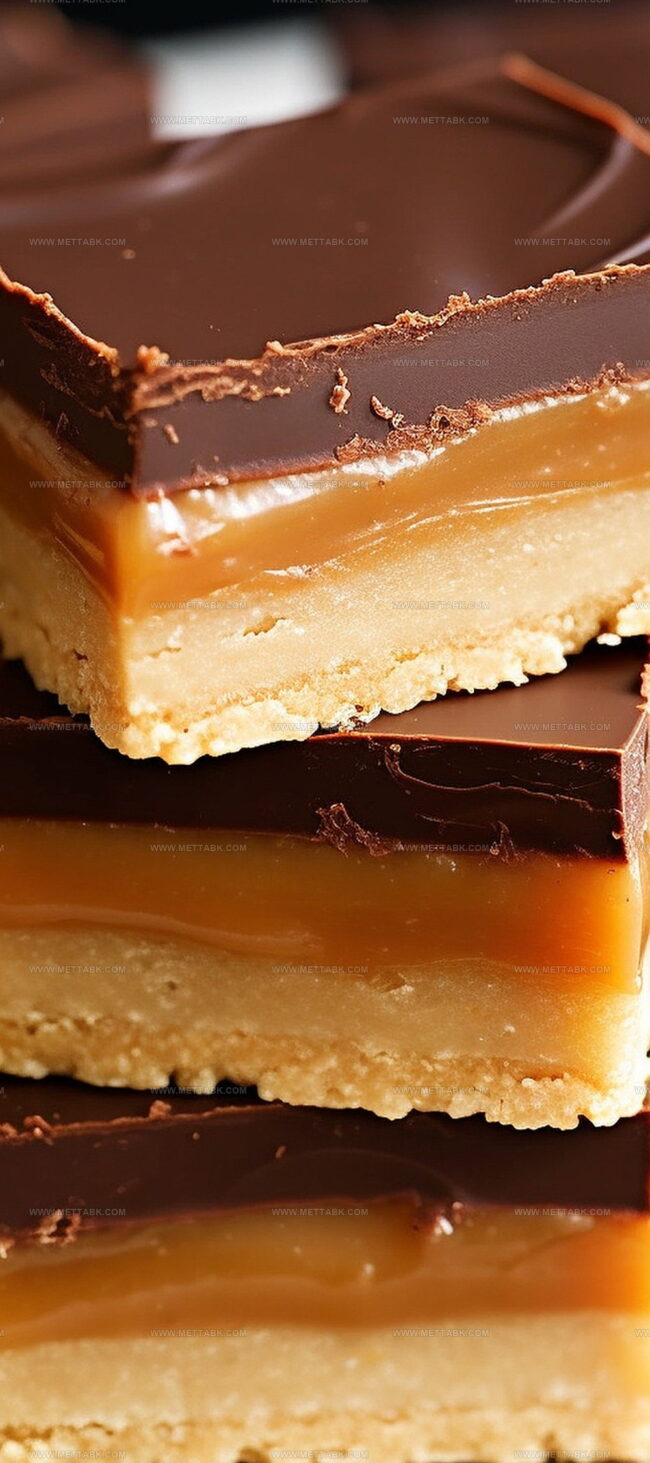
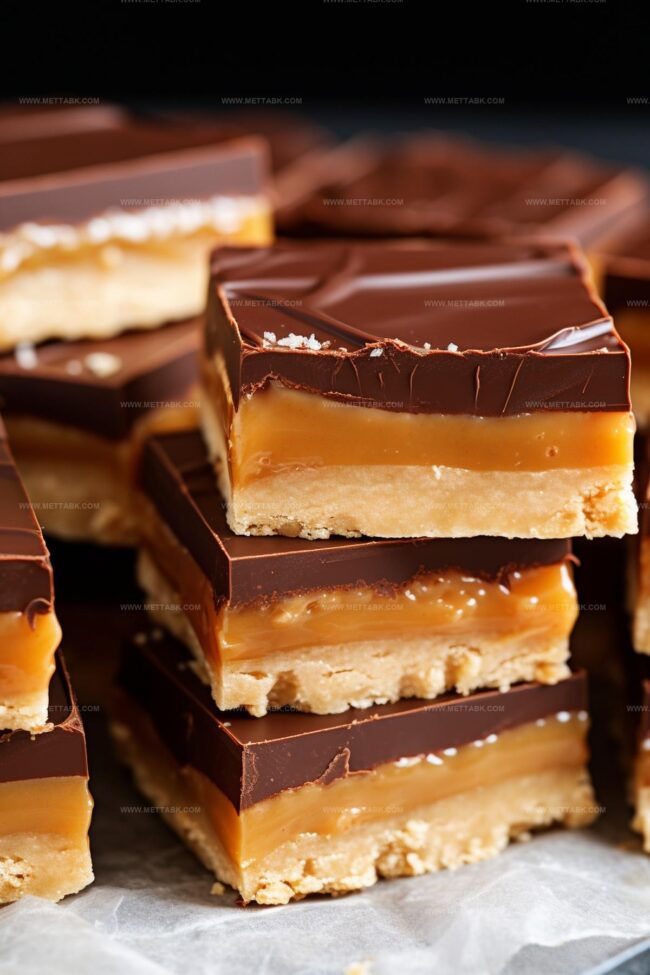
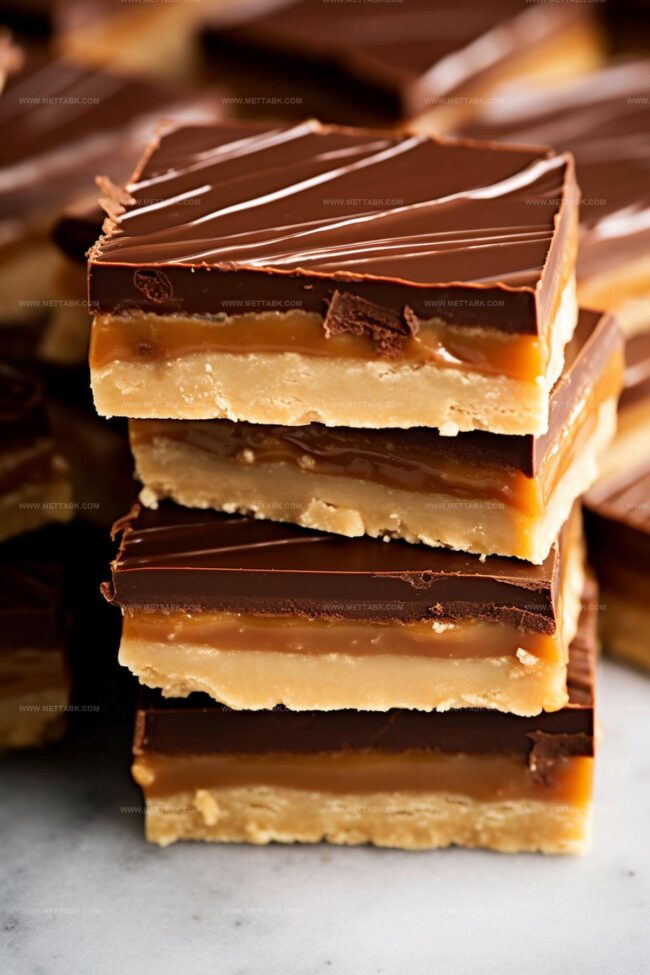
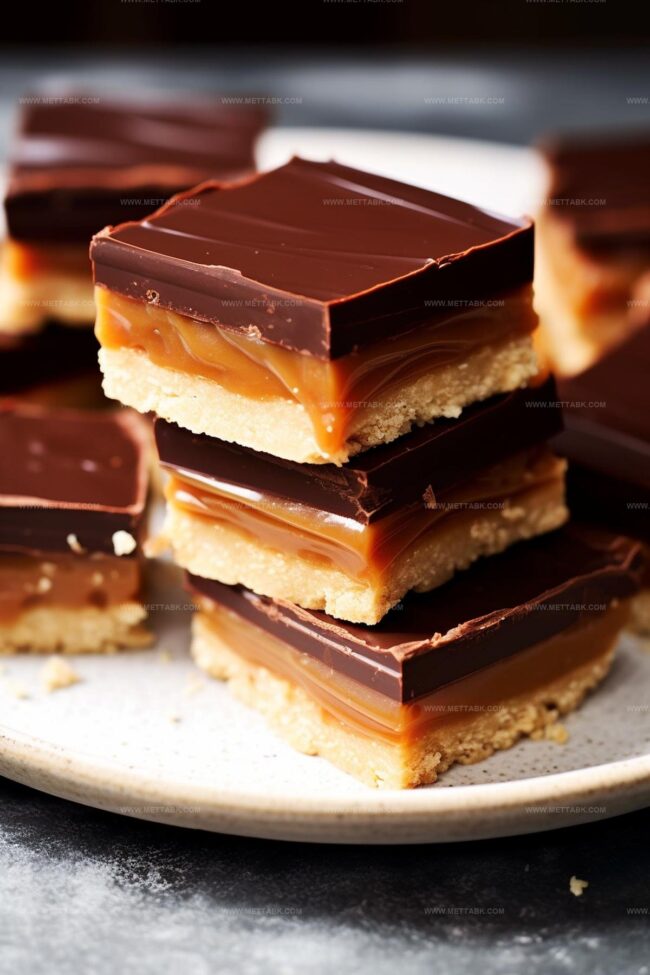
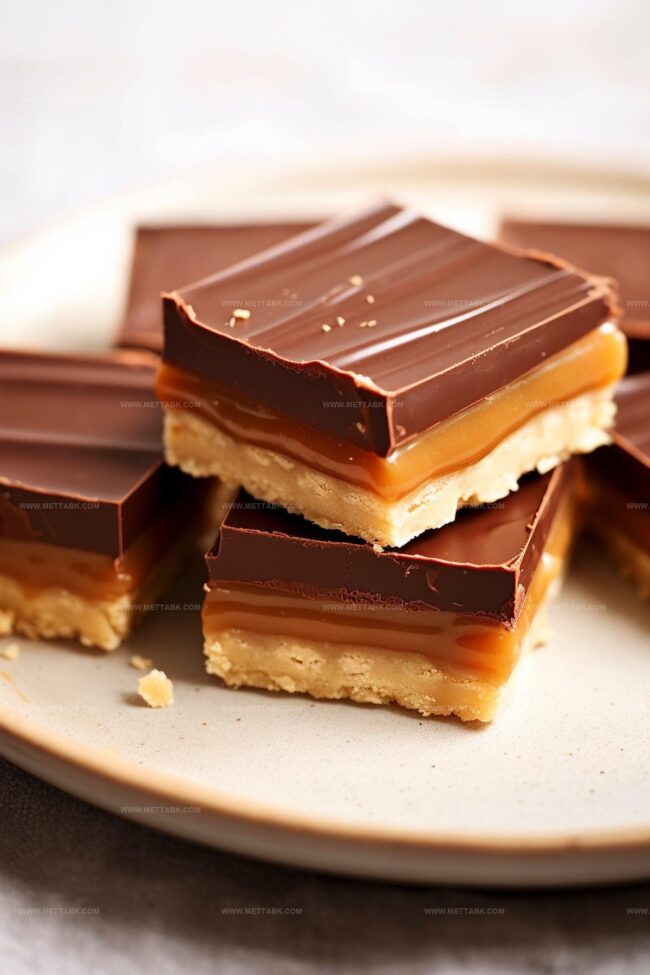
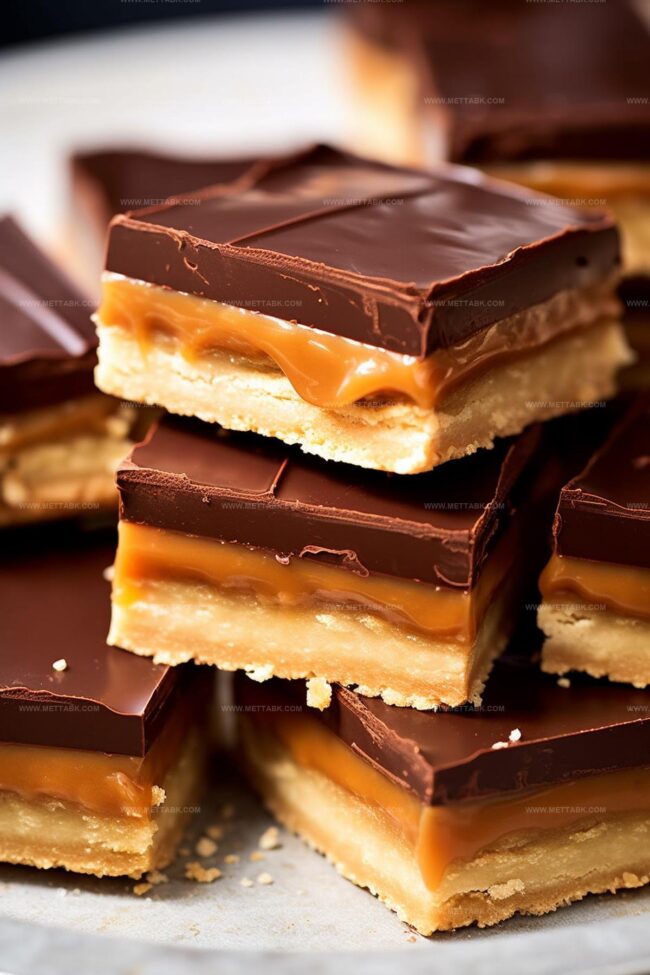
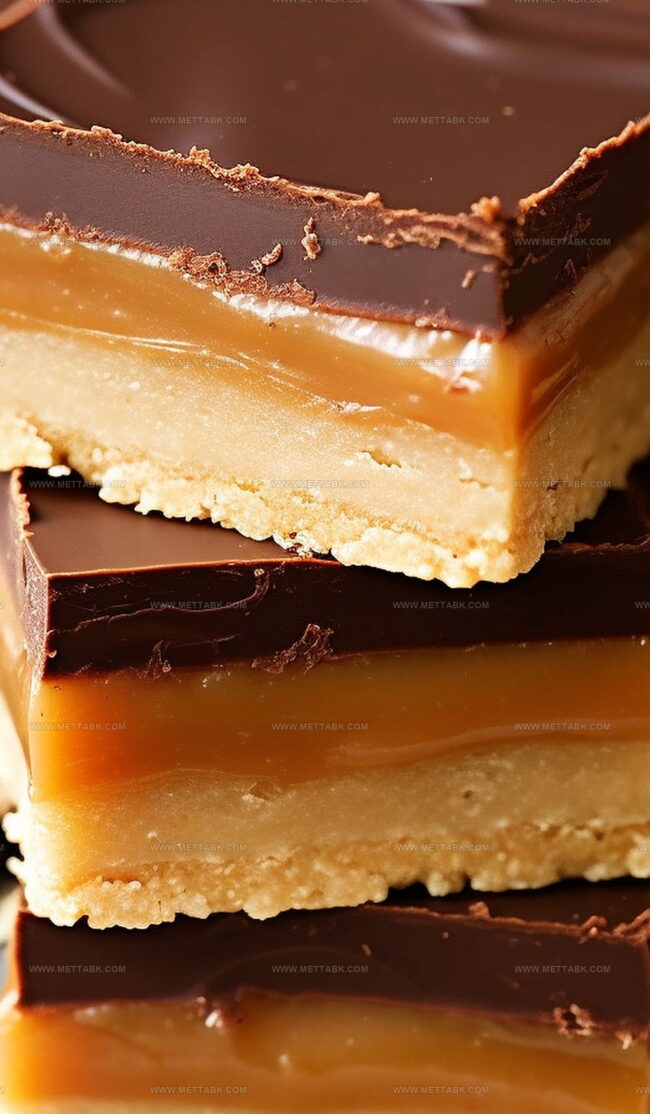
Layers of buttery shortbread, rich caramel, and smooth chocolate create pure dessert magic.
My grandmother’s handwritten recipe sparked this delightful obsession.
Crisp textures and decadent flavors blend perfectly in each mouthwatering bite.
Combining simple ingredients yields an incredible treat that feels both nostalgic and luxurious.
Minimal effort delivers maximum satisfaction with this classic dessert.
Whip up these irresistible slices and watch everyone’s eyes light with pure delight.
Why Caramel Slice Is an Irresistible Dessert Bar

Ingredients for Caramel Slice
How to Make Caramel Slice Bars
Step 1: Prepare Baking Station
Warm up your oven to 180°C (or 160°C for fan ovens). Grab a 28x18cm rectangular pan and line it with baking paper, making sure the edges hang over the sides for easy lifting later.
Step 2: Create Crumbly Base
Ingredients for base:Mix all base ingredients in a bowl until they form a consistent crumbly texture. Press the mixture firmly and evenly into the prepared pan.
Step 3: Bake Base Layer
Slide the pan into the preheated oven. Bake for about 15 minutes until the top turns a beautiful golden color.
Once done, let it cool completely.
Step 4: Craft Luscious Caramel
Ingredients for caramel:In a saucepan, melt butter with sugar and vanilla over medium-low heat.
Stir gently until sugar dissolves. Add condensed milk and whisk continuously for 5-6 minutes.
Watch for bubbling and keep stirring to prevent burning.
Step 5: Layer Caramel
Pour the silky caramel over the cooled base, spreading it evenly.
Return to the oven and bake for 12 minutes. Small brown spots are perfectly normal.
Step 6: Add Chocolate Topping
Ingredients for topping:Melt chocolate with oil in the microwave, stirring every 30 seconds until smooth. Drizzle the melted chocolate over the caramel layer, creating an even coating.
Step 7: Chill and Serve
Refrigerate the slice for at least 1 hour to set completely. Remove from fridge, let sit for 5 minutes, then slice into delightful squares.
Enjoy your homemade caramel slice!
Pro Tips for Gooey and Sweet Caramel Slice
Delicious Variations of Caramel Slice Bars
Pairings That Go Well with Caramel Slice
Storage Recommendations for Caramel Slice
FAQs
The secret is continuous whisking while cooking the caramel mixture and avoiding burning. Keep the heat at medium-low and whisk constantly, especially when adding condensed milk. Remove from heat as soon as larger bubbles form at the bottom of the pan.
Adding vegetable oil helps create a smoother, shinier chocolate layer that’s easier to cut and prevents cracking. It also ensures the chocolate remains glossy and sets nicely on top of the caramel slice.
Yes, you can use milk, dark, or semi-sweet chocolate based on your preference. Just ensure you use good quality chocolate that melts smoothly for the best results.
Print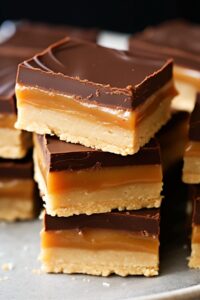
Caramel Slice Recipe
- Total Time: 47 minutes
- Yield: 16 1x
Description
Chocolate caramel slice combines rich layers of buttery shortbread, silky caramel, and glossy chocolate for an irresistible Australian dessert. Sweet indulgence promises pure delight when friends gather around this classic treat.
Ingredients
- 395 g (1 can or 14 oz) sweetened condensed milk
- 125 g (1/2 cup or 4.4 oz) unsalted butter (melted), for base
- 125 g (1/2 cup or 4.4 oz) unsalted butter (coarsely chopped), for caramel
- 200 g (7 oz) dark or milk melting chocolate
- 1 cup plain flour
- 1 cup brown sugar (total, measured without pressing)
- 1/2 cup desiccated coconut (or sweetened finely shredded coconut)
- 1 tbsp vegetable oil
- 1 tsp vanilla extract
Instructions
- Preheat the oven to 180°C (160°C fan-forced) and prepare a 28x18cm rectangular pan with greased baking paper, leaving an overhang for easy removal.
- Mix the base ingredients thoroughly and press evenly into the prepared pan.
- Bake the base for 15 minutes until golden, then refrigerate to cool completely.
- Reduce oven temperature to 160°C (140°C fan-forced).
- In a saucepan, melt butter with sugar and vanilla extract over medium-low heat, whisking until fully integrated.
- Once the mixture begins to simmer, add sweetened condensed milk and whisk continuously for 5-6 minutes.
- Watch for large bubbles forming at the bottom of the pan, indicating the caramel is ready.
- Pour the caramel evenly over the cooled base and bake for 12 minutes.
- Allow the caramel layer to cool at room temperature for 20 minutes, then refrigerate for 30 minutes.
- Melt chocolate and vegetable oil in a microwave-safe bowl, stirring at 30-second intervals until smooth.
- Spread the melted chocolate uniformly over the chilled caramel layer.
- Refrigerate the slice for at least 1 hour to set completely.
- Remove from refrigerator, let sit for 5 minutes, then slice into desired shapes before serving.
Notes
- Chill the base thoroughly before adding caramel to prevent layers from mixing and ensure clean, crisp texture.
- Use a heavy-bottomed saucepan when making caramel to prevent burning and achieve smooth, consistent results.
- Control chocolate melting by using short microwave intervals and stirring frequently to prevent seizing or overheating.
- For gluten-free version, substitute regular flour with almond or coconut flour in the base layer.
- Prep Time: 20 minutes
- Cook Time: 27 minutes
- Category: Desserts, Snacks
- Method: Baking
- Cuisine: Australian
Nutrition
- Serving Size: 16
- Calories: 259
- Sugar: 20 g
- Sodium: 37 mg
- Fat: 15 g
- Saturated Fat: 9 g
- Unsaturated Fat: 5 g
- Trans Fat: 0.1 g
- Carbohydrates: 30 g
- Fiber: 1.2 g
- Protein: 2.7 g
- Cholesterol: 25 mg
Clara Bennett
Contributing Recipe Developer & Food Writer
Expertise
Baking and Pastry Development, Gluten-Free and Allergy-Friendly Recipe Creation, Culinary Storytelling and Food Journalism, Recipe Testing and Standardization, Southern Comfort Foods and Modern Twists
Education
Sullivan University – National Center for Hospitality Studies
Associate Degree in Culinary Arts
Focus: Baking and Pastry Arts, Recipe Testing, and Culinary Journalism.
Clara specialized in crafting desserts that blend classic Southern comfort with modern techniques, while developing strong writing skills to tell the story behind every dish.
Lane Community College (Certificate Program)
Certificate in Food Writing and Photography
Focus: Culinary storytelling, recipe formatting, food styling, and visual presentation.
Clara’s love of baking started young, powered by homemade pies, biscuits, and stories passed around the family table.
After earning her degree at Sullivan University and a food writing certificate at Lane Community College, she turned her passion into a craft: sharing recipes that are simple, soulful, and always full of heart.
She’s big on bold flavors, flexible ideas, and creating sweets that fit any table (yes, even if you’re gluten-free). When she’s not baking, you’ll find her wandering farmers’ markets, styling food for the next photo shoot, or working on her ever-growing recipe journal.