Heavenly Cheesy Pepperoni Pizza Sticks Recipe For Snack Lovers
Crafting delicious cheesy pepperoni pizza sticks can turn an ordinary evening into a flavor-packed adventure.
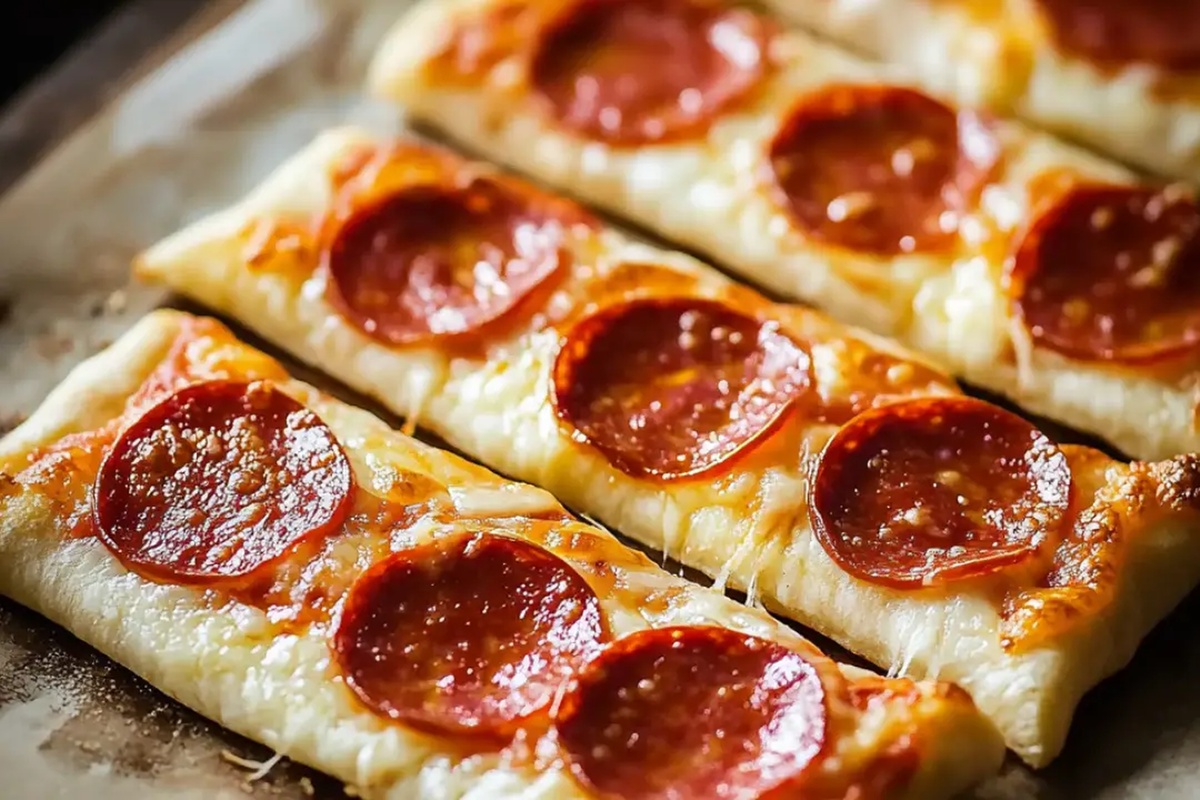
Crispy edges and melted cheese create an irresistible combination that sparks instant cravings.
Comfort food meets snack-time excitement with this simple yet mouthwatering treat.
Kids and adults alike will devour these savory bites faster than you can slide them onto a plate.
Mediterranean herbs and zesty pepperoni add layers of robust taste to each bite-sized delight.
Simple ingredients and quick preparation make this recipe a go-to option for spontaneous gatherings.
Dive into this recipe and watch everyone’s eyes light up with anticipation.
Cheesy Pepperoni Pizza Sticks Everyone Will Crave
Ingredients for Cheesy Pepperoni Pizza Sticks
For the Main Ingredients:For the Seasonings and Extras:For the Preparation Ingredients:How to Bake Cheesy Pepperoni Pizza Sticks
Step 1: Warm Up the Oven
Set your oven to a toasty 400F (200C). Cover a baking sheet with parchment paper or a silicone mat to prevent sticking.
Step 2: Roll Out the Dough
Gently spread the pizza dough on a lightly floured surface. If you’re using homemade dough, roll it into a rectangle that’s about the size of a standard baking sheet.
Step 3: Sauce It Up
Spread a generous layer of pizza sauce across the dough, leaving a small border around the edges to prevent overflow.
Step 4: Layer the Deliciousness
Create delectable layers with these ingredients:Distribute them evenly across the sauced dough for maximum flavor impact.
Step 5: Slice into Tempting Strips
Using a pizza cutter or sharp knife, slice the dough into strips approximately 1-inch wide.
Step 6: Get Twisty (Optional)
For an extra fun presentation, gently twist each strip to create a spiral shape that looks as good as it tastes.
Step 7: Arrange for Perfection
Place the pizza strips on the prepared baking sheet, leaving some breathing room between each piece.
Step 8: Add a Golden Touch
Brush each pizza strip with olive oil to help them develop a beautiful golden-brown crispiness.
Step 9: Spice It Up
Sprinkle these flavor boosters:Step 10: Bake to Crispy Goodness
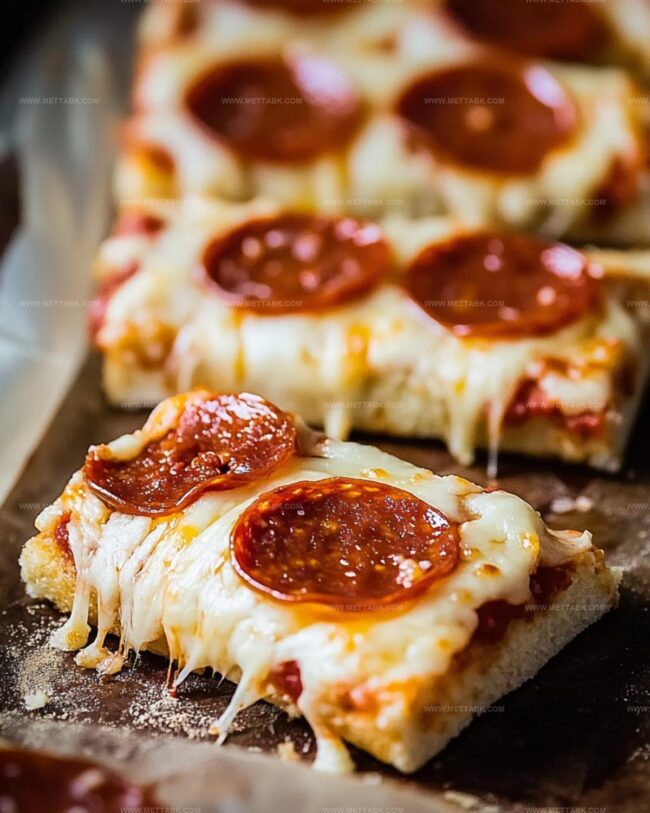
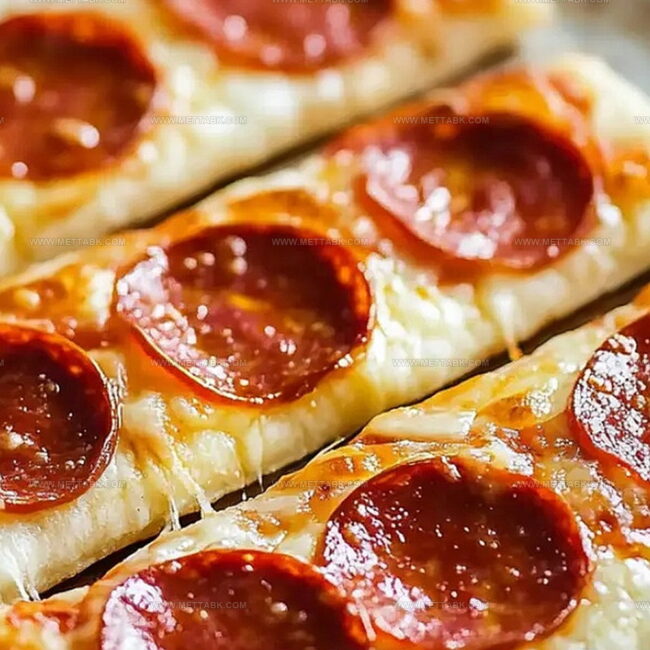
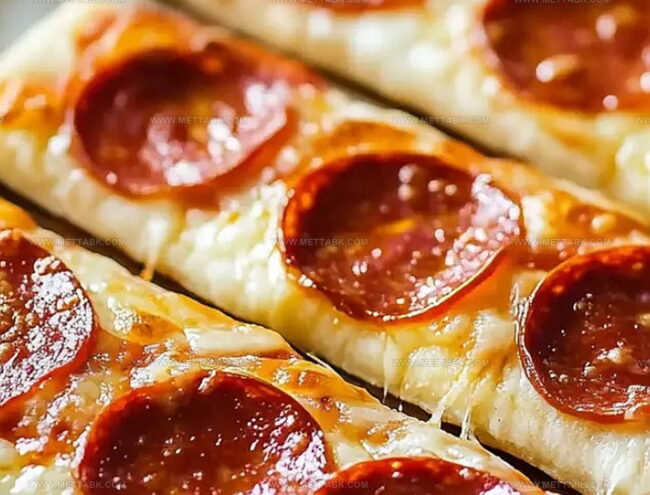
Pop the baking sheet into the oven and bake for 15-20 minutes. You’re looking for a gorgeous golden-brown color and melted, bubbly cheese.
Step 11: Serve and Enjoy
Let the pizza rolls cool for a few minutes. Serve them warm with a side of pizza sauce or marinara for dipping.
Watch them disappear in minutes!
Tips to Perfect Pepperoni Pizza Sticks
Variations on Cheesy Pepperoni Pizza Sticks
Pairings to Serve with Pepperoni Pizza Sticks
How to Store Pepperoni Pizza Sticks Properly
Store cooled pizza sticks in an airtight container in the refrigerator for up to 3-4 days. Separate layers with parchment paper to prevent sticking.
Wrap individual pizza sticks tightly in plastic wrap, then place in a freezer-safe bag. Freeze for up to 2 months for maximum freshness.
Restore crispiness by baking frozen or refrigerated pizza sticks at 350F for 8-10 minutes. Spread on a baking sheet and cover with foil to prevent excessive browning.
Reheat refrigerated pizza sticks for 30-45 seconds, but expect slightly softer texture compared to oven reheating.
FAQs
Yes, you can experiment with various cheeses like cheddar, provolone, or a blend of cheeses to create your own unique flavor profile.
Absolutely! Pizza sticks are a fun, easy-to-eat snack that kids love. They can even help you prepare the sticks by adding toppings or twisting the dough.
Lightly flour your work surface and use parchment paper or a silicone mat to prevent the dough from sticking to the baking sheet.
You can prepare the pizza sticks and refrigerate them before baking. Just add a few extra minutes to the baking time when you’re ready to cook them.
Print
Cheesy Pepperoni Pizza Sticks Recipe
- Total Time: 30 minutes
- Yield: 4 1x
Description
Mouthwatering cheesy pepperoni pizza sticks bring classic Italian flavor to snack time with crispy, golden edges. Melted mozzarella and spicy pepperoni wrapped in buttery pastry create a quick bite that satisfies pizza cravings without the full pie commitment.
Ingredients
Pizza Base:
- 1 10-ounce (280 grams) can refrigerated pizza dough
Cheese:
- 1.5 cups (170 grams) shredded mozzarella cheese
- Optional: grated Parmesan cheese
Toppings and Seasonings:
- 0.5 cup (75 grams) pepperoni slices
- 0.5 cup (120 milliliters) pizza sauce or marinara sauce
- 1 tablespoon (15 milliliters) olive oil
- 1 teaspoon Italian seasoning
- Optional: red pepper flakes
- Optional: garlic powder
Instructions
- Heat the oven to 400F (200C) and arrange a parchment-lined baking sheet for preparing the pizza sticks.
- Gently stretch or roll the pizza dough into a rectangular shape on a lightly floured surface, ensuring an even thickness.
- Distribute pizza sauce across the dough surface, maintaining a narrow border around the edges to prevent overflow during baking.
- Generously scatter mozzarella cheese over the sauce, creating an even layer, then strategically place pepperoni pieces across the cheese surface.
- Slice the prepared dough into uniform strips approximately 1-inch wide using a pizza cutter or sharp knife.
- Optionally, create visual interest by delicately twisting each strip into a spiral formation.
- Carefully transfer the pizza strips onto the prepared baking sheet, positioning them with adequate spacing to prevent sticking.
- Apply a light coating of olive oil across each strip to enhance crispiness and golden-brown coloration.
- Enhance flavor profiles by sprinkling Italian seasoning, Parmesan cheese, red pepper flakes, and garlic powder over the strips.
- Bake for 15-20 minutes until the edges transform into a rich golden hue and cheese becomes thoroughly melted and slightly bubbling.
- Allow pizza sticks to cool momentarily before serving, accompanied by additional pizza sauce or marinara for dipping.
Notes
- Swap regular pizza dough for gluten-free alternatives like cauliflower crust or pre-made gluten-free dough to accommodate dietary restrictions.
- Replace mozzarella with dairy-free cheese alternatives or nutritional yeast for a vegan-friendly version that maintains cheesy flavor.
- Substitute pepperoni with turkey pepperoni, grilled chicken strips, or plant-based protein to reduce fat content and add nutritional variety.
- Adjust heat by using mild or spicy pepperoni, adding red pepper flakes, or incorporating different seasonings to suit individual taste preferences.
- Prep Time: 15 minutes
- Cook Time: 15 minutes
- Category: Lunch, Dinner, Appetizer, Snacks
- Method: Baking
- Cuisine: Italian-American
Nutrition
- Serving Size: 4
- Calories: 360 kcal
- Sugar: 3 g
- Sodium: 720 mg
- Fat: 22 g
- Saturated Fat: 9 g
- Unsaturated Fat: 12 g
- Trans Fat: 0.2 g
- Carbohydrates: 24 g
- Fiber: 1.5 g
- Protein: 18 g
- Cholesterol: 45 mg
Nate Harper
Founder & Recipe Curator
Expertise
Single-Recipe Development, Farm-to-Table Cooking, Seasonal Menu Planning, Culinary Storytelling, Home Kitchen Innovation
Education
Cascade Culinary Institute – Central Oregon Community College
Certificate in Culinary Arts
Focus: Farm-to-table cuisine, sustainable cooking practices, and seasonal recipe creation.
Nate studied under experienced chefs who emphasized local sourcing, minimal waste, and building recipes from fresh, simple ingredients.
Nate Harper is the founder and creative force behind Make, Take, Bake. Raised in the wild beauty of Oregon’s high desert, Nate grew up surrounded by family gardens, farmers’ markets, and home kitchens that celebrated the seasons.
His early love for simple, honest food evolved into a professional passion when he attended Cascade Culinary Institute, where he sharpened his skills in creating recipes that are sustainable, satisfying, and made for everyday life.
Nate’s goal is to make cooking feel accessible, free of fuss, and full of flavor. He believes a single, thoughtfully built dish can stand alone, and sometimes even steal the show.