
Irresistibly Creamy Cheesy Rice Recipe For Cozy Dinners
Comfort meets culinary magic in this delightful cheesy rice recipe that promises to warm your heart and satisfy your hunger.
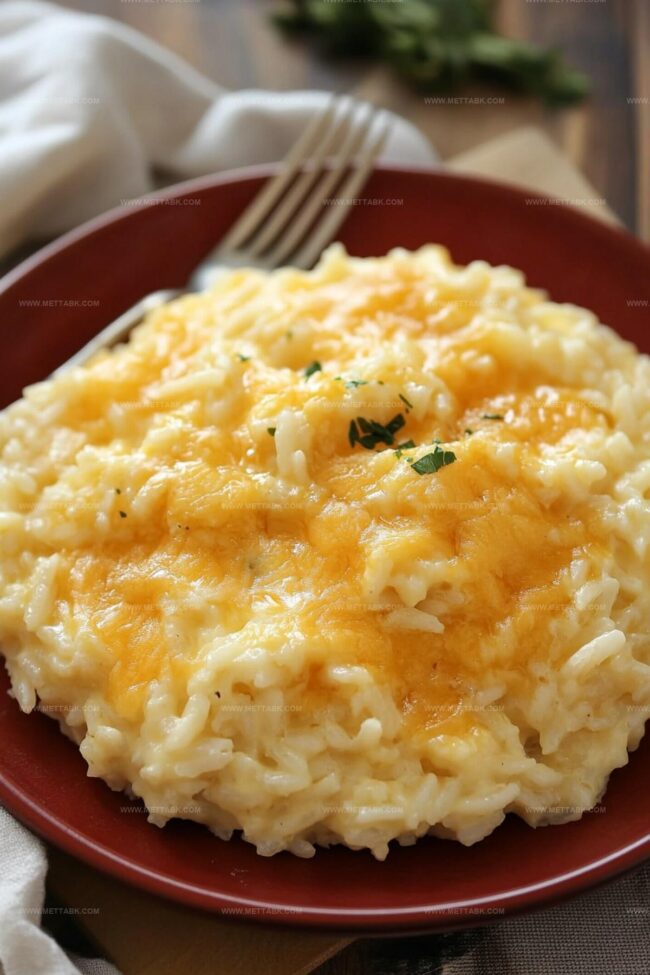
Creamy textures blend seamlessly with rich, melted cheese flavors.
Every forkful carries a promise of pure deliciousness.
Cheese lovers will instantly fall in love with this simple yet spectacular dish.
Home cooks can easily master these techniques without complicated steps.
The ingredients are straightforward and accessible in most kitchens.
Cheesy Rice That Brings Comfort

Ingredients Needed for Cheesy Rice

How to Cook Cheesy Rice

Step 1: Preheat Oven
Turn on the oven and set the temperature to 350 degrees Fahrenheit. This ensures the oven is warm and ready for baking the cheesy rice.
Step 2: Prepare Mixing Ingredients
Gather the following ingredients:Step 3: Grease Baking Dish
Lightly coat the baking dish with cooking spray or butter to prevent sticking and make cleanup easier.
Step 4: Mix Rice and Cheese
Combine the ingredients in the baking dish:Step 5: Bake the Cheesy Rice
Place the baking dish in the preheated oven.
Bake for 20 minutes until the cheese melts completely and turns golden brown. The surface should be bubbling and look temptingly crispy.
Step 6: Cool and Serve
Remove the dish from the oven and let it rest for 2-3 minutes. This allows the cheese to set slightly and makes serving easier.
Scoop out the creamy, cheesy rice and enjoy while it’s warm.
Tips for Creamy Cheesy Rice

Flavor Twists on Cheesy Rice

Pairing Suggestions for Cheesy Rice

Storing Cheesy Rice Properly
FAQs

Yes, you can use various rice types like basmati, jasmine, or brown rice. Just ensure the rice is cooked and slightly cooled before mixing with other ingredients.
No, cayenne pepper is optional. If you prefer less heat, you can reduce the amount or skip it entirely. Alternatives like black pepper or paprika work well.
Cheddar is recommended, but you can also use monterey jack, colby, or a blend of cheeses. Experiment with different cheese combinations for varied flavors.
Absolutely! The current recipe is already vegetarian. Just ensure your cheese and sour cream are vegetarian-friendly if that’s a concern for you.
Print
Cheesy Rice Recipe
- Total Time: 35 minutes
- Yield: 4 1x
Description
Comforting cheesy rice delivers creamy satisfaction with minimal ingredients. Gooey cheese and fluffy grains merge into a simple side dish you’ll crave again and again.
Ingredients
- 1 cup (240 ml) cheddar cheese, finely grated (sharp)
- 1 cup (240 ml) sour cream
- 2 cups (480 ml) steamed rice
- 1 tsp (5 ml) cayenne pepper
Instructions
- Grease a baking dish thoroughly to prevent sticking and ease serving, creating a smooth surface for the cheesy rice mixture.
- Blend warm steamed rice with sour cream, ensuring complete and uniform coating of the grains with the creamy mixture.
- Incorporate grated cheddar cheese and cayenne pepper into the rice, stirring gently to distribute the spice and cheese evenly throughout the dish.
- Transfer the seasoned rice mixture into the prepared baking dish, spreading it uniformly to ensure consistent heating and melting.
- Place the dish in a preheated 350°F oven, positioning it in the center rack for balanced heat distribution.
- Bake for 20 minutes, monitoring until the cheese melts completely and develops a golden-brown, slightly crispy surface.
- Remove from the oven and let the dish rest for 3-5 minutes, allowing the cheese to set and the flavors to meld together before serving.
- Serve hot, garnishing with optional fresh herbs or additional cayenne pepper for those desiring extra zest.
Notes
- Prevent Dry Rice by using freshly cooked, slightly moist rice to ensure a creamy, smooth texture without becoming too dry during baking.
- Cheese Variety Matters, experiment with different cheese combinations like monterey jack, gruyere, or parmesan to create unique flavor profiles and enhance the dish’s complexity.
- Customize Heat Levels by adjusting cayenne pepper quantity or replacing it with mild chili powder for those preferring less spiciness, making the recipe adaptable to different taste preferences.
- Enhance Nutrition by incorporating additional vegetables like spinach, diced bell peppers, or peas directly into the rice mixture, boosting both flavor and nutritional value without compromising the dish’s core essence.
- Prep Time: 15 minutes
- Cook Time: 20 minutes
- Category: Lunch, Dinner, Snacks
- Method: Baking
- Cuisine: American
Nutrition
- Serving Size: 4
- Calories: 400 kcal
- Sugar: 2 g
- Sodium: 350 mg
- Fat: 20 g
- Saturated Fat: 12 g
- Unsaturated Fat: 6 g
- Trans Fat: 0.5 g
- Carbohydrates: 38 g
- Fiber: 1 g
- Protein: 12 g
- Cholesterol: 40 mg
Clara Bennett
Contributing Recipe Developer & Food Writer
Expertise
Baking and Pastry Development, Gluten-Free and Allergy-Friendly Recipe Creation, Culinary Storytelling and Food Journalism, Recipe Testing and Standardization, Southern Comfort Foods and Modern Twists
Education
Sullivan University – National Center for Hospitality Studies
Associate Degree in Culinary Arts
Focus: Baking and Pastry Arts, Recipe Testing, and Culinary Journalism.
Clara specialized in crafting desserts that blend classic Southern comfort with modern techniques, while developing strong writing skills to tell the story behind every dish.
Lane Community College (Certificate Program)
Certificate in Food Writing and Photography
Focus: Culinary storytelling, recipe formatting, food styling, and visual presentation.
Clara’s love of baking started young, powered by homemade pies, biscuits, and stories passed around the family table.
After earning her degree at Sullivan University and a food writing certificate at Lane Community College, she turned her passion into a craft: sharing recipes that are simple, soulful, and always full of heart.
She’s big on bold flavors, flexible ideas, and creating sweets that fit any table (yes, even if you’re gluten-free). When she’s not baking, you’ll find her wandering farmers’ markets, styling food for the next photo shoot, or working on her ever-growing recipe journal.