Dreamy Cherry Pie Filling Desserts Recipe Everyone Adores
Whipping up delectable cherry pie filling desserts promises pure culinary magic for sweet-tooth enthusiasts.
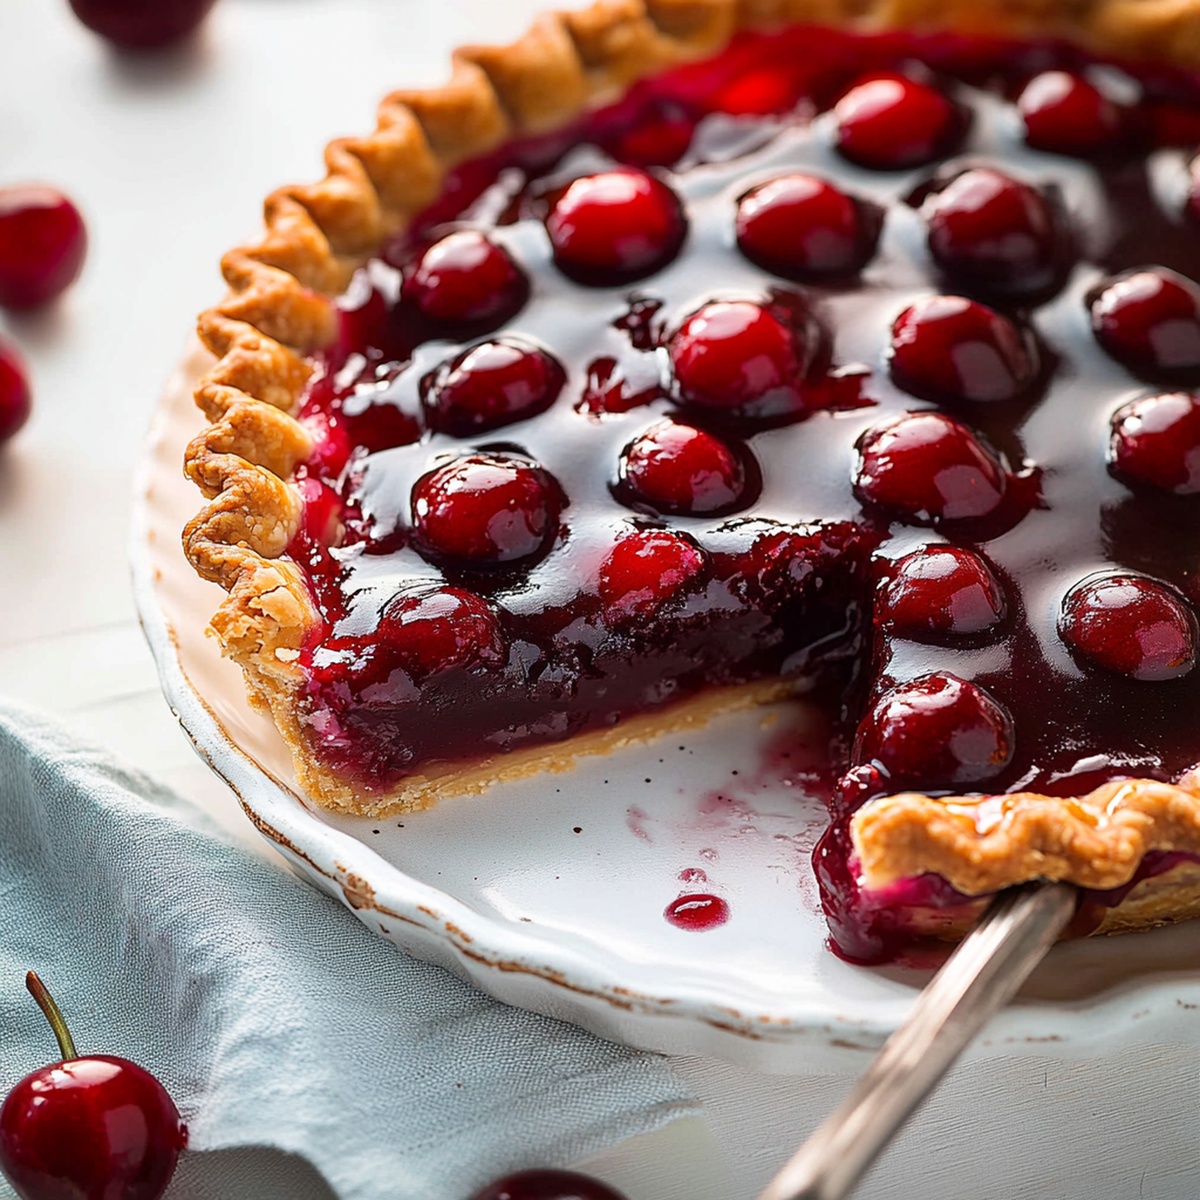
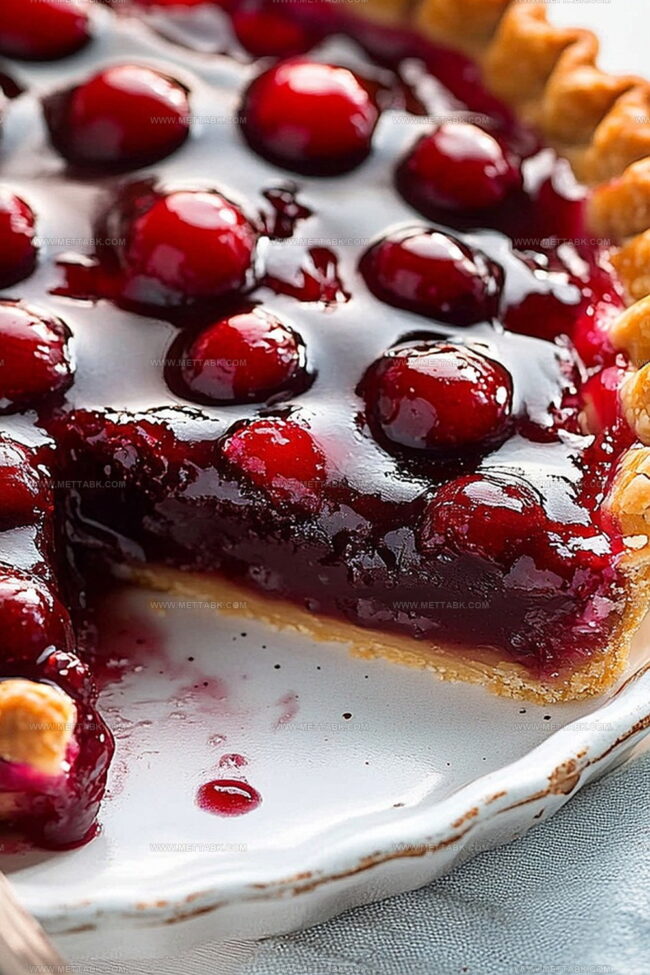
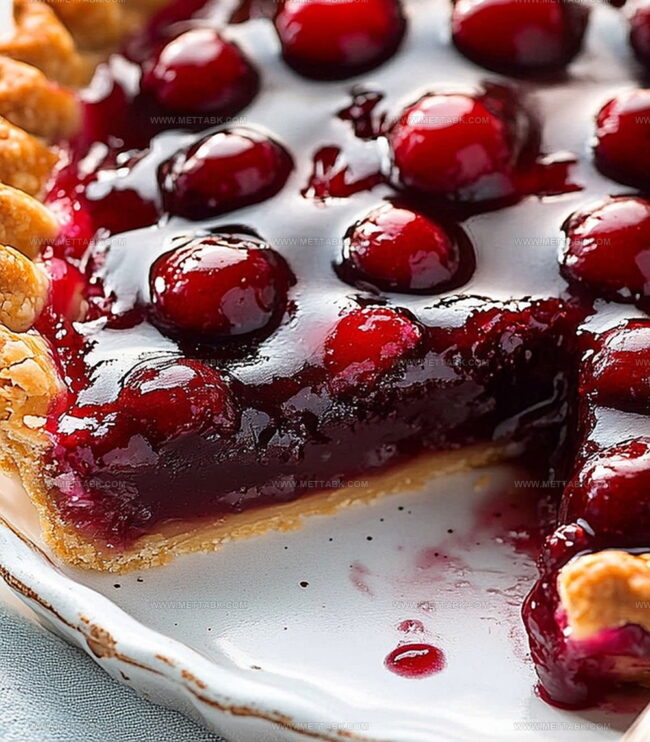
Bursting with vibrant crimson fruit, these treats capture dessert lovers’ hearts instantly.
Seasonal cherries bring incredible depth and richness to every bite.
Delightful combinations emerge when traditional techniques meet creative twists.
Bakers can experiment with multiple textures and flavor profiles using this versatile ingredient.
Simple techniques help anyone craft extraordinary desserts that look professionally prepared.
Dive into these irresistible recipes and unleash your inner pastry chef.
Cherry Pie Filling Desserts You’ll Fall For
Ingredients to Create Cherry Pie Filling Desserts
Pie Crust:Filling Ingredients:Topping and Optional Additions:How to Prepare Cherry Pie Filling Desserts Easily
Step 1: Prepare the Pie Crust
Dust your clean countertop with flour and roll out the chilled pie crust until it’s slightly larger than your pie dish. Gently transfer the dough into the dish, pressing it softly against the sides and trimming any overhanging edges with a sharp knife.
Step 2: Create a Luscious Cherry Base
Pour the vibrant cherry pie filling directly into the prepared crust, spreading it evenly with a spatula. For an extra touch of sweetness, sprinkle a light dusting of granulated sugar across the surface.
Step 3: Design the Perfect Pie Top
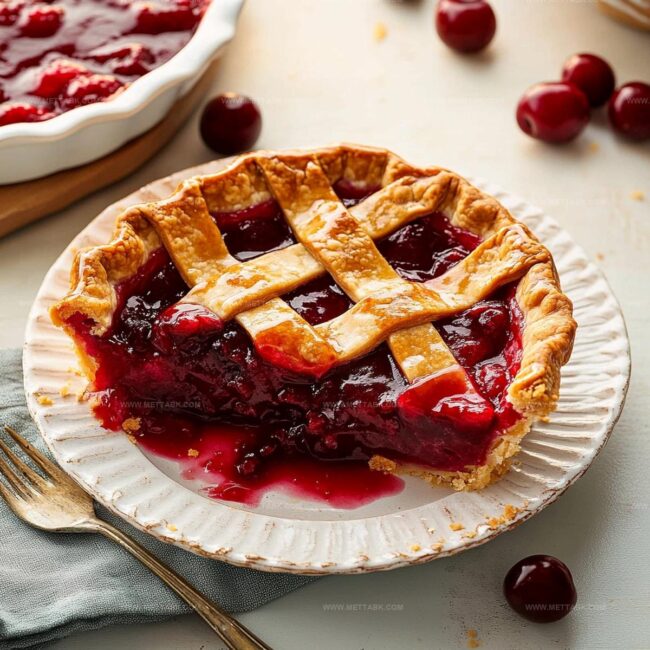
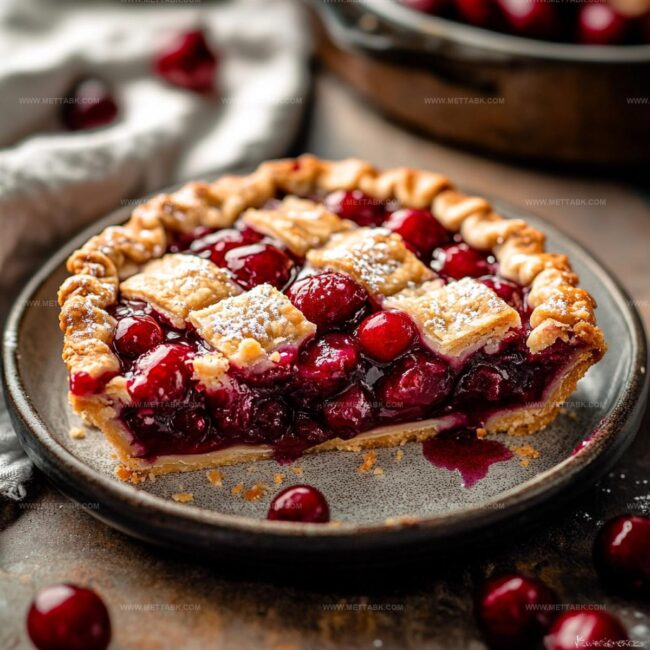
If you’re crafting a traditional double-crust pie, roll out a second piece of dough. Carefully drape it over the cherry filling, creating artistic steam vents by cutting a few decorative slits with a paring knife.
Crimp the edges to seal the pie beautifully.
Step 4: Bake to Golden Perfection
Slide the pie into a preheated oven at 425°F.
Bake for 30-35 minutes, watching for a gorgeous golden-brown crust and bubbling cherry filling that signals it’s ready to delight your taste buds.
Step 5: Cool and Serve with Flair
Remove the pie from the oven and let it rest for a few minutes.
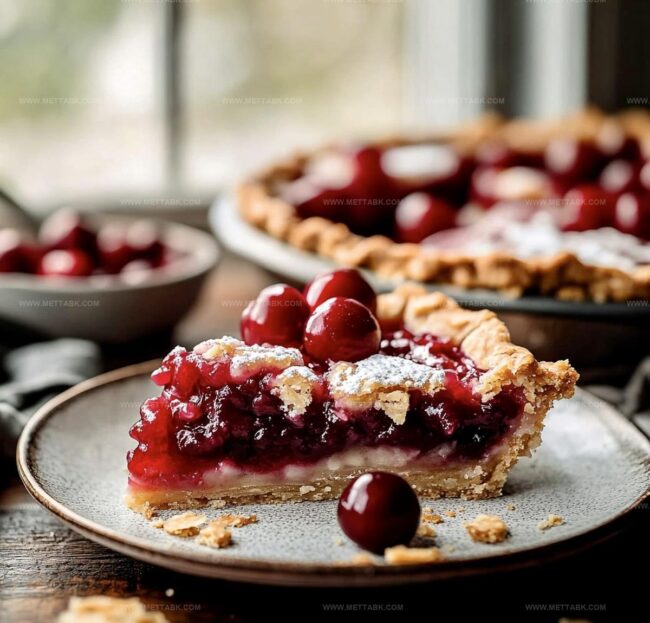
Slice and serve warm, topped with a scoop of vanilla ice cream or a dollop of fresh whipped cream for the ultimate dessert experience.
Helpful Hints for Cherry Pie Filling Desserts
Creative Versions of Cherry Pie Filling Desserts
Pairings That Match Cherry Pie Filling Desserts Well
Storing Cherry Pie Filling Desserts Safely
FAQs
Fresh sweet cherries like Bing or frozen pitted cherries are ideal. Avoid sour cherries unless you want to add extra sugar to balance the tartness.
Pre-bake the bottom crust for 10 minutes before adding filling, and use a glass or ceramic pie dish to help crisp the bottom. Dusting the bottom crust with a thin layer of breadcrumbs or ground nuts can also help prevent sogginess.
Yes, you can prepare the pie a day in advance and store it covered in the refrigerator. Reheat in the oven at 350°F for 15-20 minutes before serving to restore the crust’s crispness.
Print
Cherry Pie Filling Desserts Youll Love Recipe
- Total Time: 55 minutes
- Yield: 8 1x
Description
Irresistible cherry pie filling defines this classic American dessert perfect for summer gatherings. Sweet cherries and buttery crust combine for a delightful treat you can enjoy at home or share with friends.
Ingredients
- 2 cups cherry pie filling (store-bought or homemade)
- 1 flaky pie crust (store-bought or homemade)
- 1/4 cup sugar
- 2 tbsps cornstarch
Instructions
- Warm the oven to 425°F, ensuring a precise temperature for optimal baking results.
- Transform the chilled pastry dough on a lightly dusted surface, rolling it until it generously overhangs the pie plate’s edges.
- Delicately transfer the rolled dough into the pie plate, gently molding it to fit the contours and trimming any excess with precision.
- Distribute the cherry filling uniformly across the pastry base, creating an even layer that promises a consistent flavor in every slice.
- For a traditional two-layer pie, craft a complementary top crust, strategically cutting decorative venting slits to allow steam escape.
- Carefully position the top crust over the filling, sealing the edges by crimping or pressing with a fork to lock in the luscious fruit interior.
- Position the pie in the preheated oven, baking for 30-35 minutes until the crust transforms into a golden, crisp shell and the filling bubbles enthusiastically.
- Remove from the oven and let the pie rest momentarily, allowing the filling to settle and flavors to intensify before serving alongside a scoop of vanilla ice cream or dollop of whipped cream.
Notes
- Choose tart cherries for a balanced, less sweet filling that prevents overwhelming sugary taste.
- Add a splash of almond extract to enhance the cherry flavor and create a more complex dessert profile.
- Consider using cornstarch or tapioca starch as a thickening agent to achieve the perfect pie filling consistency without being too runny.
- For gluten-free options, substitute traditional pie crust with almond flour or gluten-free pastry mix to accommodate dietary restrictions.
- Prep Time: 20 minutes
- Cook Time: 35 minutes
- Category: Desserts
- Method: Baking
- Cuisine: American
Nutrition
- Serving Size: 8
- Calories: 250 kcal
- Sugar: 20 g
- Sodium: 150 mg
- Fat: 12 g
- Saturated Fat: 4 g
- Unsaturated Fat: 7 g
- Trans Fat: 0.5 g
- Carbohydrates: 35 g
- Fiber: 2 g
- Protein: 2 g
- Cholesterol: 30 mg
Clara Bennett
Contributing Recipe Developer & Food Writer
Expertise
Baking and Pastry Development, Gluten-Free and Allergy-Friendly Recipe Creation, Culinary Storytelling and Food Journalism, Recipe Testing and Standardization, Southern Comfort Foods and Modern Twists
Education
Sullivan University – National Center for Hospitality Studies
Associate Degree in Culinary Arts
Focus: Baking and Pastry Arts, Recipe Testing, and Culinary Journalism.
Clara specialized in crafting desserts that blend classic Southern comfort with modern techniques, while developing strong writing skills to tell the story behind every dish.
Lane Community College (Certificate Program)
Certificate in Food Writing and Photography
Focus: Culinary storytelling, recipe formatting, food styling, and visual presentation.
Clara’s love of baking started young, powered by homemade pies, biscuits, and stories passed around the family table.
After earning her degree at Sullivan University and a food writing certificate at Lane Community College, she turned her passion into a craft: sharing recipes that are simple, soulful, and always full of heart.
She’s big on bold flavors, flexible ideas, and creating sweets that fit any table (yes, even if you’re gluten-free). When she’s not baking, you’ll find her wandering farmers’ markets, styling food for the next photo shoot, or working on her ever-growing recipe journal.