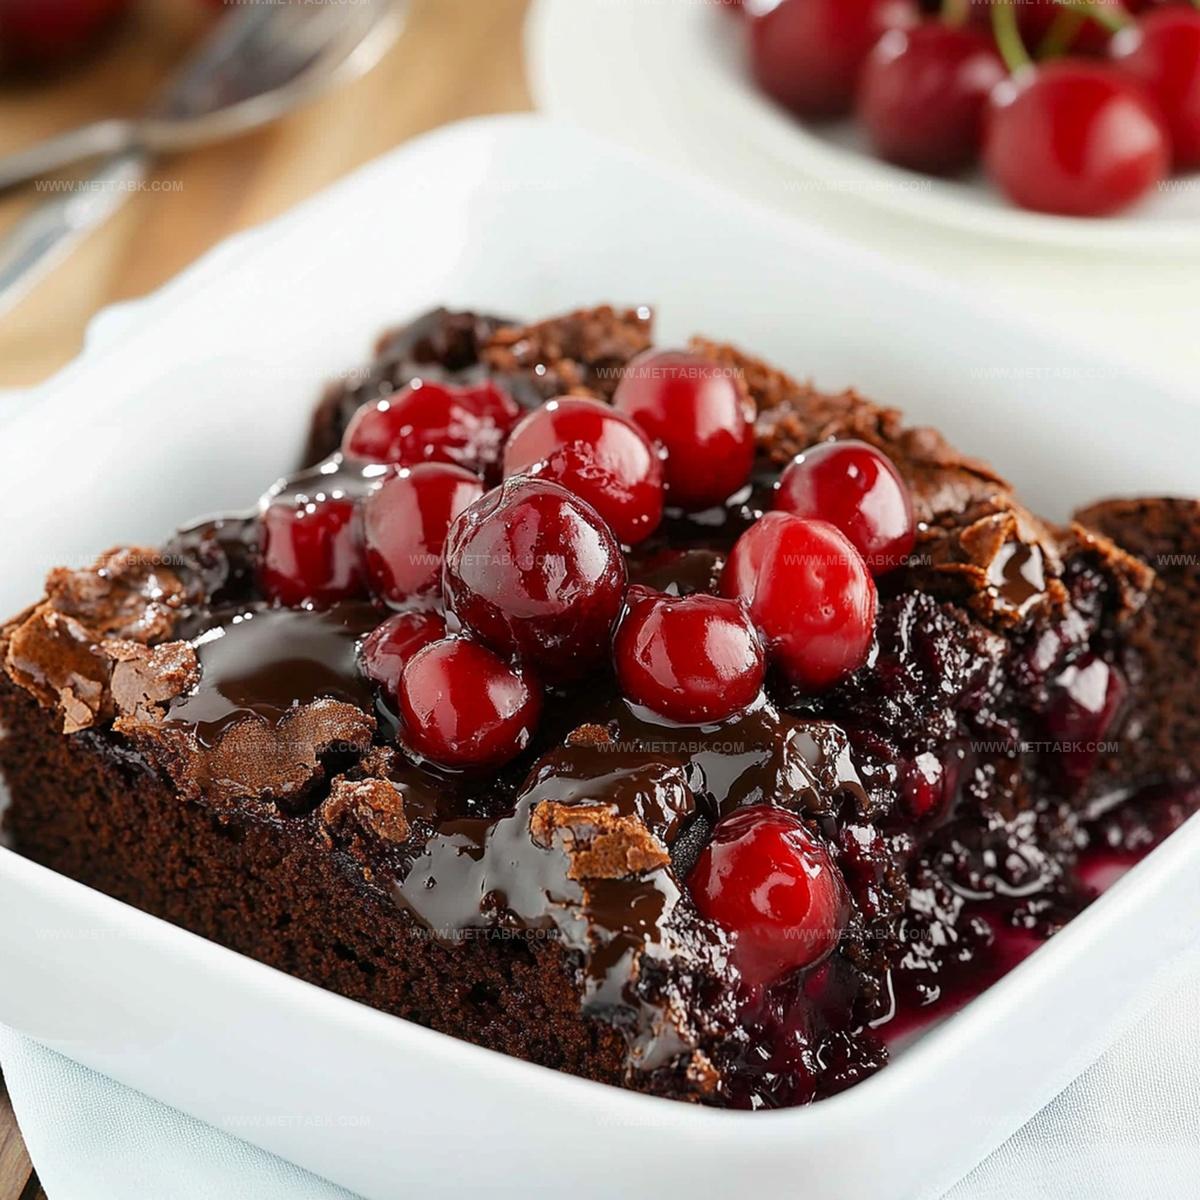
Magical Chocolate Cherry Dump Cake Recipe: Sweet Bliss in One Bowl
Baking a delightful chocolate cherry dump cake brings pure joy to any dessert lover’s kitchen.
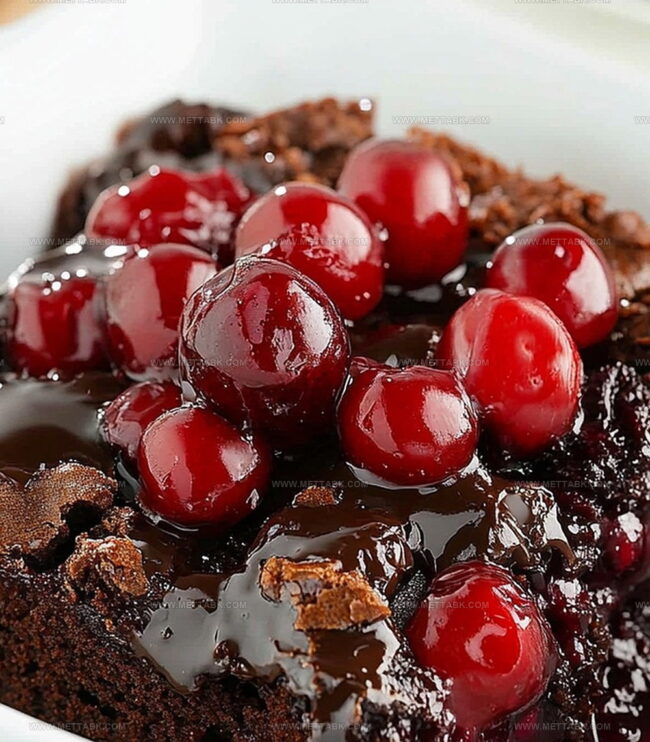
Sweet cherries nestled amid rich chocolate create an irresistible combination.
Layers of simplicity define this effortless treat that requires minimal preparation.
Minimal ingredients mean maximum flavor in every single bite.
Quick assembly makes this dessert perfect for spontaneous cravings or unexpected guests.
Home bakers appreciate how easily these ingredients transform into a decadent masterpiece.
Chocolate Cherry Dump Cake That’s Pure Comfort
What You’ll Need to Bake Chocolate Cherry Dump Cake
Main Ingredients:Chocolate Components:Baking Essentials:How to Put Together Chocolate Cherry Dump Cake Easily
Step 1: Prepare Baking Station
Warm up your oven to a cozy 350°F. Grab your trusty 9×13-inch baking dish and give it a quick spray or butter rub to prevent sticking.
Step 2: Create Cherry Foundation
Pour the vibrant cherry pie filling across the bottom of your baking dish, spreading it out into a luscious, even layer that will become the fruity base of your dessert.
Step 3: Blanket with Chocolate Mix
Gently shower the dry chocolate cake mix over the cherry layer, creating a powdery chocolate blanket that will transform into a delectable cake topping.
Step 4: Drench with Liquid Gold
Melt your butter and lovingly drizzle it across the entire surface, ensuring every bit of cake mix gets a rich, buttery coating that promises a moist and decadent treat.
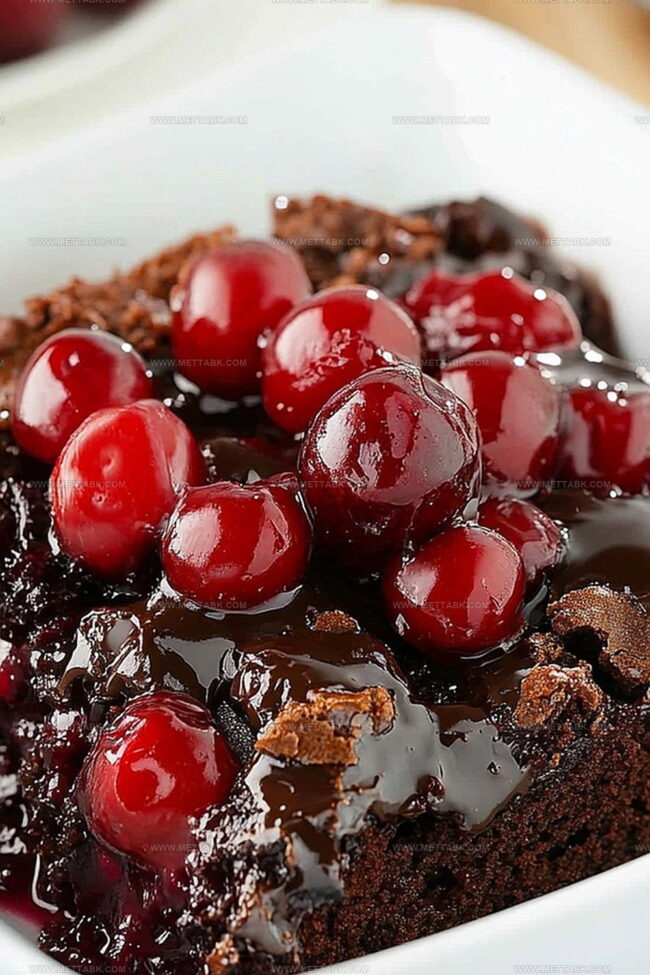
Step 5: Sprinkle Chocolate Magic
Scatter semi-sweet chocolate chips across the top, allowing them to peek through the buttery mix and add extra chocolatey bursts of flavor.
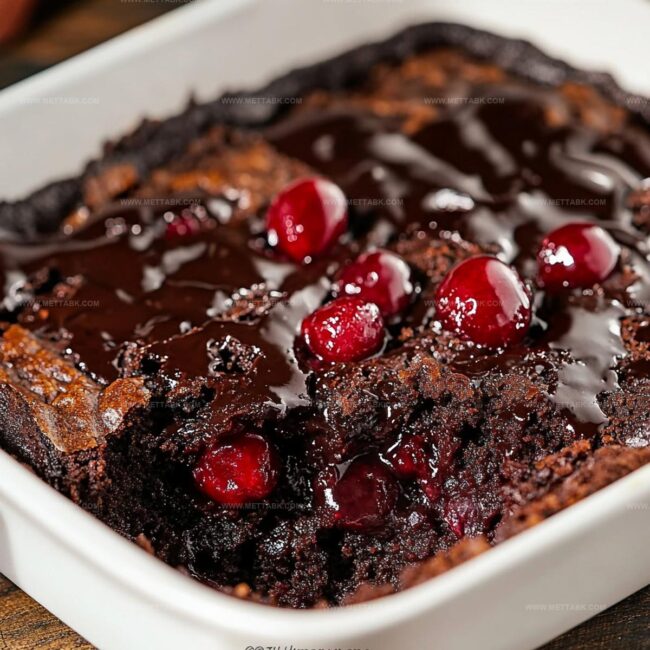
Step 6: Bake to Perfection
Slide your creation into the preheated oven and let it bake for 45-50 minutes. Watch for a golden-brown top and bubbling edges that signal your dessert is ready to dazzle.
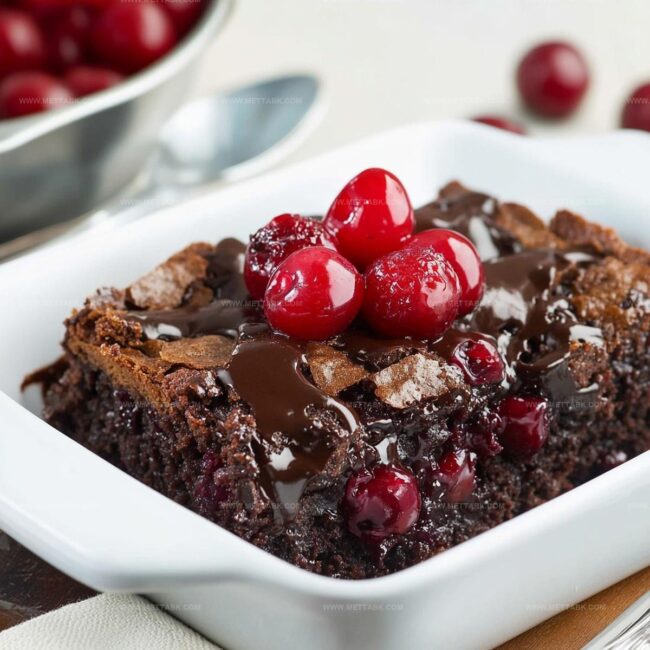
Step 7: Cool and Serve
Give your dump cake a short rest to set and cool slightly. Then dive in and enjoy the incredible blend of cherries and chocolate that’s sure to make taste buds dance!
Handy Tips for Chocolate Cherry Dump Cake Success
Fun Spins on Classic Chocolate Cherry Dump Cake
Pairings to Enjoy Alongside Chocolate Cherry Dump Cake
How to Keep Chocolate Cherry Dump Cake Tasty
FAQs
You’ll need cherry pie filling, chocolate cake mix, butter, and semi-sweet chocolate chips.
No, pie filling works best because it provides the right moisture and consistency for the dump cake.
This is an extremely easy recipe with minimal preparation – perfect for beginner bakers who want a quick dessert.
Absolutely not! This recipe requires no mixing, no complicated techniques – just layering ingredients and baking.
Print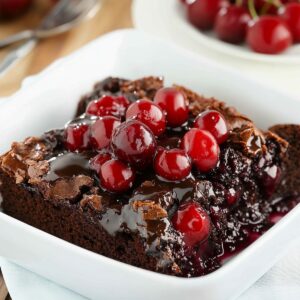
Chocolate Cherry Dump Cake Recipe
- Total Time: 1 hour
- Yield: 12 1x
Description
Simple chocolate cherry dump cake showcases rich flavors from North American dessert traditions. Layers of cherries and chocolate create an easy, comforting treat you’ll want to share with friends and family.
Ingredients
- 1 box chocolate cake mix
- 1 can (21 oz or 595 g) cherry pie filling
- 1 cup (227 g) unsalted butter, melted
- 1 cup (170 g) semi-sweet chocolate chips
- 1/2 tsp vanilla extract
Instructions
- Preheat oven to 350°F and thoroughly coat a 9×13-inch baking dish with non-stick spray.
- Create a smooth, even foundation by carefully spreading cherry pie filling across the entire bottom of the prepared dish.
- Generously distribute dry chocolate cake mix over the cherry layer, ensuring complete coverage.
- Slowly drizzle melted butter across the cake mix, allowing it to penetrate and create a rich, moist texture.
- Sprinkle semi-sweet chocolate chips uniformly over the surface, concentrating on even distribution.
- Transfer the dish to the preheated oven and bake for 45-50 minutes, watching for a golden-brown crust and bubbling edges that indicate perfect doneness.
- Remove from oven and let the cake rest for 10-15 minutes, allowing the layers to settle and flavors to meld before serving.
Notes
- Swap pie filling for fresh cherries when in season for a vibrant, tangy twist that elevates the dessert’s flavor profile.
- Ensure even butter distribution by using a pastry brush to coat the entire cake mix layer, preventing dry spots and promoting a rich, moist texture.
- For a gluten-free version, select a gluten-free chocolate cake mix and verify all ingredients are certified gluten-free.
- Add a scoop of vanilla ice cream or a dollop of whipped cream to balance the intense chocolate and cherry flavors, creating a delightful contrast in temperature and texture.
- Prep Time: 15 minutes
- Cook Time: 45 minutes
- Category: Desserts
- Method: Baking
- Cuisine: American
Nutrition
- Serving Size: 12
- Calories: 370 kcal
- Sugar: 31 g
- Sodium: 220 mg
- Fat: 18 g
- Saturated Fat: 10 g
- Unsaturated Fat: 7 g
- Trans Fat: 0.2 g
- Carbohydrates: 52 g
- Fiber: 3 g
- Protein: 4 g
- Cholesterol: 30 mg
Clara Bennett
Contributing Recipe Developer & Food Writer
Expertise
Baking and Pastry Development, Gluten-Free and Allergy-Friendly Recipe Creation, Culinary Storytelling and Food Journalism, Recipe Testing and Standardization, Southern Comfort Foods and Modern Twists
Education
Sullivan University – National Center for Hospitality Studies
Associate Degree in Culinary Arts
Focus: Baking and Pastry Arts, Recipe Testing, and Culinary Journalism.
Clara specialized in crafting desserts that blend classic Southern comfort with modern techniques, while developing strong writing skills to tell the story behind every dish.
Lane Community College (Certificate Program)
Certificate in Food Writing and Photography
Focus: Culinary storytelling, recipe formatting, food styling, and visual presentation.
Clara’s love of baking started young, powered by homemade pies, biscuits, and stories passed around the family table.
After earning her degree at Sullivan University and a food writing certificate at Lane Community College, she turned her passion into a craft: sharing recipes that are simple, soulful, and always full of heart.
She’s big on bold flavors, flexible ideas, and creating sweets that fit any table (yes, even if you’re gluten-free). When she’s not baking, you’ll find her wandering farmers’ markets, styling food for the next photo shoot, or working on her ever-growing recipe journal.