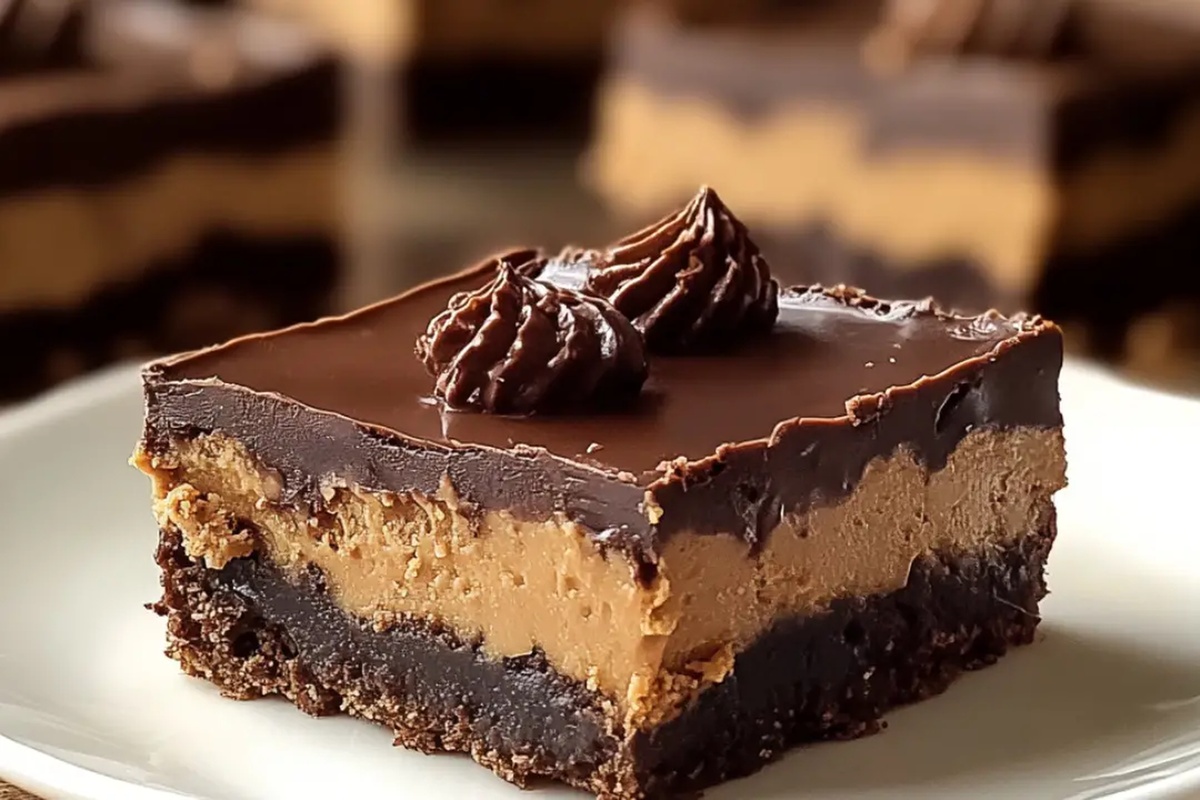
Heavenly Chocolate Peanut Butter Dream Bars Recipe
Sweet memories of childhood comfort flood back when you bite into these luscious chocolate peanut butter dream bars.
Creamy layers promise pure indulgence with minimal effort.
Decadent ingredients meld together like a delicious symphony of flavors.
Rich chocolate and smooth peanut butter create a harmonious dance on your palate.
Quick assembly means you can whip up these bars in mere minutes.
Minimal baking skills guarantee success for even novice dessert makers.
Nobody can resist these irresistible treats that deliver pure bliss in every single bite.
Chocolate Peanut Butter Dream Bars Recipe
Ingredients for Rich Chocolate Peanut Butter Bars
For the Crust:For the Peanut Butter Layer:For the Chocolate and Topping:How to Bake Chocolate Peanut Butter Dream Bars
Step 1: Create Chocolatey Cookie Base
Crush chocolate sandwich cookies into fine crumbs. Melt butter and blend thoroughly with cookie crumbs.
Press the mixture firmly into a 9×13-inch baking dish, creating an even, compact foundation. Place the dish in the refrigerator to set while preparing the next delicious layer.
Step 2: Whip Up Creamy Peanut Butter Filling
Grab a large mixing bowl and combine:Beat these ingredients until silky and well-blended. Gently fold in whipped topping to create a light, airy texture.
Spread this luxurious mixture evenly over the chilled cookie crust. Return the dish to the refrigerator.
Step 3: Craft Luscious Chocolate Pudding Layer
In a separate bowl, whisk chocolate pudding mix with cold milk. Stir until the mixture thickens and becomes smooth.
Carefully spread the pudding over the peanut butter layer, ensuring an even coverage.
Step 4: Chill and Set
Cover the dessert and place in the refrigerator.
Allow the bars to set completely for at least 4 hours. This waiting time helps the layers meld together and create a perfect texture.
Step 5: Finish With Fabulous Topping
Just before serving, generously spread additional whipped topping across the surface. Sprinkle with delicate chocolate curls for an elegant finishing touch.
Slice into beautiful bars and serve this dreamy, decadent dessert.
Tips for Perfect Chocolate Peanut Butter Bars
Flavorful Variations of Chocolate Peanut Butter Bars
Pairing Ideas for Chocolate Peanut Butter Bars
Storing Chocolate Peanut Butter Bars Properly
Store leftovers in an airtight container in the refrigerator for up to 5 days. Keep covered with plastic wrap or lid to prevent drying out and absorbing other food odors.
Carefully wrap individual bars or entire pan tightly with plastic wrap and aluminum foil. Freeze for maximum 2 months. Thaw overnight in refrigerator before serving.
Never leave these bars at room temperature longer than 2 hours. Creamy layers can spoil quickly due to dairy ingredients like cream cheese and milk.
These bars are best enjoyed cold directly from refrigerator. Avoid microwaving as pudding and whipped topping layers will become runny and lose texture.
FAQs
Yes, you can make your own whipped cream using heavy cream and powdered sugar for a fresher taste.
Substitute the chocolate sandwich cookies with gluten-free chocolate cookies or graham crackers to make the crust gluten-free.
Creamy, smooth peanut butter works best for creating a silky, consistent texture in the peanut butter layer.
Use a clean, offset spatula and spread each layer gently and carefully, ensuring the previous layer is completely chilled before adding the next.
Print
Chocolate Peanut Butter Dream Bars Recipe
- Total Time: 4 hours 20 minutes
- Yield: 16 1x
Description
Sweet chocolate peanut butter dream bars blend creamy indulgence with rich, nostalgic flavors. Layers of silky chocolate and smooth peanut butter create an irresistible dessert you’ll crave again and again.
Ingredients
Main Ingredients:
- 1 package (16 ounces/453 grams) chocolate sandwich cookies, crushed
- 1 cup (240 milliliters/8 ounces) creamy peanut butter
- 1 package (3.9 ounces/110 grams) instant chocolate pudding mix
- 1 package (8 ounces/226 grams) cream cheese, softened
Dairy and Sweet Ingredients:
- 1/2 cup (113 grams/1 stick) unsalted butter, melted
- 1 cup (120 grams) powdered sugar
- 1 container (8 ounces/226 grams) whipped topping, thawed
- 1 1/2 cups (360 milliliters) milk
Garnish:
- Additional whipped topping
- Chocolate curls
Instructions
- Create a robust base by pulverizing chocolate sandwich cookies and blending with melted butter. Press the crumbly mixture firmly into a 9×13-inch pan, ensuring an even, compact foundation. Chill the crust in the refrigerator for 15 minutes.
- Whip cream cheese, peanut butter, and powdered sugar until achieving a silky, uniform consistency. Delicately incorporate whipped topping, maintaining a light, airy texture. Distribute this luxurious layer evenly across the chilled cookie foundation.
- Construct the chocolate layer by vigorously whisking pudding mix with cold milk until the mixture transforms into a thick, glossy pudding. Carefully spread the chocolate pudding across the peanut butter stratum, creating a smooth, seamless surface.
- Refrigerate the assembled dessert for a minimum of 4 hours, allowing layers to solidify and flavors to meld. The dessert requires thorough chilling to achieve optimal texture and structural integrity.
- Prior to serving, adorn the dessert with a lavish blanket of whipped topping. Embellish with delicate chocolate curls, adding an elegant finishing touch. Slice into generous portions and indulge in this decadent, multi-layered confection.
Notes
- Experiment with gluten-free chocolate sandwich cookies to make the crust suitable for those with gluten sensitivities.
- Consider using reduced-fat cream cheese and sugar-free pudding mix for a lighter version of the dessert.
- Enhance the chocolate flavor by adding a thin layer of melted dark chocolate between the peanut butter and pudding layers for extra richness.
- Prepare the dessert a day ahead to allow flavors to meld and texture to set perfectly, making it an ideal make-ahead treat for gatherings.
- Prep Time: 20 minutes
- Cook Time: 4 hours
- Category: Desserts, Snacks
- Method: Refrigerating
- Cuisine: American
Nutrition
- Serving Size: 16
- Calories: 260 kcal
- Sugar: 18 g
- Sodium: 130 mg
- Fat: 17 g
- Saturated Fat: 6 g
- Unsaturated Fat: 9 g
- Trans Fat: 0.1 g
- Carbohydrates: 22 g
- Fiber: 1 g
- Protein: 5 g
- Cholesterol: 25 mg


Nate Harper
Founder & Recipe Curator
Expertise
Single-Recipe Development, Farm-to-Table Cooking, Seasonal Menu Planning, Culinary Storytelling, Home Kitchen Innovation
Education
Cascade Culinary Institute – Central Oregon Community College
Certificate in Culinary Arts
Focus: Farm-to-table cuisine, sustainable cooking practices, and seasonal recipe creation.
Nate studied under experienced chefs who emphasized local sourcing, minimal waste, and building recipes from fresh, simple ingredients.
Nate Harper is the founder and creative force behind Make, Take, Bake. Raised in the wild beauty of Oregon’s high desert, Nate grew up surrounded by family gardens, farmers’ markets, and home kitchens that celebrated the seasons.
His early love for simple, honest food evolved into a professional passion when he attended Cascade Culinary Institute, where he sharpened his skills in creating recipes that are sustainable, satisfying, and made for everyday life.
Nate’s goal is to make cooking feel accessible, free of fuss, and full of flavor. He believes a single, thoughtfully built dish can stand alone, and sometimes even steal the show.