
Sweet & Simple Classic Vanilla Slice Recipe: A Heavenly Treat
Crafting a delightful classic vanilla slice brings pure joy to any dessert lover’s heart.
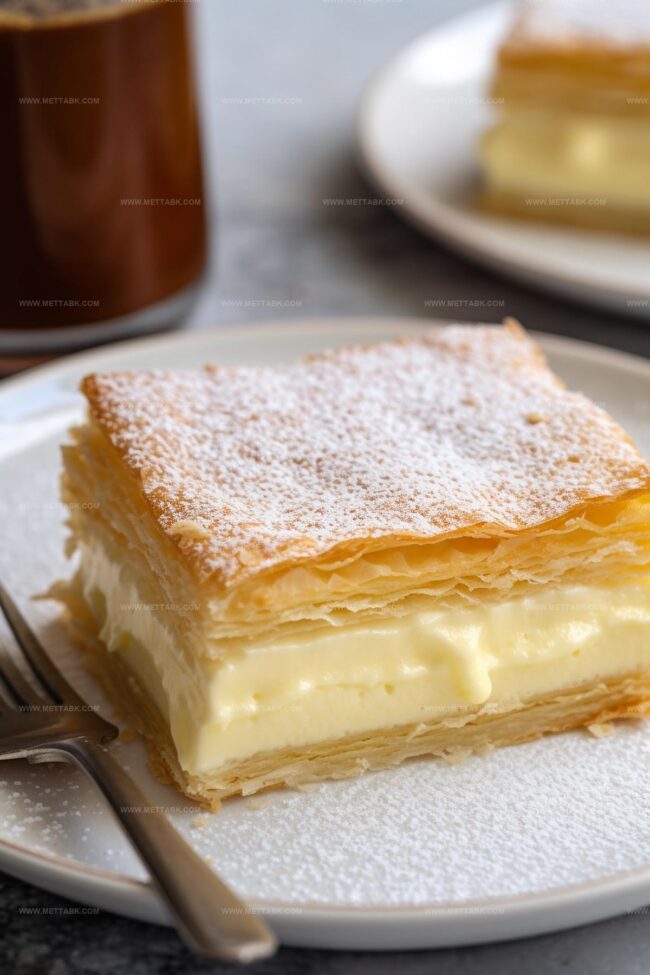
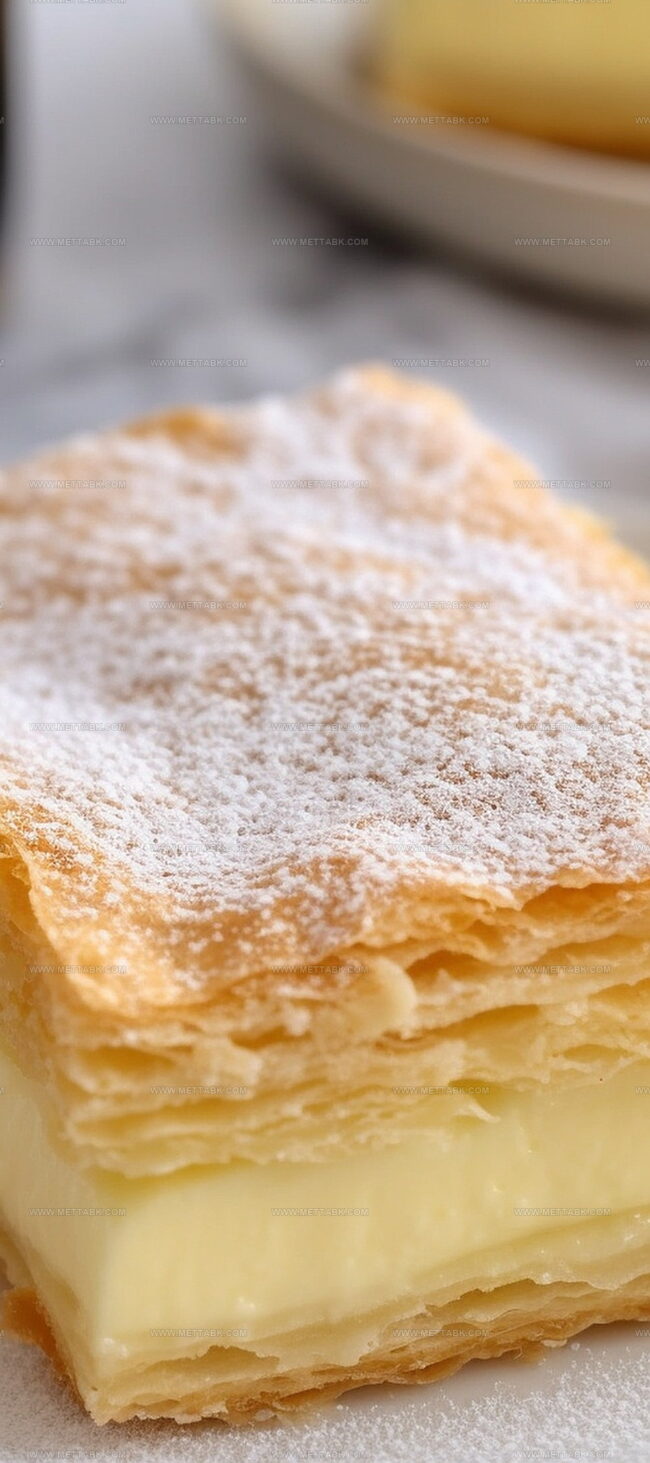
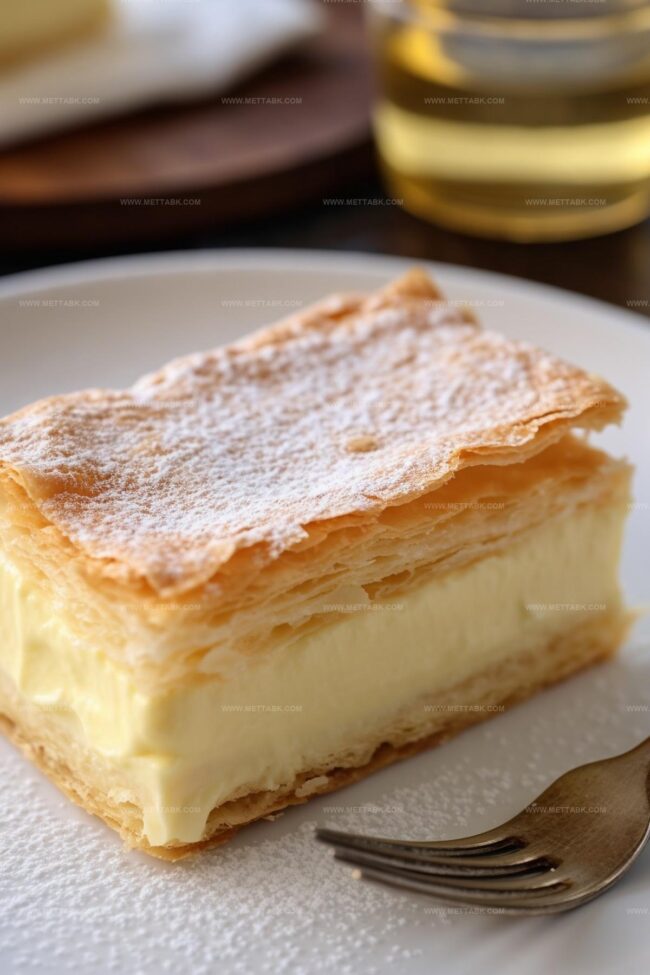
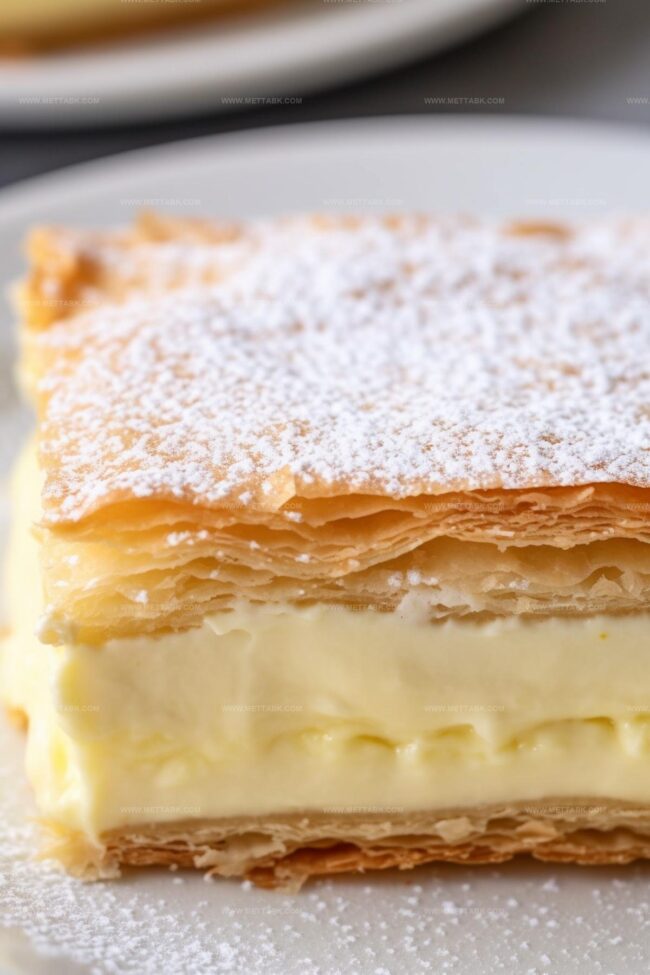
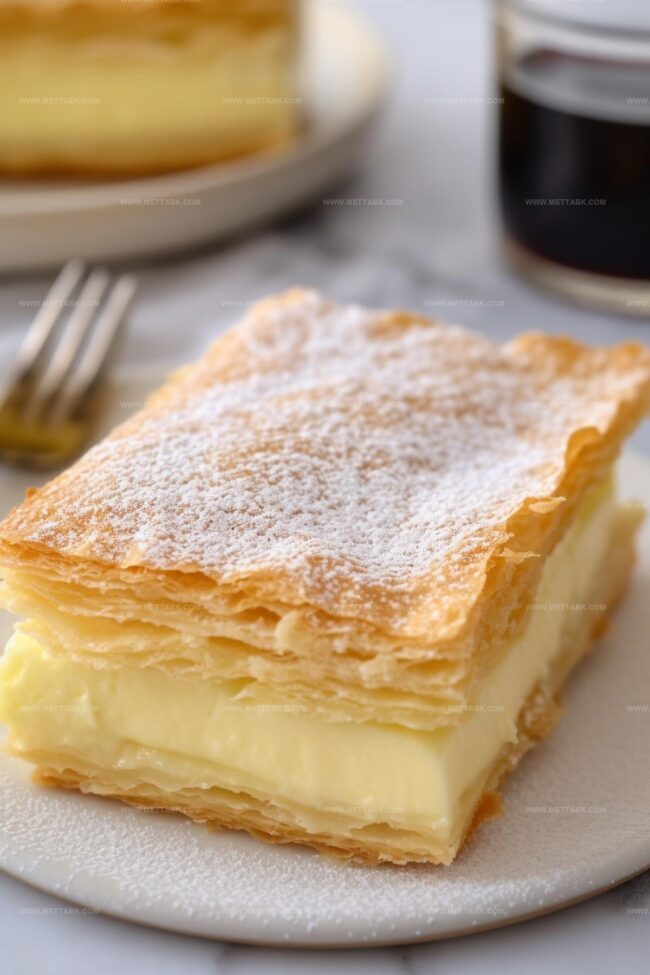
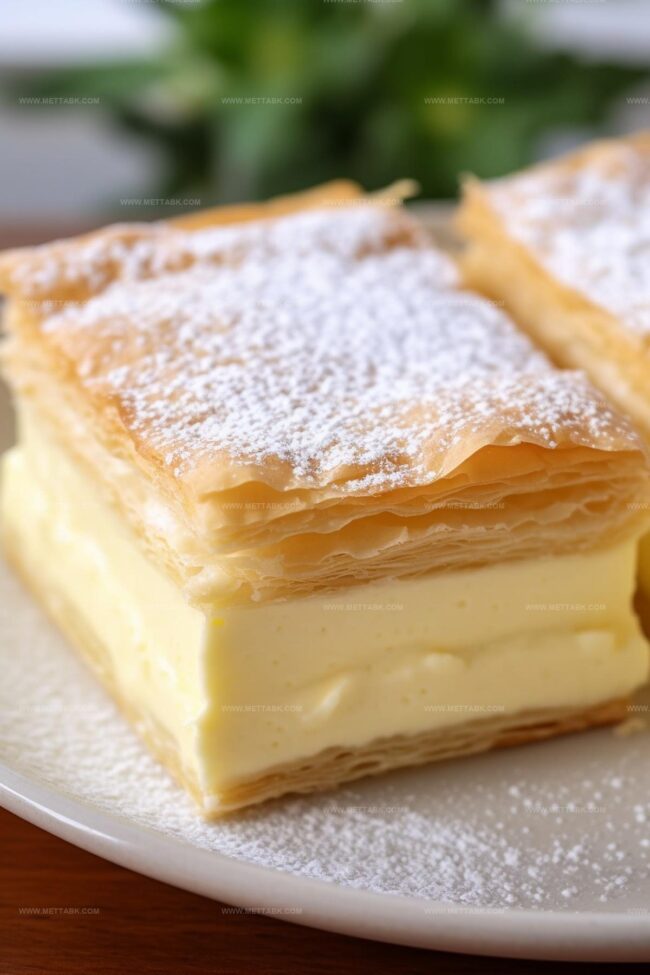
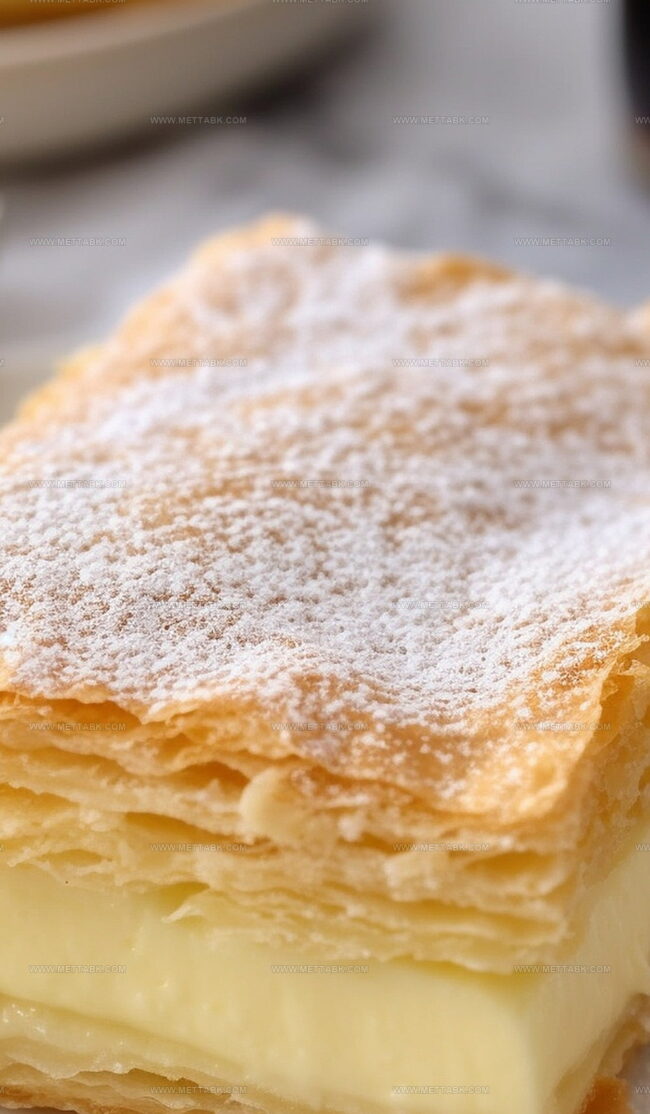
Sweet layers of creamy custard nestled between crisp pastry sheets create a nostalgic treat.
Generations of bakers have cherished this simple yet elegant dessert from australian bakeries.
Smooth vanilla-infused filling promises a decadent experience with every delicate bite.
Pastry chefs consider this recipe a true test of culinary skill and precision.
Soft, silky textures melt in your mouth, delivering a perfect balance of sweetness and delicate crunch.
You’ll fall in love with this irresistible classic that turns an ordinary moment into something magical.
Classic Vanilla Slice to Enjoy
Ingredients for Classic Vanilla Slice
Main Ingredients:
Pastry Ingredients:Custard Ingredients:Finishing Ingredients:How to Make Classic Vanilla Slice
Step 1: Prepare Golden Pastry Sheets
Warm up the oven to a gentle 150°C. Spread frozen puff pastry sheets on baking trays lined with parchment paper.
Let the pastry soften naturally. Poke tiny holes across the surface using a fork.
Cover with another parchment sheet and place a second tray on top. Bake until the pastry turns a beautiful golden shade, around 20 minutes.
Allow pastry to cool completely. Using a square 9-inch tin as a guide, carefully trim pastry sheets to perfectly fit the bottom and top of the tin.
Step 2: Create Silky Custard Base
Grab a heat-proof bowl and mix:Whisk these ingredients together. Gently fold in egg yolks, creating a smooth mixture.
Slowly stream in hot milk while whisking continuously. Add vanilla bean paste, ensuring everything blends seamlessly.
Step 3: Cook Luscious Custard
Transfer the mixture to a large saucepan. Cook over medium-high heat, stirring constantly until the custard transforms into a thick, luxurious texture.
This takes about 5-6 minutes. Remove from heat and stir in unsalted butter until completely melted and incorporated.
Step 4: Assemble Layered Dessert
Line a baking tin with parchment paper, covering bottom and sides. Place the first pastry sheet inside.
Gently sieve the custard over the pastry, spreading evenly with a spatula. Top with the second pastry sheet.
Refrigerate overnight to allow the dessert to set perfectly.
Step 5: Slice and Serve
Carefully remove the pastry from the tin and transfer to a chopping board.
Take a sharp serrated knife and score the top layer gently. Slice through the entire dessert in smooth, confident motions.
Clean the knife between each cut for pristine slices. Dust the top with a delicate sprinkle of powdered sugar just before serving.
Pro Tips for Classic Vanilla Slice

Flavor Variations on Classic Vanilla Slice
Pairing Suggestions for Classic Vanilla Slice
Storage Tips for Classic Vanilla Slice
FAQs
Pricking the pastry prevents it from puffing up unevenly and helps create a flat, uniform surface for layering the custard.
Yes, you can substitute vanilla bean paste with vanilla extract, but the flavor might be slightly less intense. Use the same quantity as specified in the recipe.
Whisk continuously while adding hot milk to the sugar and egg yolk mixture, and keep whisking constantly while cooking to ensure a smooth, lump-free custard.
Print
Classic Vanilla Slice Recipe
- Total Time: 50 minutes
- Yield: 12 1x
Description
Silky classic vanilla slice originates from Australian bakeries, offering a sweet nostalgic treat. Delicate pastry layers and creamy vanilla custard create a simple yet elegant dessert you’ll savor with each delightful bite.
Ingredients
- 8 egg yolks
- 750 mL (25.4 fl oz) milk (heated)
- 110 g (3.9 oz) caster sugar
- 113 g (4 oz) unsalted butter
- 40 g (1.4 oz) corn starch
- 50 g (1.8 oz) powdered sugar
- 2 tsps vanilla bean paste
- 2 sheets frozen butter puff pastry
Instructions
- Prepare pastry sheets by thawing frozen puff pastry at room temperature. Preheat oven to 150°C. Place pastry on parchment-lined baking trays, prick surface with fork, and cover with another parchment sheet and baking tray. Bake for 20 minutes until golden brown. Cool completely.
- Trim pastry sheets to fit a 9-inch square baking tin using a serrated knife, creating bottom and top layers.
- Create custard by whisking caster sugar and corn starch in a heat-proof bowl. Add egg yolks and gradually incorporate hot milk while continuously whisking. Introduce vanilla bean paste.
- Transfer mixture to saucepan and cook over medium-high heat, stirring constantly for 5-6 minutes until thickened. Remove from heat and blend in unsalted butter until fully integrated.
- Line baking tin with parchment paper. Place bottom pastry layer inside tin. Strain custard evenly over pastry, smoothing surface with spatula. Position top pastry layer carefully.
- Refrigerate assembled dessert overnight to set and stabilize structure.
- Remove vanilla slice from tin and transfer to chopping board. Gently score top pastry layer with sharp serrated knife.
- Slice dessert in clean, decisive cuts, wiping knife between each cut to ensure precise edges. Dust with powdered sugar before serving.
Notes
- Ensure pastry is evenly golden by rotating baking trays midway through cooking to prevent uneven browning.
- Sieving custard prevents lumps, creating a silky-smooth texture that melts in your mouth.
- Chilling overnight allows flavors to meld and helps the slice set perfectly, making cutting easier and cleaner.
- For gluten-free option, substitute puff pastry with gluten-free alternative or almond flour-based pastry sheets.
- Prep Time: 30 minutes
- Cook Time: 20 minutes
- Category: Desserts
- Method: Baking
- Cuisine: Australian
Nutrition
- Serving Size: 12
- Calories: 320
- Sugar: 20 g
- Sodium: 45 mg
- Fat: 18 g
- Saturated Fat: 11 g
- Unsaturated Fat: 6 g
- Trans Fat: 0.3 g
- Carbohydrates: 30 g
- Fiber: 0.5 g
- Protein: 5 g
- Cholesterol: 125 mg
Clara Bennett
Contributing Recipe Developer & Food Writer
Expertise
Baking and Pastry Development, Gluten-Free and Allergy-Friendly Recipe Creation, Culinary Storytelling and Food Journalism, Recipe Testing and Standardization, Southern Comfort Foods and Modern Twists
Education
Sullivan University – National Center for Hospitality Studies
Associate Degree in Culinary Arts
Focus: Baking and Pastry Arts, Recipe Testing, and Culinary Journalism.
Clara specialized in crafting desserts that blend classic Southern comfort with modern techniques, while developing strong writing skills to tell the story behind every dish.
Lane Community College (Certificate Program)
Certificate in Food Writing and Photography
Focus: Culinary storytelling, recipe formatting, food styling, and visual presentation.
Clara’s love of baking started young, powered by homemade pies, biscuits, and stories passed around the family table.
After earning her degree at Sullivan University and a food writing certificate at Lane Community College, she turned her passion into a craft: sharing recipes that are simple, soulful, and always full of heart.
She’s big on bold flavors, flexible ideas, and creating sweets that fit any table (yes, even if you’re gluten-free). When she’s not baking, you’ll find her wandering farmers’ markets, styling food for the next photo shoot, or working on her ever-growing recipe journal.