Heavenly Coconut Cream Pie Cookie Cups Recipe For Dessert Lovers
Tucking into a delightful coconut cream pie cookie cups treat promises pure dessert magic.
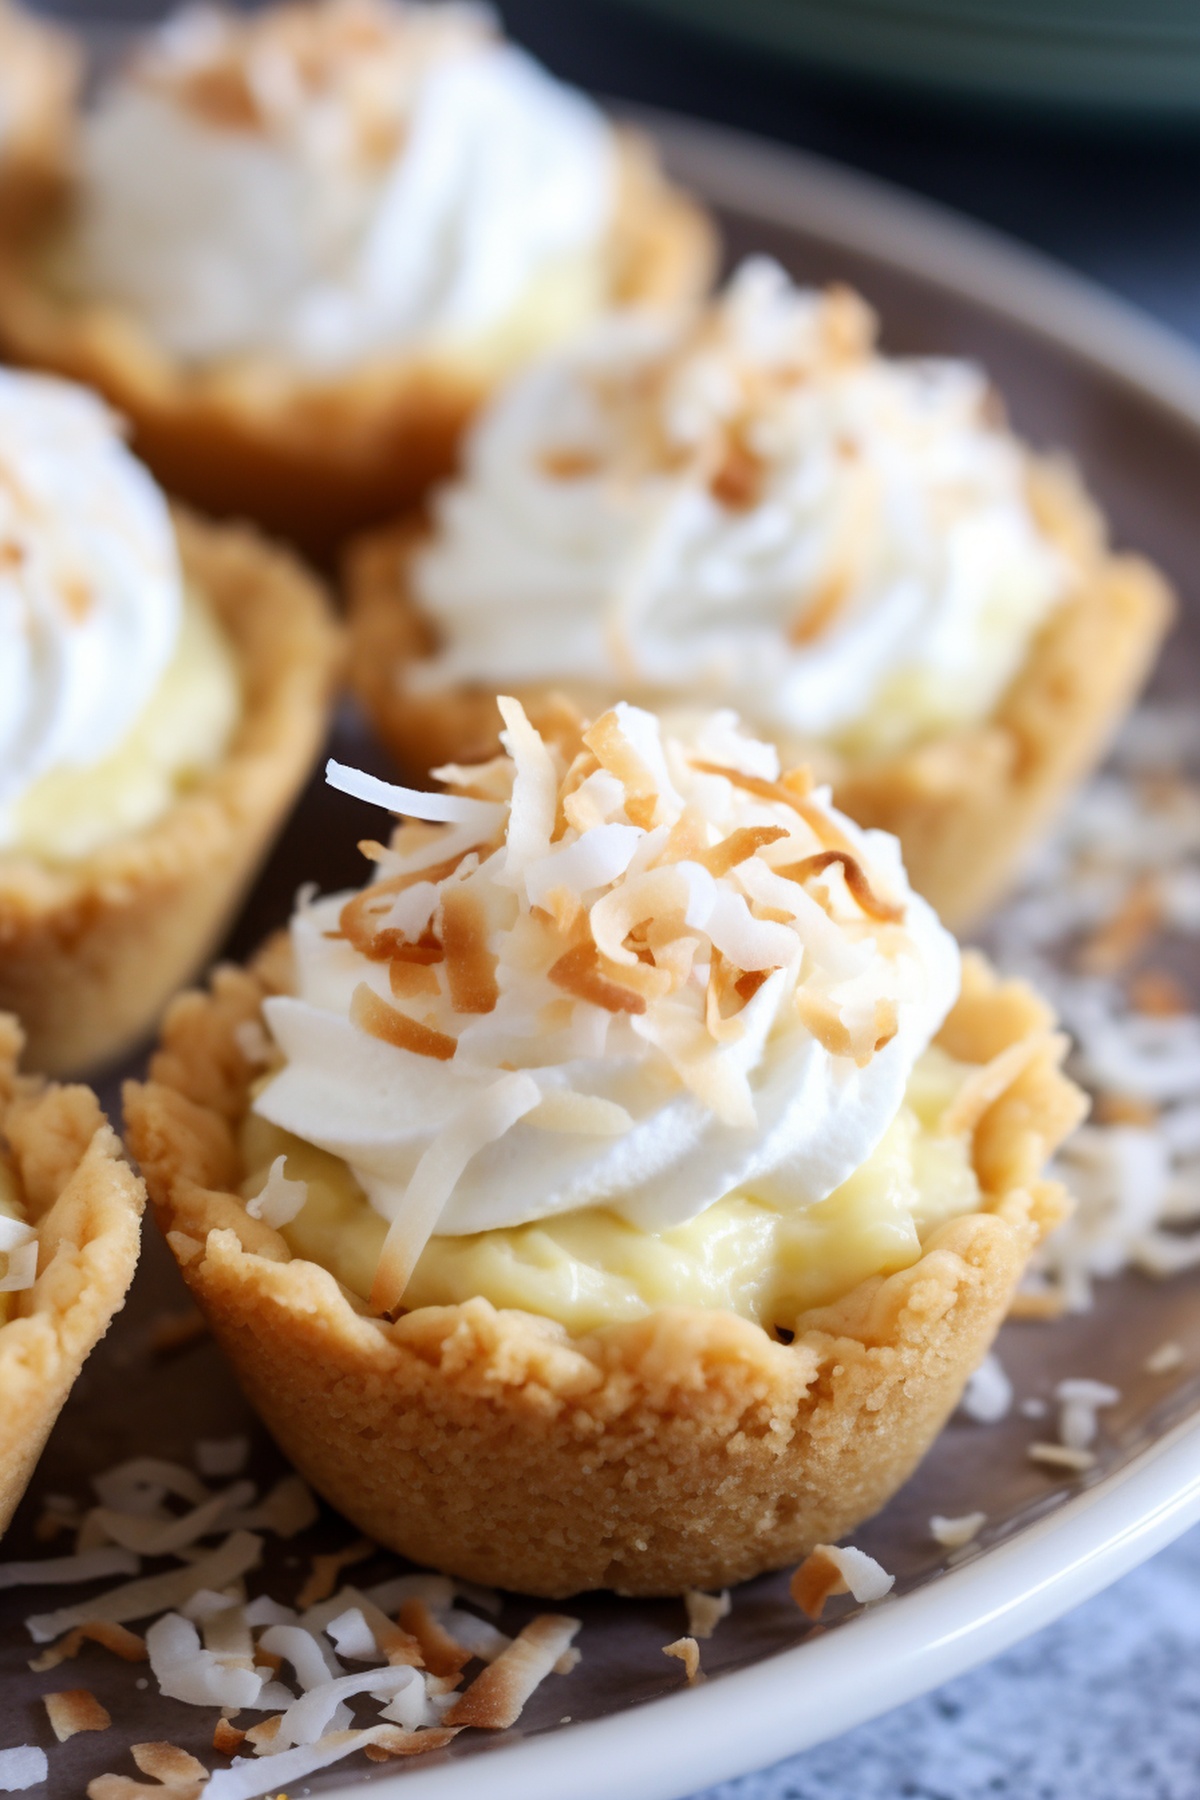
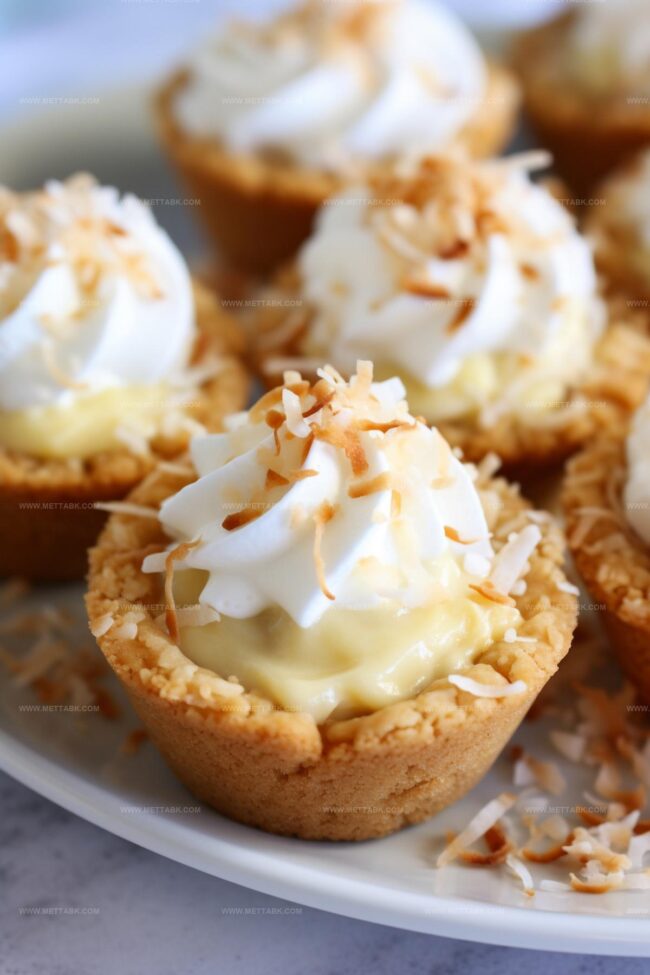
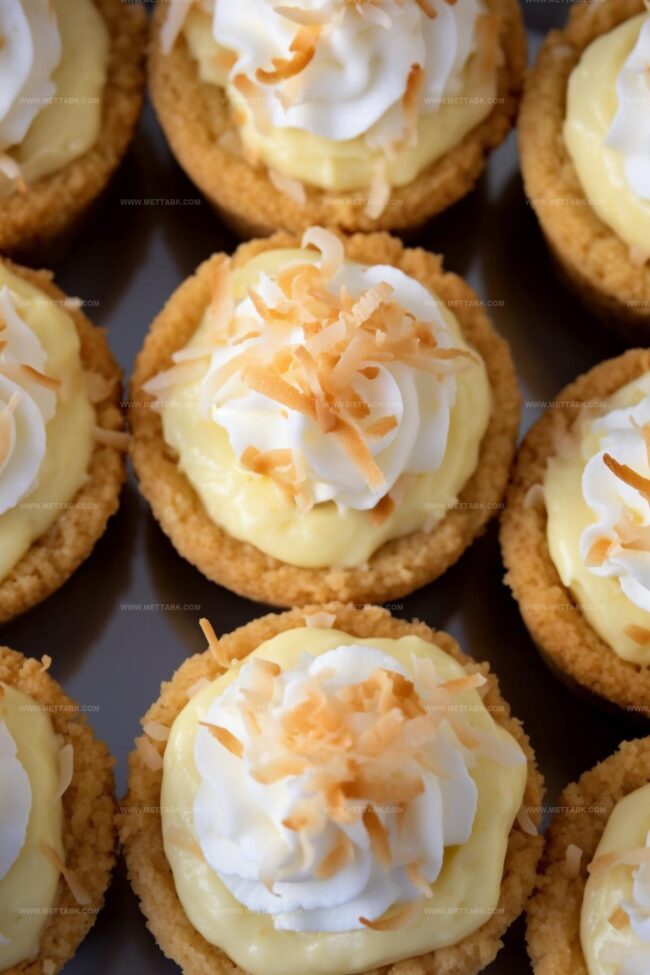
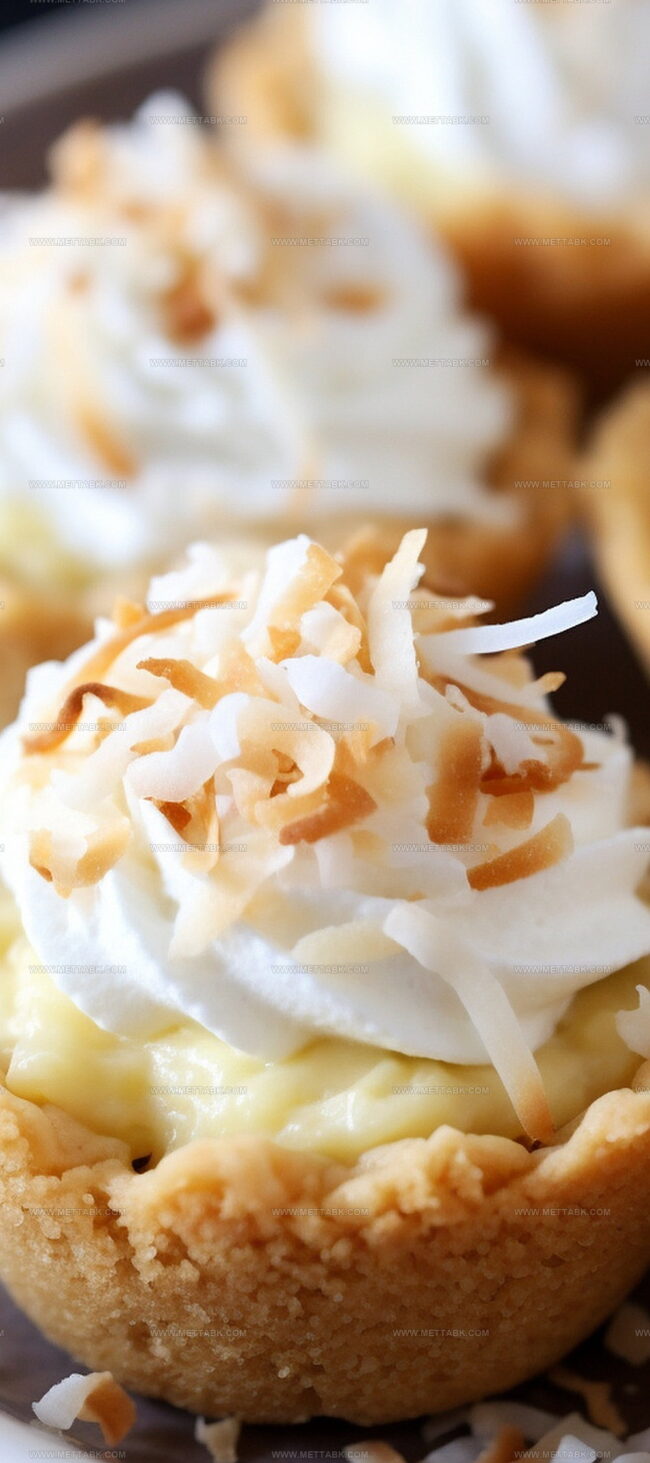
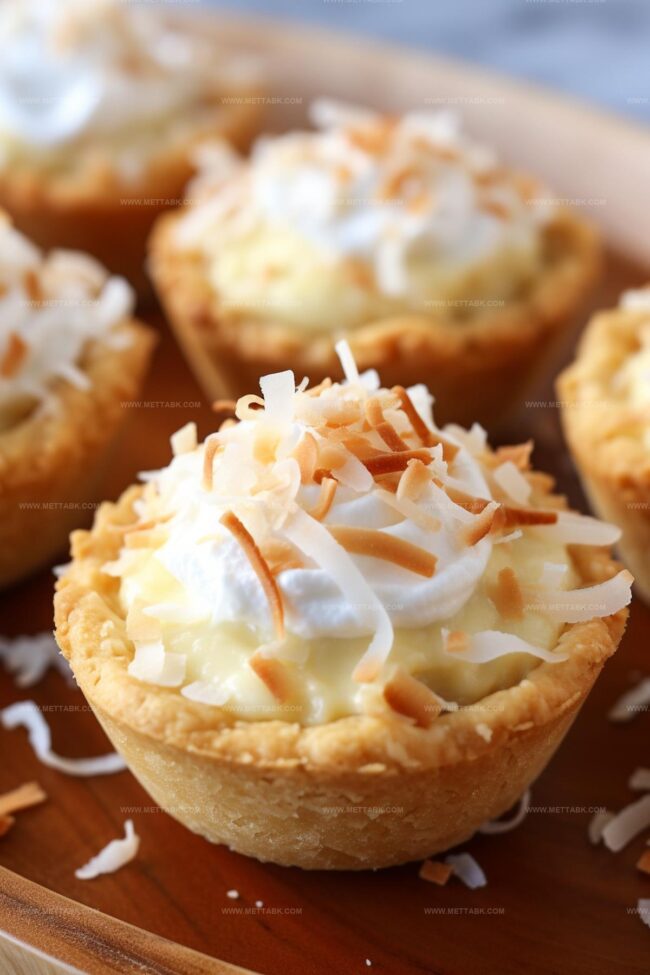
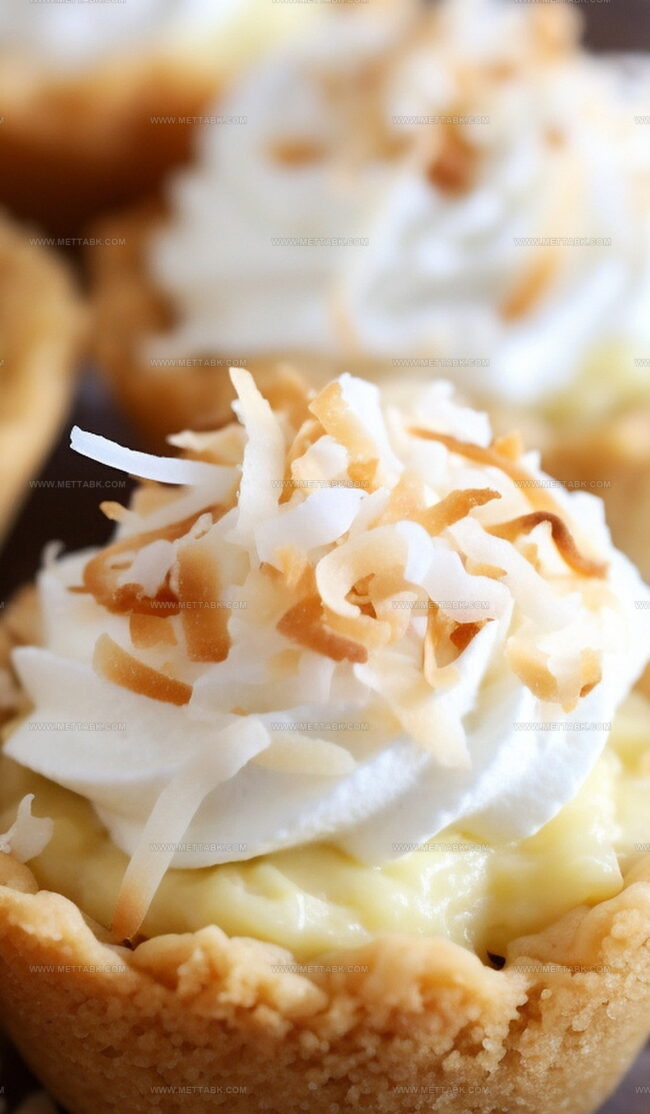
Crisp, buttery cookie shells cradle smooth, silky coconut filling that melts on your tongue.
Sweet memories of grandma’s kitchen drift through each delectable bite.
Miniature desserts always spark conversation and bring smiles around the table.
Creamy textures and rich flavors combine in these adorable handheld delights.
Small enough to enjoy without guilt yet decadent enough to feel indulgent.
Coconut Cream Pie Cookie Cups That Impress

Ingredients to Make Coconut Cream Pie Cookie Cups
Cookie Base:Coconut Cream Filling:Topping and Garnish:Preparation Essentials:How to Bake Coconut Cream Pie Cookie Cups

Step 1: Warm Up the Oven
Heat your oven to a cozy 350 degrees Fahrenheit. Grab your mini muffin pan and give each cup a generous spray of non-stick cooking spray so nothing sticks.
Step 2: Mix the Cookie Base
Grab a medium bowl and whisk the vanilla cake mix until it’s smooth as silk. Splash in some vegetable oil and crack in your eggs.
Blend everything with a hand mixer until the dough looks thick and irresistible.
Step 3: Shape the Cookie Foundations
Use a small cookie scoop to drop dough into each muffin cup.
Gently press down each dollop to create a smooth, even surface that’ll become your delicious cookie cup.
Step 4: Bake to Perfection
Pop the pan into the oven and bake for 9 to 11 minutes.
Watch carefully – you want them golden but not overdone. The cups will firm up as they cool down.
Step 5: Create Cookie Cup Wells
Once baked, take a knife and run it around the edges to loosen the cups. Use a tart shaper or wooden spoon handle to press down the center, creating a cozy little well for your filling.
Let them cool completely on a rack.
Step 6: Whip Up the Creamy Filling
In a bowl, combine:Blend with a mixer until the mixture thickens into a dreamy consistency.
Step 7: Enhance the Flavor
Stir in:Mix until everything is beautifully combined.
Step 8: Fill the Cookie Cups
Transfer the coconut cream into a pastry bag or Ziploc bag.
Pipe a generous swirl of cream into each cooled cookie cup, making sure to fill those cute little wells.
Step 9: Toast the Coconut Topping
Spread sweetened coconut in a microwave-safe bowl.
Zap on high for 4 minutes, stirring every 30 seconds. Keep a close eye to prevent burning – coconut can toast quickly!
Step 10: Garnish and Finish
Sprinkle the toasted coconut over each filled cookie cup. Press lightly so the coconut sticks to the creamy filling.
Step 11: Serve and Enjoy
Dive in immediately or store in an airtight container in the refrigerator for up to 4 days. These little bites of heaven won’t last long!
Tips to Perfect Coconut Cream Pie Cookie Cups
Variations to Try on Coconut Cream Pie Cookie Cups
Pairing Ideas with Coconut Cream Pie Cookie Cups
Storage Tips for Coconut Cream Pie Cookie Cups
FAQs
Yes, you can substitute vanilla cake mix with yellow or white cake mix. The flavor will be slightly different but still delicious.
No, a mini muffin pan, mixer, and basic kitchen tools are sufficient. A tart shaper helps, but the back of a wooden spoon works too.
Generously spray the mini muffin pan with non-stick cooking spray before adding the dough. This ensures easy removal after baking.
Yes, you can prepare the cookie cups a day in advance and fill them just before serving to maintain their crisp texture.
Print
Coconut Cream Pie Cookie Cups Recipe
- Total Time: 30 minutes
- Yield: 24 1x
Description
Delightful coconut cream pie cookie cups blend creamy dessert magic with portable charm. Miniature treats offer sweet indulgence, combining buttery cookie bases with silky coconut filling you’ll crave.
Ingredients
- 1 box vanilla cake mix
- 2 eggs
- 1/3 cup (79 mL) vegetable oil
- 1 package (3.25 oz / 92 g) instant vanilla pudding mix
- 1 cup (240 mL) heavy whipping cream
- 1/2 cup (120 mL) milk or coconut milk
- 1/4 to 1/2 tsp coconut extract
- 1 1/2 cups (180 g) sweetened coconut flakes
Instructions
- Preheat the oven to 350°F and liberally coat a mini muffin pan with non-stick spray to prevent sticking.
- Sift the vanilla cake mix in a medium bowl to remove any clumps, then incorporate vegetable oil and eggs. Blend using a hand mixer until the dough reaches a thick, cohesive texture.
- Utilize a small cookie scoop to portion dough into each muffin cavity, gently pressing to create an even surface.
- Bake for 9-11 minutes, ensuring cookies remain soft and will continue firming as they cool.
- After removing from oven, carefully loosen edges with an offset knife. Create wells in each cookie cup using a tart shaper or wooden spoon handle, then transfer to a cooling rack.
- Prepare the filling by whisking instant vanilla pudding mix with heavy cream and milk until the mixture thickens substantially.
- Fold coconut extract and sweetened coconut flakes into the cream mixture, ensuring even distribution.
- Transfer the coconut cream to a piping bag or Ziploc bag with a corner snipped. Carefully pipe cream into the center of each cooled cookie cup.
- Toast coconut in a microwave-safe bowl, heating on high for 4 minutes. Stir every 30 seconds to prevent burning, watching carefully for even golden coloration.
- Sprinkle toasted coconut over filled cookie cups, gently pressing to secure the topping.
- Serve immediately or refrigerate in an airtight container for up to 4 days, maintaining optimal freshness.
Notes
- Prevent lumpy dough by thoroughly sifting the vanilla cake mix before mixing with wet ingredients.
- Use a precise cookie scoop to ensure uniform size and even baking of cookie cups.
- Test cookie doneness by looking for slightly golden edges without overcooking, which can make cups hard and dry.
- Create perfect wells by gently pressing with a tart shaper or wooden spoon handle while cookies are still warm and soft.
- Avoid soggy bottoms by allowing cookie cups to cool completely before filling with coconut cream.
- Enhance flavor by using high-quality coconut extract and toasting coconut carefully to prevent burning.
- Customize for dietary needs by substituting gluten-free cake mix or using dairy-free alternatives for cream.
- Store cookie cups in a single layer to maintain crisp texture and prevent crushing delicate cups.
- Prep Time: 20 minutes
- Cook Time: 10 minutes
- Category: Desserts, Snacks
- Method: Baking
- Cuisine: American
Nutrition
- Serving Size: 24
- Calories: 192
- Sugar: 13 g
- Sodium: 135 mg
- Fat: 11 g
- Saturated Fat: 7 g
- Unsaturated Fat: 3 g
- Trans Fat: 0.1 g
- Carbohydrates: 21 g
- Fiber: 1 g
- Protein: 2 g
- Cholesterol: 35 mg
Clara Bennett
Contributing Recipe Developer & Food Writer
Expertise
Baking and Pastry Development, Gluten-Free and Allergy-Friendly Recipe Creation, Culinary Storytelling and Food Journalism, Recipe Testing and Standardization, Southern Comfort Foods and Modern Twists
Education
Sullivan University – National Center for Hospitality Studies
Associate Degree in Culinary Arts
Focus: Baking and Pastry Arts, Recipe Testing, and Culinary Journalism.
Clara specialized in crafting desserts that blend classic Southern comfort with modern techniques, while developing strong writing skills to tell the story behind every dish.
Lane Community College (Certificate Program)
Certificate in Food Writing and Photography
Focus: Culinary storytelling, recipe formatting, food styling, and visual presentation.
Clara’s love of baking started young, powered by homemade pies, biscuits, and stories passed around the family table.
After earning her degree at Sullivan University and a food writing certificate at Lane Community College, she turned her passion into a craft: sharing recipes that are simple, soulful, and always full of heart.
She’s big on bold flavors, flexible ideas, and creating sweets that fit any table (yes, even if you’re gluten-free). When she’s not baking, you’ll find her wandering farmers’ markets, styling food for the next photo shoot, or working on her ever-growing recipe journal.