
Fluffy Cookies and Cream Frosting Recipe: Sweet Bliss in Minutes
Sweet memories collide with creamy cookies and cream frosting that instantly transports you back to childhood birthday parties.
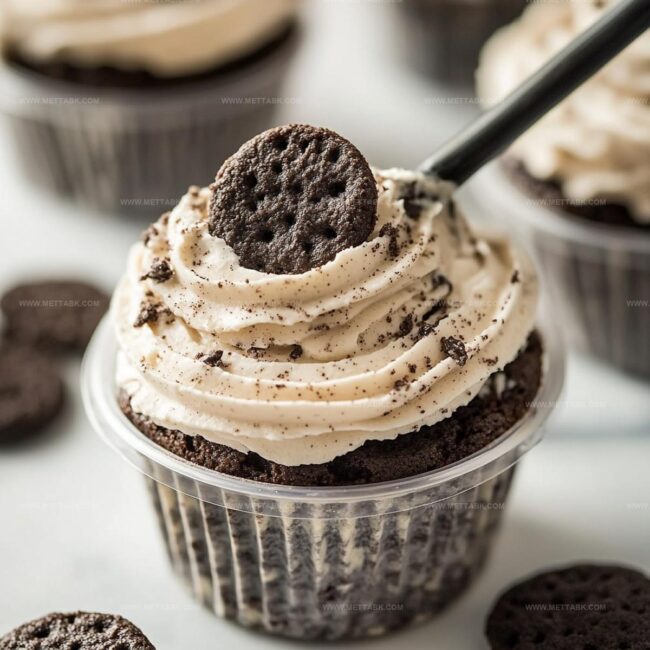
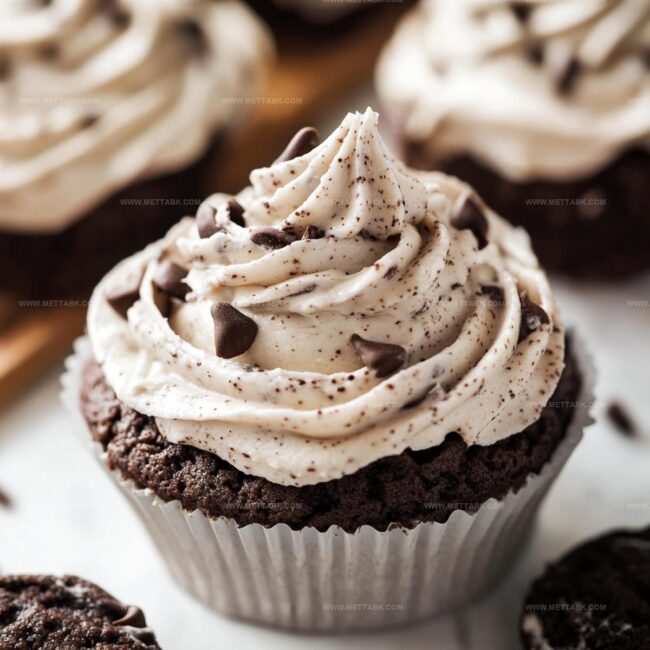
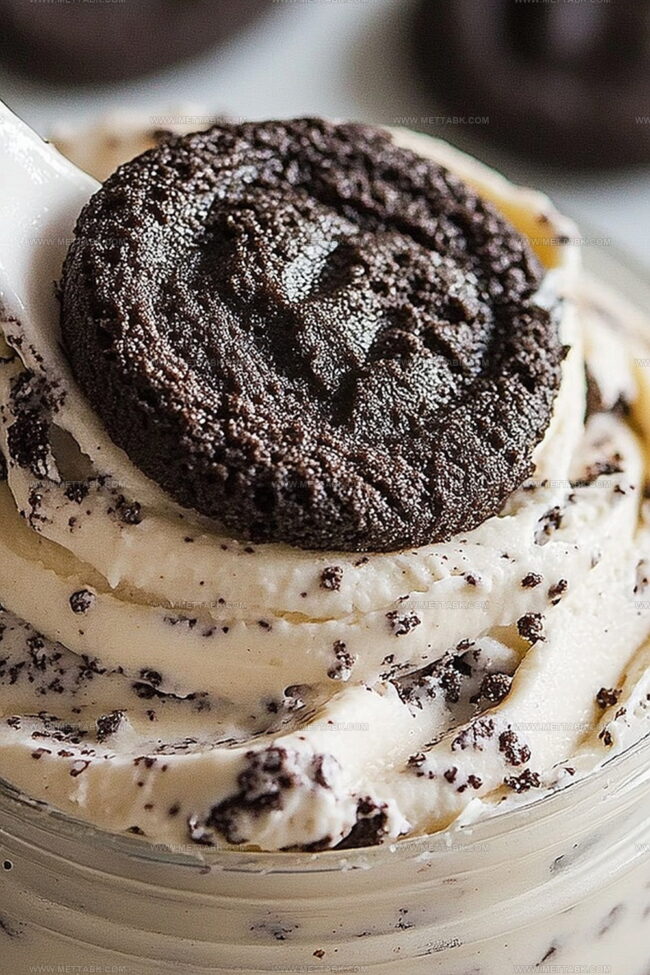
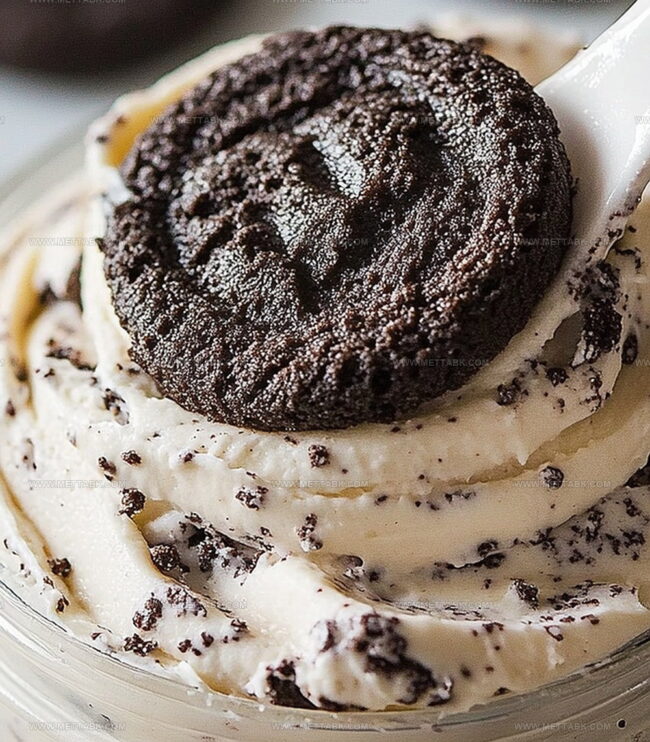
Decadent chocolate cookie crumbles swirl through smooth, silky buttercream like delightful little surprises.
Kraft marshmallows create an extra layer of richness in this irresistible topping.
Professional bakers understand how simple ingredients can create magical moments of pure indulgence.
Whipping up this frosting requires minimal effort but delivers maximum flavor excitement.
Generous dollops spread effortlessly across cakes, cupcakes, and desserts, promising delectable enjoyment with every single bite.
You won’t be able to resist sampling this crowd-pleasing recipe that turns ordinary treats into extraordinary celebrations.
Cookies and Cream Frosting That Steals the Show
Ingredients to Make Cookies and Cream Frosting
Main Ingredients:Cookie Components:Flavor Enhancers:How to Whip Up Cookies and Cream Frosting
Step 1: Soften and Fluff the Butter
Use an electric mixer to beat the butter on medium speed. Continue mixing until the butter becomes light, airy, and develops a fluffy texture.
This process typically takes about 3-5 minutes and helps create a smooth base for your frosting.
Step 2: Incorporate Powdered Sugar
Gradually add the sifted powdered sugar to the butter.
Mix on low speed, ensuring the sugar blends completely into the butter. This gradual approach prevents lumps and creates a silky-smooth consistency.
Step 3: Add Creamy Liquid Ingredients
Pour in the heavy cream and vanilla extract. Mix the ingredients thoroughly until the mixture becomes completely smooth and well combined.
The cream will help create a luxurious texture while the vanilla adds depth of flavor.
Step 4: Fold in Crunchy Cookie Pieces
Gently fold the crushed cookies into the frosting.
Stir carefully to distribute the cookie crumbs evenly throughout the mixture. Make sure the cookies are broken into small, bite-sized pieces for the best texture and flavor distribution.
Step 5: Final Mixing and Texture Check
Give the frosting a final gentle mix to ensure all ingredients are perfectly combined. The frosting should have a creamy, spreadable consistency with delightful cookie crumbs throughout.
Tips to Get Cookies and Cream Frosting Right
Variations to Change Up Frosting Flavors
Pairings That Work Great With This Frosting
Storing Cookies and Cream Frosting Safely
FAQs
The main ingredients are softened butter, powdered sugar, heavy cream, vanilla extract, and crushed chocolate sandwich cookies like Oreos.
It’s recommended to use unsalted butter to control the salt level and ensure a consistent frosting texture.
Crush the cookies into small, uneven pieces for the best texture and visual appeal in the frosting.
Yes, this versatile frosting works great on chocolate, vanilla, and even red velvet cakes and cupcakes.
Print
Cookies And Cream Frosting Recipe
- Total Time: 10 minutes
- Yield: 24 1x
Description
Classic cookies and cream frosting blends creamy richness with crushed chocolate sandwich cookies. Smooth buttercream combines with crunchy cookie pieces for a delightful dessert topping you can spread on cakes and cupcakes.
Ingredients
- 1 cup unsalted butter (softened)
- 4 cups powdered sugar (sifted)
- 1 cup crushed chocolate sandwich cookies (like Oreos)
- 2 tbsps heavy cream
- 1 tsp pure vanilla extract
Instructions
- Whip softened butter in a spacious mixing vessel using medium-high speed until it transforms into a creamy, airy texture, approximately 4 minutes.
- Incorporate powdered sugar gradually, blending on low speed to create a silky, uniform consistency without lumps.
- Stream in heavy cream and vanilla extract, continuing to mix until the frosting achieves a luxurious, velvety smoothness.
- Delicately fold crushed cookies throughout the mixture, ensuring even distribution and maintaining a balanced texture with visible cookie fragments.
- Let the frosting rest for 5-10 minutes to allow flavors to meld and achieve optimal spreading consistency.
- Transfer to a piping bag or use as a spreadable topping for cakes, cupcakes, or other dessert creations, storing any excess in a sealed container in the refrigerator.
Notes
- Softened butter is key to achieving a creamy, smooth frosting texture that spreads easily.
- Sift powdered sugar to prevent lumps and ensure a silky-smooth consistency in the final frosting.
- Crush cookies into fine crumbs for even distribution and a more balanced flavor throughout the frosting.
- Adjust cookie quantity to personal taste, adding more or less depending on desired cookie intensity.
- Prep Time: 10 minutes
- Cook Time: 0 minutes
- Category: Desserts
- Method: Blending
- Cuisine: American
Nutrition
- Serving Size: 24
- Calories: 196
- Sugar: 19 g
- Sodium: 15 mg
- Fat: 12 g
- Saturated Fat: 7 g
- Unsaturated Fat: 5 g
- Trans Fat: 0.2 g
- Carbohydrates: 22 g
- Fiber: 0.5 g
- Protein: 0.4 g
- Cholesterol: 23 mg
Clara Bennett
Contributing Recipe Developer & Food Writer
Expertise
Baking and Pastry Development, Gluten-Free and Allergy-Friendly Recipe Creation, Culinary Storytelling and Food Journalism, Recipe Testing and Standardization, Southern Comfort Foods and Modern Twists
Education
Sullivan University – National Center for Hospitality Studies
Associate Degree in Culinary Arts
Focus: Baking and Pastry Arts, Recipe Testing, and Culinary Journalism.
Clara specialized in crafting desserts that blend classic Southern comfort with modern techniques, while developing strong writing skills to tell the story behind every dish.
Lane Community College (Certificate Program)
Certificate in Food Writing and Photography
Focus: Culinary storytelling, recipe formatting, food styling, and visual presentation.
Clara’s love of baking started young, powered by homemade pies, biscuits, and stories passed around the family table.
After earning her degree at Sullivan University and a food writing certificate at Lane Community College, she turned her passion into a craft: sharing recipes that are simple, soulful, and always full of heart.
She’s big on bold flavors, flexible ideas, and creating sweets that fit any table (yes, even if you’re gluten-free). When she’s not baking, you’ll find her wandering farmers’ markets, styling food for the next photo shoot, or working on her ever-growing recipe journal.