
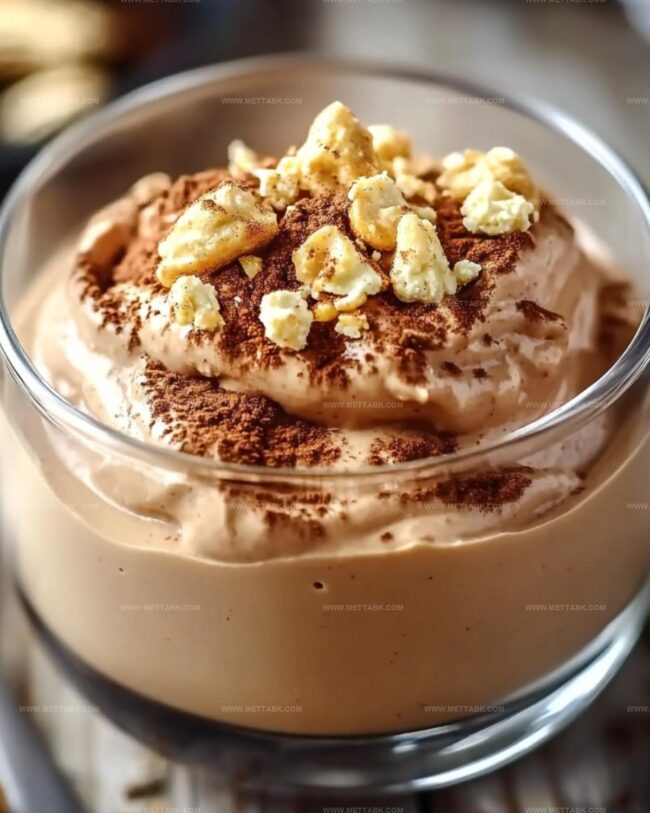
Creamy Cottage Cheese & Peanut Butter Mousse Recipe
Whipping up a delightful cottage cheese peanut butter mousse sparks joy in every kitchen adventurer.
Creamy textures blend seamlessly with rich, nutty flavors that surprise and delight.
Protein-packed ingredients create a guilt-free dessert perfect for health-conscious sweet tooths.
Smooth and velvety, this treat comes together in minutes with minimal effort.
Simple pantry staples transform into an indulgent yet nutritious delight that feels like pure magic.
Each spoonful promises a delectable balance of tangy and sweet notes.
Why This Mousse Is a Keeper
Everything Needed for Peanut Butter Mousse Dessert
For the Mousse Base:For the Liquid Adjustment:For the Topping:Mixing Instructions for This Cottage Cheese Mousse
Step 1: Blend the Creamy Base
Toss cottage cheese, peanut butter, sweetener, vanilla extract, and salt into a high-speed blender or food processor. Blast everything together for 30-60 seconds until the mixture transforms into a silky smooth dreamscape.
Step 2: Perfect the Texture
Check the consistency of your mousse. If it feels too thick, splash in 1-2 tablespoons of milk or heavy cream and give it another quick blend until it reaches that perfect, luxurious texture.
Step 3: Chill and Develop Flavors
Transfer the mousse into a serving bowl and pop it into the refrigerator. Let it cool and settle for 15-20 minutes, allowing the flavors to mingle and the texture to become gloriously firm.
Step 4: Create Chocolate Drizzle
Grab a small bowl and combine dark chocolate chips and coconut oil. Zap them in the microwave using 20-second bursts, stirring between each interval, until the mixture becomes a glossy, smooth river of chocolate.
Step 5: Dress and Serve
Scoop the chilled mousse into individual serving bowls or cute mason jars. Generously drizzle the melted chocolate over the top and sprinkle with chopped peanuts.
Dive in immediately or keep chilled until dessert time arrives.
Helpful Tips for Perfect Mousse Consistency

Change This Mousse With Optional Add-Ins
What Goes Well With Peanut Butter Mousse
How to Keep This Mousse Tasting Fresh
Store the mousse in an airtight container for up to 5 days. Place a piece of plastic wrap directly on the surface to prevent air exposure and maintain freshness.
Transfer the mousse to a freezer-safe container and freeze for up to 2 months. Thaw in the refrigerator overnight before serving.
Gently warm the mousse in the microwave for 10-15 seconds, stirring halfway through to ensure even heating. Alternatively, let it sit at room temperature for 5-10 minutes to soften.
If the texture becomes slightly separated after storing, whisk or blend briefly to restore its creamy consistency.
FAQs
Yes, you can substitute cottage cheese with Greek yogurt or ricotta for a similar creamy texture and protein boost.
It can be made gluten-free and low-carb by using a sugar-free sweetener and ensuring all ingredients are compliant with your specific dietary needs.
The mousse stays fresh for 35 days when stored in an airtight container in the refrigerator.
While a blender provides the smoothest texture, you can use a hand mixer or whisk, but you might have a slightly less creamy result.
Print
Cottage Cheese Peanut Butter Mousse Recipe
- Total Time: 15 minutes
- Yield: 2 1x
Description
Silky cottage cheese peanut butter mousse dances between creamy indulgence and protein-packed delight. Sweet meets tangy in this simple dessert, promising a guilt-free treat that satisfies both taste and nutrition.
Ingredients
Main Ingredients:
- 1 cup (240 ml) full-fat cottage cheese
- 1/4 cup (60 ml) natural peanut butter
- 2 tablespoons (30 ml) sweetener
Flavor Enhancers:
- 1 teaspoon vanilla extract
- 1/4 teaspoon salt
Toppings and Binding:
- 1/2 tablespoon (7.5 ml) milk or heavy cream
- 2 ounces (56 grams) dark chocolate chips
- 1 teaspoon coconut oil
- Chopped peanuts for garnish
Instructions
- Prepare the blending station with a high-speed blender or food processor, ensuring all components are clean and ready for mixing.
- Combine cottage cheese, peanut butter, sweetener, vanilla extract, and optional salt into the blender, creating a potential protein-rich dessert base.
- Pulse and blend the mixture for 30-45 seconds, periodically stopping to scrape down the sides, ensuring a completely smooth and velvety texture.
- Evaluate the consistency, adding 1-2 tablespoons of milk or heavy cream if the mousse appears too dense, then blend again until achieving a silky, spreadable texture.
- Transfer the mousse to a chilled ceramic bowl, allowing it to rest in the refrigerator for 15-20 minutes at 40°F to enhance flavor integration and achieve a firmer structure.
- While chilling, prepare the chocolate drizzle by microwaving dark chocolate chips and coconut oil in 20-second intervals, stirring between each burst until smoothly melted.
- Once chilled, portion the mousse into elegant serving vessels, creating artistic swirls with a spoon.
- Generously drizzle the glossy melted chocolate over the mousse, creating delicate patterns.
- Garnish with chopped peanuts, adding a delightful crunch and nutty dimension to the creamy dessert.
- Serve immediately or store in the refrigerator, maintaining optimal texture and flavor for up to 3 days.
Notes
- Choose a high-powered blender or food processor to achieve the smoothest, creamiest texture without lumps.
- Experiment with different sweeteners like stevia, monk fruit, or honey to customize the mousse’s sweetness and accommodate various dietary needs.
- For a protein-packed boost, add a scoop of vanilla or unflavored protein powder during blending to enhance the nutritional profile.
- Ensure all ingredients are at room temperature to help them blend more seamlessly and create a silky-smooth consistency.
- Prep Time: 10 minutes
- Cook Time: 5 minutes
- Category: Desserts
- Method: Blending
- Cuisine: Fusion
Nutrition
- Serving Size: 2
- Calories: 545 kcal
- Sugar: 7 g
- Sodium: 360 mg
- Fat: 41 g
- Saturated Fat: 10 g
- Unsaturated Fat: 28 g
- Trans Fat: 0 g
- Carbohydrates: 18 g
- Fiber: 3 g
- Protein: 22 g
- Cholesterol: 40 mg
Clara Bennett
Contributing Recipe Developer & Food Writer
Expertise
Baking and Pastry Development, Gluten-Free and Allergy-Friendly Recipe Creation, Culinary Storytelling and Food Journalism, Recipe Testing and Standardization, Southern Comfort Foods and Modern Twists
Education
Sullivan University – National Center for Hospitality Studies
Associate Degree in Culinary Arts
Focus: Baking and Pastry Arts, Recipe Testing, and Culinary Journalism.
Clara specialized in crafting desserts that blend classic Southern comfort with modern techniques, while developing strong writing skills to tell the story behind every dish.
Lane Community College (Certificate Program)
Certificate in Food Writing and Photography
Focus: Culinary storytelling, recipe formatting, food styling, and visual presentation.
Clara’s love of baking started young, powered by homemade pies, biscuits, and stories passed around the family table.
After earning her degree at Sullivan University and a food writing certificate at Lane Community College, she turned her passion into a craft: sharing recipes that are simple, soulful, and always full of heart.
She’s big on bold flavors, flexible ideas, and creating sweets that fit any table (yes, even if you’re gluten-free). When she’s not baking, you’ll find her wandering farmers’ markets, styling food for the next photo shoot, or working on her ever-growing recipe journal.