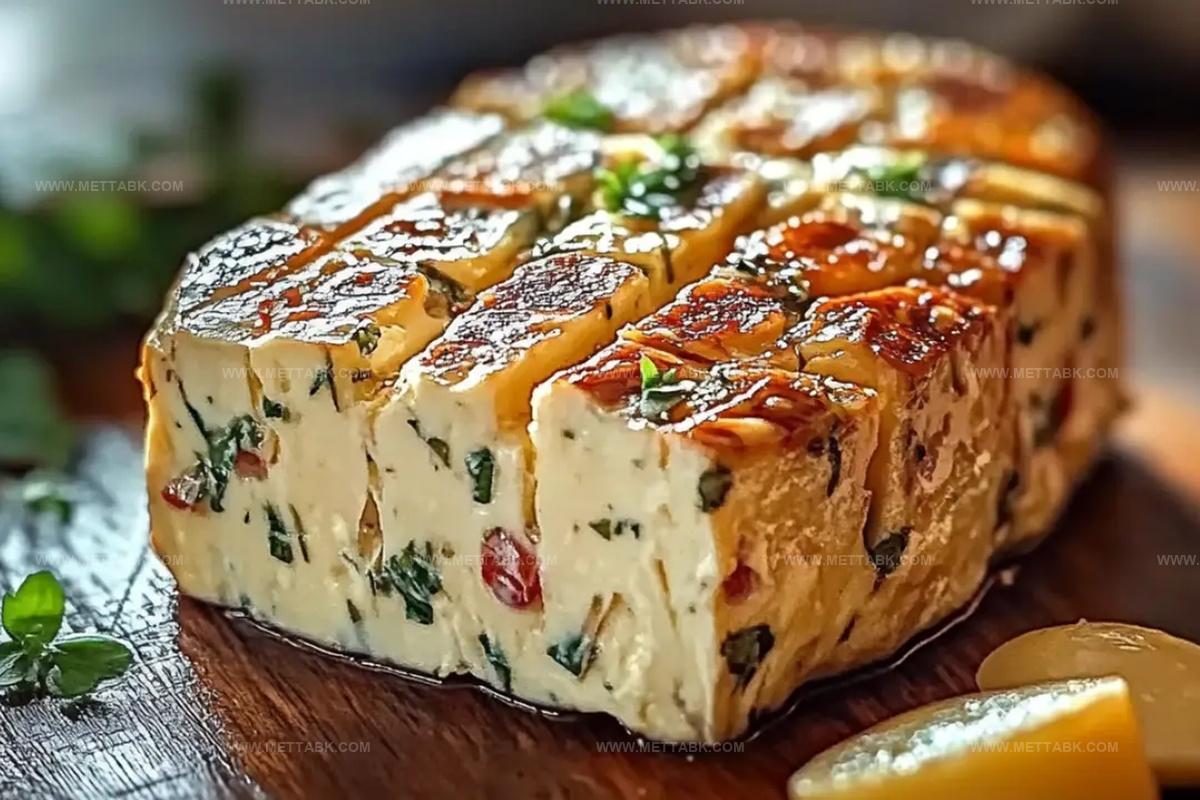
Zesty Cowboy Butter Recipe: A Flavor-Packed Ranch Sensation
Cowboy butter adds a mouthwatering twist to your culinary adventures with its bold, zesty flavor profile.
Packed with herbs and spices, this condiment brings rustic charm to grilled meats and roasted vegetables.
Melted butter combined with garlic, herbs, and a hint of heat creates a versatile sauce that elevates any dish.
Its origins trace back to western ranch kitchens where hearty meals demanded robust accompaniments.
Ranch cooks knew how to make simple ingredients sing with incredible depth and richness.
You can drizzle this golden elixir over steaks, spread it on warm bread, or use it as a dipping sauce for endless possibilities.
Let this cowboy butter become your secret weapon in the kitchen, ready to impress and delight.
Why This Butter Sauce Is a Total Hit
Everything Inside This Cowboy Butter
For the Core Ingredients:For the Herbs and Spices:For the Seasonings and Enhancers:Making Cowboy Butter That’s Rich and Smooth
Step 1: Prepare Work Surface
Grab a 30cm square piece of parchment paper and set it nearby on your clean kitchen counter.
Step 2: Blend Flavor Explosion
In a mixing bowl, combine these delicious ingredients:Use a potato masher to start blending, then switch to a fork to create a smooth, well-mixed texture.
Step 3: Shape Butter Log
Create a rustic log shape of the butter mixture right in the mixing bowl, keeping it loose and natural.
Step 4: Transfer to Parchment
Gently place the butter mixture lengthwise at the bottom of your prepared parchment paper.
Step 5: Roll and Wrap
Carefully roll the paper from the bottom, initially keeping the edges slightly uneven. Grab both ends and twist in opposite directions to create a tight, smooth cylindrical shape.
Step 6: Chill and Store
Pop the wrapped butter into the refrigerator until you’re ready to serve.
Step 7: Serve with Flair
Slice and serve this mouth-watering butter alongside grilled steak, fresh seafood, or roasted vegetables for an instant flavor upgrade.
Tips That Help Cowboy Butter Turn Out Great
Creative Butter Styles With Cowboy Seasoning
Foods That Go With Cowboy Butter Spread
How to Keep Cowboy Butter Soft and Fresh
Store wrapped cowboy butter in an airtight container in the refrigerator for up to 7-10 days. Keep away from strong-smelling foods to prevent flavor absorption.
Wrap the butter log tightly in plastic wrap, then place in a freezer bag. Freeze for up to 3 months. Thaw overnight in the refrigerator before using.
Remove from refrigerator 10-15 minutes before serving to soften slightly. This helps spread more easily on warm dishes or freshly cooked foods.
Before freezing, slice the butter log into smaller sections. This allows you to thaw only the amount needed, keeping the rest preserved longer.
FAQs
Cowboy Butter is packed with bold, zesty flavors like garlic, herbs, and spices that transform ordinary butter into a restaurant-quality condiment with incredible taste.
Absolutely! You can swap or add different fresh herbs like rosemary, thyme, or parsley based on your personal preference and what you have available in your kitchen.
Cowboy Butter stays fresh for up to 7-10 days when stored in an airtight container or wrapped tightly in parchment paper in the refrigerator.
Print
Cowboy Butter Recipe
- Total Time: 1 hour 15 minutes
- Yield: 8 1x
Description
Cowboy butter brings zesty southwestern flair to your culinary adventure, melting with rich herbal notes and spicy undertones. Drizzled over grilled meats or used as a dipping sauce, this versatile condiment will elevate your dining experience with bold, irresistible flavors.
Ingredients
Main Ingredients:
- 200 grams (7 ounces) unsalted butter, cubed and slightly softened
Herbs:
- 1/2 cup fresh parsley, finely chopped
- 1 tablespoon fresh chives, finely sliced
- 2 teaspoons fresh thyme leaves
Flavor Enhancers:
- 1 tablespoon Dijon mustard
- 2 teaspoons prepared horseradish
- 2 garlic cloves, cores removed and crushed
- 1 teaspoon fresh lemon juice
- 1/2 teaspoon paprika
- 1/2 teaspoon fine cooking salt
Instructions
- Prepare a 30cm square parchment paper sheet for butter wrapping.
- In a mixing bowl, thoroughly blend all ingredients using a potato masher, then transition to a fork for smoother texture.
- Form the butter mixture into a loose cylindrical shape within the bowl.
- Position the butter log lengthwise on the bottom third of the prepared parchment paper.
- Carefully roll the paper upward, encasing the butter log initially with gentle folds.
- Grip both paper ends and twist in opposite directions, creating a compact, uniform cylinder.
- Compress and smooth the wrapped butter, ensuring tight edges.
- Refrigerate the butter log for at least 1 hour to firm and enhance flavor melding.
- Serve chilled as a vibrant, zesty accompaniment to grilled meats, seafood, or roasted vegetables.
Notes
- Select unsalted butter at room temperature for smoother mixing and easier blending of ingredients.
- Use fresh herbs like parsley and chives for maximum flavor intensity and vibrant color in the compound butter.
- Experiment with alternative herb combinations or add minced garlic for a personalized twist that suits your taste preferences.
- Wrap the butter log tightly in plastic wrap after parchment paper for extended storage up to two weeks in the refrigerator.
- Prep Time: 15 minutes
- Cook Time: 1 hour
- Category: Appetizer, Snacks
- Method: Rolling
- Cuisine: American
Nutrition
- Serving Size: 8
- Calories: 204
- Sugar: 0.1 g
- Sodium: 295 mg
- Fat: 23 g
- Saturated Fat: 14 g
- Unsaturated Fat: 8 g
- Trans Fat: 0.5 g
- Carbohydrates: 0.3 g
- Fiber: 0.1 g
- Protein: 0.2 g
- Cholesterol: 61 mg
Clara Bennett
Contributing Recipe Developer & Food Writer
Expertise
Baking and Pastry Development, Gluten-Free and Allergy-Friendly Recipe Creation, Culinary Storytelling and Food Journalism, Recipe Testing and Standardization, Southern Comfort Foods and Modern Twists
Education
Sullivan University – National Center for Hospitality Studies
Associate Degree in Culinary Arts
Focus: Baking and Pastry Arts, Recipe Testing, and Culinary Journalism.
Clara specialized in crafting desserts that blend classic Southern comfort with modern techniques, while developing strong writing skills to tell the story behind every dish.
Lane Community College (Certificate Program)
Certificate in Food Writing and Photography
Focus: Culinary storytelling, recipe formatting, food styling, and visual presentation.
Clara’s love of baking started young, powered by homemade pies, biscuits, and stories passed around the family table.
After earning her degree at Sullivan University and a food writing certificate at Lane Community College, she turned her passion into a craft: sharing recipes that are simple, soulful, and always full of heart.
She’s big on bold flavors, flexible ideas, and creating sweets that fit any table (yes, even if you’re gluten-free). When she’s not baking, you’ll find her wandering farmers’ markets, styling food for the next photo shoot, or working on her ever-growing recipe journal.