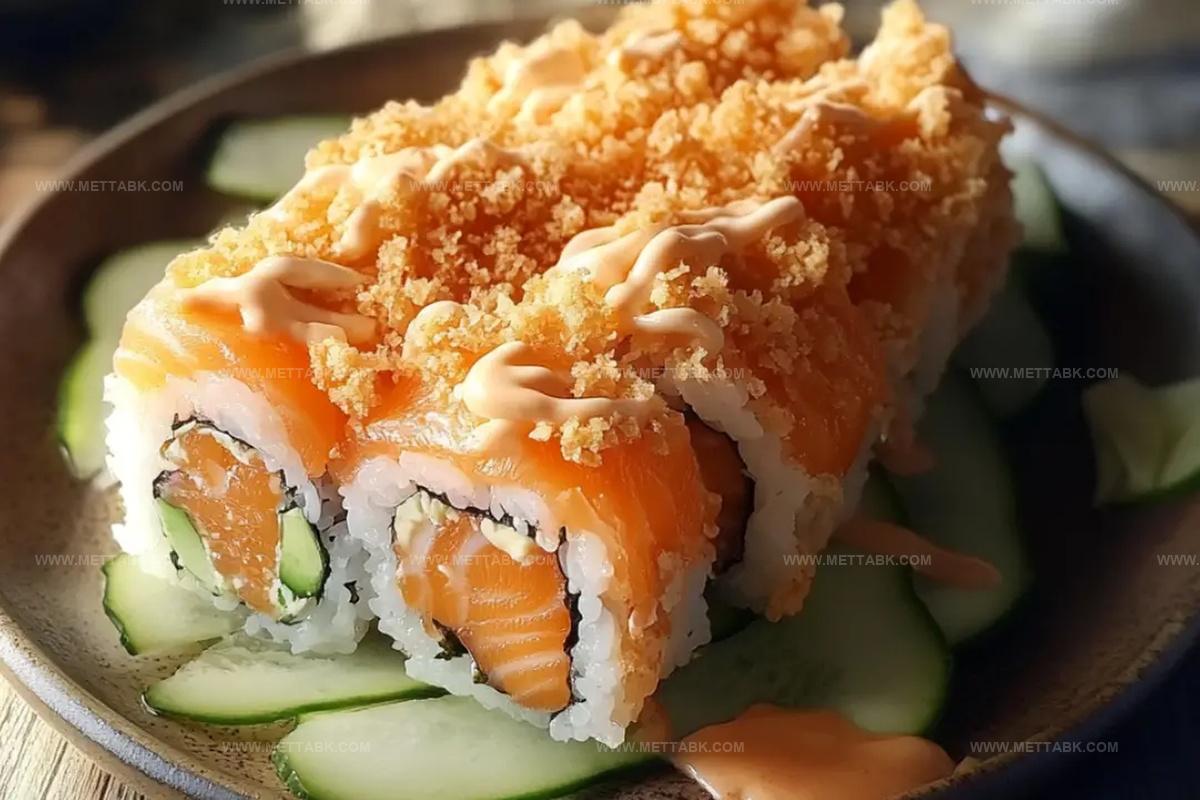
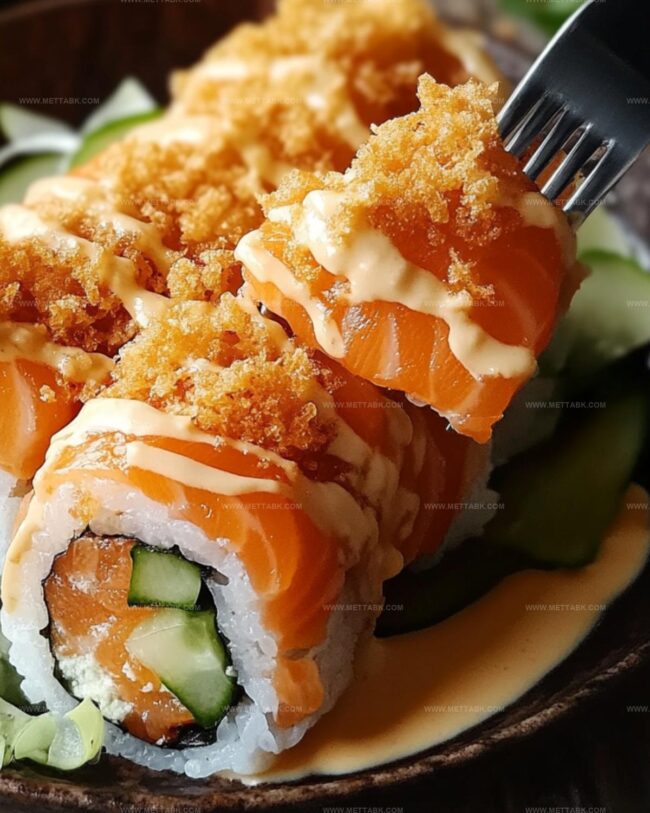
Irresistible Crunchy Salmon Roll Recipe You’ll Love Tonight
Crisp and delightful, this salmon roll brings unexpected crunch to your sushi adventure.
Layers of fresh ingredients promise a culinary journey that surprises and delights.
Delicate fish meets crispy textures in a harmonious blend of flavors.
Skilled home cooks can easily master this restaurant-style treat with minimal preparation.
Handcrafted rolls showcase your creativity and passion for innovative cuisine.
Each bite delivers a perfect balance of softness and snap.
Crunchy Salmon Roll Flavor Explosion Guide
Ingredients List for Crunchy Salmon Rolls
For the Base:For the Filling:For the Garnish and Finishing:How to Roll Crunchy Salmon Perfectly
Step 1: Position Nori Sheet
Lay a crisp nori sheet on a bamboo rolling mat with the glossy side facing downward. Ensure the sheet is centered and flat for a perfect roll.
Step 2: Spread Sushi Rice
Gently spread a smooth, even layer of sticky sushi rice across the nori, leaving a small naked strip of about half an inch at the top edge for sealing.
Step 3: Layer Fresh Ingredients
Carefully arrange your filling ingredients in a neat line along the bottom edge of the rice:Step 4: Craft The Roll
Lift the bamboo mat’s edge and begin rolling the nori sheet tightly and smoothly away from you.
Use gentle, consistent pressure to create a compact cylinder. Moisten the exposed nori strip with water to help seal the roll securely.
Step 5: Add Crunchy Topping
Sprinkle a delightful coating of:Step 6: Slice With Precision
Using a razor-sharp knife, slice the roll into uniform bite-sized pieces. Clean the knife between cuts for smooth, clean slices.
Step 7: Serve And Garnish
Transfer the rolls to a serving plate. Drizzle with spicy mayo if desired and accompany with a small dish of soy sauce for dipping.
Tips to Nail the Crunchy Salmon Roll
Variations to Try with Crunchy Salmon Rolls
Pairing Ideas for Crunchy Salmon Rolls
Storing Crunchy Salmon Rolls Safely
Store leftovers in an airtight container and keep in the refrigerator for up to 24 hours. Place parchment paper between rolls to prevent sticking.
Wrap individual rolls tightly in plastic wrap, then place in a freezer-safe container. Freeze for maximum 1 month to maintain optimal texture and flavor.
Warm gently for 15-20 seconds at 50% power to prevent rice from becoming tough. Check temperature before eating to ensure even heating.
Let rolls sit outside for 10-15 minutes to reduce chill, allowing flavors to develop and texture to soften naturally.
FAQs
Fresh sushi-grade salmon is ideal, ensuring high quality and safe raw consumption. Always buy from a reputable fishmonger who specializes in sushi-grade fish.
A bamboo sushi mat is recommended for rolling, but you can use parchment paper or plastic wrap as an alternative if you don’t have a mat. A sharp knife is crucial for clean, precise cuts.
Wet your hands with a mixture of water and rice vinegar before handling sushi rice. This helps create a non-stick surface and adds a subtle flavor to the rice.
Print
Crunchy Salmon Roll Recipe
- Total Time: 15 minutes
- Yield: 1 1x
Description
Gourmet Crunchy Salmon Roll delivers oceanic elegance with Japanese-inspired flair. Crisp textures and rich flavors invite you to savor each delectable bite of this culinary masterpiece.
Ingredients
Main Ingredients:
- 1/2 pound (0.5 lb) fresh salmon, sliced into strips
- 1 cup sushi rice, cooked and seasoned
- 1 sheet nori (seaweed)
Complementary Ingredients:
- 1/2 avocado, sliced
- 1/4 cucumber, julienned
- 1/4 cup tempura flakes (crispy bits)
Seasoning and Garnish:
- 1 tablespoon spicy mayo (optional)
- 1 teaspoon sesame seeds
- Soy sauce, for serving
Instructions
- Position a nori sheet on a bamboo mat with the glossy side facing downward.
- Uniformly distribute sushi rice across the nori, maintaining a small bare margin near the top edge.
- Layer fresh salmon strips, creamy avocado slices, and crisp cucumber lengthwise along the bottom rice border.
- Gently but firmly compress the mat to create a tight cylindrical shape, ensuring uniform pressure throughout rolling.
- Moisten the exposed nori edge with water to create a secure seal and prevent unraveling.
- Generously coat the exterior of the roll with golden tempura flakes and sprinkle white sesame seeds for added texture and visual appeal.
- Using a razor-sharp knife dipped in water, slice the roll into precise 1-inch segments to prevent rice from sticking.
- Optional: Drizzle spicy mayonnaise across the top for an extra flavor dimension.
- Plate alongside traditional soy sauce for dipping and immediate serving to maintain optimal temperature and crispness.
Notes
- Choosing salmon is crucial; opt for sushi-grade, fresh fish to ensure safe raw consumption and top-quality flavor.
- Wet your knife with water before slicing to prevent rice and ingredients from sticking, creating clean, precise cuts.
- Tempura flakes can be substituted with panko breadcrumbs or toasted sesame seeds for gluten-free or low-carb alternatives.
- Keep sushi rice at room temperature while preparing to maintain ideal texture and prevent clumping during rolling.
- Prep Time: 15 minutes
- Cook Time: 0 minutes
- Category: Lunch, Dinner, Appetizer, Snacks
- Method: Rolling
- Cuisine: Japanese
Nutrition
- Serving Size: 1
- Calories: 550 kcal
- Sugar: 3 g
- Sodium: 700 mg
- Fat: 28 g
- Saturated Fat: 4.5 g
- Unsaturated Fat: 21 g
- Trans Fat: 0.1 g
- Carbohydrates: 45 g
- Fiber: 5 g
- Protein: 30 g
- Cholesterol: 60 mg


Nate Harper
Founder & Recipe Curator
Expertise
Single-Recipe Development, Farm-to-Table Cooking, Seasonal Menu Planning, Culinary Storytelling, Home Kitchen Innovation
Education
Cascade Culinary Institute – Central Oregon Community College
Certificate in Culinary Arts
Focus: Farm-to-table cuisine, sustainable cooking practices, and seasonal recipe creation.
Nate studied under experienced chefs who emphasized local sourcing, minimal waste, and building recipes from fresh, simple ingredients.
Nate Harper is the founder and creative force behind Make, Take, Bake. Raised in the wild beauty of Oregon’s high desert, Nate grew up surrounded by family gardens, farmers’ markets, and home kitchens that celebrated the seasons.
His early love for simple, honest food evolved into a professional passion when he attended Cascade Culinary Institute, where he sharpened his skills in creating recipes that are sustainable, satisfying, and made for everyday life.
Nate’s goal is to make cooking feel accessible, free of fuss, and full of flavor. He believes a single, thoughtfully built dish can stand alone, and sometimes even steal the show.