Irresistibly Crunchy Toffee Bits Recipe for Sweet Snackers
Sweet moments of indulgence arrive when crunchy toffee bits become the star of your dessert adventure.
Delicate golden shards promise a delightful crunch that melts perfectly on your tongue.
Crafting these magical morsels requires simple ingredients and minimal effort.
Pure butter caramelizes into rich amber crystals that deliver intense sweetness and texture.
Kitchen magic happens when sugar transforms under gentle heat, creating irresistible golden nuggets.
Scattered over ice cream, blended into brownies, or enjoyed straight from the pan, these toffee bits will spark pure culinary joy.
Prepare to fall in love with this simple yet spectacular treat that elevates any dessert from ordinary to extraordinary.
Crunchy Toffee Bits to Savor

Ingredients for Crunchy Toffee Bits
Base Components:Toffee and Chocolate Layer:Optional Finishing Touch:How to Make Crunchy Toffee Bits
Step 1: Warm Up The Oven
Crank your oven to a toasty 350°F. Grab an 8×8 inch baking pan and dress it up with parchment paper or foil.
Give it a quick spray of cooking oil to prevent sticking.
Step 2: Create The Buttery Base
Grab these ingredients:Whip these together using a mixer until they form a crumbly, slightly clumpy mixture that holds together when you press it.
Step 3: Press And Bake The Crust
Dump the mixture into your prepared pan. Use the bottom of a measuring cup to press it down firmly, creating an even layer.
Slide it into the oven and bake for about 15 minutes until the edges turn a gorgeous golden brown.
Step 4: Drizzle The First Topping
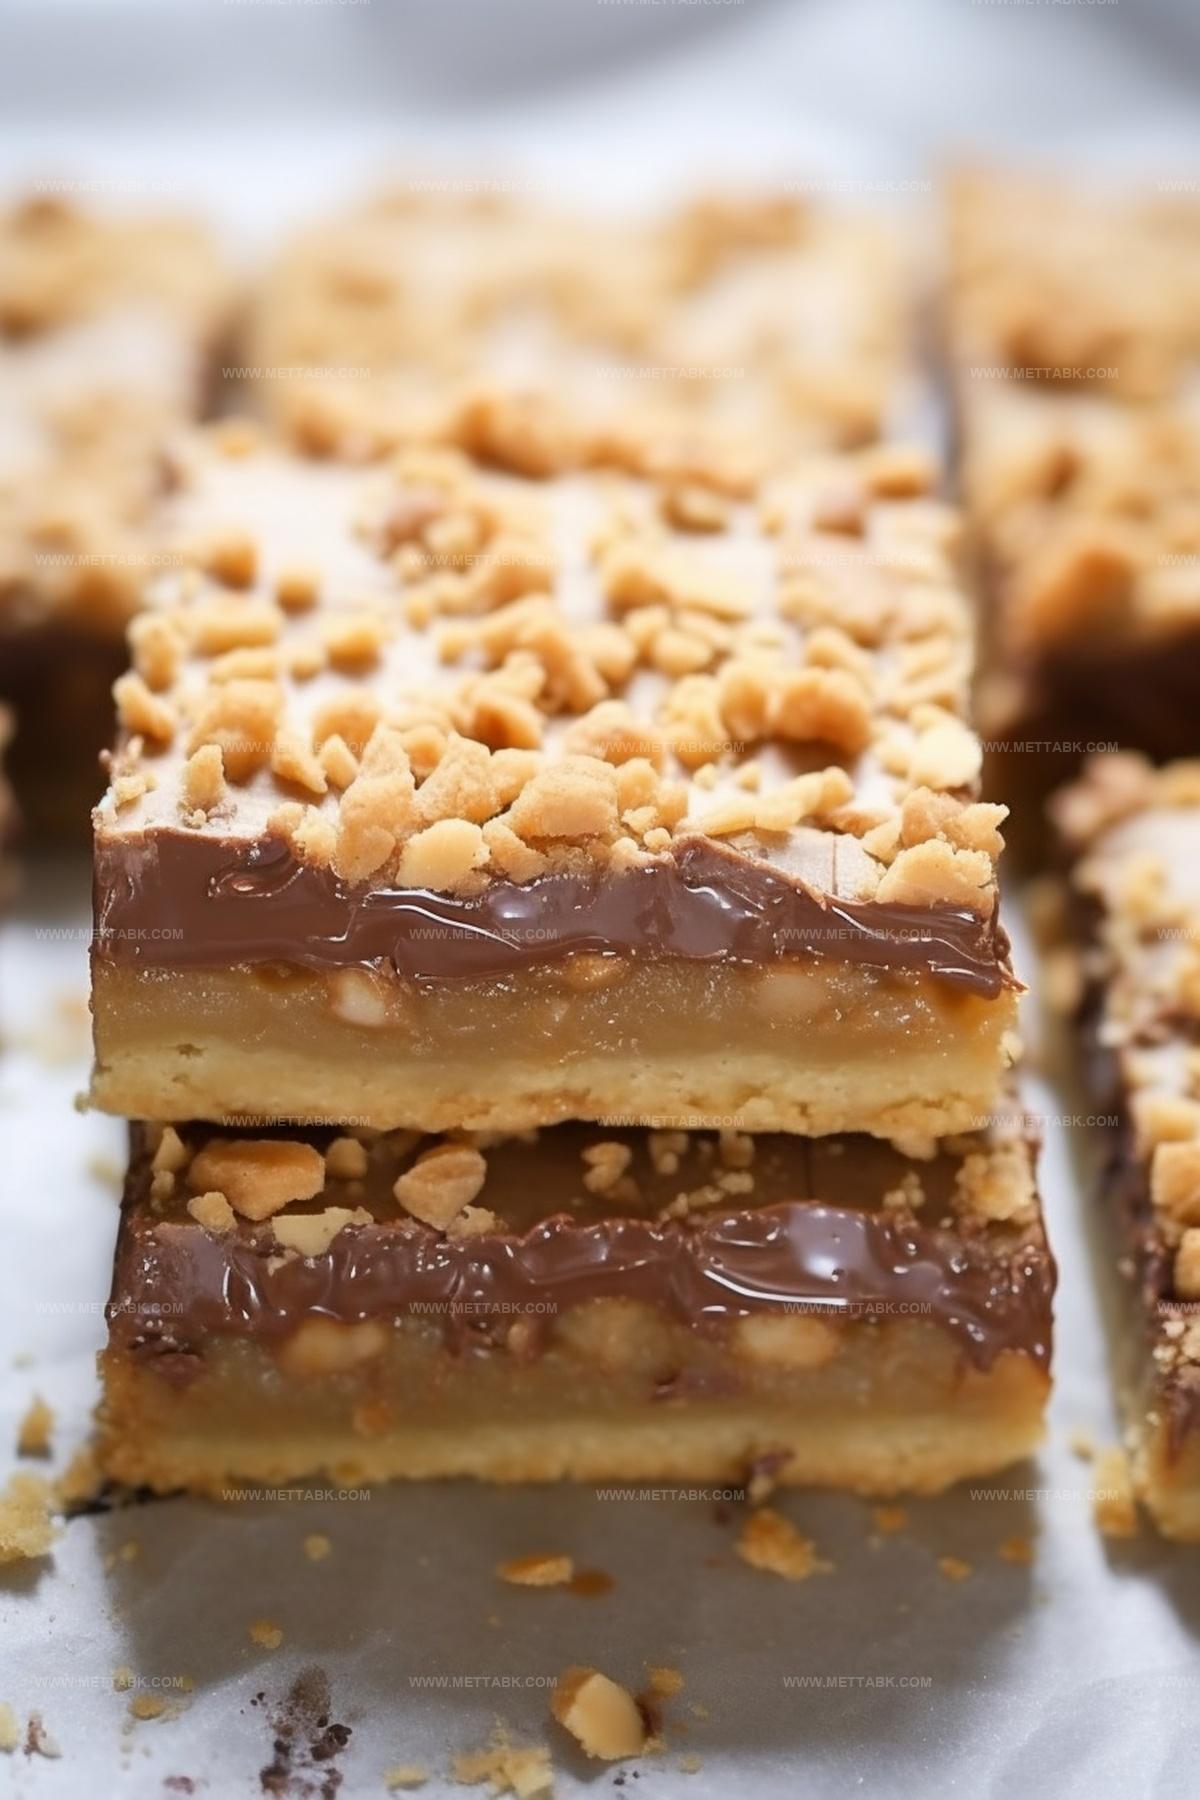
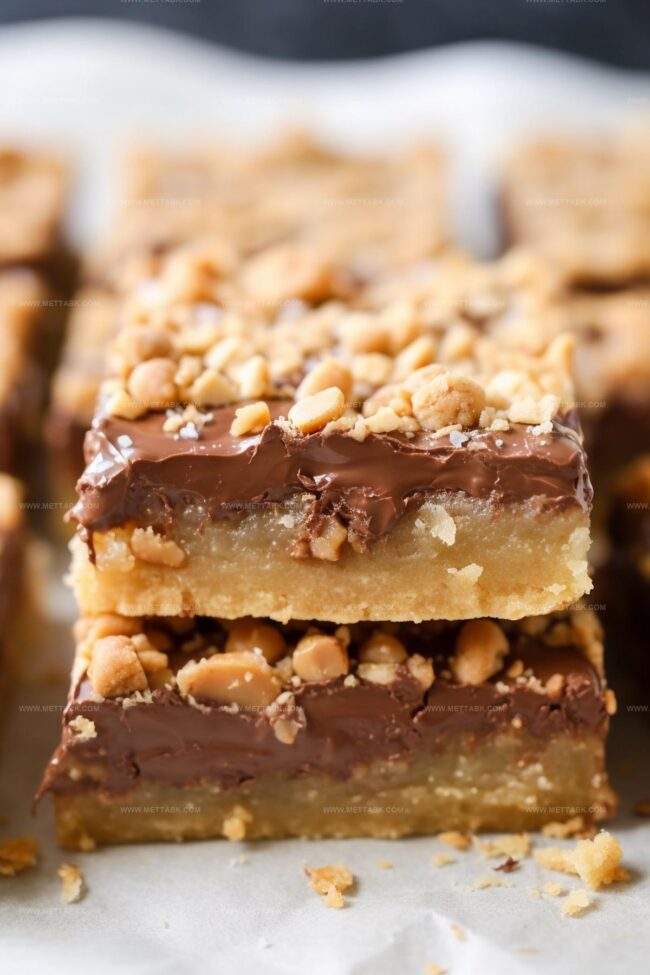
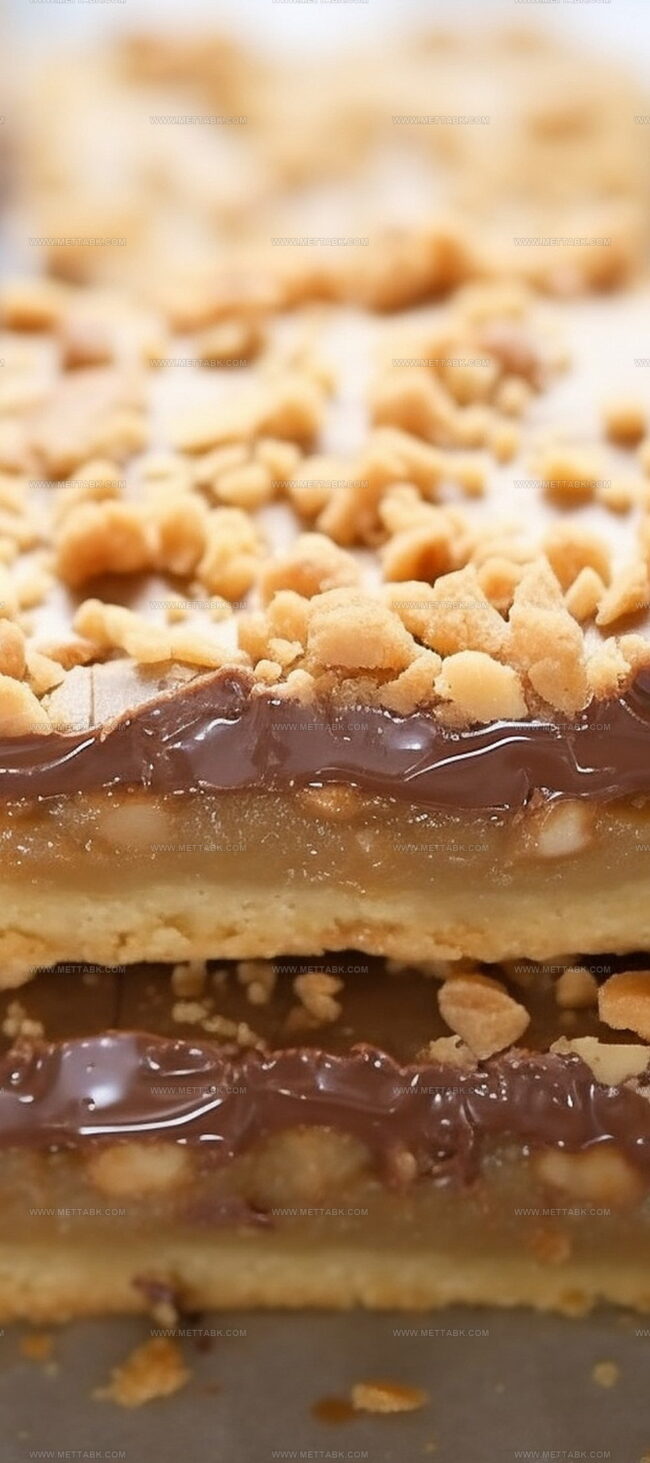
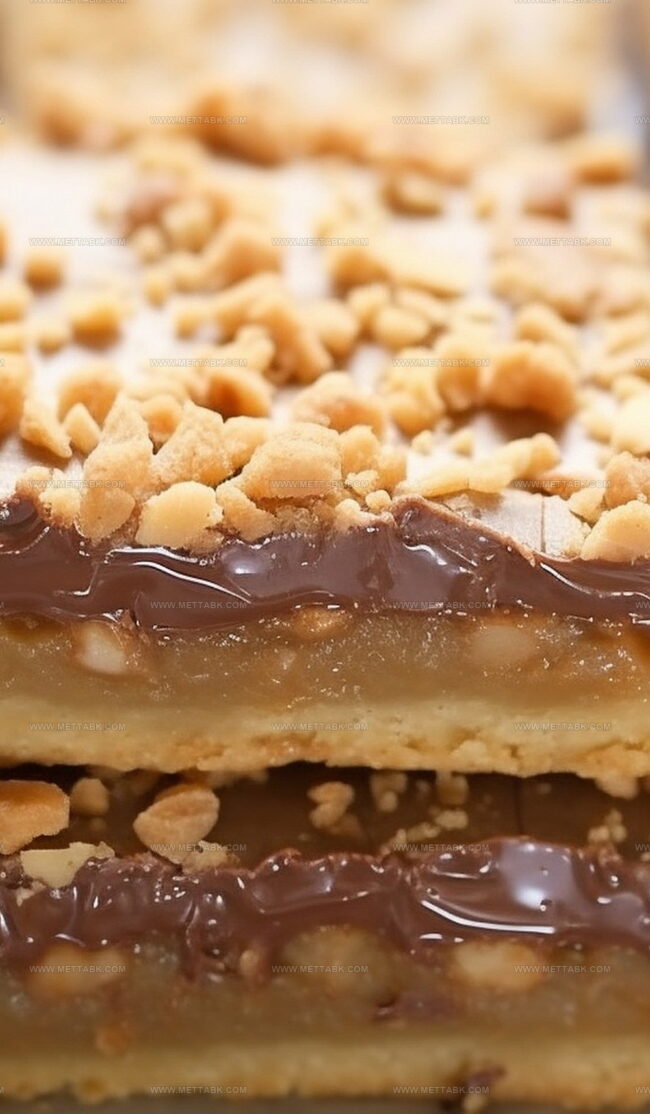
Sprinkle toffee bits across the hot crust.
Mix together:Pour this creamy mixture evenly over the toffee bits.
Step 5: Bubble And Bake
Pop the pan back in the oven for 7-10 minutes until the top gets bubbly and delicious.
Step 6: Chocolate Magic
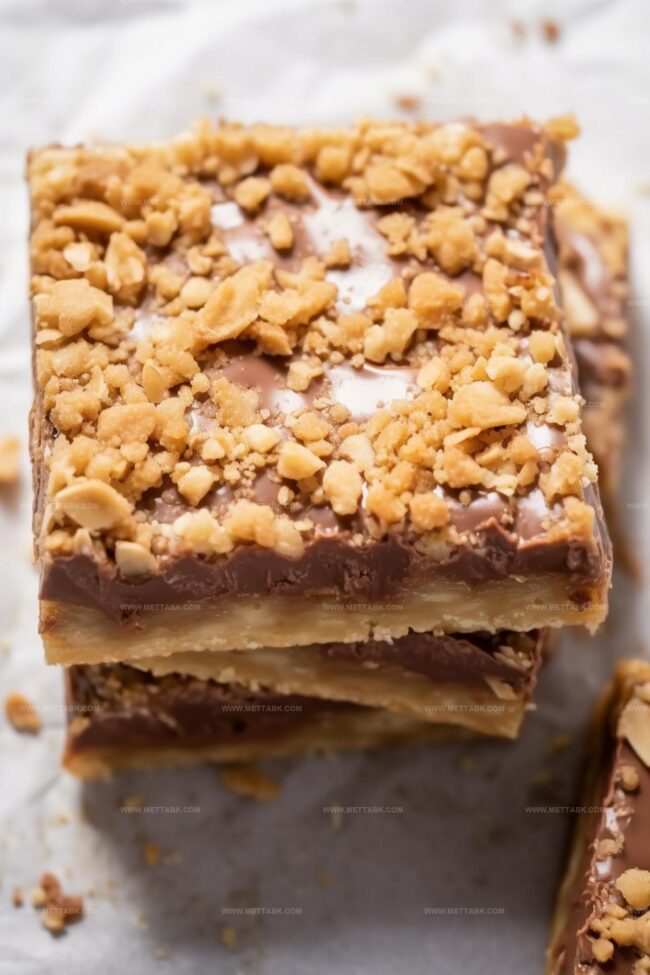
Pull the pan out and let it cool slightly. Scatter chocolate chips across the top.
Let them sit for 3-5 minutes until soft, then gently spread them into a smooth layer. Shower more toffee bits on top and add a pinch of sea salt if you’re feeling fancy.
Step 7: Cool And Slice
Let the bars cool completely at room temperature. If you’re impatient, the refrigerator can help speed things up.
Once set, slice and enjoy your crunchy toffee masterpiece!
Pro Tips for Crunchy Toffee Bits

Variations on Crunchy Toffee Bits
Pairing Ideas for Crunchy Toffee Bits
Storing Crunchy Toffee Bits Properly
FAQs
Yes, you can substitute dark brown sugar, but it will slightly alter the flavor profile, making the toffee bits more rich and molasses-like.
While an electric mixer makes combining ingredients easier, you can use a wooden spoon or spatula, though it will require more manual effort to achieve a smooth mixture.
You can chop up toffee candy bars or use chopped Heath bars as a substitute, which will provide a similar crunchy, caramel-like texture to the dessert.
To make it gluten-free, simply replace the all-purpose flour with a gluten-free flour blend that contains xanthan gum for better binding.
Print
Crunchy Toffee Bits Recipe
- Total Time: 40 minutes
- Yield: 8 1x
Description
Homemade crunchy toffee bits elevate desserts with rich caramel flavor and delightful texture. Sweet crumbles add irresistible depth to cookies, ice cream, and baked goods, inviting you to explore gourmet confectionery magic.
Ingredients
- 1 cup toffee bits
- 1 cup milk chocolate chips
- 1/2 cup (115 g) unsalted butter (softened)
- 1/2 cup light brown sugar (firmly packed)
- 1/3 cup sweetened condensed milk
- 1 1/4 cups all-purpose flour
- 1 tbsp unsalted butter (melted)
- 1/4 tsp salt
- Flaky sea salt (optional)
Instructions
- Preheat the oven to 350°F (175°C). Line an 8×8 inch baking dish with foil or parchment paper, then lightly grease the surface.
- In a mixing bowl, cream together softened butter and brown sugar until smooth. Gradually incorporate flour and salt, mixing until the texture becomes crumbly but cohesive.
- Press the crust mixture evenly into the prepared pan using the bottom of a measuring cup. Bake for 15 minutes, or until the edges turn golden brown.
- Immediately after removing from the oven, sprinkle toffee bits across the crust. Whisk condensed milk with melted butter, then pour evenly over the toffee bits.
- Return to the oven and bake for 7-10 minutes, watching for the mixture to bubble and become slightly set.
- Remove from the oven and let cool briefly. Scatter chocolate chips over the surface and allow them to melt for 3-5 minutes. Gently spread the softened chocolate using an offset spatula, covering the entire layer.
- Immediately top with remaining toffee bits and a light sprinkle of flaky sea salt if desired. Let cool completely at room temperature or refrigerate to help the chocolate set quickly.
- Once fully cooled and set, lift the entire dessert from the pan using the foil or parchment. Cut into squares and serve.
Notes
- Ensure butter is softened at room temperature for smooth mixing and optimal crust texture.
- Use a measuring cup with a flat bottom to create an even, compact crust that holds together perfectly.
- Let chocolate chips sit for a few minutes after removing from oven, allowing them to soften naturally for easy spreading without breaking the layer beneath.
- A light sprinkle of flaky sea salt can elevate the flavor profile, balancing the sweetness of toffee and chocolate.
- Prep Time: 15 minutes
- Cook Time: 25 minutes
- Category: Snacks, Desserts
- Method: Baking
- Cuisine: American
Nutrition
- Serving Size: 8
- Calories: 267 kcal
- Sugar: 22 g
- Sodium: 83 mg
- Fat: 14 g
- Saturated Fat: 8 g
- Unsaturated Fat: 5 g
- Trans Fat: 0.1 g
- Carbohydrates: 31 g
- Fiber: 1 g
- Protein: 2 g
- Cholesterol: 27 mg
Clara Bennett
Contributing Recipe Developer & Food Writer
Expertise
Baking and Pastry Development, Gluten-Free and Allergy-Friendly Recipe Creation, Culinary Storytelling and Food Journalism, Recipe Testing and Standardization, Southern Comfort Foods and Modern Twists
Education
Sullivan University – National Center for Hospitality Studies
Associate Degree in Culinary Arts
Focus: Baking and Pastry Arts, Recipe Testing, and Culinary Journalism.
Clara specialized in crafting desserts that blend classic Southern comfort with modern techniques, while developing strong writing skills to tell the story behind every dish.
Lane Community College (Certificate Program)
Certificate in Food Writing and Photography
Focus: Culinary storytelling, recipe formatting, food styling, and visual presentation.
Clara’s love of baking started young, powered by homemade pies, biscuits, and stories passed around the family table.
After earning her degree at Sullivan University and a food writing certificate at Lane Community College, she turned her passion into a craft: sharing recipes that are simple, soulful, and always full of heart.
She’s big on bold flavors, flexible ideas, and creating sweets that fit any table (yes, even if you’re gluten-free). When she’s not baking, you’ll find her wandering farmers’ markets, styling food for the next photo shoot, or working on her ever-growing recipe journal.