
Easy Easter Bunny Button Cookies Recipe: A Charming Sweet Treat
Sweet-toothed bakers can create adorable easter bunny button cookies that sparkle with whimsy and charm.
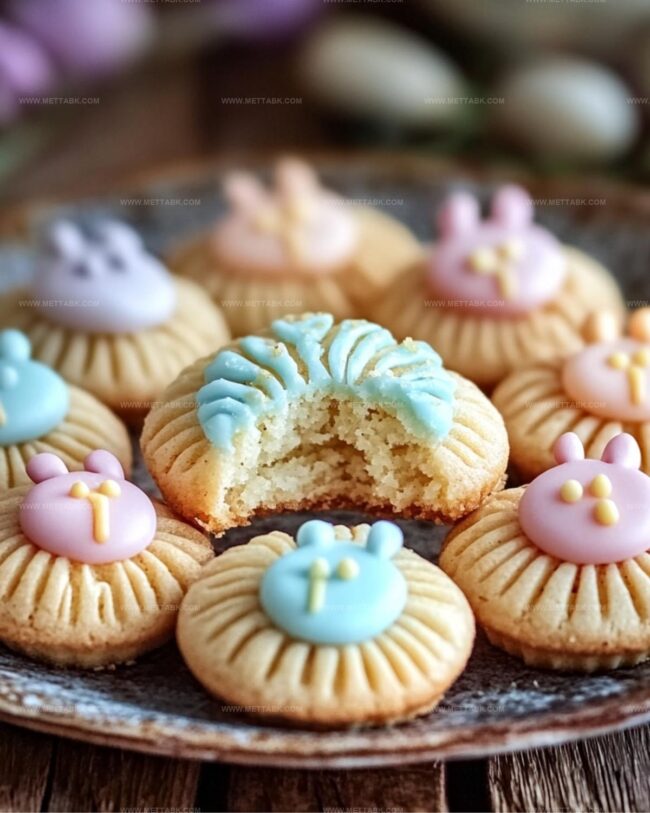
Colorful sprinkles and pastel frosting bring these delightful treats to life.
Crisp sugar cookie bases transform into playful rabbit faces with simple decorating techniques.
Kids absolutely love helping craft these cute confections during spring celebrations.
Soft buttercream icing provides the perfect canvas for bunny features.
Minimal ingredients and straightforward steps make this recipe accessible for novice and experienced bakers alike.
Easter Bunny Button Cookies to Delight Kids

Ingredients for Festive Bunny Button Cookies
For the Base:For the Coating and Decoration:For the Baking Essentials:How to Bake Easter Bunny Button Cookies
Step 1: Whip Up the Cookie Base
Warm up your oven to 350F. Grab a baking sheet and line it with parchment paper.
In a big mixing bowl, cream together soft butter and sugar until they become light and airy. Gently fold in egg yolks and vanilla extract, stirring until everything looks smooth and creamy.
Slowly add flour and mix until a beautiful dough forms.
Step 2: Shape Sugary Cookie Balls
Roll the dough into cute little balls, each about the size of a small walnut.
Lovingly coat each ball in sparkling sanding sugar, making sure they’re completely covered in sweet, glittery goodness. Arrange the sugar-coated balls on the prepared baking sheet, leaving some breathing room between each cookie.
Step 3: Add Festive Chocolate Centers
Carefully press a chocolate Easter candy into the center of each cookie ball. Use your fingertips to gently push the candy down, creating a delightful button-like appearance.
Step 4: Bake to Golden Perfection
Slide the baking sheet into the preheated oven. Bake for 10-12 minutes, watching for those edges to turn a lovely golden brown.
Once they’re looking just right, pull them out of the oven. Let the cookies rest on the baking sheet for a few minutes to catch their breath.
Step 5: Cool and Celebrate
Transfer the cookies to a wire rack and let them cool completely. These adorable Easter Bunny Button Cookies are now ready to bring joy and sweetness to your holiday celebration!
Tips for Perfect Bunny Button Cookies

Variations on Easter Bunny Button Cookies
Pairings to Serve with Bunny Button Cookies
Best Storage for Bunny Button Cookies
Store cookies in an airtight container lined with parchment paper between layers. Keep refrigerated for up to 5 days, maintaining their soft texture and preventing staleness.
Carefully place cooled cookies in a freezer-safe container, separating layers with wax paper. Freeze for maximum 3 weeks, ensuring chocolate candies remain intact and cookie quality stays high.
Keep cookies in a sealed container at room temperature for 3-4 days. Place in a cool, dry spot away from direct sunlight to preserve their crumbly texture and flavor.
Warm refrigerated or frozen cookies for 8-10 seconds in microwave. Alternatively, let cookies sit at room temperature for 15-20 minutes before serving to restore their original softness and taste.
FAQs
Yes, you can swap Easter chocolate candies with other small chocolate pieces like Hershey’s Kisses or mini chocolate eggs to match your preference or available ingredients.
Chill the cookie dough for 30 minutes before shaping and baking. This helps maintain the cookies’ shape and prevents excessive spreading.
Sanding sugar adds a decorative sparkle and light crunch, but you can substitute it with regular granulated sugar if needed. The cookies will still taste delicious.
Absolutely! You can prepare the cookie dough and refrigerate it for up to 3 days before baking. Just bring the dough to room temperature before shaping and baking.
Print
Easter Bunny Button Cookies Recipe
- Total Time: 32 minutes
- Yield: 24 1x
Description
Delightful Easter Bunny Button Cookies bring whimsical springtime charm to your dessert table. Pastel-colored, adorable sugar cookies with chocolate centers offer playful sweetness you’ll adore.
Ingredients
Main Ingredients (Dry):
- 2.5 cups all-purpose flour
- 1 cup sugar
- Sanding sugar (for rolling)
Main Ingredients (Wet):
- 1 cup unsalted butter, softened
- 2 large egg yolks
- 1 teaspoon vanilla extract
Decorative Ingredients:
- Easter chocolate candy (such as mini eggs or chocolate bunnies)
Instructions
- Prepare a pristine baking workspace and preheat the oven to 350F (175C), lining a baking sheet with parchment paper for optimal cookie preparation.
- Using an electric mixer, cream butter and sugar until the mixture becomes airy and pale, creating a smooth foundation for the cookie base.
- Introduce egg yolks and vanilla extract to the butter mixture, blending thoroughly to ensure a uniform consistency and rich flavor profile.
- Gradually incorporate flour into the wet ingredients, mixing until a cohesive dough forms that can be easily manipulated.
- Craft uniform spherical dough portions, each approximately 1 inch in diameter, and delicately roll them through sanding sugar for a sparkling exterior.
- Arrange the sugar-coated dough balls on the prepared baking sheet, positioning them with sufficient spacing to allow for minimal spreading during baking.
- Gently nestle a chocolate Easter candy into the center of each cookie, applying gentle pressure to secure the decorative element without disrupting the dough’s structure.
- Slide the baking sheet into the preheated oven and bake for 10-12 minutes, watching for subtle golden edges that indicate perfect doneness.
- After removing from the oven, allow cookies to rest momentarily on the baking sheet to stabilize, then transfer to a wire cooling rack for complete cooling.
- Present these whimsical Easter Bunny Button Cookies as a delightful seasonal confection perfect for holiday celebrations.
Notes
- Chill the dough for 30 minutes before rolling to prevent spreading and maintain cookie shape during baking.
- Use room temperature butter and eggs for smoother, more consistent cookie texture that ensures even mixing.
- Swap chocolate candies with alternative decorations like colored sprinkles or pastel M&Ms for different festive variations.
- Store cookies in an airtight container at room temperature for up to 5 days to maintain freshness and softness.
- Prep Time: 20 minutes
- Cook Time: 12 minutes
- Category: Desserts, Snacks
- Method: Baking
- Cuisine: American
Nutrition
- Serving Size: 24
- Calories: 148 kcal
- Sugar: 8 g
- Sodium: 35 mg
- Fat: 8 g
- Saturated Fat: 5 g
- Unsaturated Fat: 3 g
- Trans Fat: 0.2 g
- Carbohydrates: 18 g
- Fiber: 0.3 g
- Protein: 2 g
- Cholesterol: 45 mg
Nate Harper
Founder & Recipe Curator
Expertise
Single-Recipe Development, Farm-to-Table Cooking, Seasonal Menu Planning, Culinary Storytelling, Home Kitchen Innovation
Education
Cascade Culinary Institute – Central Oregon Community College
Certificate in Culinary Arts
Focus: Farm-to-table cuisine, sustainable cooking practices, and seasonal recipe creation.
Nate studied under experienced chefs who emphasized local sourcing, minimal waste, and building recipes from fresh, simple ingredients.
Nate Harper is the founder and creative force behind Make, Take, Bake. Raised in the wild beauty of Oregon’s high desert, Nate grew up surrounded by family gardens, farmers’ markets, and home kitchens that celebrated the seasons.
His early love for simple, honest food evolved into a professional passion when he attended Cascade Culinary Institute, where he sharpened his skills in creating recipes that are sustainable, satisfying, and made for everyday life.
Nate’s goal is to make cooking feel accessible, free of fuss, and full of flavor. He believes a single, thoughtfully built dish can stand alone, and sometimes even steal the show.