
Easter Dirt Cake Recipe: A Springtime Treat for Joyful Celebrations
Sweet memories of childhood birthdays often spark a magical easter dirt cake adventure that brings pure delight to dessert lovers.
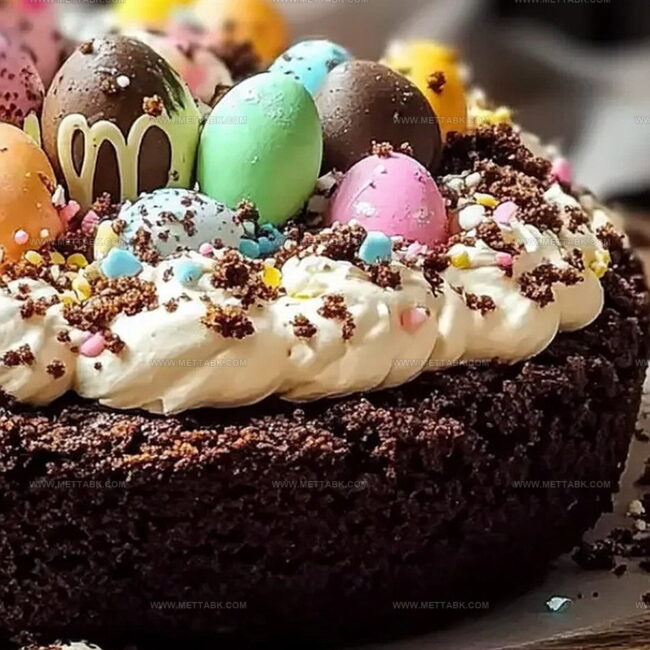
Layers of creamy pudding and crushed cookies create a whimsical landscape reminiscent of spring’s playful spirit.
Chocolate crumbs mimic rich soil while gummy worms peek through, adding a touch of playful charm.
Kids and adults alike will adore this quirky, no-bake treat that feels like an edible garden.
Chocolate pudding, crushed Oreos, and creative assembly make this dessert a guaranteed crowd-pleaser.
Seasonal decorations transform an ordinary dessert into a memorable celebration of springtime joy.
Let you imagination run wild and craft a delicious masterpiece that will spark smiles around the table.
What Makes Easter Dirt Cake So Festive and Delicious
Ingredients Needed for Easter Dirt Cake
For the Crust:For the Pudding Layer:For the Cream Topping:For the Decoration and Texture:How to Make Easter Dirt Cake Step-by-Step
Step 1: Prepare Oreo Crust
Crush Oreos into fine crumbs using a food processor. Mix in melted butter until the crumbs are thoroughly coated.
Press the buttery crumb mixture into a 9×13-inch pan, creating an even layer. Chill the crust in the refrigerator to set.
Step 2: Whip Up Chocolate Pudding
In a mixing bowl, whisk milk and instant chocolate pudding mix until the mixture becomes smooth and creamy. Place the bowl in the refrigerator for 10-15 minutes to allow the pudding to thicken and set.
Step 3: Craft Fluffy Cream Cheese Topping
Beat room-temperature cream cheese until it becomes silky and smooth. Chill a mixing bowl and whisk attachment in the freezer for 5-10 minutes to ensure maximum whipping potential.
Whip heavy cream on medium-high speed until soft peaks form. Gently add powdered sugar and vanilla extract.
Fold in the whipped cream cheese and continue beating until stiff, luxurious peaks develop.
Step 4: Assemble Layered Dessert
Crush 12 Oreos in a Ziploc bag, creating rough, chunky pieces.
Grind another 12 Oreos into fine, delicate crumbs for topping. Carefully fold the whipped cream mixture and crushed Oreo pieces into the prepared chocolate pudding.
Spread this delectable mixture evenly over the chilled Oreo crust. Sprinkle the fine Oreo crumbs on top for a classic dirt cake appearance.
Step 5: Chill and Decorate
Refrigerate the cake for a minimum of 3 hours to allow flavors to meld and texture to set. Before serving, get creative with decorations.
Scatter pastel candy eggs, add adorable Peeps, sprinkle shredded coconut, or dust with colorful sprinkles to create a festive Easter-themed dessert.
Helpful Tips for Easter Dirt Cake Success
Flavor Variations for Easter Dirt Cake
What to Serve With Easter Dirt Cake Dessert
How to Store Easter Dirt Cake Properly

Store in an airtight container for up to 5 days, keeping the cake covered with plastic wrap to prevent drying out or absorbing other refrigerator odors.
Wrap tightly in plastic wrap and aluminum foil, then place in a freezer-safe container. Freeze for up to 2 months. Thaw overnight in the refrigerator before serving.
Do not leave the cake out for more than 2 hours due to dairy ingredients. Always keep refrigerated when not serving.
Best enjoyed cold. If slightly frozen, let sit at room temperature for 15-20 minutes before serving to soften the texture and restore creamy consistency.
FAQs
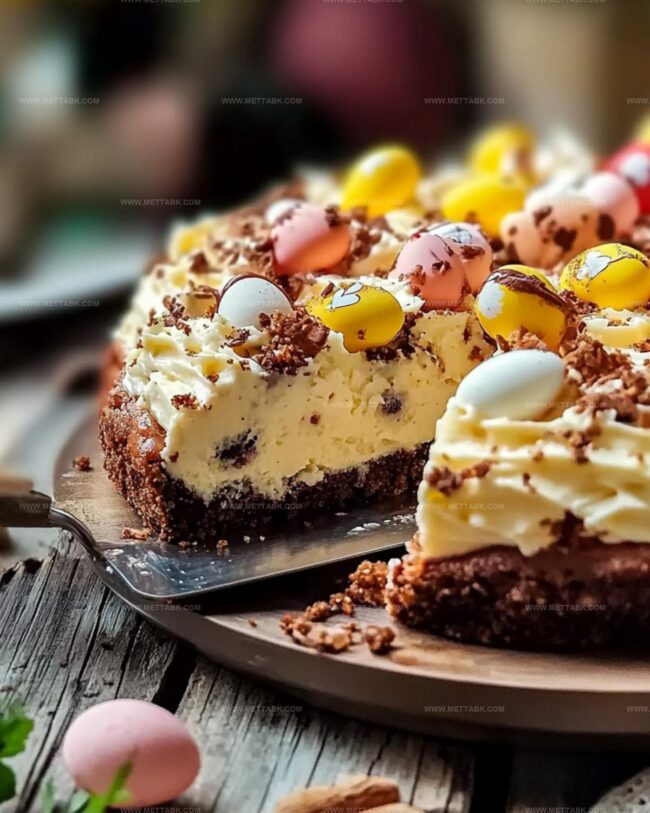
The crust is made entirely of crushed Oreo cookies mixed with melted butter, creating a rich, chocolatey base that serves as the foundation of the dessert.
The cream cheese is whipped with heavy cream and powdered sugar to create a light, fluffy filling that adds a creamy, smooth consistency to the dessert.
Rough Oreo pieces are folded into the pudding mixture for added texture, while fine Oreo crumbs are sprinkled on top to create the “dirt” appearance that gives the cake its signature look.
Print
Easter Dirt Cake Recipe
- Total Time: 3 hours 45 minutes
- Yield: 12 1x
Description
Easter dirt cake combines childhood nostalgia with playful dessert design, delivering a whimsical treat perfect for spring celebrations. Sweet chocolate layers and cookie crumbles create a delightful landscape you’ll savor with gleeful anticipation.
Ingredients
Primary Ingredients:
- 2 13-ounce packages Oreo cookies (crushed)
- 2 3.4-ounce boxes instant chocolate pudding mix
- 3 cups milk
- 8 ounces full-fat cream cheese
Creamy Components:
- 1/2 cup butter
- 1 1/2 cups heavy whipping cream
- 1/2 cup powdered sugar
- 2 teaspoons vanilla extract
Decorative Ingredients:
- Candy eggs
- Marshmallow Peeps
- Shredded coconut
- Sprinkles
Instructions
- Pulverize Oreo cookies into a fine, sandy texture using a food processor, ensuring no large chunks remain.
- Incorporate melted butter into the cookie crumbs, mixing thoroughly to create a cohesive base mixture.
- Firmly press the buttered crumb mixture into a 9×13-inch pan, creating an even, compact layer.
- Chill the prepared crust in the refrigerator to set firmly.
- Whisk milk and instant chocolate pudding mix together until completely smooth and free of lumps.
- Allow the pudding mixture to rest in the refrigerator for 10-15 minutes, enabling it to thicken and develop a rich consistency.
- Cream the room-temperature cream cheese until silky and free of any lumps.
- Prepare the whipping station by pre-chilling a mixing bowl and whisk attachment in the freezer for 5-10 minutes.
- Whip heavy cream on medium-high speed until soft, billowy peaks form.
- Gradually incorporate powdered sugar, vanilla extract, and whipped cream cheese into the mixture.
- Continue beating until stiff, sturdy peaks develop, creating a light and airy filling.
- Crush 12 Oreo cookies into rough, uneven pieces using a Ziploc bag.
- Grind an additional 12 Oreos into ultra-fine crumbs for a delicate topping.
- Gently fold the whipped cream mixture and rough cookie pieces into the prepared pudding.
- Spread the combined mixture evenly over the chilled Oreo crust.
- Sprinkle the finely ground Oreo crumbs across the top for a realistic “dirt” appearance.
- Refrigerate the dessert for a minimum of 3 hours to allow complete setting and flavor melding.
- Before serving, artfully decorate with candy eggs, marshmallow Peeps, shredded coconut, or festive sprinkles.
Notes
- Crush Oreos precisely in a food processor for uniform, fine crumbs that create a smooth, consistent base and prevent clumpy textures.
- Chill mixing bowl and whisk beforehand to ensure maximum cream volume and stability during whipping, resulting in fluffier, more stable whipped cream.
- Use room-temperature cream cheese to blend seamlessly without lumps, creating a silky smooth texture throughout the dessert.
- Experiment with gluten-free Oreos or graham crackers to make the recipe suitable for those with gluten sensitivities, maintaining the classic dirt cake experience.
- Prep Time: 45 minutes
- Cook Time: 3 hours
- Category: Desserts, Snacks
- Method: Refrigerating
- Cuisine: American
Nutrition
- Serving Size: 12
- Calories: 403
- Sugar: 32 g
- Sodium: 137 mg
- Fat: 28 g
- Saturated Fat: 17 g
- Unsaturated Fat: 9 g
- Trans Fat: 0.5 g
- Carbohydrates: 35 g
- Fiber: 1 g
- Protein: 4 g
- Cholesterol: 73 mg
Clara Bennett
Contributing Recipe Developer & Food Writer
Expertise
Baking and Pastry Development, Gluten-Free and Allergy-Friendly Recipe Creation, Culinary Storytelling and Food Journalism, Recipe Testing and Standardization, Southern Comfort Foods and Modern Twists
Education
Sullivan University – National Center for Hospitality Studies
Associate Degree in Culinary Arts
Focus: Baking and Pastry Arts, Recipe Testing, and Culinary Journalism.
Clara specialized in crafting desserts that blend classic Southern comfort with modern techniques, while developing strong writing skills to tell the story behind every dish.
Lane Community College (Certificate Program)
Certificate in Food Writing and Photography
Focus: Culinary storytelling, recipe formatting, food styling, and visual presentation.
Clara’s love of baking started young, powered by homemade pies, biscuits, and stories passed around the family table.
After earning her degree at Sullivan University and a food writing certificate at Lane Community College, she turned her passion into a craft: sharing recipes that are simple, soulful, and always full of heart.
She’s big on bold flavors, flexible ideas, and creating sweets that fit any table (yes, even if you’re gluten-free). When she’s not baking, you’ll find her wandering farmers’ markets, styling food for the next photo shoot, or working on her ever-growing recipe journal.