
The Best Easter Egg Cheesecake Jars Recipe for Spring Sweetness
Crafting an easter egg cheesecake jars delight promises a whimsical journey through sweet memories.
Pastel colors and creamy textures dance together in these mini desserts.
Small glass containers become magical vessels for decadent layers of childhood nostalgia.
Chocolate fragments and smooth cream cheese create unexpected flavor symphonies.
Each spoonful captures the playful spirit of spring celebrations.
Lightweight and portable, these jars make sharing effortless and fun.
You’ll fall in love with this simple yet stunning dessert that turns ordinary moments into extraordinary experiences.
Why These Cheesecake Jars Are a Crowd Favorite
Ingredients for Easter Egg Cheesecake Jars
For the Crust:For the Cheesecake Filling:For the Decorative Elements and Coloring:How to Layer Cheesecake Jars Neatly at Home
Step 1: Create Crumbly Base
Grab graham crackers and crush them into fine crumbs. Mix the crumbs with sugar and melted butter until they feel like damp beach sand.
Gently press this mixture into the bottom of each mini jar, creating a solid foundation for your delightful dessert.
Step 2: Whip Creamy Filling
In a large mixing bowl, beat cream cheese until it becomes silky smooth.
Add powdered sugar and vanilla extract, continuing to blend until the mixture looks light and fluffy. Gently fold in whipped cream, incorporating it carefully to maintain the airy texture.
Divide the creamy mixture into two separate bowls.
Step 3: Add Playful Color
Take one portion of the cream cheese mixture and transform it with a pop of pink.
Use strawberry powder or food coloring to create a soft, pastel shade that hints at spring flavors.
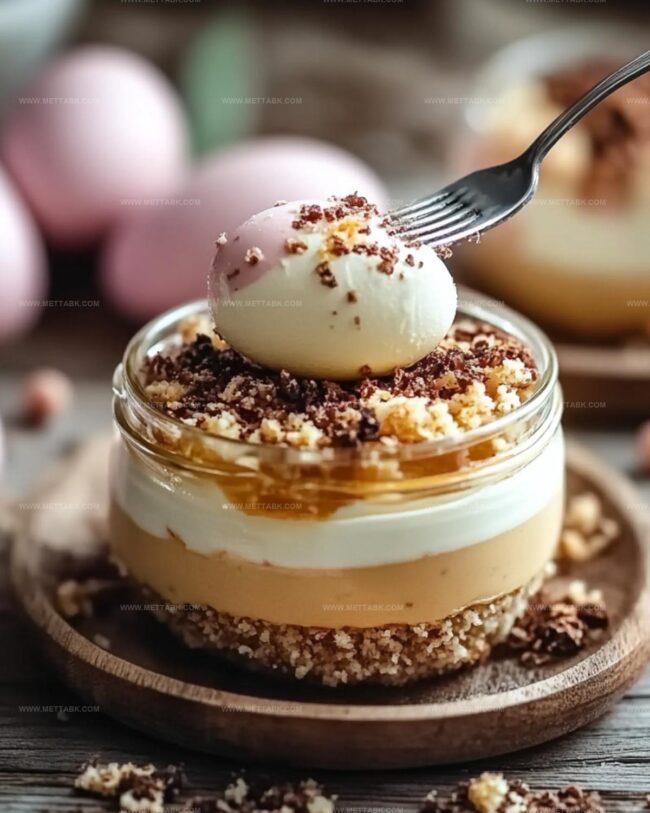
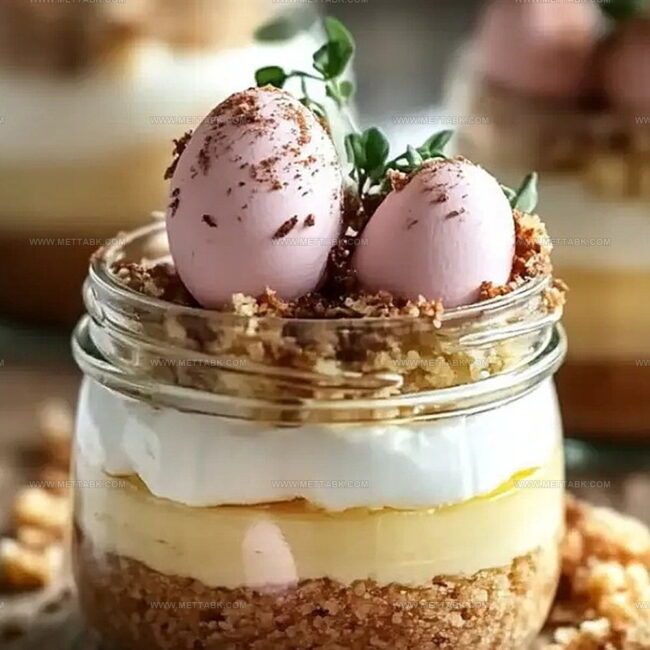
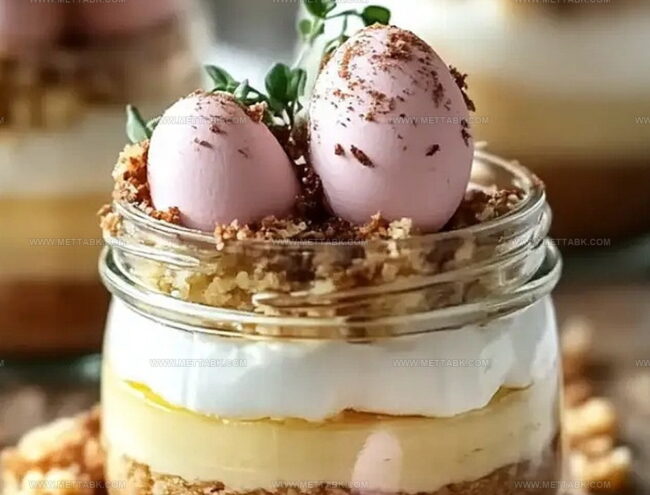
Step 4: Layer With Love
Carefully spoon or pipe the pink cheesecake layer into each jar, creating an even surface.
Follow this with the classic white cheesecake layer, building beautiful contrasting tiers.
Step 5: Decorate Festively
Crown each jar with a generous swirl of whipped cream.
Sprinkle pastel candy eggs and colorful sprinkles across the top, adding a whimsical Easter touch that makes these desserts truly special.
Step 6: Chill and Delight
Refrigerate the jars for 1-2 hours, allowing the flavors to meld and the texture to set perfectly.
Serve chilled and watch everyone’s eyes light up with joy.
Tips to Get Smooth Cheesecake in Every Jar
Creative Styles for Easter Cheesecake Jars
Sweet Pairings for These Cheesecake Jars
How to Store Cheesecake Jars Properly Overnight
Transfer cheesecake jars to an airtight container and store in the refrigerator for up to 3-4 days. Cover each jar with plastic wrap to prevent moisture and odor absorption.
Wrap individual jars tightly with plastic wrap and aluminum foil. Freeze for maximum 2 months. Place in freezer-safe containers to prevent potential damage.
Remove frozen jars from freezer and let them slowly defrost in the refrigerator overnight. Avoid room temperature thawing to maintain texture and prevent bacterial growth.
These cheesecake jars are best enjoyed cold. If desired, let them sit at room temperature for 10-15 minutes before serving to soften slightly and enhance flavor profile.
FAQs
Yes, you can prepare these jars up to 2 days in advance. Keep them refrigerated and add the candy eggs and whipped cream topping just before serving.
No, you just need small mason jars or dessert glasses, a mixing bowl, electric mixer, and basic baking tools. Standard kitchen equipment works perfectly.
Chill each layer for about 10-15 minutes before adding the next layer. This helps the cheesecake layers set and stay distinct, creating beautiful separate layers.
Print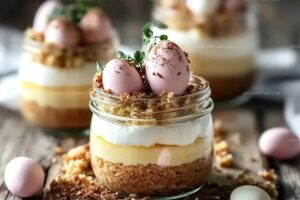
Easter Egg Cheesecake Jars Recipe
- Total Time: 30 minutes
- Yield: 18 1x
Description
Sweet layers of creamy Easter egg cheesecake jars blend nostalgic childhood memories with sophisticated dessert crafting. Rich chocolate, silky cream cheese, and festive sprinkles combine in portable mason jar perfection that will delight guests at any springtime celebration.
Ingredients
Main Ingredients:
- 8 ounces (226 grams) cream cheese, softened
- 1 cup graham cracker crumbs
- 1 cup heavy cream
- 12–18 pastel candy eggs
Sweeteners and Flavorings:
- 1/2 cup powdered sugar
- 2 tablespoons granulated sugar
- 1 teaspoon vanilla extract
- Pink gel food coloring (optional)
- 1 tablespoon freeze-dried strawberry powder (optional)
Binding and Base Ingredients:
- 4 tablespoons unsalted butter, melted
- Whipped cream (for topping)
Instructions
- Craft a delectable base by blending graham cracker crumbs with melted butter and sugar until the mixture resembles coarse, damp sand.
- Distribute the crumbly foundation evenly into miniature glass jars, gently compressing to create a solid crust layer.
- Whip cream cheese in a large mixing bowl until silky and uniform, ensuring no lumps remain.
- Incorporate powdered sugar and vanilla extract, beating the mixture until it becomes light and airy.
- Gently fold whipped cream into the cream cheese mixture, maintaining a delicate, cloud-like consistency.
- Separate the creamy filling into two portions, transforming one section with pink food coloring or strawberry powder for a vibrant layer.
- Carefully layer the pink-tinted cheesecake cream atop the graham cracker foundation in each jar.
- Delicately pipe or spoon the pristine white cheesecake mixture over the pink layer, creating a beautiful two-tone effect.
- Crown each jar with a luxurious swirl of whipped cream, adding an elegant finishing touch.
- Embellish with pastel candy eggs and a sprinkle of colorful decorations for a festive presentation.
- Refrigerate the assembled jars for 1-2 hours to allow flavors to meld and texture to set, ensuring a perfectly chilled dessert.
Notes
- Customize the crust by swapping graham crackers with gluten-free cookies or crushed almonds for dietary needs.
- Use room temperature cream cheese to achieve a smoother, lump-free cheesecake filling that blends effortlessly.
- Create a vegan version by substituting cream cheese with cashew-based alternatives and using coconut whipped cream for a dairy-free delight.
- Experiment with different natural food colorings like beetroot powder or matcha for unique pastel layers that add both color and subtle flavor complexity.
- Prep Time: 30 minutes
- Cook Time: 0 minutes
- Category: Desserts
- Method: Blending
- Cuisine: American
Nutrition
- Serving Size: 18
- Calories: 159
- Sugar: 12 g
- Sodium: 58 mg
- Fat: 11 g
- Saturated Fat: 7 g
- Unsaturated Fat: 4 g
- Trans Fat: 0.1 g
- Carbohydrates: 13 g
- Fiber: 0.2 g
- Protein: 2 g
- Cholesterol: 37 mg
Clara Bennett
Contributing Recipe Developer & Food Writer
Expertise
Baking and Pastry Development, Gluten-Free and Allergy-Friendly Recipe Creation, Culinary Storytelling and Food Journalism, Recipe Testing and Standardization, Southern Comfort Foods and Modern Twists
Education
Sullivan University – National Center for Hospitality Studies
Associate Degree in Culinary Arts
Focus: Baking and Pastry Arts, Recipe Testing, and Culinary Journalism.
Clara specialized in crafting desserts that blend classic Southern comfort with modern techniques, while developing strong writing skills to tell the story behind every dish.
Lane Community College (Certificate Program)
Certificate in Food Writing and Photography
Focus: Culinary storytelling, recipe formatting, food styling, and visual presentation.
Clara’s love of baking started young, powered by homemade pies, biscuits, and stories passed around the family table.
After earning her degree at Sullivan University and a food writing certificate at Lane Community College, she turned her passion into a craft: sharing recipes that are simple, soulful, and always full of heart.
She’s big on bold flavors, flexible ideas, and creating sweets that fit any table (yes, even if you’re gluten-free). When she’s not baking, you’ll find her wandering farmers’ markets, styling food for the next photo shoot, or working on her ever-growing recipe journal.