
Dreamy Easter Fudge With Mini Eggs Recipe: Sweet Spring Magic
Whipping up this delectable easter fudge with mini eggs brings pure chocolate magic right to your kitchen counter.
Sweet moments of joy emerge from simple ingredients blended with care.
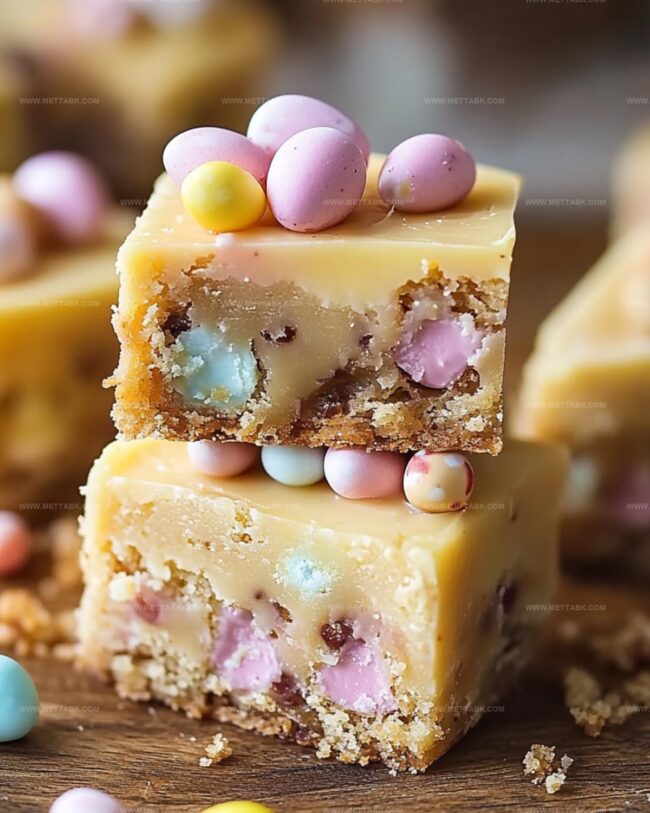
Pastel-colored candies peek through creamy layers, creating a dessert that sparkles with springtime cheer.
Chocolate lovers will adore how effortlessly this recipe comes together with minimal effort.
Soft, velvety textures mingle with crunchy candy shells, promising a delightful treat for everyone.
Small hands can help mix and decorate, making this a perfect family baking adventure.
Grab your mixing bowl and let the delicious memories begin!
Easter Fudge with Mini Eggs to Savor
Ingredients for Easter Fudge with Mini Eggs
For the Base:For the Flavor Enhancers:For the Topping and Mix-ins:Step-by-Step Easter Fudge Instructions
Step 1: Prepare Chocolate Base
Grab a microwave-safe bowl and combine chopped chocolate, sweetened condensed milk, and butter. Microwave in short 30-second bursts, stirring gently between each interval.
Continue until the mixture transforms into a silky, smooth chocolate blend. Stir in vanilla extract to enhance the rich flavor.
Step 2: Incorporate Colorful Eggs
Gently fold about half of the mini eggs into the chocolate mixture. You can choose to crush them or leave them whole for different textures.
Keep some eggs aside for a beautiful topping.
Step 3: Create Fudge Layer
Line an 8×8-inch baking pan with parchment paper, ensuring full coverage of the bottom and sides.
Pour the luscious chocolate mixture into the prepared pan. Use a spatula to create an even, smooth surface.
Artfully press the remaining mini eggs on top, creating a festive and colorful design.
Step 4: Chill and Serve
Place the pan in the refrigerator and let the fudge set for a minimum of 2 hours.
The fudge should become firm and solid. Once completely chilled, lift the parchment paper from the pan and slice into delectable small squares.
Serve and enjoy your Easter-themed treat!
Pro Tips for Smooth Easter Fudge

Flavor Variations for Easter Fudge

Best Pairings with Easter Fudge
Storage Recommendations for Easter Fudge
Store the fudge in an airtight container with parchment paper between layers to prevent sticking. Keeps fresh for up to 7 days in the refrigerator.
Wrap individual fudge pieces tightly in plastic wrap, then place in a freezer-safe container. Fudge stays delicious for 2-3 months when frozen.
Remove frozen fudge from the freezer and let it sit in the refrigerator overnight. Allow pieces to come to room temperature for 15-20 minutes before serving for best texture.
Microwave individual pieces on 50% power for 5-10 seconds if you prefer a slightly softer consistency, but avoid overheating to maintain the fudge’s smooth texture.
FAQs
Look for a smooth, glossy texture with no solid chocolate chunks. Stir frequently during microwaving to prevent burning and ensure even melting.
Yes, you can use milk, dark, or white chocolate based on your preference. Just ensure you choose a good quality chocolate that melts smoothly.
Substitute with similar colorful chocolate candies like M&Ms or chopped chocolate bars. The goal is to add a festive, colorful touch to the fudge.
Crush them into small, uneven pieces – some chunks and some fine crumbs. This gives the fudge interesting texture and ensures chocolate bits are distributed throughout.
Print
Easter Fudge With Mini Eggs Recipe
- Total Time: 15 minutes
- Yield: 16 1x
Description
Chocolate lovers rejoice with this delightful Easter Fudge with Mini Eggs, a sweet celebration of spring’s favorite treat. Creamy chocolate blends perfectly with crunchy candy-coated eggs, creating a festive dessert you’ll crave long after the holiday.
Ingredients
Main Ingredients:
- 12 ounces (340 grams) white chocolate (or milk chocolate), chopped
- 14 ounces (1 can) sweetened condensed milk
Flavor Enhancers:
- 1 tablespoon butter
- 1 teaspoon vanilla extract
Decorative Ingredients:
- 1/2 cup mini chocolate eggs (Cadbury Mini Eggs or M&Ms), some whole and some crushed
Instructions
- Combine chocolate, sweetened condensed milk, and butter in a microwave-safe bowl. Microwave in 30-second increments, stirring between each interval, until chocolate melts completely and mixture becomes silky smooth.
- Incorporate vanilla extract into the glossy chocolate mixture, stirring until fully integrated.
- Gently crush approximately half of the mini eggs and fold them into the fudge base, ensuring even distribution throughout the mixture.
- Prepare an 8×8-inch pan by lining it with parchment paper, allowing slight overhang for easy removal.
- Transfer the fudge mixture into the prepared pan, using a spatula to create an even surface.
- Artfully arrange the remaining whole and crushed mini eggs across the top of the fudge, pressing them gently to secure.
- Place the pan in the refrigerator and chill for 2 hours or until the fudge sets completely and becomes firm to the touch.
- Once set, lift the parchment paper to remove the fudge from the pan and slice into bite-sized squares using a sharp knife.
- Store the fudge in an airtight container in the refrigerator for up to one week.
Notes
- Choose high-quality milk or dark chocolate for a richer, more decadent fudge that melts smoothly and provides deeper flavor complexity.
- Gently crush mini eggs with a rolling pin to create varied texture, allowing some pieces to remain chunky while others become fine crumbs for visual interest.
- Let the fudge sit at room temperature for 10-15 minutes before serving to achieve the perfect soft, melt-in-your-mouth consistency that isn’t too hard or too soft.
- Swap regular chocolate for dairy-free alternatives and use condensed coconut milk to make this treat suitable for those with lactose sensitivities or following vegan diets.
- Prep Time: 15 minutes
- Cook Time: 0 minutes
- Category: Desserts, Snacks
- Method: Melting
- Cuisine: British
Nutrition
- Serving Size: 16
- Calories: 183
- Sugar: 21 g
- Sodium: 27 mg
- Fat: 8 g
- Saturated Fat: 5 g
- Unsaturated Fat: 3 g
- Trans Fat: 0.1 g
- Carbohydrates: 26 g
- Fiber: 0.3 g
- Protein: 2 g
- Cholesterol: 10 mg
Nate Harper
Founder & Recipe Curator
Expertise
Single-Recipe Development, Farm-to-Table Cooking, Seasonal Menu Planning, Culinary Storytelling, Home Kitchen Innovation
Education
Cascade Culinary Institute – Central Oregon Community College
Certificate in Culinary Arts
Focus: Farm-to-table cuisine, sustainable cooking practices, and seasonal recipe creation.
Nate studied under experienced chefs who emphasized local sourcing, minimal waste, and building recipes from fresh, simple ingredients.
Nate Harper is the founder and creative force behind Make, Take, Bake. Raised in the wild beauty of Oregon’s high desert, Nate grew up surrounded by family gardens, farmers’ markets, and home kitchens that celebrated the seasons.
His early love for simple, honest food evolved into a professional passion when he attended Cascade Culinary Institute, where he sharpened his skills in creating recipes that are sustainable, satisfying, and made for everyday life.
Nate’s goal is to make cooking feel accessible, free of fuss, and full of flavor. He believes a single, thoughtfully built dish can stand alone, and sometimes even steal the show.