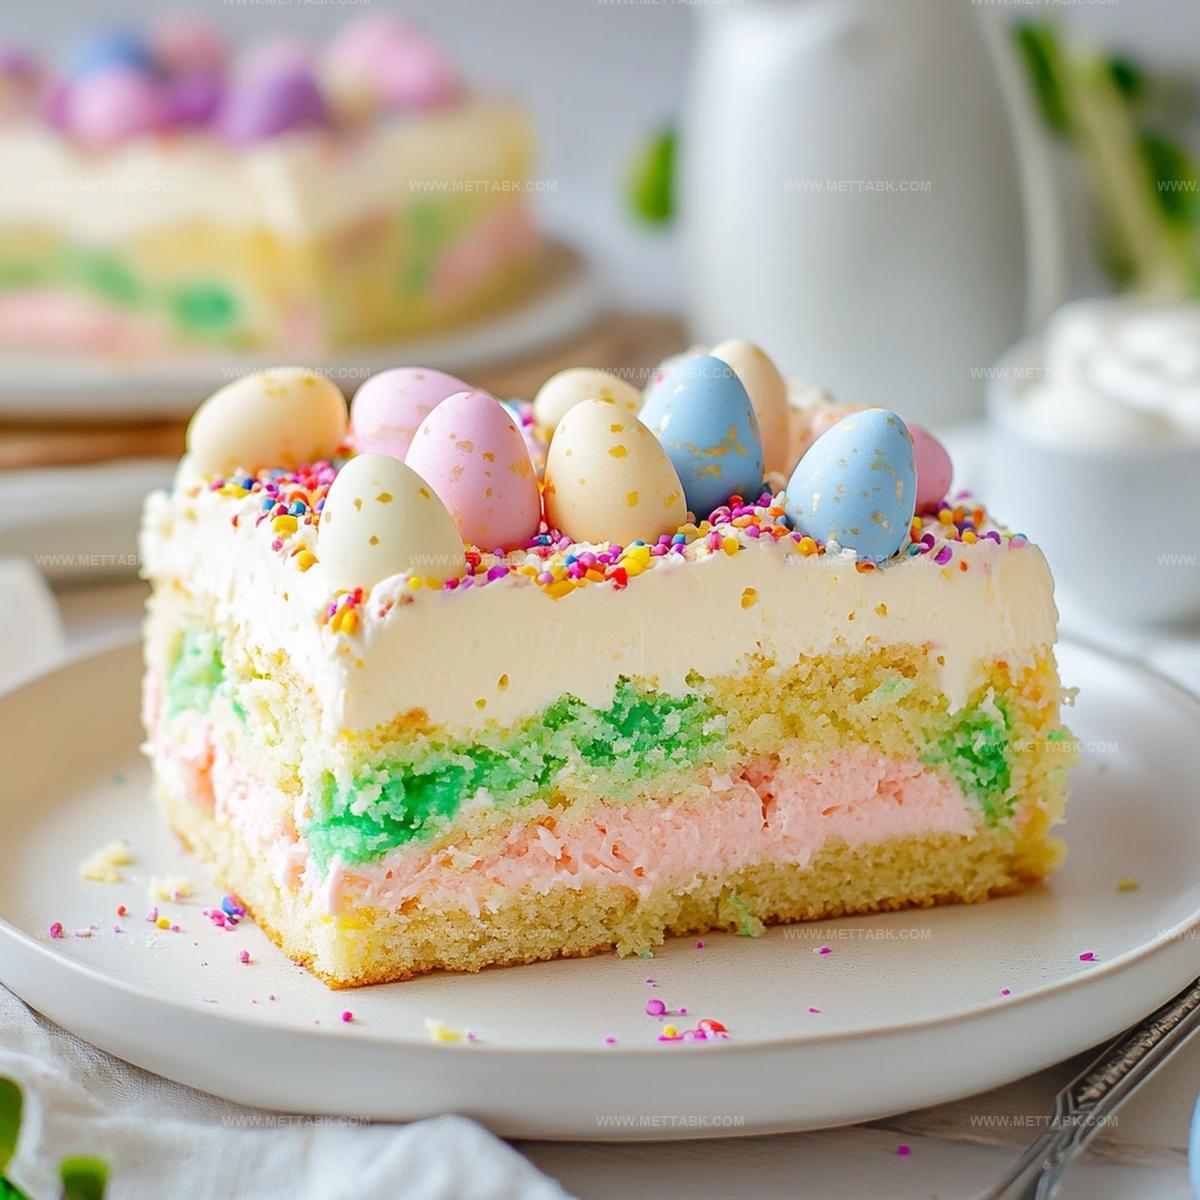
Colorful Easter Poke Cake Recipe That’s Foolproof & Fabulous
Crafting an easter poke cake brings pure springtime magic right to your dessert table.
Sweet memories of childhood celebrations dance through this delightful treat.
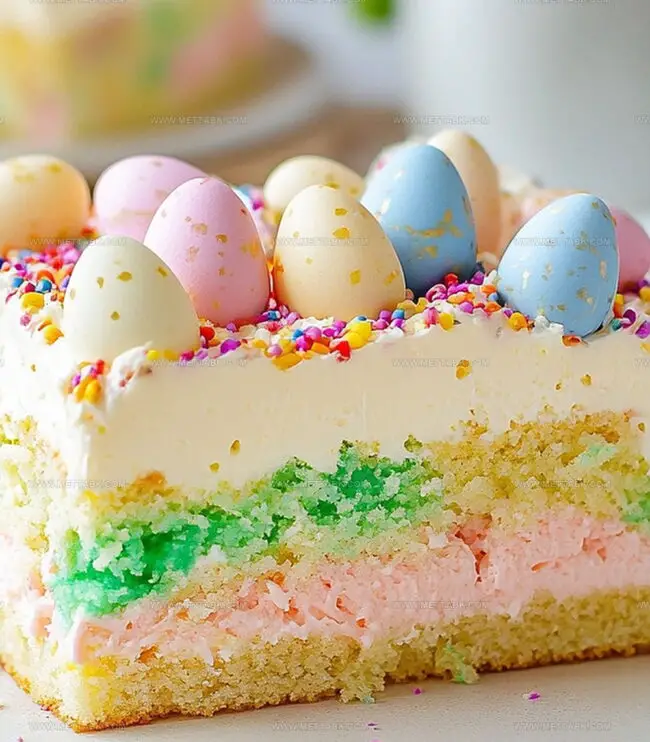
Marshmallow-like textures and pastel colors make this dessert irresistibly charming.
Creamy layers promise a delectable experience that surprises and delights.
Springtime gatherings deserve something special that sparks joy and conversation.
Soft, moist cake infused with vibrant flavors will become your new favorite seasonal indulgence.
Come explore this simple yet spectacular dessert that everyone will adore.
Easter Poke Cake That Delights Every Crowd
Ingredients for Sweet and Colorful Easter Poke Cake
Cake Base:Gelatin Layer:Topping:Steps to Assemble Easter Poke Cake Easily
Step 1: Warm Up The Oven
Crank the oven to a toasty 350°F. Grab your 9×13 inch baking dish and give it a quick spray of cooking oil to prevent any sticky situations.
Step 2: Whip Up The Cake Batter
Grab a large mixing bowl and combine:Blend everything until the mixture looks smooth and creamy with no lumps.
Step 3: Bake The Cake Base
Pour the batter into the prepared baking dish.
Slide it into the preheated oven and bake for 30-35 minutes. Check doneness by inserting a toothpick – it should come out clean when the cake is ready.
Step 4: Create Cake Holes
Let the cake cool down slightly. Take a fork and playfully poke holes all across the cake’s surface.
These little tunnels will help the gelatin seep in beautifully.
Step 5: Add Colorful Gelatin
Dissolve gelatin powder in boiling water.
Carefully pour the liquid gelatin evenly over the cake, making sure it fills all those lovely fork holes.
Step 6: Chill And Set
Place the cake in the refrigerator and let it cool completely for at least two hours.
This helps the gelatin set and the flavors meld together.
Step 7: Top And Decorate
Spread a generous layer of whipped topping over the chilled cake.
Sprinkle some festive Easter-themed sprinkles on top for a fun, colorful finish.
Tips for Moist and Flavorful Easter Poke Cake
Creative Twists on Easter Poke Cake
Pairings That Enhance Easter Poke Cake Experience
Storage Ideas to Keep Easter Poke Cake Fresh
FAQs
Use a slow, steady pour directly into each hole, letting the gelatin naturally seep down into the cake’s interior. Move systematically across the cake to ensure even distribution.
Absolutely! While the recipe suggests traditional flavors, you can experiment with different colors and tastes like strawberry, lime, or berry to match your Easter theme and create a unique dessert.
A standard white or vanilla cake mix is ideal for this recipe. The neutral flavor allows the gelatin and toppings to shine while providing a perfect base for the poke cake technique.
Print
Easter Poke Cake Recipe
- Total Time: 55 minutes
- Yield: 12 1x
Description
Delightful easter poke cake brings springtime flavors to dessert tables with creamy layers of pastel sweetness. Festive and easy to prepare, this dessert will charm guests with its simple yet elegant presentation.
Ingredients
- 1 package (3 oz) gelatin powder (any color)
- 1 cup water (or milk for richness)
- 1 box vanilla cake mix
- 3 large eggs (room temperature)
- 1/2 cup vegetable oil
- 1 tub (8 oz) whipped topping
- 1/4 cup sprinkles
Instructions
- Preheat the oven to 350°F and prepare a 9×13 inch baking dish with a light grease coating.
- Combine cake mix ingredients in a large mixing bowl, blending until the mixture achieves a smooth, consistent texture.
- Transfer the cake batter into the prepared baking dish, ensuring even distribution.
- Bake for 30-35 minutes, checking doneness by inserting a toothpick into the center – it should emerge clean.
- Allow the cake to cool for approximately 10-15 minutes after removing from the oven.
- Using a fork, create systematic rows of holes across the entire cake surface, ensuring deep and evenly spaced punctures.
- Prepare gelatin by dissolving powder completely in boiling water, creating a vibrant liquid mixture.
- Carefully pour the gelatin over the cake, allowing it to seep into the poked holes, distributing evenly across the surface.
- Refrigerate the cake for at least 2 hours to set the gelatin and allow flavors to absorb.
- Once chilled, spread a generous layer of whipped topping across the entire cake surface.
- Sprinkle colorful Easter-themed decorative sprinkles over the whipped topping for a festive finish.
- Return to refrigerator until ready to serve, keeping the cake chilled for optimal texture and taste.
Notes
- Experiment with different cake mix flavors like lemon or funfetti for a unique twist on the classic recipe.
- Use pastel-colored gelatin to enhance the Easter theme and create a festive, springtime look.
- For a lighter version, substitute low-fat cake mix and sugar-free gelatin to reduce calories without compromising taste.
- Create a gluten-free option by using a gluten-free cake mix and checking that all ingredients are certified gluten-free.
- Prep Time: 20 minutes
- Cook Time: 35 minutes
- Category: Desserts
- Method: Baking
- Cuisine: American
Nutrition
- Serving Size: 12
- Calories: 244 kcal
- Sugar: 18 g
- Sodium: 210 mg
- Fat: 12 g
- Saturated Fat: 3 g
- Unsaturated Fat: 9 g
- Trans Fat: 0.1 g
- Carbohydrates: 30 g
- Fiber: 0.5 g
- Protein: 2.5 g
- Cholesterol: 37 mg
Clara Bennett
Contributing Recipe Developer & Food Writer
Expertise
Baking and Pastry Development, Gluten-Free and Allergy-Friendly Recipe Creation, Culinary Storytelling and Food Journalism, Recipe Testing and Standardization, Southern Comfort Foods and Modern Twists
Education
Sullivan University – National Center for Hospitality Studies
Associate Degree in Culinary Arts
Focus: Baking and Pastry Arts, Recipe Testing, and Culinary Journalism.
Clara specialized in crafting desserts that blend classic Southern comfort with modern techniques, while developing strong writing skills to tell the story behind every dish.
Lane Community College (Certificate Program)
Certificate in Food Writing and Photography
Focus: Culinary storytelling, recipe formatting, food styling, and visual presentation.
Clara’s love of baking started young, powered by homemade pies, biscuits, and stories passed around the family table.
After earning her degree at Sullivan University and a food writing certificate at Lane Community College, she turned her passion into a craft: sharing recipes that are simple, soulful, and always full of heart.
She’s big on bold flavors, flexible ideas, and creating sweets that fit any table (yes, even if you’re gluten-free). When she’s not baking, you’ll find her wandering farmers’ markets, styling food for the next photo shoot, or working on her ever-growing recipe journal.