
The Ultimate No-Bake Chocolate Biscuit Cake Recipe You’ll Adore
Crafting a delightful no-bake chocolate biscuit cake brings pure joy to your kitchen adventures.
Sweet memories of childhood treats dance through this simple dessert.
Crumbly biscuits merge with rich chocolate, creating a magical combination that melts hearts.
Minimal effort transforms basic ingredients into an irresistible confection.
Kitchen novices and seasoned bakers alike can master this delectable creation with ease.
Cool and creamy textures promise a perfect treat for any occasion.
You’ll fall in love with how quickly this dessert comes together, making it your new go-to indulgence.
No-Bake Chocolate Biscuit Cake That Melts in Your Mouth
Ingredients for Chocolate Biscuit Cake
For the Base Ingredients:For the Binding Ingredients:For the Preparation Ingredients:How to Assemble No-Bake Chocolate Biscuit Cake
Step 1: Crumble Biscuits into Delightful Pieces
Grab your favorite biscuits and break them into chunky, uneven pieces. The irregular shapes will add texture and character to your chocolate treat.
Choose biscuits that are crisp and sturdy like graham crackers, digestive biscuits, or shortbread.
Step 2: Prepare Your Baking Canvas
Select a loaf pan and line it with parchment paper, letting the edges hang over for easy removal.
Alternatively, you can use aluminum foil to create a roll-style cake. Ensure the pan or foil is clean and dry.
Step 3: Craft the Luscious Chocolate Mixture
Grab a spacious mixing bowl and combine these ingredients:Whisk the ingredients together until they transform into a silky, glossy chocolate sauce. The mixture should look smooth and have a luxurious sheen.
Step 4: Marry Biscuits with Chocolate Goodness
Gently fold the crumbled biscuit pieces into the chocolate mixture. Use a spatula to ensure every single piece gets coated in the decadent sauce.
The goal is to create a uniform chocolate-covered texture.
Step 5: Shape Your Chocolate Creation
Transfer the mixture into your prepared pan or shape it into a log using the aluminum foil.
Press down firmly to eliminate air pockets and create a compact structure.
Step 6: Chill to Perfection
Place your chocolate biscuit cake in the freezer for 2-3 hours.
The cold temperature will help the cake set and develop a firm, slice-able consistency.
Step 7: Slice and Savor
Remove the cake from the freezer and slice into beautiful portions.
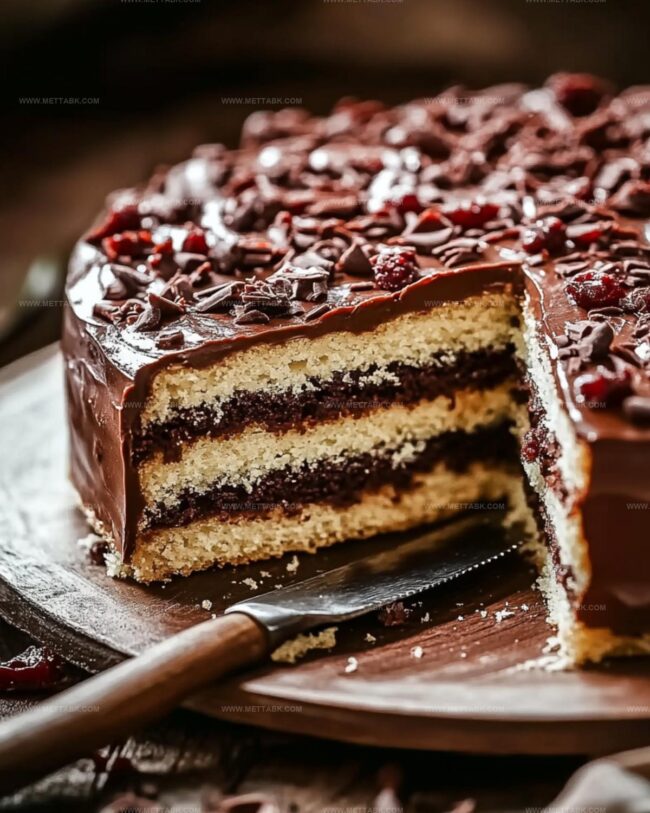
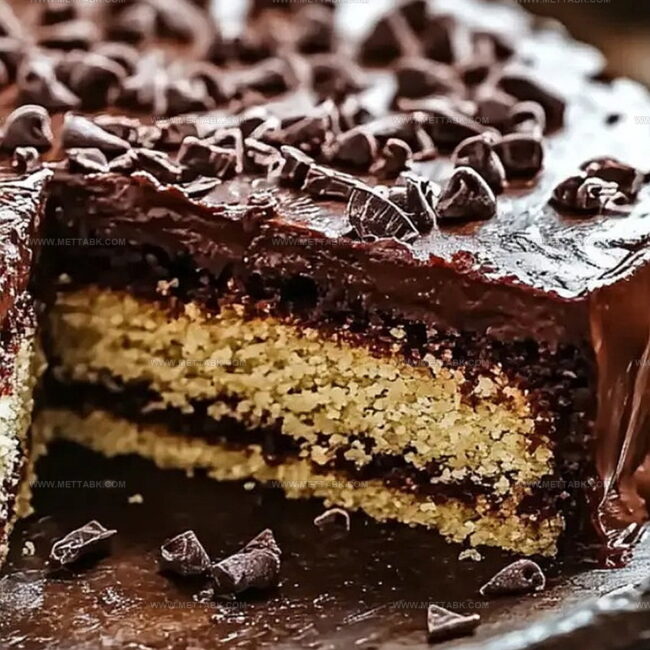
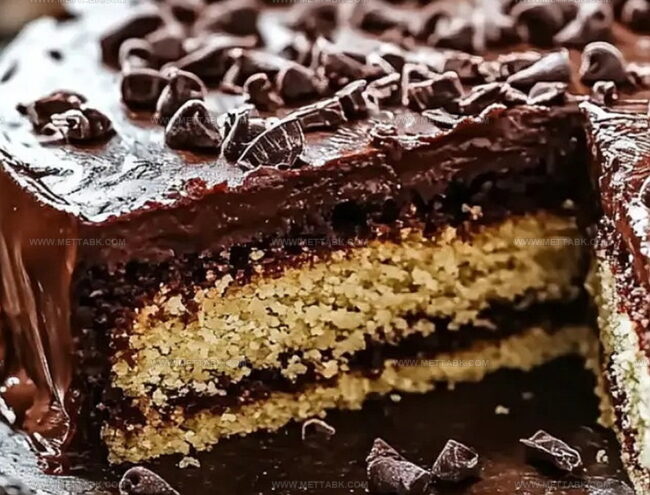
Each slice will reveal a delightful mosaic of chocolate-covered biscuit pieces. Store any leftovers in the freezer for future indulgence.
Tips for Smooth No-Bake Biscuit Cake
Flavor Variations for Chocolate Biscuit Cake
What to Serve with Chocolate Biscuit Cake
Storing Your Chocolate Biscuit Cake
Place leftover slices in an airtight container with parchment paper between layers. Keep chilled for up to 5 days, maintaining texture and flavor.
Wrap individual slices tightly in plastic wrap, then store in freezer-safe bags. Preserve quality for 2-3 months without losing taste or consistency.
Remove desired portions from freezer and let sit in refrigerator for 15-20 minutes before serving. Avoid microwaving to prevent texture breakdown.
Allow frozen slice to rest at room temperature for 10 minutes before enjoying. Slice will soften naturally without compromising delicious chocolate flavor.
FAQs
Yes, you can use various plain or sweet biscuits like digestive, graham crackers, or Marie biscuits. Just ensure they are dry and crisp for the best texture.
This basic recipe doesn’t contain nuts, but always check your specific biscuit ingredients to confirm they are nut-free.
When stored in the freezer, the cake can last up to 2-3 weeks if properly wrapped in plastic wrap or placed in an airtight container.
Absolutely! You can mix in chocolate chips, dried fruits, or sprinkle some crushed nuts on top before freezing to add more flavor and texture.
Print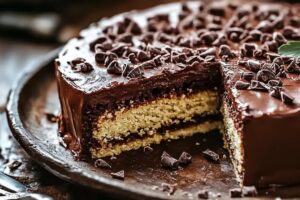
Easy No-Bake Chocolate Biscuit Cake Recipe
- Total Time: 15 minutes
- Yield: 8 1x
Description
Indulgent Chocolate Biscuit Cake brings classic Portuguese dessert magic to your kitchen with minimal effort. Rich chocolate layers blend perfectly with crunchy biscuits, promising a delightful treat you’ll savor until the last delicious bite.
Ingredients
Base Ingredients:
Chocolate and Cookie Base:
- 7 ounces (200 grams) digestive biscuits or graham crackers
- 1/2 cup (113 grams) unsalted butter
- 4 tablespoons (60 ml) cocoa powder
Chocolate Mixture:
- 1/2 cup (100 grams) granulated sugar
- 1/2 cup (120 ml) milk
- 1 teaspoon vanilla extract
Additional Toppings and Garnish:
- 3.5 ounces (100 grams) dark chocolate
- 2 tablespoons (30 ml) heavy cream
- Optional: powdered sugar for dusting
Instructions
- Crush digestive or graham crackers into rustic, uneven fragments, creating a textural base for the dessert.
- Prepare a rectangular mold by lining with parchment paper, allowing slight overhang for easy removal.
- Create a luxurious chocolate mixture by whisking melted butter with rich cocoa powder and velvety sweetened condensed milk until achieving a silky, uniform consistency.
- Incorporate the crumbled biscuit pieces into the chocolate blend, gently folding to ensure each fragment is thoroughly enrobed with the decadent coating.
- Transfer the chocolatey mixture into the prepared mold, using a spatula to compress and distribute evenly, eliminating potential air pockets.
- Chill in the freezer for approximately 2-3 hours at 0°F, allowing the dessert to solidify and develop a firm, sliceable texture.
- Remove from freezer, lift out using parchment edges, and slice into elegant portions using a sharp knife warmed under hot water for clean cuts.
- Serve immediately or store wrapped in plastic film within the freezer for future indulgence, maintaining optimal texture and flavor.
Notes
- Precision matters when breaking biscuits, aim for bite-sized chunks to ensure even coating and easier eating.
- Using high-quality cocoa powder elevates the chocolate flavor, transforming this simple dessert into a luxurious treat.
- For gluten-free options, swap regular biscuits with gluten-free alternatives like digestive or graham crackers without compromising texture.
- Control sweetness by adjusting condensed milk quantity or using dark cocoa powder for a more intense, less sugary profile.
- Prep Time: 15 minutes
- Cook Time: 0 minutes
- Category: Desserts, Snacks
- Method: Freezing
- Cuisine: British
Nutrition
- Serving Size: 8
- Calories: 280 kcal
- Sugar: 20 g
- Sodium: 120 mg
- Fat: 15 g
- Saturated Fat: 9 g
- Unsaturated Fat: 5 g
- Trans Fat: 0.2 g
- Carbohydrates: 30 g
- Fiber: 2 g
- Protein: 4 g
- Cholesterol: 25 mg
Nate Harper
Founder & Recipe Curator
Expertise
Single-Recipe Development, Farm-to-Table Cooking, Seasonal Menu Planning, Culinary Storytelling, Home Kitchen Innovation
Education
Cascade Culinary Institute – Central Oregon Community College
Certificate in Culinary Arts
Focus: Farm-to-table cuisine, sustainable cooking practices, and seasonal recipe creation.
Nate studied under experienced chefs who emphasized local sourcing, minimal waste, and building recipes from fresh, simple ingredients.
Nate Harper is the founder and creative force behind Make, Take, Bake. Raised in the wild beauty of Oregon’s high desert, Nate grew up surrounded by family gardens, farmers’ markets, and home kitchens that celebrated the seasons.
His early love for simple, honest food evolved into a professional passion when he attended Cascade Culinary Institute, where he sharpened his skills in creating recipes that are sustainable, satisfying, and made for everyday life.
Nate’s goal is to make cooking feel accessible, free of fuss, and full of flavor. He believes a single, thoughtfully built dish can stand alone, and sometimes even steal the show.