
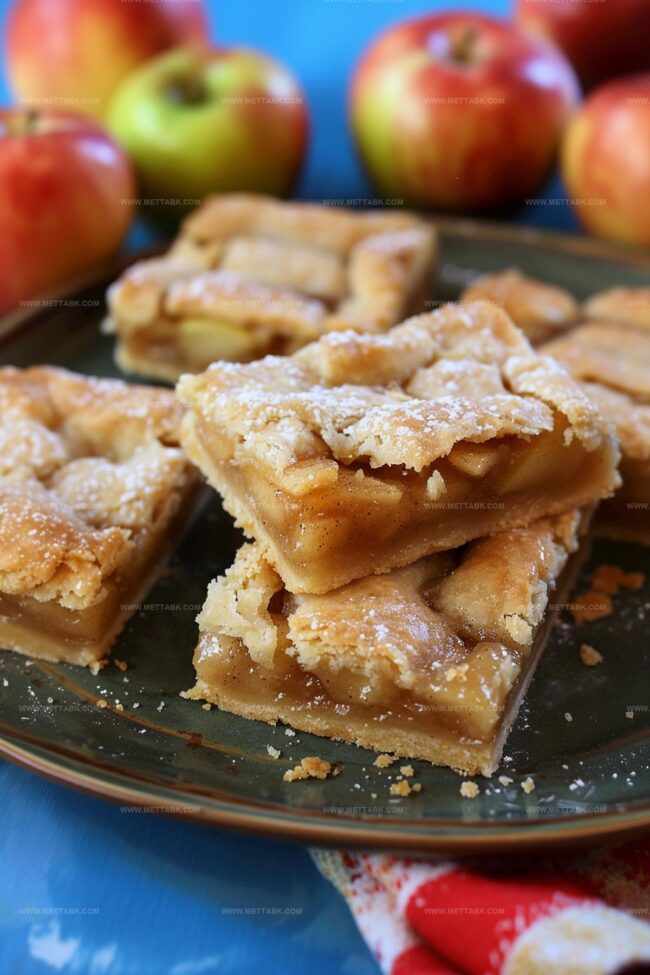
Homemade Flaky Apple Pie Bars Recipe: Sweet Fall Bliss
Crafting delectable flaky apple pie bars brings pure joy to any kitchen adventure.
Sweet aromas will soon fill your home with warmth and comfort.
Buttery pastry layers promise a delightful twist on classic dessert traditions.
Crisp autumn apples mingle with delicate spices, creating a mouthwatering experience.
Seasonal ingredients dance together in this simple yet elegant treat.
Homemade goodness awaits you with just a few basic ingredients and minimal preparation time.
Each bite promises a delightful escape into pure, comforting deliciousness.
Flaky Apple Pie Bars That Satisfy

Ingredients for Flaky Apple Pie Bars
Pie Crust and Topping:Apple Filling:Optional Additions:How to Make Flaky Apple Pie Bars
Step 1: Warm Up the Oven
Set your oven to a cozy 375°F (190°C). Grab a 9 x 13-inch baking pan and give it a quick spray with non-stick cooking spray or rub it down with butter.
Step 2: Create the Magical Base
In a spacious mixing bowl, bring together:Blend these dry ingredients until they’re best friends.
Step 3: Develop the Perfect Dough
Use a pastry cutter to work butter or shortening into the flour mixture until it looks like sandy crumbs.
In another bowl, whisk egg yolks with milk. Slowly pour the liquid into the flour mixture, stirring until a soft dough emerges.
Step 4: Divide the Dough
Separate about one-fourth of the dough – this will become your spectacular topping later.
Step 5: Build the Crust Foundation
Press the remaining dough into the pan, creating a smooth, even layer that will cradle the apple filling.
Step 6: Layer with Apple Goodness
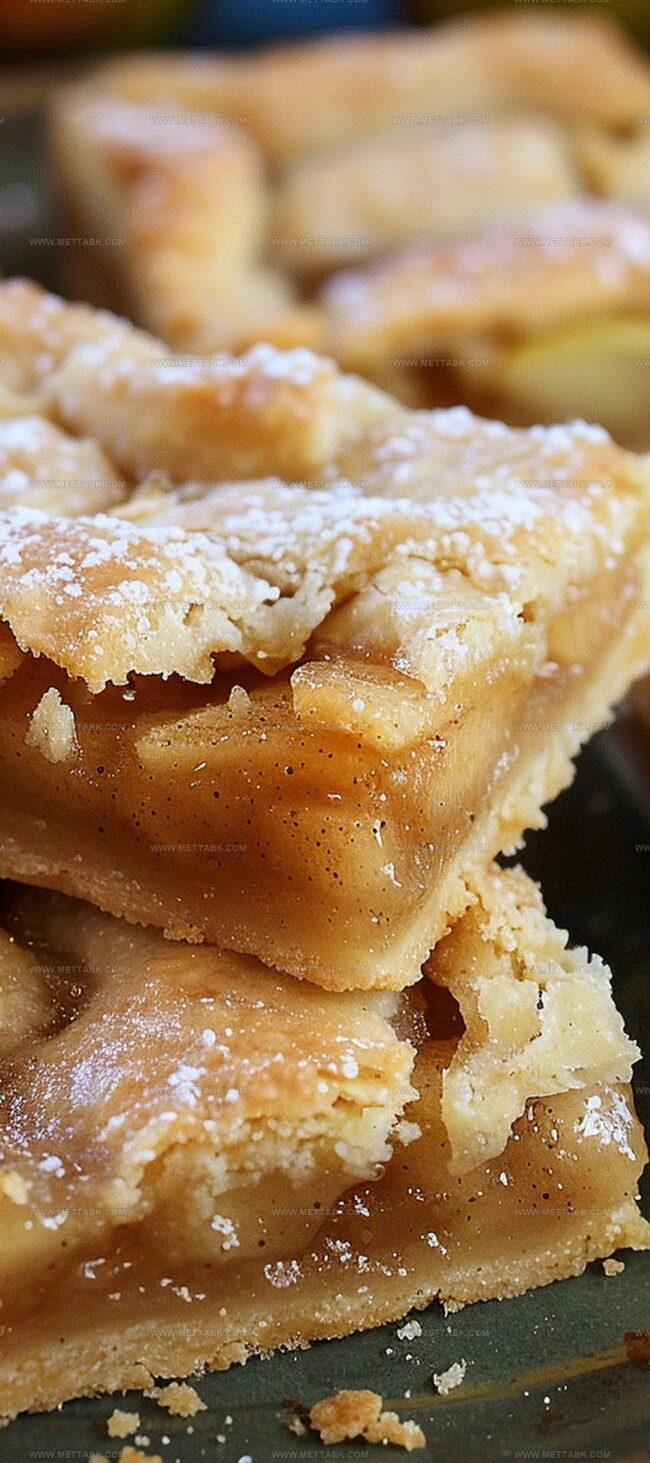
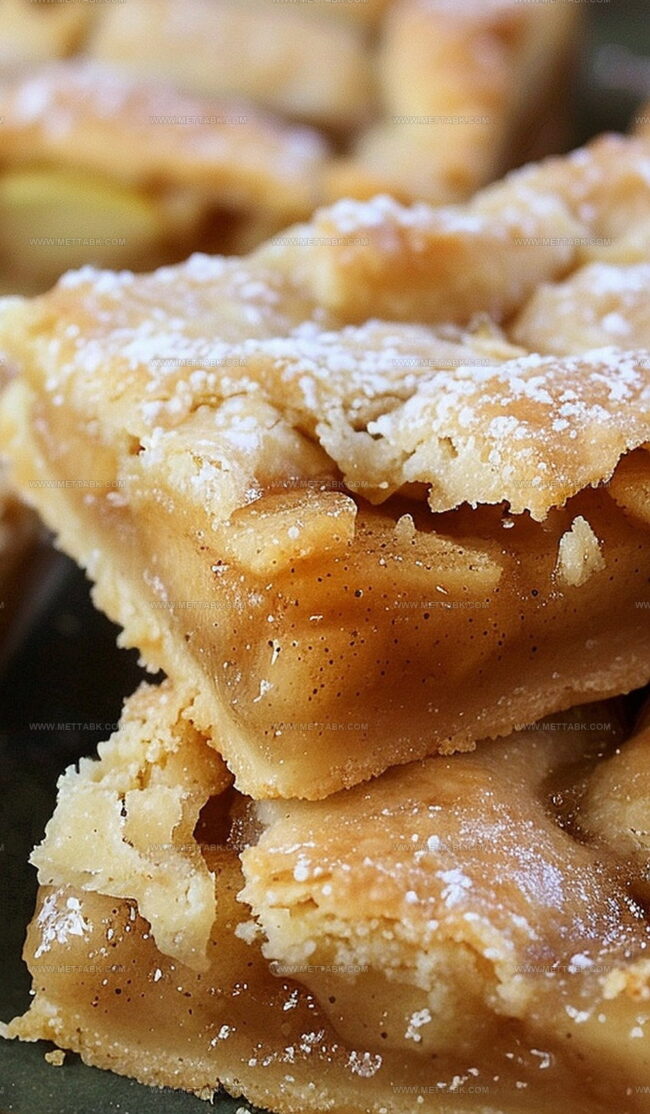
Spread sliced apples across the crust. In a small bowl, mix:Sprinkle this sweet mixture generously over the apples.
Step 7: Craft the Crumbly Topping
Take the reserved dough and mix with:Blend until it becomes a delightful, crumbly mixture. Scatter this over the apple layer.
Step 8: Bake to Perfection
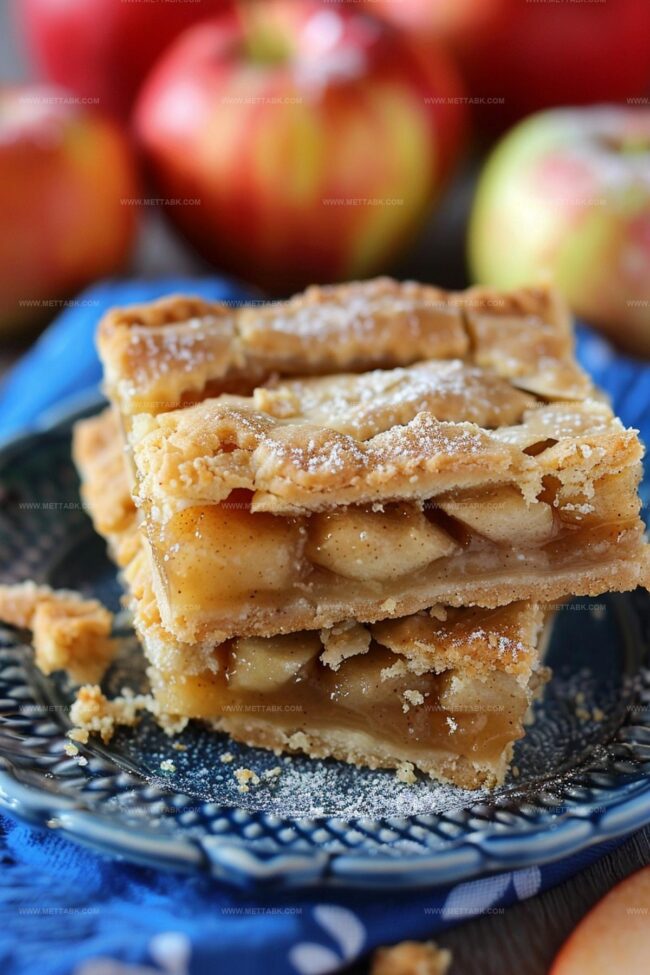
Slide the pan into the oven and bake for 40 minutes. Look for a golden-brown topping and bubbling filling – that’s your signal of deliciousness.
Step 9: Rest and Slice
Let the bars cool completely in the pan. This waiting time helps them set and makes cutting into perfect squares a breeze.
Enjoy your homemade apple pie bars!
Tips to Nail Flaky Apple Pie Bars
Variations on Flaky Apple Pie Bars

Pairing Suggestions with Flaky Apple Pie Bars
Storage Advice for Flaky Apple Pie Bars

FAQs
Brown sugar adds moisture and a deeper caramel-like flavor, while granulated sugar provides sweetness and helps create a crisp texture in the apple pie bars.
Yes, you can replace pecans with walnuts, almonds, or simply omit nuts if you have allergies or prefer a nut-free version of the bars.
Look for a golden brown topping and bubbling filling around the edges. The crust should be firm and slightly crisp when it’s done baking.
Print
Flaky Apple Pie Bars Recipe
- Total Time: 1 hour 10 minutes
- Yield: 12 1x
Description
Homemade Flaky Apple Pie Bars showcase classic American dessert flavors in a convenient handheld treat. Crisp pastry and caramelized apples blend perfectly for a delightful experience you’ll savor with each delectable bite.
Ingredients
- 8 small apples (Granny Smith, peeled, cored, and thinly sliced)
- 1 cup (230 g) butter or vegetable shortening
- 2 ½ cups (315 g) all-purpose flour
- 2 tbsps granulated sugar
- ½ cup (100 g) granulated sugar
- ¼ cup (50 g) brown sugar
- 2 egg yolks
- ½ cup (120 ml) milk
- 1 tsp ground cinnamon
- 2 tbsps all-purpose flour
- 1 tbsp brown sugar
- 1 tbsp granulated sugar
- Handful of crushed pecans
Instructions
- Prepare the oven environment at 375°F (190°C), positioning the rack in the center. Coat a 9 x 13-inch baking pan with non-stick spray or butter to ensure easy removal.
- Create the foundational pastry mixture by combining flour and granulated sugar in a large mixing bowl. Blend these dry components thoroughly until uniformly integrated.
- Transform the dry ingredients into a cohesive dough by cutting cold butter into the flour using a pastry cutter until the texture resembles coarse, pebble-like crumbs. Whisk egg yolks with milk in a separate vessel, then gradually incorporate this liquid into the flour mixture, stirring consistently until a uniform dough emerges.
- Partition the dough, reserving approximately one-fourth for the crumb topping. This separated portion will later add textural complexity to the dessert.
- Press the primary dough portion into the prepared pan, ensuring an even, compact base that covers the entire bottom surface.
- Arrange apple slices across the dough base in an overlapping pattern. Sprinkle a harmonious blend of brown sugar, granulated sugar, and cinnamon uniformly over the fruit layer.
- Craft the crumb topping by combining the reserved dough with brown sugar, crushed pecans, additional granulated sugar, and flour. Mix until the consistency becomes delightfully crumbly, then distribute this mixture generously over the seasoned apples.
- Slide the pan into the preheated oven and bake for 40 minutes. Monitor until the topping achieves a golden-brown hue and the filling becomes effervescent and bubbling.
- Remove from the oven and allow the bars to cool completely within the pan. This resting period enables the dessert to stabilize, facilitating clean, precise cutting into elegant squares.
Notes
- Choose cold butter or shortening to ensure the most flaky, tender crust texture that melts in your mouth.
- Dice apples uniformly to guarantee even cooking and consistent texture throughout the bars.
- Experiment with different apple varieties like Honeycrisp, Granny Smith, or Braeburn for varied flavor profiles and sweetness levels.
- Add a pinch of nutmeg or allspice to the sugar mixture to enhance the warm, aromatic fall-inspired flavors of the dessert.
- Prep Time: 30 minutes
- Cook Time: 40 minutes
- Category: Desserts
- Method: Baking
- Cuisine: American
Nutrition
- Serving Size: 12
- Calories: 298 kcal
- Sugar: 21 g
- Sodium: 72 mg
- Fat: 16 g
- Saturated Fat: 7 g
- Unsaturated Fat: 8 g
- Trans Fat: 0.3 g
- Carbohydrates: 38 g
- Fiber: 2 g
- Protein: 3 g
- Cholesterol: 70 mg
Clara Bennett
Contributing Recipe Developer & Food Writer
Expertise
Baking and Pastry Development, Gluten-Free and Allergy-Friendly Recipe Creation, Culinary Storytelling and Food Journalism, Recipe Testing and Standardization, Southern Comfort Foods and Modern Twists
Education
Sullivan University – National Center for Hospitality Studies
Associate Degree in Culinary Arts
Focus: Baking and Pastry Arts, Recipe Testing, and Culinary Journalism.
Clara specialized in crafting desserts that blend classic Southern comfort with modern techniques, while developing strong writing skills to tell the story behind every dish.
Lane Community College (Certificate Program)
Certificate in Food Writing and Photography
Focus: Culinary storytelling, recipe formatting, food styling, and visual presentation.
Clara’s love of baking started young, powered by homemade pies, biscuits, and stories passed around the family table.
After earning her degree at Sullivan University and a food writing certificate at Lane Community College, she turned her passion into a craft: sharing recipes that are simple, soulful, and always full of heart.
She’s big on bold flavors, flexible ideas, and creating sweets that fit any table (yes, even if you’re gluten-free). When she’s not baking, you’ll find her wandering farmers’ markets, styling food for the next photo shoot, or working on her ever-growing recipe journal.