Quick & Zesty Fried Olives With Garlic Aioli Recipe
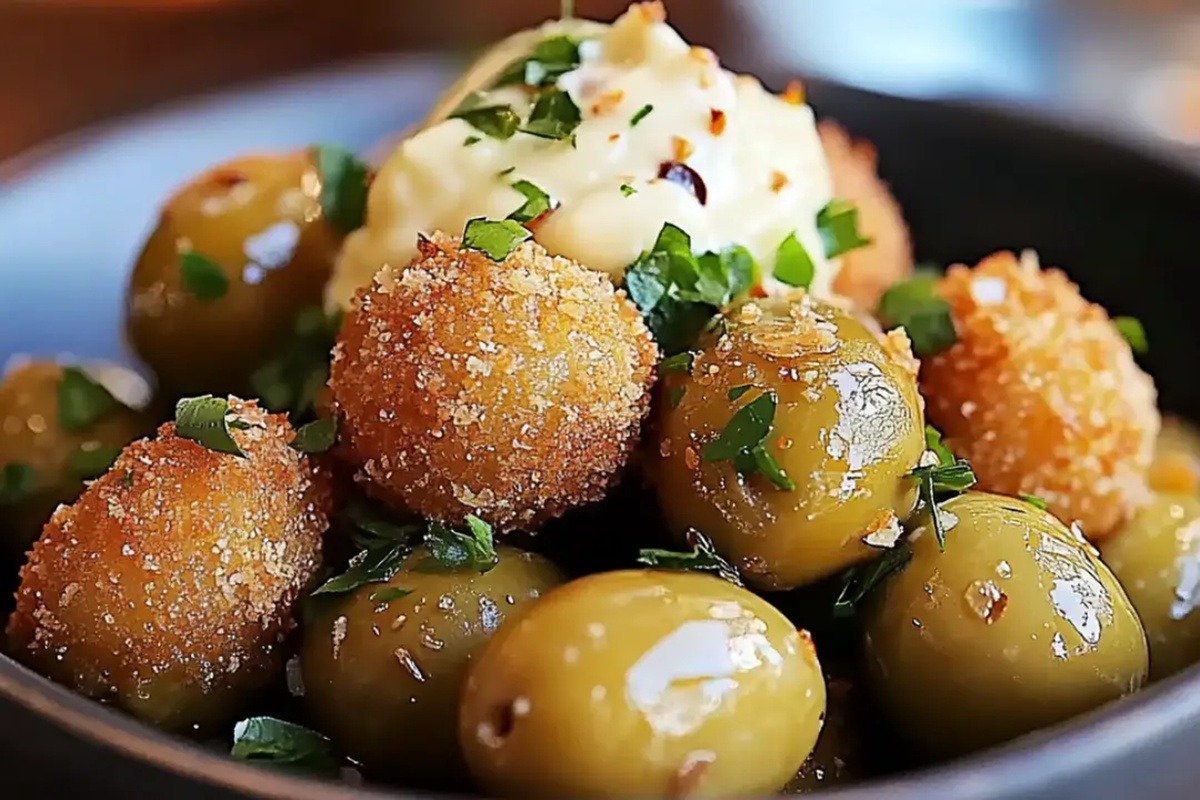
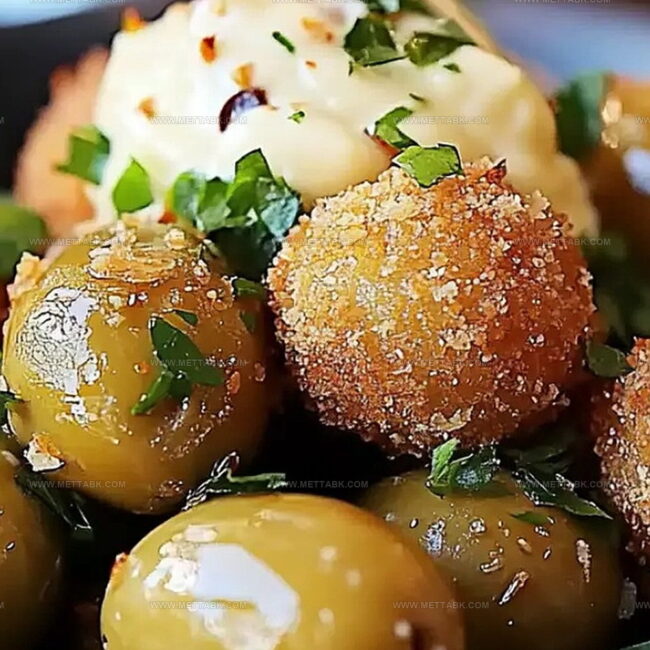
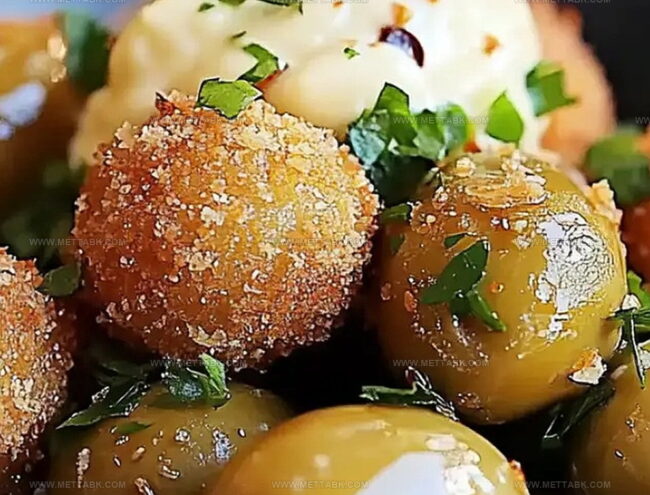
Crispy, golden fried olives with garlic aioli pack a surprising punch of Mediterranean flavor that will make you rethink appetizer possibilities.
Olive lovers understand the magic of transforming these briny gems into crunchy delights.
Unexpected textures create culinary excitement when each olive becomes a perfect golden-brown morsel.
Garlic aioli adds a creamy, zesty companion that complements the salty olive crunch.
Simple ingredients dance together in this quick recipe that feels like a gourmet secret.
Unexpected and delightful, these bite-sized treats will become your new favorite conversation starter at any gathering.
Reasons to Love Fried Olives with Garlic Aioli
Ingredients Needed for Fried Olives with Garlic Aioli
For the Main Ingredient:For the Breading Components:For the Seasoning and Dip:For the Cooking:For the Finishing:How to Prepare Fried Olives with Garlic Aioli Properly
Step 1: Whisk Creamy Garlic Aioli
Blend all aioli ingredients smoothly until well combined:Set the aioli aside to let flavors meld together.
Step 2: Prepare Breading Stations
Create three separate shallow dishes for coating process:Step 3: Coat Olives Completely
Roll each olive systematically through coating stations:Step 4: Heat Cooking Oil
Warm vegetable oil in heavy-bottomed skillet over medium heat until shimmering.
Step 5: Fry Olive Batch
Carefully place breaded olives into hot oil, cooking in small batches:Step 6: Drain Excess Oil
Transfer fried olives onto paper towel-lined plate to absorb extra oil.
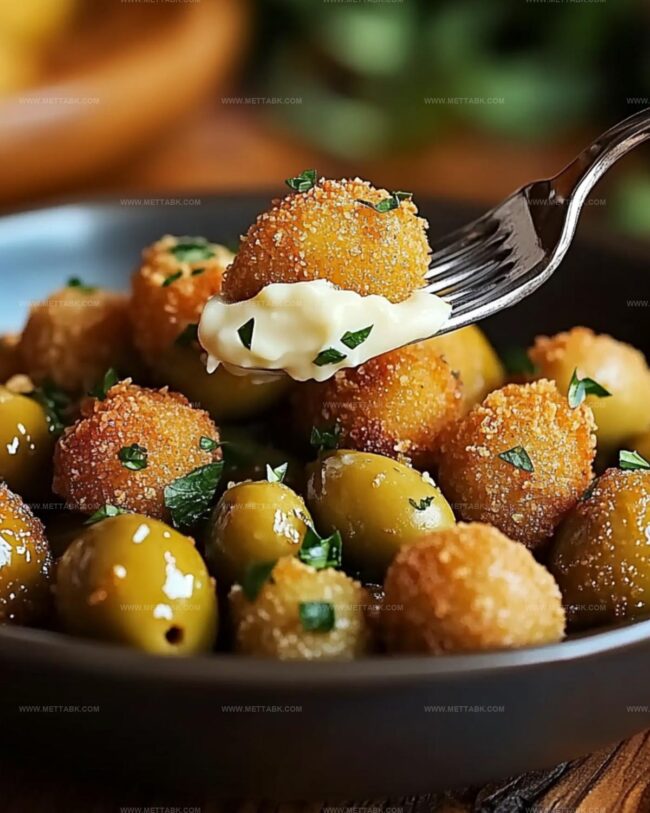
Step 7: Serve Immediately
Arrange crispy olives on serving platter with aioli dipping sauce.
Helpful Tips for Crispy Fried Olives With Aioli
Variations to Try With Fried Olives and Aioli
What Goes Well With Fried Olives and Garlic Aioli
How to Store Fried Olives With Garlic Aioli
FAQs
Green or black olives with pits removed work perfectly. Kalamata or Spanish olives provide excellent flavor and texture for frying.
Yes, you can prepare the garlic aioli up to 2 days in advance and store it covered in the refrigerator. This helps the flavors blend and intensify.
Pat the olives dry before breading and make sure the oil is hot enough (around 350°F) before frying. Don’t overcrowd the pan, which helps maintain crispiness.
Not in its current form. To make it gluten-free, substitute regular breadcrumbs with gluten-free breadcrumbs and use gluten-free flour for coating.
Print
Fried Olives With Garlic Aioli Recipe
- Total Time: 30 minutes
- Yield: 4 1x
Description
Crispy fried olives with garlic aioli elevate Mediterranean snacking to a delightful culinary adventure. Bold flavors and crunchy textures combine in this irresistible appetizer that will surprise and delight guests craving something unique.
Ingredients
Main Ingredients:
- 1 cup green olives, drained
- 1 cup breadcrumbs
- 1/2 cup all-purpose flour
- 2 large eggs, beaten
Seasoning:
- 2 cloves garlic, minced
- 1 tablespoon lemon juice
- Salt to taste
- Pepper to taste
Sauce:
- 1/2 cup mayonnaise
Instructions
- Craft a zesty garlic aioli by whisking mayonnaise with finely chopped garlic, a splash of tangy lemon juice, and a pinch of salt and pepper. Refrigerate to let flavors meld.
- Arrange three shallow dishes: one with flour, another with whisked eggs, and the third with crisp breadcrumbs.
- Roll each olive first in flour, ensuring a light, even coating that helps eggs adhere. Shake off excess.
- Dunk floured olives into beaten eggs, allowing any drips to fall back into the bowl.
- Transfer eggs-coated olives to breadcrumbs, gently pressing to create a uniform, crunchy exterior.
- Heat vegetable oil in a heavy skillet to 350°F, maintaining a consistent temperature for even browning.
- Carefully lower breaded olives into hot oil, working in small batches to prevent overcrowding.
- Fry for 2-3 minutes, rotating occasionally, until they transform into golden-brown, crispy morsels.
- Extract olives using a slotted spoon, letting excess oil drip back into the pan.
- Transfer to a paper towel-lined plate to absorb residual oil and maintain crispness.
- Plate the sizzling olives alongside the chilled garlic aioli for dipping.
- Serve immediately while olives are hot and aioli is cool for maximum flavor contrast.
Notes
- Choose green olives with firm texture for best frying results, as they hold their shape better during cooking.
- Ensure oil temperature stays around 350°F to prevent olives from becoming greasy or burning quickly.
- Pat olives completely dry before breading to help coating stick better and create crispier exterior.
- For gluten-free version, swap regular breadcrumbs with almond flour or gluten-free panko crumbs.
- Prep Time: 20 minutes
- Cook Time: 10 minutes
- Category: Appetizer, Snacks
- Method: Frying
- Cuisine: Mediterranean
Nutrition
- Serving Size: 4
- Calories: 303 kcal
- Sugar: 1 g
- Sodium: 747 mg
- Fat: 27 g
- Saturated Fat: 4 g
- Unsaturated Fat: 22 g
- Trans Fat: 0 g
- Carbohydrates: 14 g
- Fiber: 3 g
- Protein: 6 g
- Cholesterol: 93 mg
Clara Bennett
Contributing Recipe Developer & Food Writer
Expertise
Baking and Pastry Development, Gluten-Free and Allergy-Friendly Recipe Creation, Culinary Storytelling and Food Journalism, Recipe Testing and Standardization, Southern Comfort Foods and Modern Twists
Education
Sullivan University – National Center for Hospitality Studies
Associate Degree in Culinary Arts
Focus: Baking and Pastry Arts, Recipe Testing, and Culinary Journalism.
Clara specialized in crafting desserts that blend classic Southern comfort with modern techniques, while developing strong writing skills to tell the story behind every dish.
Lane Community College (Certificate Program)
Certificate in Food Writing and Photography
Focus: Culinary storytelling, recipe formatting, food styling, and visual presentation.
Clara’s love of baking started young, powered by homemade pies, biscuits, and stories passed around the family table.
After earning her degree at Sullivan University and a food writing certificate at Lane Community College, she turned her passion into a craft: sharing recipes that are simple, soulful, and always full of heart.
She’s big on bold flavors, flexible ideas, and creating sweets that fit any table (yes, even if you’re gluten-free). When she’s not baking, you’ll find her wandering farmers’ markets, styling food for the next photo shoot, or working on her ever-growing recipe journal.