
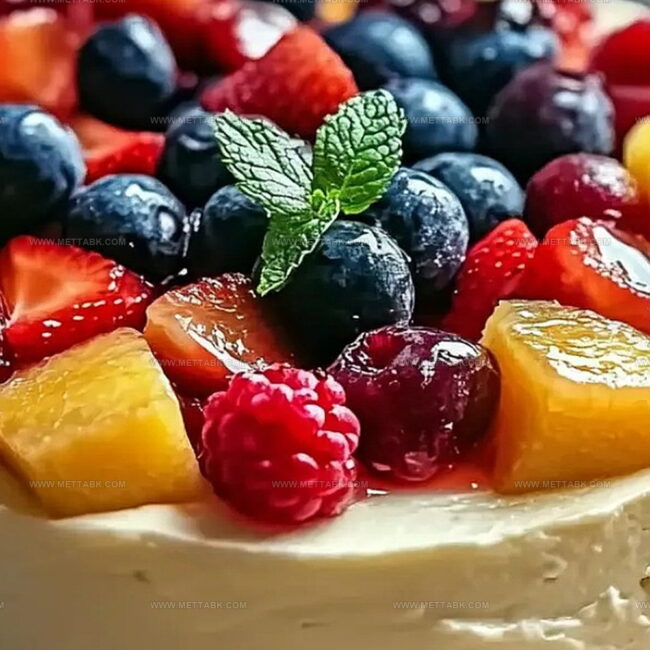
Dreamy Fruit Salad Cheesecake Recipe That Wows Every Time
Mixing fresh seasonal fruit into a creamy cheesecake sounds like a delightful culinary adventure.
Soft cream cheese blends seamlessly with ripe, juicy berries and tropical fruits.
Layers of sweetness create a dessert that feels both indulgent and refreshing.
Smooth textures contrast with bright fruit chunks, making each bite a delicious surprise.
Guests will adore this elegant yet simple treat that looks impressive without complicated techniques.
Whipping up this dessert takes minimal effort but delivers maximum satisfaction.
You can definitely impress everyone at the next gathering with this irresistible fruit salad cheesecake.
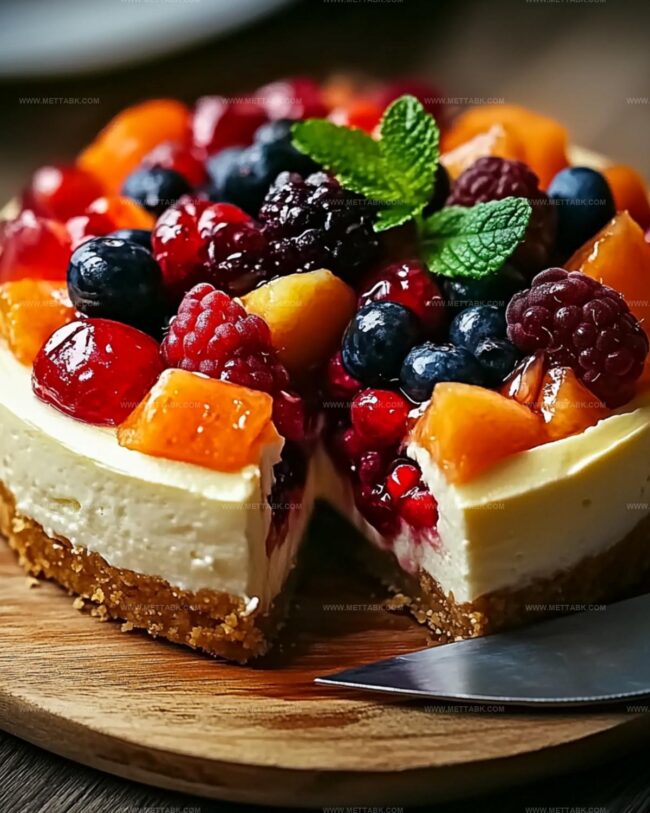
Fruit Salad Cheesecake Bursting with Freshness
Ingredients for Fruit Salad Cheesecake
For the Base:For the Filling:For the Fruits and Nuts:For the Liquid:How to Make Creamy Fruit Salad Cheesecake
Step 1: Create the Crispy Crust
Crush vanilla wafers into fine crumbs and blend thoroughly with melted butter. Press the mixture firmly into the bottom of a springform pan, creating a solid, even base.
The crust should be compact and smooth, forming the foundation of your cheesecake.
Step 2: Prepare the Creamy Filling
Heat drained pineapple with sugar in a saucepan, stirring until sugar completely dissolves.
In a separate bowl, soften gelatin in cold water, then incorporate it into the warm pineapple mixture. Lower the heat and add cubed cream cheese, stirring until the mixture becomes silky and uniform.
Allow the filling to cool to room temperature, creating a smooth and luscious base.
Step 3: Introduce Fruity Goodness
Gently fold in a colorful medley of fruits and nuts:Carefully blend whipped topping into the mixture, ensuring an even distribution of flavors and textures.
Step 4: Assemble and Chill
Transfer the vibrant filling over the prepared crust, using a spatula to create a smooth, even surface. Place the cheesecake in the refrigerator and let it set overnight or for a minimum of 6 hours.
This chilling time allows the flavors to meld and the texture to become perfectly firm.
Step 5: Serve and Enjoy
Remove the cheesecake from the springform pan with care.
Slice into beautiful wedges and serve chilled. Each bite promises a burst of fruity, creamy delight that will impress your guests and satisfy your sweet tooth.
Tips for Perfect Fruit Salad Cheesecake

Variations on Fruit Salad Cheesecake
Pairings to Serve with Fruit Salad Cheesecake
Proper Storage for Fruit Salad Cheesecake
Store the cheesecake in an airtight container or cover tightly with plastic wrap. Keep in the refrigerator for up to 4-5 days to maintain freshness and prevent bacterial growth.
Wrap individual slices or the entire cheesecake in plastic wrap, then place in a freezer-safe container. Freeze for up to 2 months, ensuring no air can penetrate the wrapping.
Transfer frozen cheesecake to the refrigerator and let it thaw slowly overnight. Avoid room temperature thawing to prevent texture changes and potential bacterial development.
Warm individual slices briefly in the microwave for 10-15 seconds at low power. Alternatively, let the slice sit at room temperature for 10-15 minutes before serving to soften slightly and enhance flavor.
FAQs
Yes, you can substitute graham cracker crumbs or digestive biscuits for vanilla wafer crumbs. Just ensure the crumbs are finely ground and mixed well with melted butter.
Gelatin helps the cheesecake set properly, but you can use agar-agar as a vegetarian alternative or cornstarch as a thickener. The texture might slightly differ from the original recipe.
Absolutely! Feel free to include diced kiwi, strawberries, or blueberries. Just make sure the fruits are not too watery to maintain the cheesecake’s consistency.
Print
Fruit Salad Cheesecake Recipe
- Total Time: 45 minutes
- Yield: 8 1x
Description
Creamy fruit salad cheesecake delights dessert enthusiasts with its luscious blend of tangy cream cheese and fresh seasonal fruits. Cool, smooth layers promise a refreshing indulgence that satisfies summer cravings and invites you to savor each delectable bite.
Ingredients
Fruits:
- 1 1/2 cups halved seedless grapes
- 1 (11 oz.) can mandarin oranges, drained and halved
- 1 (10 oz.) jar maraschino cherries, drained and chopped
- 1 (20 ounces / 567 grams) can crushed pineapple, drained
Dairy and Filling Ingredients:
- 1 (8 ounces / 227 grams) package cream cheese, cubed
- 2 cups whipped topping
- 3/4 cup granulated sugar
- 1/2 cup cold water
- 2 envelopes unflavored gelatin
Crust Ingredients:
- 1 1/2 cups vanilla wafer crumbs
- 2 tablespoons butter, melted
- 1/2 cup finely chopped pecans
Instructions
- Craft a robust foundation by blending vanilla wafer crumbs with melted butter until thoroughly integrated. Press the mixture compactly into a 9-inch springform pan, creating an even base. Allow the crust to rest momentarily.
- In a medium saucepan, simmer drained pineapple with sugar over medium heat until sugar dissolves completely. Separately, activate gelatin in cold water, then incorporate into the pineapple mixture. Reduce heat, introduce cubed cream cheese, and stir until achieving a silky, uniform consistency. Let the mixture cool to ambient temperature.
- Once cooled, delicately incorporate halved grapes, mandarin oranges, maraschino cherries, and pecans into the cream cheese base. Gently fold whipped topping throughout, ensuring uniform distribution of ingredients.
- Transfer the fruity cheesecake mixture onto the prepared crust, using a spatula to create a smooth, level surface. Refrigerate for 6-8 hours or overnight, allowing the dessert to solidify completely.
- After chilling, carefully release the cheesecake from the springform pan. Slice into elegant portions and serve thoroughly chilled, revealing a vibrant, textured dessert.
Notes
- Use graham crackers or digestive biscuits as an alternative to vanilla wafers for a different flavor profile and texture.
- Choose fresh, ripe fruits at peak season to enhance the natural sweetness and vibrant colors of the cheesecake.
- Bloom the gelatin in cold water for a few minutes before adding to the warm pineapple mixture to ensure smooth, lump-free incorporation.
- Prepare the cheesecake up to 2 days in advance and store covered in the refrigerator for a stress-free dessert option.
- Prep Time: 30 minutes
- Cook Time: 15 minutes
- Category: Desserts
- Method: Simmering
- Cuisine: American
Nutrition
- Serving Size: 8
- Calories: 275
- Sugar: 29 g
- Sodium: 145 mg
- Fat: 16 g
- Saturated Fat: 7 g
- Unsaturated Fat: 8 g
- Trans Fat: 0.3 g
- Carbohydrates: 30 g
- Fiber: 1.5 g
- Protein: 3 g
- Cholesterol: 30 mg
Nate Harper
Founder & Recipe Curator
Expertise
Single-Recipe Development, Farm-to-Table Cooking, Seasonal Menu Planning, Culinary Storytelling, Home Kitchen Innovation
Education
Cascade Culinary Institute – Central Oregon Community College
Certificate in Culinary Arts
Focus: Farm-to-table cuisine, sustainable cooking practices, and seasonal recipe creation.
Nate studied under experienced chefs who emphasized local sourcing, minimal waste, and building recipes from fresh, simple ingredients.
Nate Harper is the founder and creative force behind Make, Take, Bake. Raised in the wild beauty of Oregon’s high desert, Nate grew up surrounded by family gardens, farmers’ markets, and home kitchens that celebrated the seasons.
His early love for simple, honest food evolved into a professional passion when he attended Cascade Culinary Institute, where he sharpened his skills in creating recipes that are sustainable, satisfying, and made for everyday life.
Nate’s goal is to make cooking feel accessible, free of fuss, and full of flavor. He believes a single, thoughtfully built dish can stand alone, and sometimes even steal the show.