The Perfect Golden and Crispy Chicken Recipe for Family Dinners
Crafting the perfect golden and crispy chicken requires more than just basic cooking skills.
My kitchen adventures have taught me that texture matters immensely in creating memorable meals.
Achieving that irresistible crunch demands precise techniques and careful preparation.
Professional chefs often share secret methods for guaranteeting maximum flavor and incredible surface browning.
Salt, seasoning, and temperature control play crucial roles in developing spectacular results.
Understanding these fundamental principles can turn an ordinary dish into something extraordinary.
Watch as you master a technique that will impress everyone around your dining table.
Golden and Crispy Chicken That You’ll Want to Make Often

Ingredients to Make Golden and Crispy Chicken
For the Protein:For the Coating:For the Liquid and Seasoning:For the Sauce:For the Garnish:Stepwise Instructions for Crispy Chicken
Step 1: Warm Up the Oven
Crank your oven to a toasty 375°F (190°C). Grab a baking dish and give it a light grease or line with parchment paper.
Take your chicken breasts and give them a gentle pat-down with paper towels to remove excess moisture. Sprinkle salt and pepper generously over both sides of the chicken.
Step 2: Create the Crunchy Coating
Grab a shallow bowl and mix together:Melt some butter and dunk each chicken breast into it. Then roll the buttery chicken in the breadcrumb mixture, pressing firmly to make sure the coating sticks like a dream.
Step 3: Awaken the Garlic
Heat up a small pan with olive oil over medium heat. Toss in minced garlic and let it dance around for 1-2 minutes until it releases its magical aroma.
Step 4: Simmer the Sauce
Tumble diced tomatoes into the pan with the fragrant garlic. Season with a pinch of salt and pepper.
Let the sauce bubble and simmer for about 5 minutes, giving it an occasional stir.
Step 5: Sear the Chicken
Fire up a skillet with olive oil over medium-high heat.
Once it’s sizzling hot, carefully place the breaded chicken breasts into the pan. Sear each side for 2-3 minutes until they turn a gorgeous golden brown and develop a crispy exterior.
Step 6: Bake to Perfection
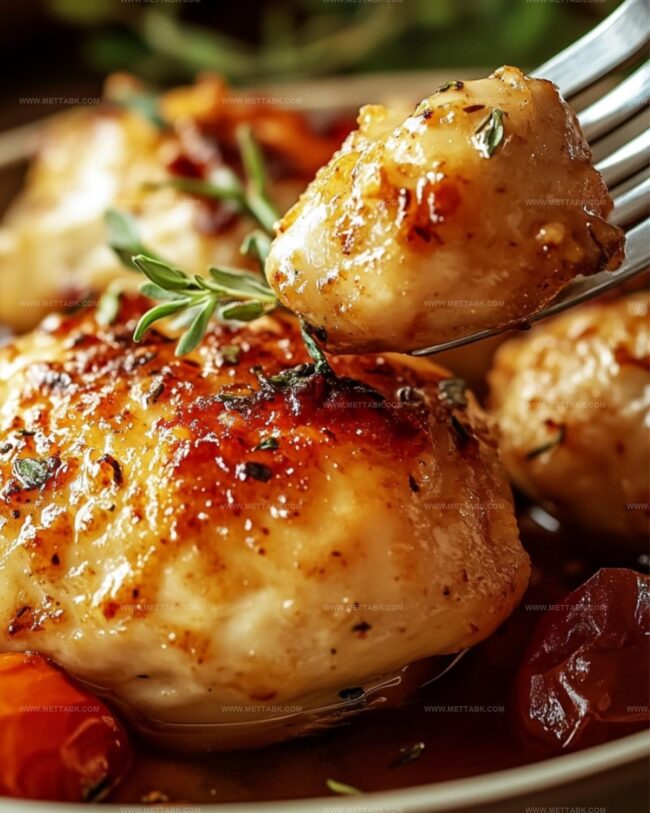
Transfer the seared chicken to your prepared baking dish. Pour the garlic tomato sauce evenly over the top.
Slide the dish into the oven and bake for about 20 minutes. Check that the internal temperature reaches 165°F (74°C).
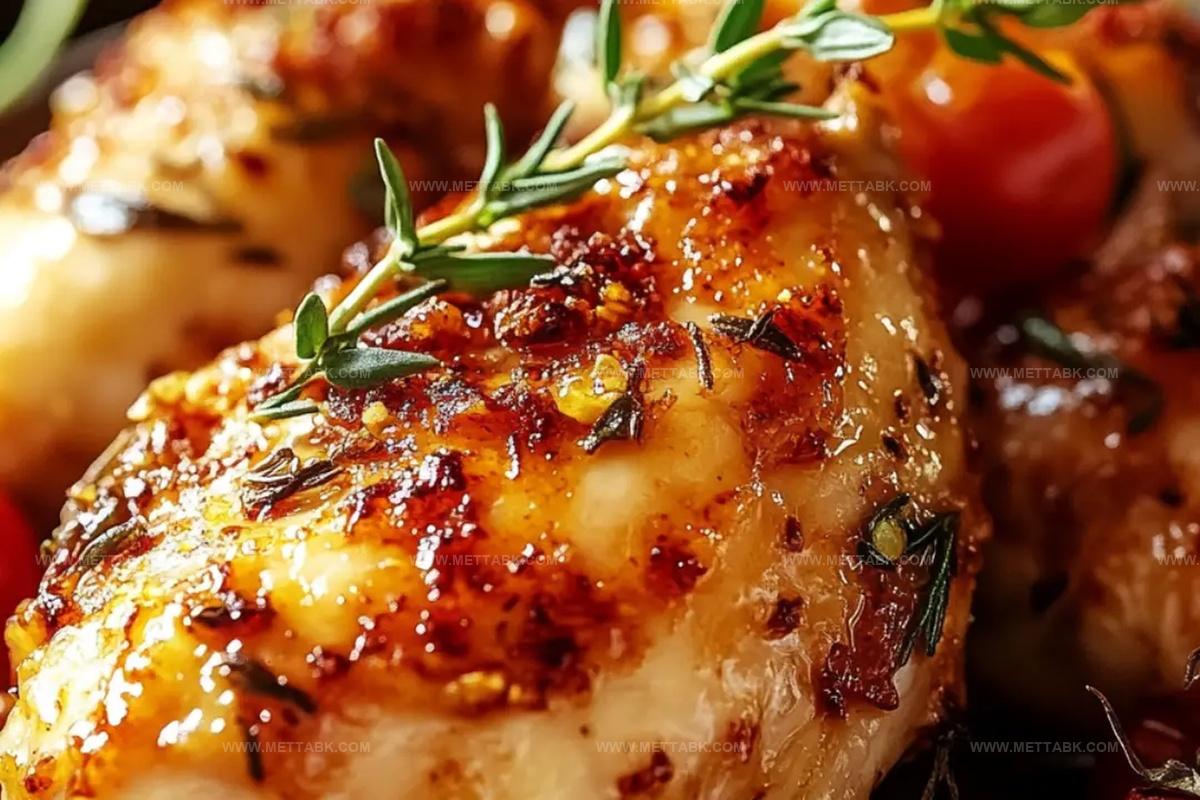
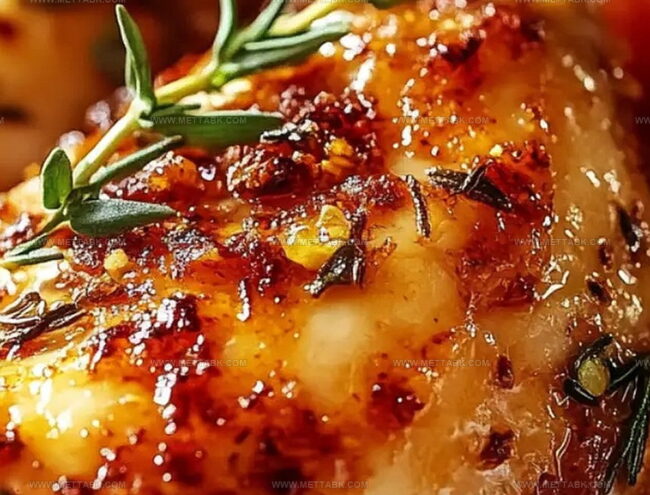
For an extra crunch, switch the oven to broil for the final 2-3 minutes. Keep a close eye to prevent burning – you want golden, not charred!
Step 7: Final Flourish
Pull the chicken out of the oven once it’s beautifully golden and crisp. Sprinkle some fresh parsley on top for a pop of color and freshness.
Serve immediately alongside your favorite sides and enjoy the delicious crunch!
Tips to Achieve the Perfect Crispy Coating
Variations to Change Up the Flavors
Pairing Ideas to Round Out Your Plate
Enhance Savory Chicken Delight: Perfect Pairings
How to Store Crispy Chicken Correctly
FAQs
Panko breadcrumbs are ideal because they create a lighter, crispier coating compared to traditional breadcrumbs. They help achieve that golden, crunchy exterior that makes this chicken dish special.
Yes, you can substitute chicken breasts with chicken thighs. Just ensure they are similar in size and adjust cooking time slightly, as thighs might take a bit longer to cook through. Always check the internal temperature reaches 165F/74C.
Replace panko breadcrumbs with gluten-free breadcrumbs or crushed gluten-free crackers. Ensure all other ingredients like Parmesan cheese are also gluten-free.
Print
Golden And Crispy Chicken Recipe
- Total Time: 50 minutes
- Yield: 4 1x
Description
Irresistible golden and crispy chicken brings a delightful crunch that elevates home cooking to restaurant-quality perfection. Succulent meat beneath a perfectly seasoned exterior promises a mouthwatering experience you’ll crave again and again.
Ingredients
Main Protein:
- 4 Chicken Breasts (boneless, skinless)
Coating Ingredients:
- 1/2 cup Breadcrumbs (panko breadcrumbs)
- 1/2 cup Parmesan Cheese (grated)
- 1 tablespoon Dried Italian Herbs (mix of oregano, basil, thyme)
Wet Ingredients and Seasonings:
- 1 tablespoon Olive Oil (for browning)
- 2 tablespoons Butter (melted)
- 4 Garlic Cloves (minced)
- 1 can (14.5 ounces) Diced Tomatoes (with juices)
- Salt (to taste)
- Pepper (to taste)
- Fresh Parsley (for garnish)
Instructions
- Prepare the culinary canvas by heating the oven to 375F (190C). Create a non-stick surface using parchment paper or a light oil coating on a baking dish.
- Meticulously dry the chicken breasts using paper towels, then season both surfaces with salt and pepper for foundational flavor.
- Craft a crispy armor by combining panko breadcrumbs, Parmesan cheese, and dried Italian herbs in a shallow vessel.
- Transform the chicken by immersing each piece in melted butter, then carefully encase it with the herbed breadcrumb mixture, pressing gently to ensure a complete, adherent coating.
- Awaken the aromatics by sautéing minced garlic in olive oil over medium heat for 1-2 minutes until fragrant and translucent.
- Elevate the sauce by introducing diced tomatoes to the garlic pan, seasoning with salt and pepper. Allow the mixture to simmer and meld flavors for approximately 5 minutes.
- Develop a golden exterior by searing the breaded chicken in a skillet with olive oil, browning each side for 2-3 minutes until a rich, crisp crust forms.
- Transfer the seared chicken to the prepared baking dish, then lavish with the garlic-tomato sauce, ensuring even coverage.
- Orchestrate the final cooking by baking for 20 minutes, confirming doneness when the internal temperature reaches 165F (74C).
- Achieve ultimate crispness by activating the broiler for a final 2-3 minutes, carefully monitoring to prevent burning while transforming the coating to a perfect golden hue.
- Liberate the chicken from the oven, embellish with fresh parsley, and serve immediately alongside complementary accompaniments.
Notes
- Select chicken breasts of uniform thickness to ensure even cooking and a consistent crispy texture.
- Pat chicken completely dry before breading to help the coating adhere better and achieve maximum crispiness.
- Use fresh Parmesan cheese for a more robust flavor and better coating adherence compared to pre-grated varieties.
- Avoid overcrowding the skillet when searing to prevent steaming and maintain a perfect golden-brown crust.
- Check chicken’s internal temperature with a meat thermometer to guarantee it’s fully cooked without drying out.
- Substitute panko with gluten-free breadcrumbs for a celiac-friendly version of the dish.
- Experiment with different herb blends like oregano, thyme, or rosemary to customize the flavor profile.
- Let chicken rest for 3-5 minutes after baking to help retain moisture and make cutting easier.
- Prep Time: 20 minutes
- Cook Time: 30 minutes
- Category: Lunch, Dinner, Snacks
- Method: Baking
- Cuisine: American
Nutrition
- Serving Size: 4
- Calories: 345 kcal
- Sugar: 3 g
- Sodium: 420 mg
- Fat: 18 g
- Saturated Fat: 7 g
- Unsaturated Fat: 9 g
- Trans Fat: 0.1 g
- Carbohydrates: 12 g
- Fiber: 2 g
- Protein: 38 g
- Cholesterol: 95 mg
Nate Harper
Founder & Recipe Curator
Expertise
Single-Recipe Development, Farm-to-Table Cooking, Seasonal Menu Planning, Culinary Storytelling, Home Kitchen Innovation
Education
Cascade Culinary Institute – Central Oregon Community College
Certificate in Culinary Arts
Focus: Farm-to-table cuisine, sustainable cooking practices, and seasonal recipe creation.
Nate studied under experienced chefs who emphasized local sourcing, minimal waste, and building recipes from fresh, simple ingredients.
Nate Harper is the founder and creative force behind Make, Take, Bake. Raised in the wild beauty of Oregon’s high desert, Nate grew up surrounded by family gardens, farmers’ markets, and home kitchens that celebrated the seasons.
His early love for simple, honest food evolved into a professional passion when he attended Cascade Culinary Institute, where he sharpened his skills in creating recipes that are sustainable, satisfying, and made for everyday life.
Nate’s goal is to make cooking feel accessible, free of fuss, and full of flavor. He believes a single, thoughtfully built dish can stand alone, and sometimes even steal the show.