The Flaky Grandmothers Pie Crust Recipe Passed Down With Love
Baking a delightful grandmother’s pie crust recipe brings back memories of warm kitchen aromas and cherished family moments.
Whispers of nostalgia dance through generations, capturing the essence of home-style comfort.
Delicate layers of buttery goodness promise a culinary experience that transcends simple ingredients.
Tender pastry secrets passed down through decades reveal a connection deeper than mere cooking techniques.
Precision matters, but love matters more when crafting this treasured recipe.
Crisp, flaky edges tell stories of patience and dedication, inviting you to create something truly magical.
Dive into this timeless tradition and let your kitchen become a canvas of delicious memories.
Classic Grandmother’s Pie Crust Secrets
Ingredients for Flaky Pie Crust
For the Dry Ingredients:For the Fat:For the Liquid:For the Optional Finishing:Stepwise Guide to Pie Crust Perfection
Step 1: Prepare Chilled Ingredients
Grab your cold butter and water straight from the refrigerator. If your kitchen feels warm, toss the flour in the fridge for a quick 10-minute chill to keep everything cool and ready for a perfectly flaky pie crust.
Step 2: Blend Dry Ingredients
Whisk flour, salt, and optional sugar in a large mixing bowl. This ensures every grain gets mixed evenly, creating a smooth base for your delectable pie crust.
Step 3: Incorporate Butter
Use a pastry cutter or your fingertips to break down butter into the flour. Work quickly until the mixture looks like rough breadcrumbs with tiny butter chunks.
These little butter pieces will create magical flaky layers in your final crust.
Step 4: Add Icy Water
Drizzle ice water one tablespoon at a time.
Gently mix after each addition using a fork or your hands. Stop when the dough starts forming a slightly crumbly mass that holds together when squeezed.
Step 5: Shape Dough Discs
Split the dough into two portions for a double-crust pie or keep it whole for a single crust. Form each piece into a smooth disc, wrap tightly in plastic, and refrigerate for 30 minutes.
This resting period helps butter firm up and gluten relax.
Step 6: Roll Out Crust
On a lightly floured surface, roll the dough into a thin circle about 1/8-inch thick.
Make sure it extends 2 inches beyond your pie pan. Carefully transfer the dough, pressing gently into pan edges.
Trim excess dough, leaving a small overhang for beautiful crimping.
Step 7: Pre-Bake Crust (Optional)
For recipes requiring a pre-baked crust, follow these steps:Bake at 375°F for 15 minutes.
Remove weights and continue baking 5-10 minutes until golden brown.
Step 8: Finish and Bake
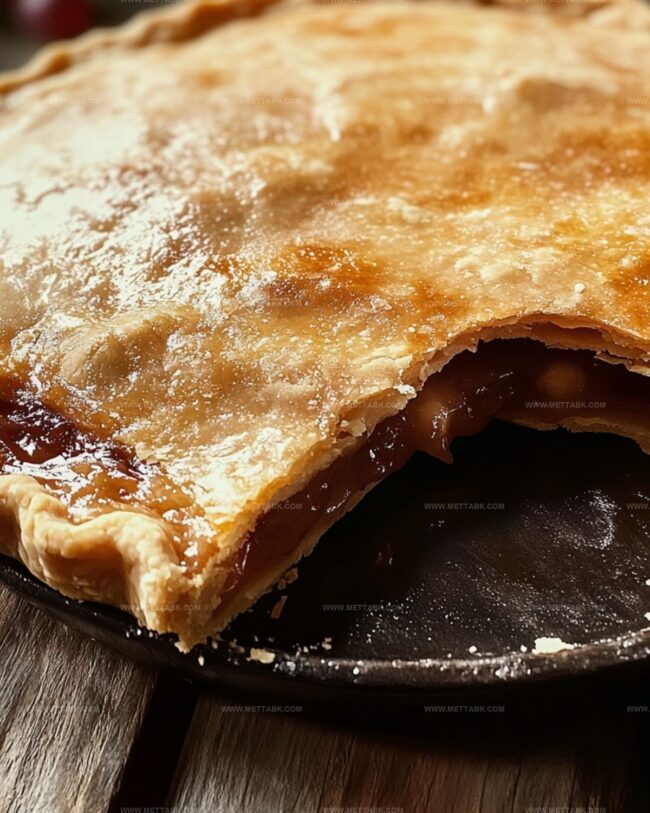
Fill the crust with your chosen filling.
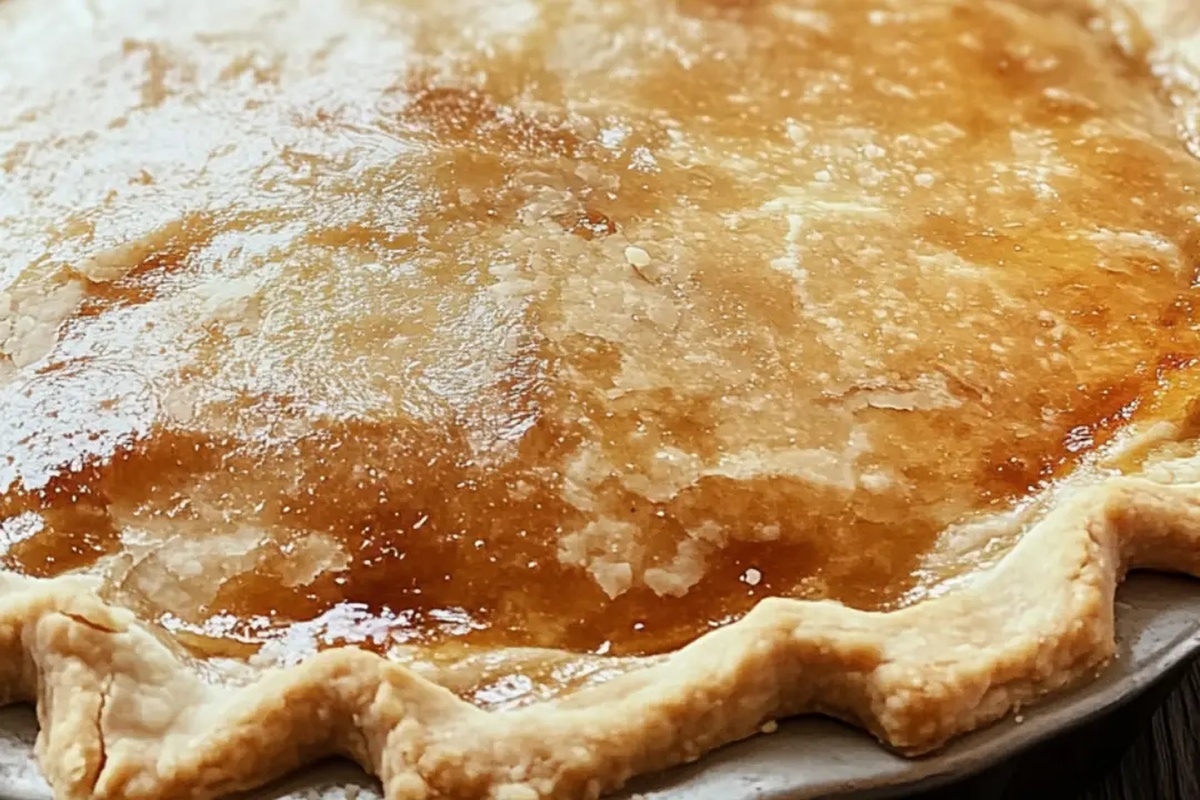
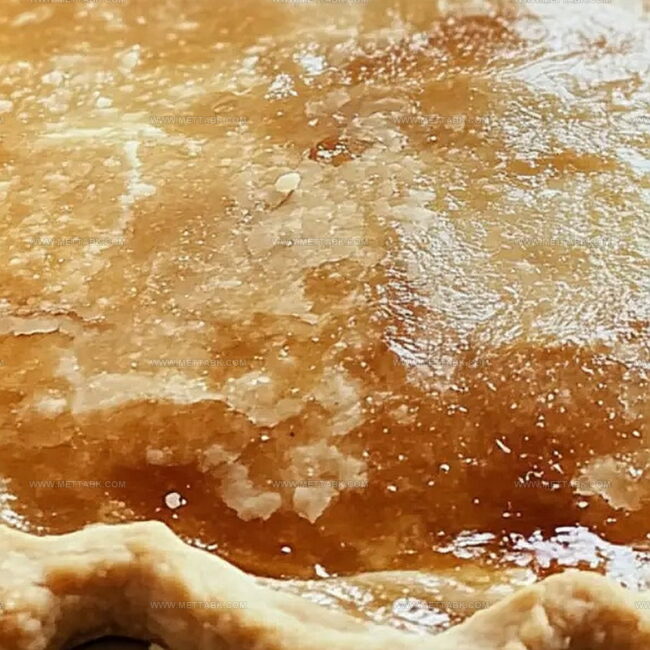
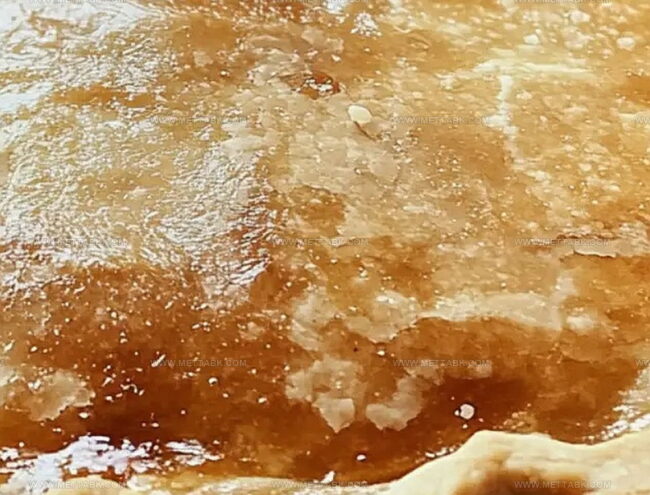
Add a top crust if desired. For a gorgeous golden shine, brush the top with an egg wash made from beaten egg and water.
Bake according to your specific pie recipe instructions.
Tips for Handling Pie Crust Like Grandma
Creative Variations on Traditional Pie Crust
What Pairs Best with Pie Crust
Storing Pie Crust for Freshness
FAQs
Cold butter creates pockets of fat that melt during baking, producing those signature flaky layers in the pie crust. When butter is cold, it doesn’t blend completely with flour, which helps create a tender, crisp texture.
Absolutely! You can prepare the dough and refrigerate it for up to 3 days or freeze it for up to 3 months. Just wrap it tightly in plastic wrap to prevent drying out and preserve its quality.
If the dough is too dry, add ice water one teaspoon at a time. If it’s too wet, sprinkle a little flour and gently knead. The perfect consistency is when the dough holds together when squeezed but isn’t sticky.
Print
Grandmothers Pie Crust Recipe
- Total Time: 1 hour 10 minutes
- Yield: 8 1x
Description
Grandma’s legendary pie crust recipe unlocks flaky, buttery perfection passed down through generations. Crisp, golden edges and delicate layers promise a nostalgic slice of homemade comfort that you’ll cherish with every delightful bite.
Ingredients
Main Ingredients:
- 2.5 cups (300 grams) all-purpose flour
- 1 cup (227 grams) unsalted butter
- 1 teaspoon salt
Additional Ingredients:
- 6 to 8 tablespoons ice water
Optional Ingredients:
- 1 tablespoon sugar
- 1 teaspoon vinegar
Instructions
- Refrigerate all ingredients thoroughly, including flour, to maintain optimal temperature for a delicate, crumbly pastry. Cold components are crucial for achieving a light, flaky texture.
- Combine flour, salt, and optional sugar in a spacious mixing vessel, whisking thoroughly to distribute seasonings evenly throughout the dry mixture.
- Incorporate frigid, cubed butter into the flour blend using a pastry cutter or fingertips. Break down butter until the texture resembles coarse, pebble-like crumbs, which will create signature layered pastry structure.
- Gradually introduce ice-cold water, one tablespoon at a time. Gently integrate liquid using a fork, stopping when the dough coheres into a shaggy, slightly irregular mass that maintains shape when compressed.
- Partition the dough into two equal segments for a double-crust preparation, or maintain as a single piece for a simple crust. Transform each portion into a compact disc, encase completely in plastic wrap, and refrigerate for minimum 30 minutes to solidify butter and relax gluten proteins.
- On a lightly dusted surface, elongate one dough disc into a thin circular shape approximately 1/8-inch thick. Carefully transfer to pie pan, pressing gently into edges and trimming excess with a modest overhang for decorative crimping.
- For pre-baking, puncture dough base with fork tines, layer with parchment, and fill with ceramic weights or dried legumes. Roast at 375F for 15 minutes, remove weights, then continue baking 5-10 minutes until achieving a golden complexion.
- Populate the prepared crust with selected filling, potentially covering with a secondary crust layer. For an elegant finish, delicately brush exposed pastry with a whisked egg wash, creating a luminous, bronzed surface during final baking.
Notes
- Keep butter ice-cold to guarantee maximum flakiness in your pie crust, ensuring those delectable tender layers every baker dreams about.
- Work quickly and handle dough minimally to prevent butter from melting, which prevents developing those signature delicate, crumbly textures.
- Use vodka instead of water for an ultra-tender crust since alcohol doesn’t develop gluten, resulting in an exceptionally light and crispy pastry.
- Experiment with alternative flour blends like adding almond or whole wheat flour for unique nutritional profiles and interesting flavor dimensions while maintaining classic pie crust structure.
- Prep Time: 45 minutes
- Cook Time: 25 minutes
- Category: Desserts
- Method: Baking
- Cuisine: American
Nutrition
- Serving Size: 8
- Calories: 267
- Sugar: 0.5 g
- Sodium: 149 mg
- Fat: 21 g
- Saturated Fat: 13 g
- Unsaturated Fat: 7.5 g
- Trans Fat: 0.2 g
- Carbohydrates: 18 g
- Fiber: 1 g
- Protein: 3 g
- Cholesterol: 55 mg
Nate Harper
Founder & Recipe Curator
Expertise
Single-Recipe Development, Farm-to-Table Cooking, Seasonal Menu Planning, Culinary Storytelling, Home Kitchen Innovation
Education
Cascade Culinary Institute – Central Oregon Community College
Certificate in Culinary Arts
Focus: Farm-to-table cuisine, sustainable cooking practices, and seasonal recipe creation.
Nate studied under experienced chefs who emphasized local sourcing, minimal waste, and building recipes from fresh, simple ingredients.
Nate Harper is the founder and creative force behind Make, Take, Bake. Raised in the wild beauty of Oregon’s high desert, Nate grew up surrounded by family gardens, farmers’ markets, and home kitchens that celebrated the seasons.
His early love for simple, honest food evolved into a professional passion when he attended Cascade Culinary Institute, where he sharpened his skills in creating recipes that are sustainable, satisfying, and made for everyday life.
Nate’s goal is to make cooking feel accessible, free of fuss, and full of flavor. He believes a single, thoughtfully built dish can stand alone, and sometimes even steal the show.