The Best Green Bean Casserole Recipe Everyone Will Love
Classic green bean casserole brings nostalgic comfort to dinner tables across America.
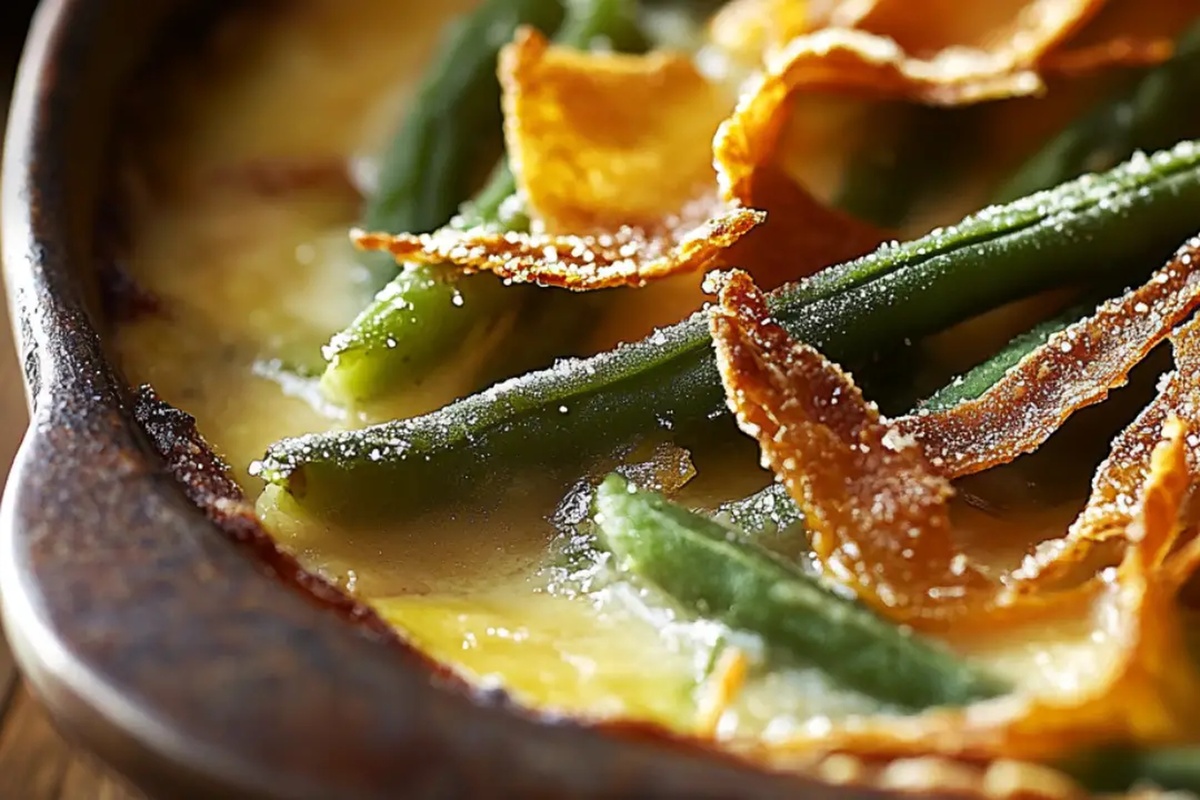
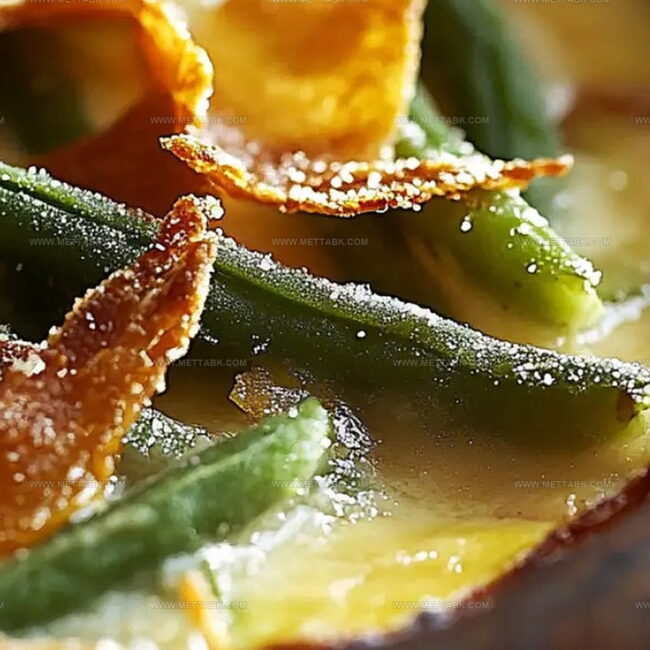
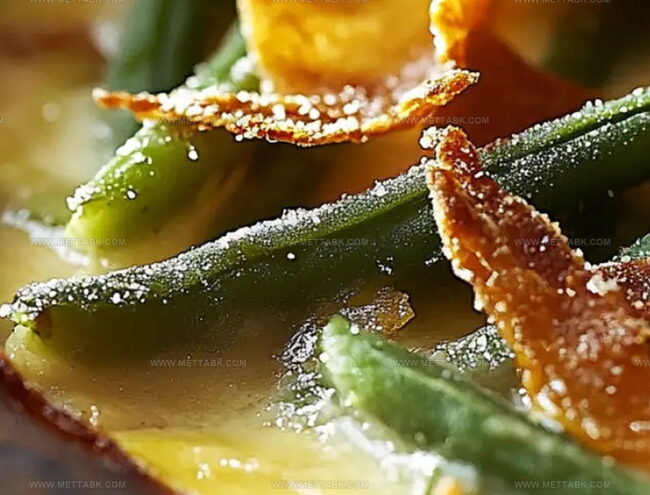
Crispy onions and creamy sauce make this dish irresistibly delicious.
Traditional recipes often feel heavy and predictable.
We crafted a lighter version that keeps all the beloved flavors intact.
Seasonal green beans provide a fresh crunch that perfectly complements the rich mushroom base.
Mushroom soup creates a velvety texture without overwhelming the delicate vegetables.
Whip up this crowd-pleasing side dish and watch everyone’s faces light up with pure joy.
Classic Green Bean Casserole Made Easy
Ingredients for Classic Green Bean Casserole
For the Main Vegetable:For the Sauce Components:For the Seasonings:For the Topping:For the Preparation:How to Prepare Classic Green Bean Casserole
Step 1: Warm Up The Oven
Preheat your oven to 375°F (190°C). Lightly spray a 9×13-inch baking dish with cooking oil to prevent sticking and set it aside.
Step 2: Prep The Green Beans
Bring a large pot of water to a boil. Add fresh green beans and cook for about 5 minutes until they turn bright green and become slightly tender.
Step 3: Shock And Cool The Beans
Drain the beans quickly and immediately transfer them to an ice water bath to halt the cooking process and keep them crisp. Spread the beans out on a paper towel to dry completely.
Step 4: Create The Creamy Base
In a large skillet, melt butter over medium heat until golden and bubbling.
Add finely chopped shallots and sauté until they become soft and translucent.
Step 5: Build The Flavor Foundation
Add fresh thyme, salt, and black pepper to the skillet. Stir to combine and let the fragrant flavors meld together.
Step 6: Whisk Up The Sauce
Sprinkle flour over the mixture and whisk vigorously. Slowly pour in chicken stock and heavy cream, stirring constantly to avoid lumps and create a smooth sauce.
Step 7: Thicken The Magic
Allow the sauce to simmer gently, stirring occasionally, until it thickens into a silky, luxurious gravy that perfectly coats the beans.
Step 8: Marry The Beans And Sauce
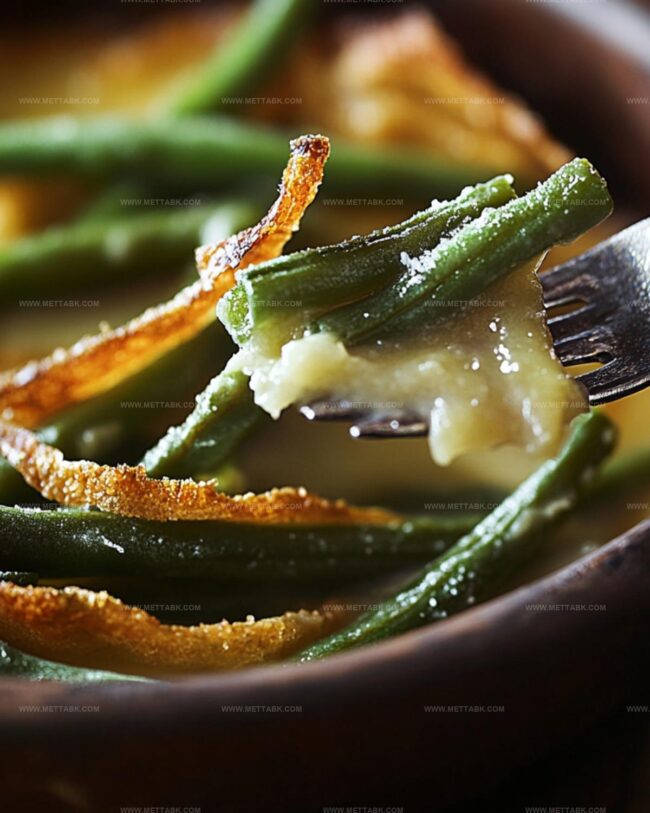
Fold the prepared green beans into the creamy sauce, making sure each bean is evenly coated for maximum flavor.
Step 9: Bake To Perfection
Transfer the green bean mixture to the prepared baking dish.
Generously sprinkle crispy fried onions over the top for a delightful crunchy finish.
Step 10: Final Flourish
Bake the casserole in the preheated oven for 15-20 minutes until the edges bubble and the fried onions turn a beautiful golden brown.
Step 11: Serve And Celebrate
Remove the casserole from the oven and serve immediately while hot, enjoying this creamy, crunchy, and irresistible classic side dish.
Tips for Delicious Green Bean Casserole
Variations on Classic Green Bean Casserole
Pairing Suggestions for Green Bean Casserole
Storage Tips for Fresh Green Bean Casserole
FAQs
Fresh green beans are ideal, but you can also use frozen green beans that have been thawed and patted dry. Avoid canned green beans as they’re too soft and can make the casserole mushy.
Yes, you can prepare the casserole up to the baking stage and refrigerate it for up to 24 hours. Just add the crispy fried onions right before baking to keep them crunchy.
Replace the chicken stock with vegetable stock and use a butter substitute or olive oil. The rest of the recipe remains the same, creating a delicious vegetarian version of the classic casserole.
Print
Green Bean Casserole Recipe
- Total Time: 45 minutes
- Yield: 6 1x
Description
Comfort meets nostalgia in this classic Green Bean Casserole, blending crisp green beans with creamy mushroom sauce and golden-brown crispy onions. Homestyle cooking delivers pure satisfaction for family gatherings and holiday meals you’ll savor with genuine delight.
Ingredients
Main Ingredients:
- 1.5 pounds (680 grams) fresh green beans, trimmed
- 1 cup (240 milliliters) chicken stock
- 1 cup (240 milliliters) heavy cream
- 6 ounces (170 grams) crispy fried onions
Seasoning and Herbs:
- 1/2 teaspoon dried thyme
- 1/2 teaspoon kosher salt
- 1/2 teaspoon black pepper
Cooking Ingredients:
- 2 tablespoons salted butter
- 2 small shallots, thinly sliced
- 2 tablespoons all-purpose flour
Instructions
- Prepare the oven at 375F (190C) and coat a 9×17-inch baking dish with cooking spray for easy release.
- Boil a large pot of water and submerge green beans, cooking for precisely 5 minutes to maintain crisp texture.
- Quickly transfer blanched green beans into an ice water bath to halt cooking process, then drain and pat dry on paper towels.
- Melt butter in a large skillet over medium heat, sautéing shallots until they become translucent and fragrant, approximately 5 minutes.
- Incorporate thyme, salt, and pepper into the shallot mixture, stirring to distribute flavors evenly.
- Dust flour over the mixture, whisking thoroughly to prevent clumping, and cook for one minute to eliminate raw flour taste.
- Gradually pour chicken stock while continuously whisking, then repeat with heavy cream to create a smooth, lump-free sauce.
- Simmer the sauce for 8-10 minutes, stirring occasionally until it reaches a thick, gravy-like consistency.
- Fold green beans into the sauce, ensuring complete and even coating.
- Transfer the sauced green beans to the prepared baking dish and generously sprinkle crispy fried onions on top.
- Bake uncovered for 15-20 minutes until edges are bubbling and onions turn golden brown.
- Remove from oven and serve immediately while hot and crispy.
Notes
- Trim green beans carefully to remove tough ends and ensure even cooking.
- Blanching helps maintain vibrant color and crisp texture of green beans while partially cooking them.
- Ice bath immediately stops cooking process, preventing mushy or overcooked beans.
- Whisk sauce constantly to prevent lumps and achieve smooth, creamy consistency.
- Use fresh thyme for more intense, aromatic flavor compared to dried herbs.
- Substitute chicken stock with vegetable stock for vegetarian version.
- Add crispy bacon bits for extra flavor if desired.
- For gluten-free option, replace wheat flour with cornstarch or gluten-free flour blend.
- Make ahead and refrigerate before baking to save time during meal preparation.
- Can be stored in refrigerator for 2-3 days, reheat gently to maintain sauce texture.
- Prep Time: 15 minutes
- Cook Time: 30 minutes
- Category: Lunch, Dinner, Appetizer
- Method: Baking
- Cuisine: American
Nutrition
- Serving Size: 6
- Calories: 183
- Sugar: 2 g
- Sodium: 280 mg
- Fat: 13 g
- Saturated Fat: 7 g
- Unsaturated Fat: 5 g
- Trans Fat: 0 g
- Carbohydrates: 15 g
- Fiber: 4 g
- Protein: 4 g
- Cholesterol: 40 mg
Nate Harper
Founder & Recipe Curator
Expertise
Single-Recipe Development, Farm-to-Table Cooking, Seasonal Menu Planning, Culinary Storytelling, Home Kitchen Innovation
Education
Cascade Culinary Institute – Central Oregon Community College
Certificate in Culinary Arts
Focus: Farm-to-table cuisine, sustainable cooking practices, and seasonal recipe creation.
Nate studied under experienced chefs who emphasized local sourcing, minimal waste, and building recipes from fresh, simple ingredients.
Nate Harper is the founder and creative force behind Make, Take, Bake. Raised in the wild beauty of Oregon’s high desert, Nate grew up surrounded by family gardens, farmers’ markets, and home kitchens that celebrated the seasons.
His early love for simple, honest food evolved into a professional passion when he attended Cascade Culinary Institute, where he sharpened his skills in creating recipes that are sustainable, satisfying, and made for everyday life.
Nate’s goal is to make cooking feel accessible, free of fuss, and full of flavor. He believes a single, thoughtfully built dish can stand alone, and sometimes even steal the show.