
The Magical Hocus Pocus Cookies Recipe Everyone Will Adore
Magic sparkles when you whip up these delightful hocus pocus cookies that transport childhood memories into sweet reality.
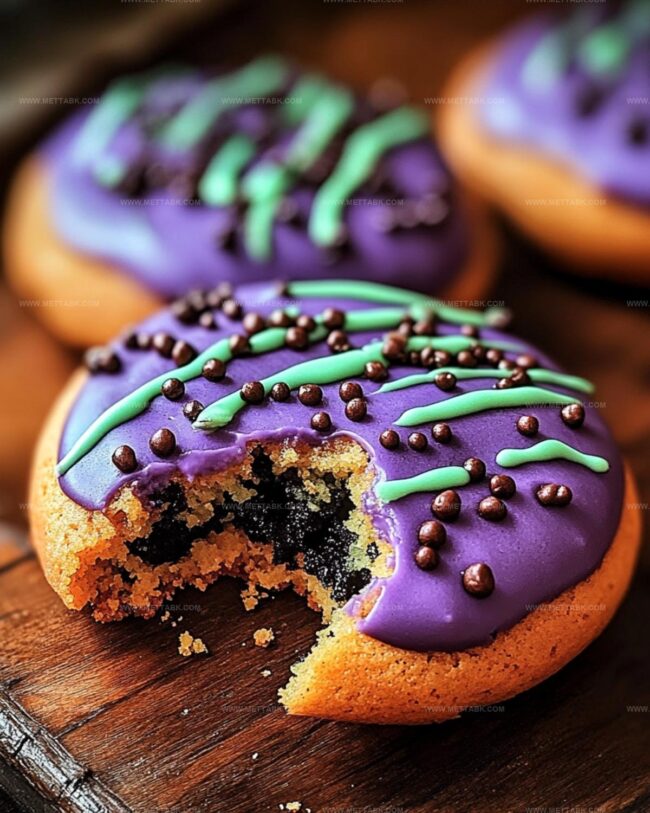
Mysterious swirls of chocolate and vanilla dance across each magical treat.
Nostalgic flavors blend seamlessly, creating a spell of pure deliciousness.
Childhood whimsy meets culinary creativity in this enchanting dessert.
Simple ingredients become extraordinary with a playful twist.
Crafting these cookies feels like conducting a delectable kitchen ritual.
You’ll fall under their irresistible charm, so gather your mixing bowl and let the magic begin.
Hocus Pocus Cookies to Spellbind Your Taste Buds
Ingredients to Bake Magical Hocus Pocus Cookies
For the Base:For the Dry Ingredients:For the Decorative Elements:Step-by-Step Guide to Cookie Magic
Step 1: Prepare Baking Station
Line a baking sheet with parchment paper to create a perfect cookie landing zone.
Step 2: Cream Butter and Sugar
Use a stand mixer to blend butter and sugar until the mixture becomes light, fluffy, and looks like clouds of sweetness.
Step 3: Incorporate Eggs
Add eggs one at a time, mixing thoroughly after each addition to create a smooth, silky base.
Step 4: Add Flavor Boost
Pour in vanilla extract and mix until the batter becomes wonderfully fragrant.
Step 5: Mix Dry Ingredients
In a separate bowl, combine:Whisk these ingredients until perfectly blended.
Step 6: Combine Wet and Dry Mixtures
Gradually add the dry ingredient mixture to the butter mixture, mixing on medium speed until a consistent dough forms.
Step 7: Create Magical Color Dough
Divide the dough into three equal parts. Use gel food coloring to transform each portion:Knead each portion until the color spreads evenly throughout.
Step 8: Prepare Decorative Elements
Set up two separate dishes:Step 9: Shape Colorful Cookies
Scoop 2 teaspoons of each colored dough and roll into separate balls. Gently press the different colored doughs together, being careful not to blend the colors completely.
Step 10: Add Festive Coating
Roll the combined dough balls into a smooth shape and slightly flatten. Roll the edges in Halloween sprinkles for a magical touch.
Step 11: Chocolate Chip Decoration
Gently press white chocolate chips into the top and sides of each cookie.
Step 12: Chill the Cookies
Refrigerate the cookies for 30 minutes to help them hold their shape.
Step 13: Preheat the Oven
Set the oven to 400°F (200°C), creating the perfect baking environment.
Step 14: Arrange Cookies
Place the chilled cookies on the baking sheet, leaving about 2 inches between each magical treat.
Step 15: Bake to Perfection
Bake for 12-14 minutes until the edges turn a beautiful golden brown.
Step 16: Cool Down
Remove from the oven and let the cookies rest for a few minutes.
Transfer to a wire rack to cool completely.
Step 17: Store Your Magic
Keep the cooled cookies in an airtight container to maintain their enchanting texture and flavor.
Tips to Perfect Cookie Texture and Flavor

Variations to Personalize Your Cookies

Pairing Suggestions to Enjoy with Cookies
Storage Advice for Cookie Freshness
Seal cookies in an airtight container, layer with parchment paper between each cookie. Keep fresh for 5-7 days in the refrigerator.
Wrap individual cookies in plastic wrap, place in freezer-safe container. Preserve for up to 3 months. Thaw at room temperature for 30 minutes before serving.
Keep in sealed container away from direct sunlight. Consume within 3-4 days for optimal taste and texture.
Warm cookies briefly in microwave for 10-15 seconds or place in preheated oven at 300°F for 2-3 minutes to restore softness and enhance flavor.
FAQs
Gel food coloring provides more vibrant colors without adding extra moisture to the dough, which helps maintain the cookies’ texture and prevents spreading during baking.
No, the specific combination of cake flour, all-purpose flour, and cornstarch creates the perfect texture and structure for these Hocus Pocus Cookies. Changing the flours might affect the final result.
Gently press the colored dough balls together without overworking them, and handle the dough minimally to keep the distinct color separation.
Print
Hocus Pocus Cookies Recipe
- Total Time: 59 minutes
- Yield: 48 1x
Description
Magical Hocus Pocus cookies weave enchanting Halloween flavors into each delightful bite. Spellbinding Halloween treats invite you to savor a whimsical culinary adventure that sparks festive spirit and delights sweet-seeking souls.
Ingredients
Main Ingredients:
- 1.5 cups (355 ml) butter, softened
- 2 cups (400 g) white sugar
- 3 large eggs
- 2 cups (240 g) cake flour
- 2.5 cups (313 g) all-purpose flour
- 2 cups (340 g) white chocolate chips
Flavoring and Seasoning:
- 3 teaspoons vanilla extract
- 1.5 teaspoons cornstarch
- 1.5 teaspoons baking soda
- 0.75 teaspoon salt
Decorative Ingredients:
- Orange gel food coloring
- Green gel food coloring
- Purple gel food coloring
- Halloween sprinkles
Instructions
- Prepare a parchment-lined baking sheet to prevent cookie sticking.
- Cream butter and sugar in a stand mixer until the mixture becomes light and airy, approximately 3-4 minutes.
- Incorporate eggs individually, mixing thoroughly after each addition to ensure smooth integration.
- Blend in vanilla extract, continuing to mix until fully combined.
- Sift together cake flour, all-purpose flour, cornstarch, baking soda, and salt in a separate bowl to eliminate potential lumps.
- Gradually fold dry ingredients into the butter mixture at medium speed, creating a uniform dough.
- Divide the dough into three equal portions and tint each section using gel food coloring: one orange, one green, and one purple. Knead thoroughly to distribute color evenly.
- Prepare white chocolate chips in a bowl and Halloween sprinkles in a shallow dish for coating.
- Create multi-colored cookie balls by combining 2 teaspoons of each colored dough, carefully pressing together without blending colors.
- Shape the combined dough into a cohesive ball, gently flatten, and roll edges in festive Halloween sprinkles.
- Strategically embed white chocolate chips onto the cookie surface and sides.
- Refrigerate cookies for 30 minutes to firm up the dough and enhance flavor development.
- Heat oven to 400F (200C), ensuring proper temperature before baking.
- Arrange chilled cookies on the baking sheet, spacing them approximately 2 inches apart to allow for spreading.
- Bake for 12-14 minutes until edges turn golden brown, indicating perfect doneness.
- Allow cookies to rest briefly on the baking sheet before transferring to a wire rack for complete cooling.
- Store in an airtight container to maintain freshness and texture.
Notes
- Chill the dough for better color definition and prevent colors from blending too much during baking.
- Use gel food coloring for vibrant, intense Halloween-themed colors that won’t water down the cookie dough.
- Avoid overworking the dough when mixing colors to maintain a marbled, magical appearance.
- For gluten-free option, substitute cake and all-purpose flour with a gluten-free flour blend, keeping the same measurements.
- Prep Time: 45 minutes
- Cook Time: 14 minutes
- Category: Desserts, Snacks
- Method: Baking
- Cuisine: American
Nutrition
- Serving Size: 48
- Calories: 190
- Sugar: 12 g
- Sodium: 95 mg
- Fat: 10 g
- Saturated Fat: 6 g
- Unsaturated Fat: 4 g
- Trans Fat: 0.2 g
- Carbohydrates: 25 g
- Fiber: 0.3 g
- Protein: 2 g
- Cholesterol: 20 mg
Nate Harper
Founder & Recipe Curator
Expertise
Single-Recipe Development, Farm-to-Table Cooking, Seasonal Menu Planning, Culinary Storytelling, Home Kitchen Innovation
Education
Cascade Culinary Institute – Central Oregon Community College
Certificate in Culinary Arts
Focus: Farm-to-table cuisine, sustainable cooking practices, and seasonal recipe creation.
Nate studied under experienced chefs who emphasized local sourcing, minimal waste, and building recipes from fresh, simple ingredients.
Nate Harper is the founder and creative force behind Make, Take, Bake. Raised in the wild beauty of Oregon’s high desert, Nate grew up surrounded by family gardens, farmers’ markets, and home kitchens that celebrated the seasons.
His early love for simple, honest food evolved into a professional passion when he attended Cascade Culinary Institute, where he sharpened his skills in creating recipes that are sustainable, satisfying, and made for everyday life.
Nate’s goal is to make cooking feel accessible, free of fuss, and full of flavor. He believes a single, thoughtfully built dish can stand alone, and sometimes even steal the show.