
Dreamy Homemade Coffee Ice Cream Recipe: Sweet Frozen Bliss
Crafting delectable homemade coffee ice cream requires just three simple ingredients that promise an extraordinary dessert experience.
Creamy and rich textures await you with minimal kitchen effort.
Cold brewing techniques enhance the robust coffee flavor profile perfectly.
Summer afternoons call for cool, indulgent treats that refresh and delight.
Each spoonful delivers an intense caffeine-infused smoothness without complicated preparation steps.
Joe coffee enthusiasts will appreciate this straightforward recipe that turns basic components into something spectacular.
Let’s whip up this decadent frozen delight that makes every scoop an irresistible adventure.
What Makes This Coffee Ice Cream So Easy and Creamy
Ingredients for Homemade Coffee Ice Cream
For the Base:For the Flavor:For the Optional Extras:How to Make Coffee Ice Cream with Few Ingredients
Step 1: Brew Strong Coffee Essence
Grab your favorite instant coffee and dissolve it completely in hot water. Let the coffee mixture cool down to room temperature, allowing the rich coffee flavor to develop fully.
Step 2: Whip Up Fluffy Cream
Pull out your cold heavy cream and use an electric mixer or whisk to beat it until it transforms into billowy, stiff peaks. The cream should stand up tall and look glossy when you lift the whisk.
Step 3: Blend Dreamy Ingredients
Combine the ingredients in a gentle folding motion:Fold carefully to maintain the cream’s airy texture, ensuring everything mixes smoothly without deflating the whipped cream.
Step 4: Prepare For Freezing
Transfer the silky coffee mixture into a freezer-safe container with a tight-fitting lid.
Smooth the top with a spatula to create an even surface.
Step 5: Freeze And Transform
Place the container in the freezer for 6-8 hours or overnight.
The mixture will gradually turn into a luxurious, creamy ice cream with deep coffee notes.
Step 6: Serve And Enjoy
Remove the ice cream from the freezer 5-10 minutes before serving to soften slightly.
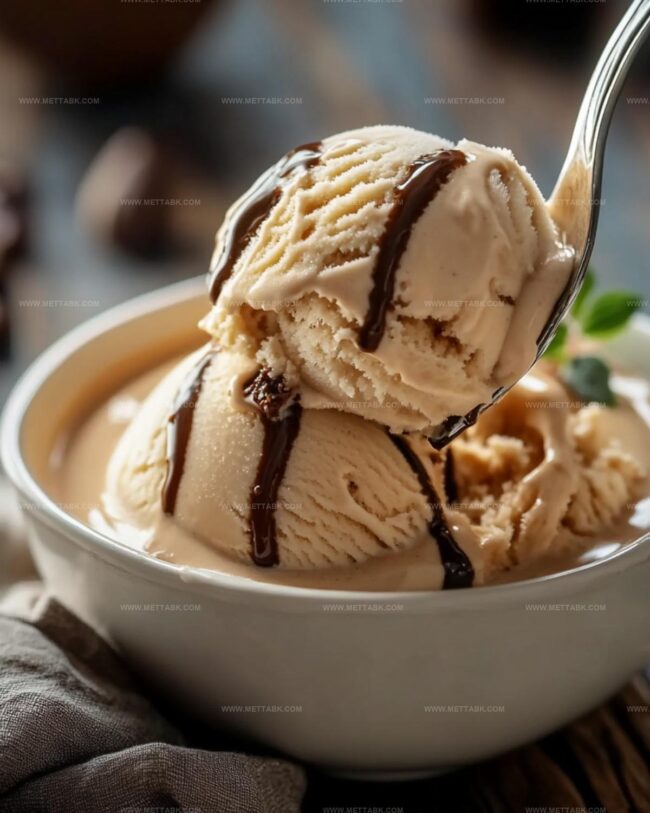
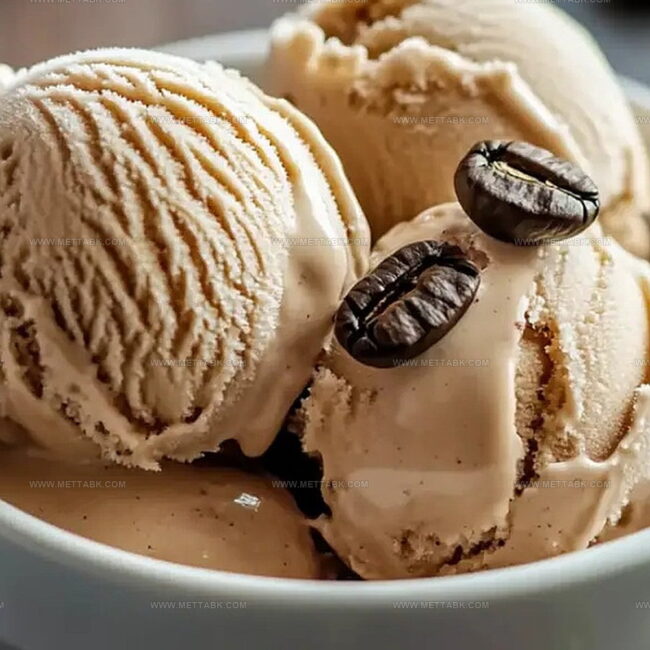
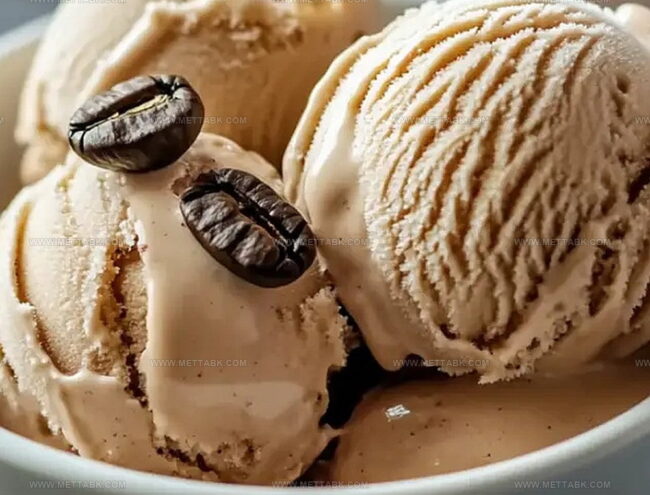
Scoop into bowls and sprinkle with optional toppings like:Tricks to Get Creamy Homemade Coffee Ice Cream
Creative Flavors to Add to Coffee Ice Cream
Perfect Foods to Serve with Coffee Ice Cream
Best Storage Tips for Homemade Coffee Ice Cream
FAQs
No, instant coffee works best for this recipe as it dissolves easily and provides a concentrated flavor without adding extra liquid that could affect the ice cream’s texture.
Not at all! This no-churn method uses whipped cream and sweetened condensed milk, which means you can make delicious ice cream without any special equipment.
The coffee flavor will be mild to moderate. If you want a stronger coffee taste, you can increase the amount of instant coffee slightly, but be careful not to add too much liquid.
Unfortunately, this recipe contains heavy cream and sweetened condensed milk, which are dairy products. It’s not suitable for those avoiding dairy or looking for a lactose-free option.
Print
Homemade Coffee Ice Cream With Only 3 Recipe
- Total Time: 8 hours 15 minutes
- Yield: 4 1x
Description
Creamy Homemade Coffee Ice Cream delivers rich, velvety indulgence with minimal ingredients. Smooth espresso notes dance through each spoonful, promising delightful moments of pure caffeinated bliss you won’t want to miss.
Ingredients
Main Ingredients:
- 400 milliliters (13.5 fluid ounces) heavy whipping cream
- 200 milliliters (6.75 fluid ounces) sweetened condensed milk
Flavor Enhancer:
- 2 tablespoons instant coffee
Optional Additions:
- 1 teaspoon vanilla extract (optional)
Instructions
- Dissolve the instant coffee granules in hot water, allowing the concentrated brew to cool to room temperature, releasing its rich aroma.
- Chill a large mixing bowl and whisk, then vigorously whip the heavy cream until it transforms into voluminous, sturdy peaks that hold their shape.
- Carefully incorporate the sweetened condensed milk into the whipped cream, using gentle folding motions to maintain the cream’s delicate structure.
- Slowly stream the cooled coffee into the cream mixture, gently blending until a uniform, silky texture emerges with no streaks.
- Transfer the luxurious mixture into a freezer-safe container, ensuring a smooth, even surface.
- Seal the container tightly and place in the freezer for 6-8 hours, or ideally overnight, to achieve a perfectly firm, creamy consistency.
- Before serving, let the ice cream rest at room temperature for 2-3 minutes to soften slightly, enhancing its smooth, velvety texture.
- Optional: Garnish with a sprinkle of chocolate chips, a drizzle of caramel, or a light dusting of coffee powder for an elevated presentation.
Notes
- Opt for high-quality instant coffee to ensure a rich, robust coffee flavor that elevates the entire dessert.
- Use cold heavy cream straight from the refrigerator for the best whipping results and maximum volume.
- Consider using a hand mixer or stand mixer to achieve perfectly stiff peaks without overbeating the cream.
- Experiment with different coffee variations like espresso powder or cold brew concentrate for unique flavor profiles.
- Prep Time: 15 minutes
- Cook Time: 8 hours (on Low) or 4 hours (on High)
- Category: Desserts
- Method: Freezing
- Cuisine: American
Nutrition
- Serving Size: 4
- Calories: 328
- Sugar: 34 g
- Sodium: 60 mg
- Fat: 27 g
- Saturated Fat: 17 g
- Unsaturated Fat: 8 g
- Trans Fat: 0.5 g
- Carbohydrates: 29 g
- Fiber: 0.5 g
- Protein: 4 g
- Cholesterol: 95 mg
Nate Harper
Founder & Recipe Curator
Expertise
Single-Recipe Development, Farm-to-Table Cooking, Seasonal Menu Planning, Culinary Storytelling, Home Kitchen Innovation
Education
Cascade Culinary Institute – Central Oregon Community College
Certificate in Culinary Arts
Focus: Farm-to-table cuisine, sustainable cooking practices, and seasonal recipe creation.
Nate studied under experienced chefs who emphasized local sourcing, minimal waste, and building recipes from fresh, simple ingredients.
Nate Harper is the founder and creative force behind Make, Take, Bake. Raised in the wild beauty of Oregon’s high desert, Nate grew up surrounded by family gardens, farmers’ markets, and home kitchens that celebrated the seasons.
His early love for simple, honest food evolved into a professional passion when he attended Cascade Culinary Institute, where he sharpened his skills in creating recipes that are sustainable, satisfying, and made for everyday life.
Nate’s goal is to make cooking feel accessible, free of fuss, and full of flavor. He believes a single, thoughtfully built dish can stand alone, and sometimes even steal the show.