
The Easiest Homemade Crunch Bars Recipe for Chocolate Lovers
Crafting delectable homemade crunch bars lets you transform simple ingredients into a mouthwatering treat that rivals store-bought versions.
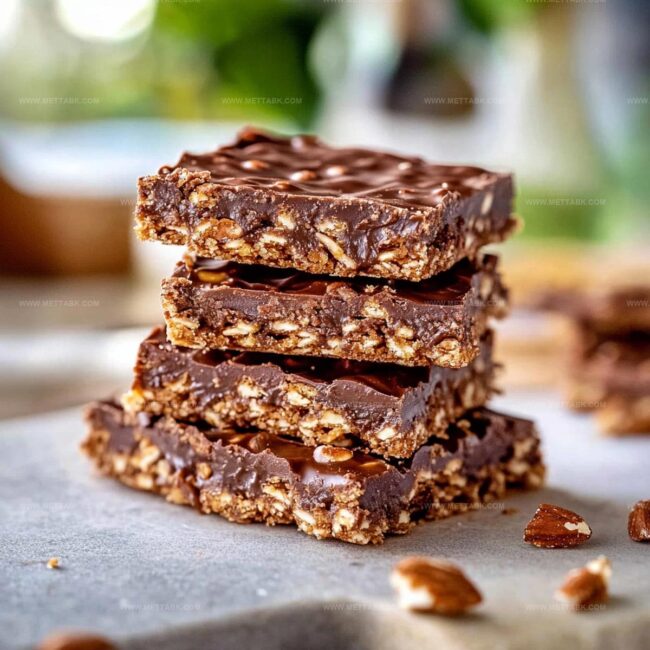
Sweet chocolate mingles with crisp rice cereal, creating layers of irresistible texture.
Every bite promises pure indulgence without complicated techniques.
Kitchen novices and seasoned bakers alike can master this simple recipe.
Minimal equipment means you’ll whip up these bars faster than running to the store.
Chocolate lovers will appreciate the rich, smooth coating that perfectly complements the satisfying crackle of rice puffs.
You won’t believe how easy it is to create this classic candy at home.
Prepare to become the neighborhood dessert hero with these irresistible bars.
Homemade Crunch Bars That Satisfy Sweet Tooth
Ingredients for Crispy and Chocolatey Homemade Crunch Bars
Base Ingredients:Crispy Element:Optional Preparation Ingredients:Optional Topping Ingredients:How to Make Homemade Crunch Bars Easily
Step 1: Prepare Baking Vessel
Get an 8×8-inch baking dish ready by lightly coating the inside with a thin layer of butter or giving it a quick spray of cooking oil. This prevents the chocolatey treat from sticking and makes removal a breeze.
Step 2: Melt Chocolate Base
Place a medium saucepan on low heat and combine chocolate chips with butter. Stir gently and consistently until the mixture transforms into a smooth, glossy liquid with no lumps remaining.
Step 3: Incorporate Marshmallow Magic
Drop mini marshmallows into the warm chocolate mixture. Continue stirring until the marshmallows completely dissolve and blend seamlessly with the chocolate, creating a rich and creamy texture.
Step 4: Introduce Crunchy Element
Carefully fold rice cereal into the chocolate-marshmallow mixture. Ensure every single cereal piece gets thoroughly coated, distributing the crunch evenly throughout the mixture.
Step 5: Shape and Smooth
Transfer the entire mixture into the prepared baking dish. Use a spatula or the back of a spoon to press down firmly, creating a uniform and compact layer that will hold together perfectly.
Step 6: Add Bonus Toppings
While the mixture is still warm, sprinkle on any additional toppings like chopped nuts, extra chocolate chips, or colorful sprinkles if you want to get creative.
Step 7: Chill and Set
Place the baking dish in the refrigerator for approximately 30 minutes.
Once the bars are completely firm, slice into squares and enjoy your homemade chocolate crunch bars.
Tips for Perfect Homemade Crunch Bars Every Time
Flavorful Variations on Homemade Crunch Bars to Try
Pairings That Complement Homemade Crunch Bars Beautifully
Best Storage Ideas for Homemade Crunch Bars
FAQs
Yes, you can substitute milk, dark, or white chocolate based on your preference. Just ensure it melts smoothly and complements the rice cereal.
Regular-sized marshmallows work too. Just chop them into smaller pieces to help them melt faster and distribute evenly in the mixture.
Try using dark chocolate with higher cocoa content, whole grain rice cereal, or reduce the amount of butter for a lighter version.
Absolutely! Kids can help measure ingredients, stir the mixture, and press the bars into the pan. Always supervise them near the stove and hot ingredients.
Print
Homemade Crunch Bars Recipe
- Total Time: 50 minutes
- Yield: 12 1x
Description
Irresistible chocolate crunch bars merge crispy rice cereal with smooth melted chocolate for a classic sweet treat. Homemade confections like this deliver pure nostalgic comfort with minimal effort and maximum deliciousness.
Ingredients
- 1 cup chocolate chips (semi-sweet or dark)
- 4 tbsps unsalted butter
- 2 cups mini marshmallows
- 3 cups rice cereal
- Optional: nuts or sprinkles
Instructions
- Prepare an 8×8-inch pan by lightly coating with butter or non-stick cooking spray to prevent sticking.
- Create a double boiler setup or use low heat to melt chocolate chips and butter, stirring continuously until achieving a silky, uniform consistency.
- Introduce mini marshmallows into the warm chocolate mixture, gently stirring until they dissolve completely and integrate seamlessly with the chocolate.
- Carefully incorporate rice cereal into the chocolate-marshmallow blend, ensuring each crisp piece gets thoroughly coated with the rich, glossy mixture.
- Transfer the entire mixture into the prepared pan, using a spatula or clean hands to distribute evenly and compress the layers for a compact texture.
- While the mixture remains slightly warm, sprinkle additional toppings like chopped nuts or chocolate drizzle if desired.
- Chill in the refrigerator for approximately 30-35 minutes until the bars become firm and solid, then slice into uniform squares using a sharp knife.
Notes
- Ensure a non-stick surface by thoroughly greasing the baking dish to prevent the bars from sticking and make removal effortless.
- Use low heat when melting chocolate to avoid burning, creating a silky smooth base that ensures perfect texture and rich flavor.
- Stir marshmallows gently to maintain their fluffy texture while integrating seamlessly into the chocolate mixture for a decadent treat.
- Experiment with different cereals like cornflakes or graham crackers for unique crunch variations that can cater to personal taste preferences or dietary needs.
- Prep Time: 15 minutes
- Cook Time: 35 minutes
- Category: Snacks, Desserts
- Method: Melting
- Cuisine: American
Nutrition
- Serving Size: 12
- Calories: 160
- Sugar: 10 g
- Sodium: 45 mg
- Fat: 7 g
- Saturated Fat: 4 g
- Unsaturated Fat: 2 g
- Trans Fat: 0 g
- Carbohydrates: 22 g
- Fiber: 1 g
- Protein: 1.5 g
- Cholesterol: 12 mg
Clara Bennett
Contributing Recipe Developer & Food Writer
Expertise
Baking and Pastry Development, Gluten-Free and Allergy-Friendly Recipe Creation, Culinary Storytelling and Food Journalism, Recipe Testing and Standardization, Southern Comfort Foods and Modern Twists
Education
Sullivan University – National Center for Hospitality Studies
Associate Degree in Culinary Arts
Focus: Baking and Pastry Arts, Recipe Testing, and Culinary Journalism.
Clara specialized in crafting desserts that blend classic Southern comfort with modern techniques, while developing strong writing skills to tell the story behind every dish.
Lane Community College (Certificate Program)
Certificate in Food Writing and Photography
Focus: Culinary storytelling, recipe formatting, food styling, and visual presentation.
Clara’s love of baking started young, powered by homemade pies, biscuits, and stories passed around the family table.
After earning her degree at Sullivan University and a food writing certificate at Lane Community College, she turned her passion into a craft: sharing recipes that are simple, soulful, and always full of heart.
She’s big on bold flavors, flexible ideas, and creating sweets that fit any table (yes, even if you’re gluten-free). When she’s not baking, you’ll find her wandering farmers’ markets, styling food for the next photo shoot, or working on her ever-growing recipe journal.