Irresistible Homemade Glazed Doughnuts Recipe for Sweet Mornings
Every baker dreams of crafting perfect homemade glazed doughnuts that melt in your mouth with sugary bliss.
Soft, pillowy circles of fried dough beckon from bakery windows and kitchen counters.
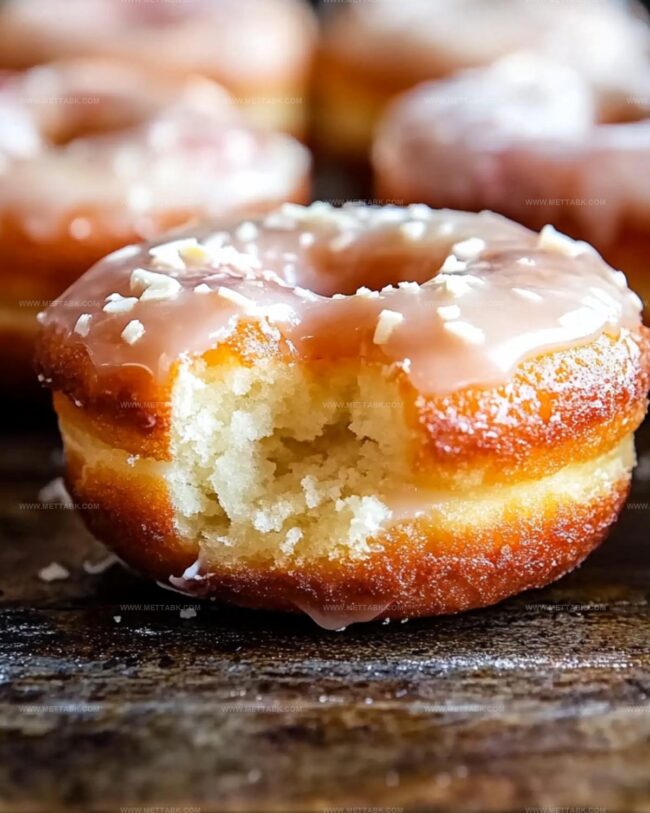
Crisp exteriors give way to tender, light interiors that whisper sweet promises of indulgence.
Magical moments happen when flour, yeast, and love combine into golden rings of pure comfort.
Creating these delectable treats requires patience and a dash of culinary passion.
Warm, freshly glazed doughnuts emerge from your kitchen like edible treasures waiting to be savored.
Let’s roll up our sleeves and transform simple ingredients into a delightful breakfast or dessert that will make everyone smile.
Why Glazed Doughnuts Are Always Worth the Work
Ingredients You’ll Need for Glazed Doughnuts
For the Dough Base:For the Enriching Ingredients:For the Frying and Coating:How to Fry and Glaze Your Doughnuts Right
Step 1: Activate Yeast Mixture
Blend warm milk, sugar, and yeast in a spacious mixing bowl. Allow the mixture to sit and become wonderfully frothy, watching bubbles develop for about 5 minutes.
Step 2: Build Soft Dough
Crack an egg into the yeast mixture and add:Gradually incorporate flour, stirring until a tender, pillowy dough forms.
Step 3: Knead and Rise Dough
Transfer dough to a lightly floured surface.
Knead thoroughly until the texture becomes silky and smooth. Place the dough in a greased bowl, cover with a clean kitchen towel, and let it rise in a warm spot for approximately one hour.
Step 4: Shape Doughnuts
Roll out the risen dough to half-inch thickness. Use a doughnut cutter to create circular shapes with perfect centers.
Step 5: Prepare Frying Station
Heat oil in a deep fryer or heavy-bottomed pot until it reaches 375°F. Maintain a consistent temperature for even cooking.
Step 6: Fry Doughnuts
Carefully lower doughnuts into hot oil, cooking in small batches. Fry until they turn a gorgeous golden brown color.
Remove and drain excess oil on paper towels.
Step 7: Create Glossy Glaze
Whisk together:Blend until the mixture becomes wonderfully smooth and shiny.
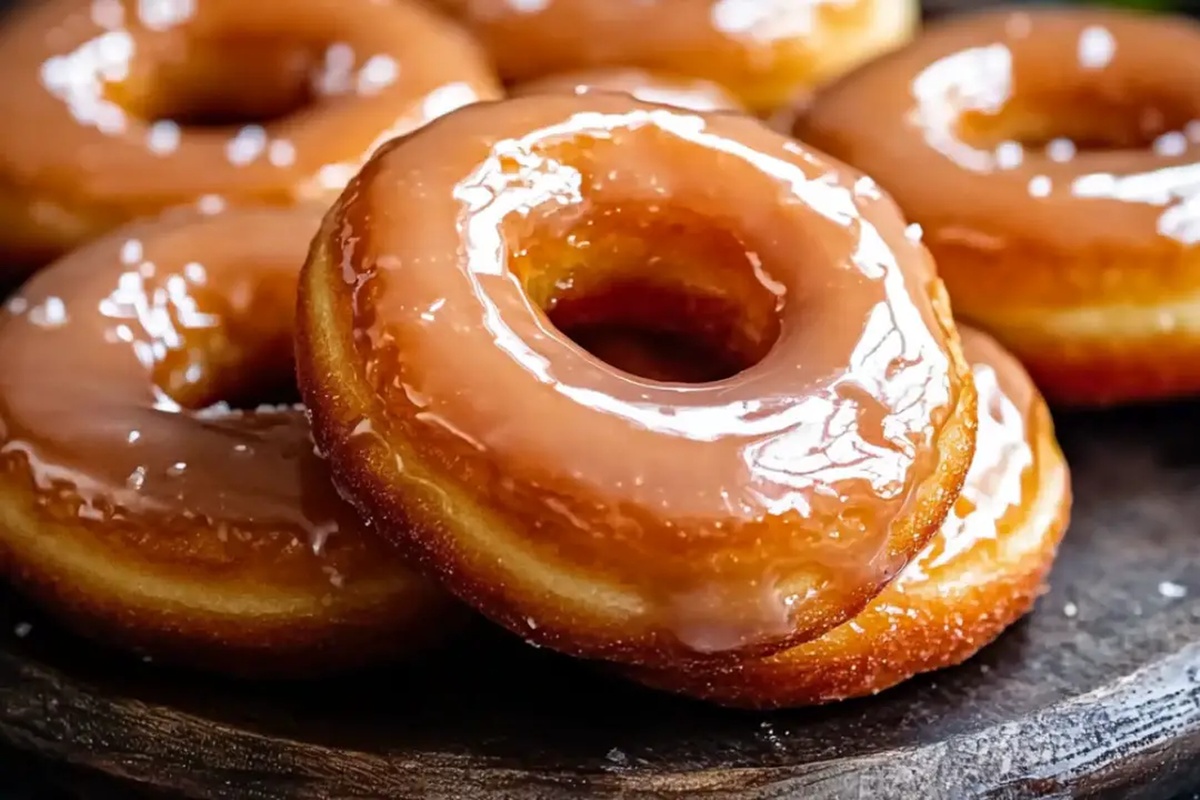
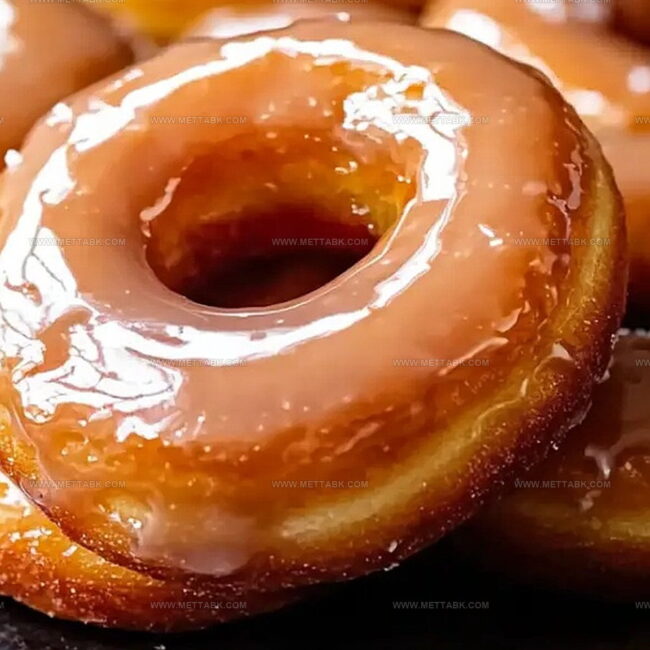
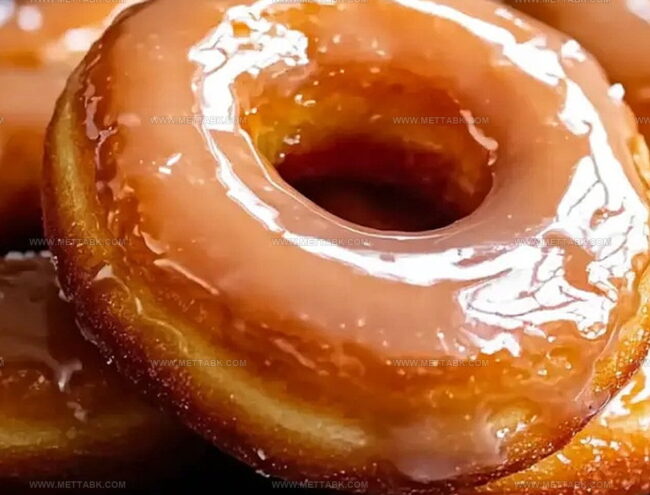
Step 8: Finish with Glaze
Dip each warm doughnut into the glaze, allowing excess to drip off. Place on a wire rack to set and allow glaze to harden slightly.
Tips for Making Soft Glazed Doughnuts at Home
Ways to Customize Homemade Glazed Doughnut Flavor
What to Serve With Homemade Glazed Doughnuts
How to Store Glazed Doughnuts and Keep Them Soft
Seal glazed doughnuts in an airtight container, placing parchment paper between layers to prevent sticking. Keep refrigerated for up to 3 days, maintaining best texture and flavor.
Wrap individual doughnuts tightly in plastic wrap, then place in a freezer-safe bag. Store frozen for 2-3 weeks, preserving their delightful taste and soft texture.
Store unglazed doughnuts at room temperature in a sealed container for 1-2 days, away from direct sunlight and heat sources.
Warm refrigerated or frozen doughnuts in a preheated oven at 350F for 5-7 minutes, restoring their fresh-baked warmth and slight crispness.
FAQs
Mix yeast with warm milk (around 110°F) and wait 5 minutes. If it becomes foamy and bubbly, your yeast is alive and ready to use.
Yes, all-purpose flour works fine. Bread flour has slightly more protein, which makes doughnuts a bit chewier, but both will produce delicious results.
Dust your hands and work surface with flour. Avoid adding too much extra flour, which can make doughnuts tough. Use a light touch when kneading.
Print
Homemade Glazed Doughnuts Recipe
- Total Time: 35 minutes
- Yield: 12 1x
Description
Crispy, golden Homemade Glazed Doughnuts promise a delightful journey through sweet, pillowy perfection. Warm from the fryer and kissed with sugary glaze, these treats will transport you to pastry paradise with each delectable bite.
Ingredients
Main Ingredients:
- 2 1/4 cups (270 grams) all-purpose flour
- 1/2 cup (120 milliliters) milk, warmed
- 2 teaspoons (8 grams) active dry yeast
- 1 egg, beaten
Binding and Flavoring Ingredients:
- 1/4 cup (50 grams) sugar
- 2 tablespoons (30 grams) unsalted butter, melted
- 1 teaspoon (5 milliliters) vanilla extract
Frying and Coating Ingredients:
- Oil for frying
- 2 cups (240 grams) powdered sugar
- 3–4 tablespoons (45–60 milliliters) milk
- 1/2 teaspoon (2.5 milliliters) vanilla extract
Instructions
- Activate yeast by dissolving it in warm, slightly tepid milk mixed with granulated sugar. Allow the mixture to develop a frothy appearance for approximately 5 minutes.
- Incorporate beaten egg, melted butter, and aromatic vanilla extract into the yeast mixture. Gradually fold in flour, creating a supple, elastic dough.
- Transfer the dough onto a lightly dusted work surface. Knead methodically until achieving a smooth, uniform texture. Nestle the dough into a generously greased container, drape with a clean kitchen towel, and permit rising in a draft-free zone for roughly 60 minutes.
- Using a rolling pin, gently flatten the dough to a half-inch thickness. Utilize a specialized doughnut cutter or circular cutters to craft precise doughnut shapes.
- Prepare for frying by heating vegetable oil in a deep, heavy-bottomed vessel to precisely 375°F. Maintain a consistent temperature throughout cooking.
- Carefully lower doughnuts into the sizzling oil, cooking in small batches. Rotate once to ensure even, golden-brown coloration. Transfer to absorbent paper towels to eliminate excess oil.
- Craft a silky glaze by whisking powdered sugar with milk and vanilla until achieving a luxurious, smooth consistency.
- Delicately immerse each freshly fried doughnut into the glossy glaze, allowing excess to drip away. Position on a wire cooling rack to set and solidify the coating.
Notes
- Check yeast freshness by ensuring it creates a foamy surface, which indicates active fermentation and guarantees soft, fluffy doughnuts.
- Use room temperature ingredients to help dough rise evenly and create consistent texture throughout the doughnuts.
- Allow dough to rise in a warm, draft-free area like inside a turned-off oven to promote optimal yeast development and prevent drying out.
- Maintain consistent oil temperature between 365-375F to prevent greasy or undercooked doughnuts, using a digital thermometer for precision.
- Prep Time: 20 minutes
- Cook Time: 15 minutes
- Category: Breakfast, Snacks, Desserts
- Method: Frying
- Cuisine: American
Nutrition
- Serving Size: 12
- Calories: 275 kcal
- Sugar: 23 g
- Sodium: 110 mg
- Fat: 10 g
- Saturated Fat: 5 g
- Unsaturated Fat: 4 g
- Trans Fat: 0.1 g
- Carbohydrates: 38 g
- Fiber: 1 g
- Protein: 4 g
- Cholesterol: 35 mg
Nate Harper
Founder & Recipe Curator
Expertise
Single-Recipe Development, Farm-to-Table Cooking, Seasonal Menu Planning, Culinary Storytelling, Home Kitchen Innovation
Education
Cascade Culinary Institute – Central Oregon Community College
Certificate in Culinary Arts
Focus: Farm-to-table cuisine, sustainable cooking practices, and seasonal recipe creation.
Nate studied under experienced chefs who emphasized local sourcing, minimal waste, and building recipes from fresh, simple ingredients.
Nate Harper is the founder and creative force behind Make, Take, Bake. Raised in the wild beauty of Oregon’s high desert, Nate grew up surrounded by family gardens, farmers’ markets, and home kitchens that celebrated the seasons.
His early love for simple, honest food evolved into a professional passion when he attended Cascade Culinary Institute, where he sharpened his skills in creating recipes that are sustainable, satisfying, and made for everyday life.
Nate’s goal is to make cooking feel accessible, free of fuss, and full of flavor. He believes a single, thoughtfully built dish can stand alone, and sometimes even steal the show.