
Irresistible Homemade Snickers Recipe That Beats the Store
Sweet memories of childhood chocolate bars spark magic in this homemade snickers adventure that brings nostalgic flavors right into your kitchen.
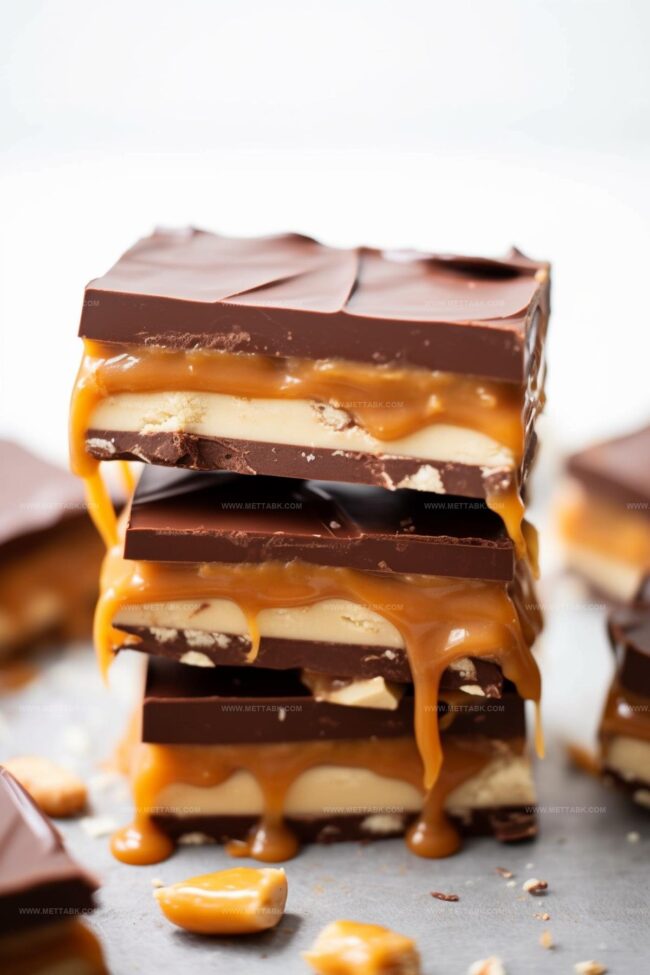
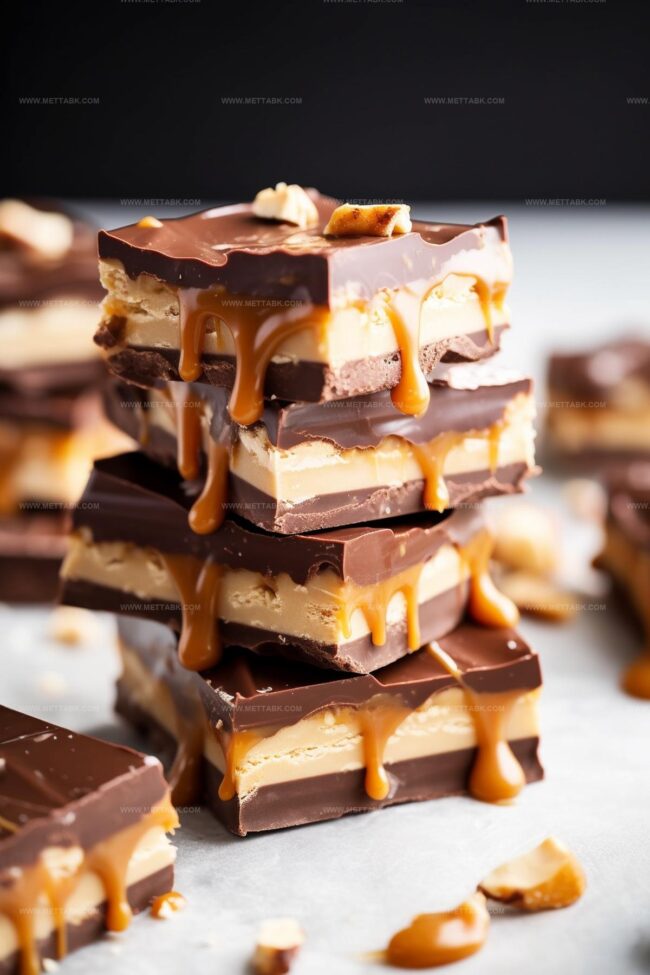
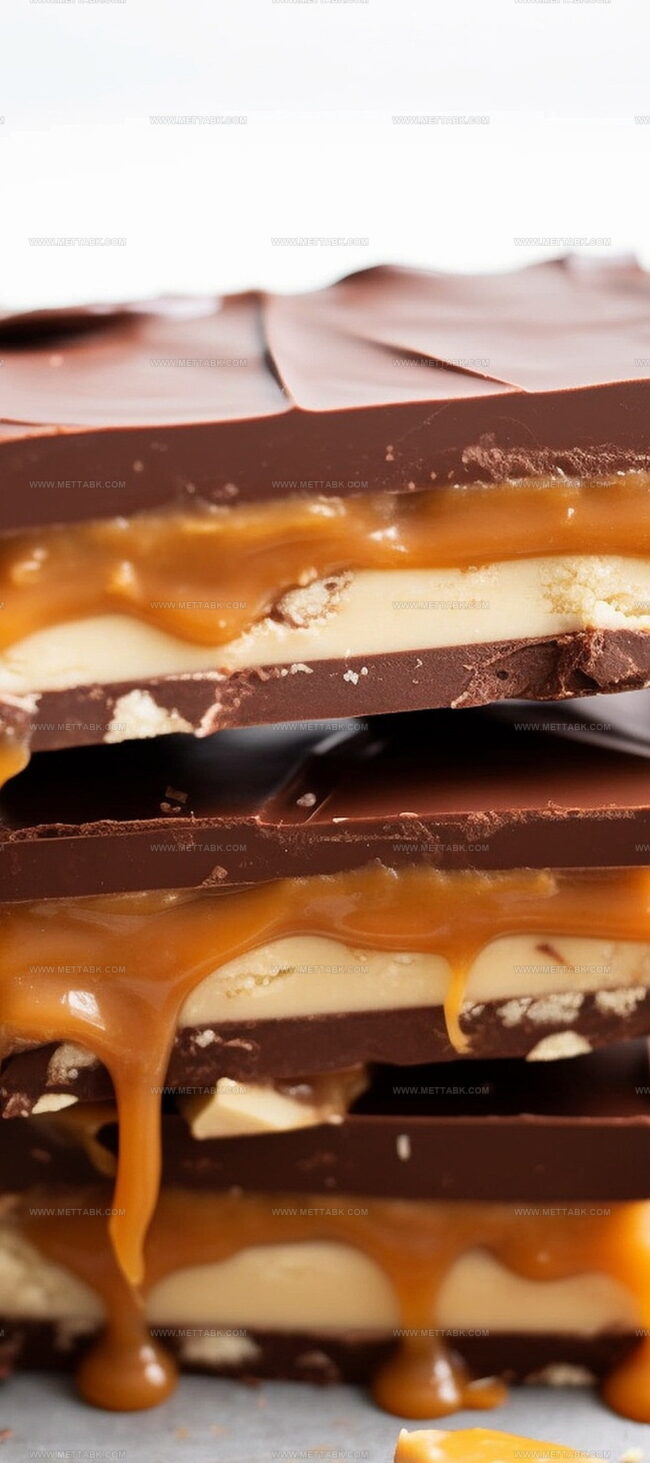
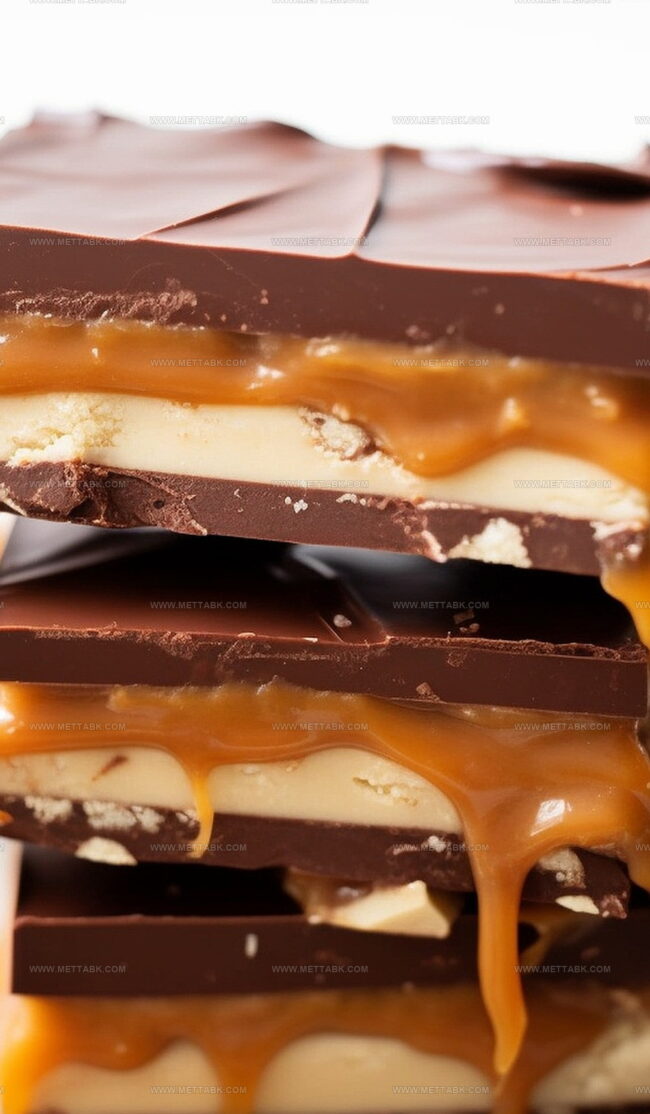
Layers of caramel, nougat, and rich chocolate create a decadent treat impossible to resist.
Crafting these bars lets you control every delicious ingredient without preservatives or artificial additives.
Each bite connects you to classic candy joy while offering a personalized twist on the beloved classic.
Smooth peanuts add crunch and depth to the irresistible combination of textures and tastes.
Forget store-bought versions and embrace the satisfaction of making something extraordinary from scratch.
You’ll feel like a culinary artist ready to impress everyone with this delightful confection.
Homemade Snickers Bars to Enjoy
Ingredients for Homemade Snickers
Base Layer:Nougat Layer:Caramel and Top Layer:Instructions to Make Homemade Snickers
Step 1: Prepare the Chocolate Base
Line a 9×13 inch pan with foil or parchment paper and lightly spray with non-stick cooking spray. Combine chocolate chips and peanut butter in a microwave-safe bowl.
Melt the mixture by heating at 50% power for one minute, then stir. Continue heating in 30-second intervals, stirring between each, until completely smooth and melted.
Step 2: Create the First Chocolate Layer
Pour the melted chocolate mixture evenly into the prepared pan. Place the pan in the refrigerator for 20 minutes to allow the chocolate to set firmly.
Step 3: Whip Up the Nougat Filling
Melt butter in a medium saucepan over medium heat. Add:Stir continuously until sugar dissolves completely.
Bring the mixture to a boil and cook for 5 minutes, stirring occasionally. Remove from heat and blend in:Stir until the mixture becomes smooth and creamy.
Step 4: Spread the Nougat Layer
Fold chopped peanuts into the nougat mixture. Spread this layer evenly over the chilled chocolate base.
Allow to cool completely at room temperature.
Step 5: Pour the Caramel Goodness
Combine caramels and whipping cream in a microwave-safe bowl.
Melt using 50% power, heating for 30 seconds and stirring between intervals. Continue until the caramel becomes silky smooth.
Alternatively, melt in a saucepan over low heat. Pour the caramel evenly over the nougat layer and let it cool completely.
Step 6: Add the Final Chocolate Topping
Melt the remaining chocolate chips and peanut butter using the same microwave method as before. Pour this final chocolate layer over the caramel, spreading carefully to create an even coating.
Step 7: Chill and Set
Refrigerate the entire pan for at least one hour until completely firm. Carefully remove the entire block from the pan by lifting the foil or parchment paper.
Slice into bars of your preferred size and shape.
Step 8: Store and Enjoy
Keep the Snickers bars in a covered container.
They will stay fresh and delicious for up to one week at room temperature or in the refrigerator.
Tips for Homemade Snickers
Variations on Homemade Snickers
Pairing Ideas for Homemade Snickers
Storage Advice for Homemade Snickers
FAQs
Yes, you can substitute peanuts with almonds, cashews, or pecans for a unique twist on the classic Snickers flavor.
Absolutely! Just ensure you use gluten-free chocolate chips and check that all other ingredients are certified gluten-free.
Work with cool layers and allow each layer to set completely in the refrigerator before adding the next. This helps maintain distinct, clean layers in your homemade Snickers.
You can replace marshmallow fluff with a mixture of melted marshmallows and a little corn syrup to achieve a similar texture and binding effect in the nougat layer.
Print
Homemade Snickers Recipe
- Total Time: 1 hour 30 minutes
- Yield: 12 1x
Description
Indulgent homemade Snickers bars blend layers of nougat, caramel, and peanuts enrobed in chocolate. Rich chocolate and classic candy flavors combine for a nostalgic sweet treat you can create in your own kitchen.
Ingredients
- 1 cup milk chocolate chips
- 1 cup milk chocolate chips
- 1/4 cup creamy peanut butter
- 1/4 cup creamy peanut butter
- 1/4 cup creamy peanut butter
- 1 cup granulated sugar
- 1 cup salted peanuts (coarsely chopped)
- 14 oz caramels (kraft caramel bits recommended)
- 7 oz marshmallow fluff
- 1/4 cup unsalted butter
- 1/4 cup whipping cream
- 1/4 cup evaporated milk
- 1 tsp vanilla extract
Instructions
- Prepare a 9×13 inch pan by lining it with foil or parchment paper and lightly spraying with non-stick cooking spray.
- Melt chocolate chips and peanut butter in a microwave-safe bowl at 50% power. Heat for 1 minute, then stir. Continue heating in 30-second intervals until completely smooth and melted.
- Pour the chocolate mixture evenly into the prepared pan. Refrigerate for 20 minutes until set.
- In a medium saucepan, melt butter over medium heat. Add sugar and milk, stirring constantly until sugar dissolves. Bring to a boil and cook for 5 minutes, stirring occasionally.
- Remove from heat and mix in marshmallow fluff, peanut butter, and vanilla extract until smooth and creamy.
- Fold in chopped peanuts and spread the nougat mixture evenly over the chocolate layer. Allow to cool completely.
- Combine caramels and whipping cream in a microwave-safe bowl. Heat at 50% power for 30 seconds, stirring between intervals until smooth and fully melted.
- Pour melted caramel over the nougat layer, ensuring even coverage. Let cool completely until set.
- Melt remaining chocolate chips and peanut butter using the same microwave method as the first chocolate layer.
- Pour final chocolate layer over caramel, spreading to create a smooth, even top.
- Refrigerate for at least 1 hour until completely firm.
- Remove entire slab from pan by lifting the foil. Cut into individual bars of desired size.
- Store in a covered container at room temperature for up to one week.
Notes
- Ensure chocolate and peanut butter are melted slowly to prevent burning, stirring frequently for smooth consistency.
- For a healthier version, substitute dark chocolate and use natural peanut butter with no added sugars.
- Make the dessert gluten-free by checking ingredient labels for marshmallow fluff and chocolate chips.
- Prevent sticking by using high-quality parchment paper with overhanging edges for easy removal.
- Prep Time: 20 minutes
- Cook Time: 1 hour 10 minutes
- Category: Desserts, Snacks
- Method: Melting
- Cuisine: American
Nutrition
- Serving Size: 12
- Calories: 247
- Sugar: 25 g
- Sodium: 95 mg
- Fat: 14 g
- Saturated Fat: 6 g
- Unsaturated Fat: 7 g
- Trans Fat: 0.1 g
- Carbohydrates: 27 g
- Fiber: 1.5 g
- Protein: 4 g
- Cholesterol: 15 mg
Clara Bennett
Contributing Recipe Developer & Food Writer
Expertise
Baking and Pastry Development, Gluten-Free and Allergy-Friendly Recipe Creation, Culinary Storytelling and Food Journalism, Recipe Testing and Standardization, Southern Comfort Foods and Modern Twists
Education
Sullivan University – National Center for Hospitality Studies
Associate Degree in Culinary Arts
Focus: Baking and Pastry Arts, Recipe Testing, and Culinary Journalism.
Clara specialized in crafting desserts that blend classic Southern comfort with modern techniques, while developing strong writing skills to tell the story behind every dish.
Lane Community College (Certificate Program)
Certificate in Food Writing and Photography
Focus: Culinary storytelling, recipe formatting, food styling, and visual presentation.
Clara’s love of baking started young, powered by homemade pies, biscuits, and stories passed around the family table.
After earning her degree at Sullivan University and a food writing certificate at Lane Community College, she turned her passion into a craft: sharing recipes that are simple, soulful, and always full of heart.
She’s big on bold flavors, flexible ideas, and creating sweets that fit any table (yes, even if you’re gluten-free). When she’s not baking, you’ll find her wandering farmers’ markets, styling food for the next photo shoot, or working on her ever-growing recipe journal.