
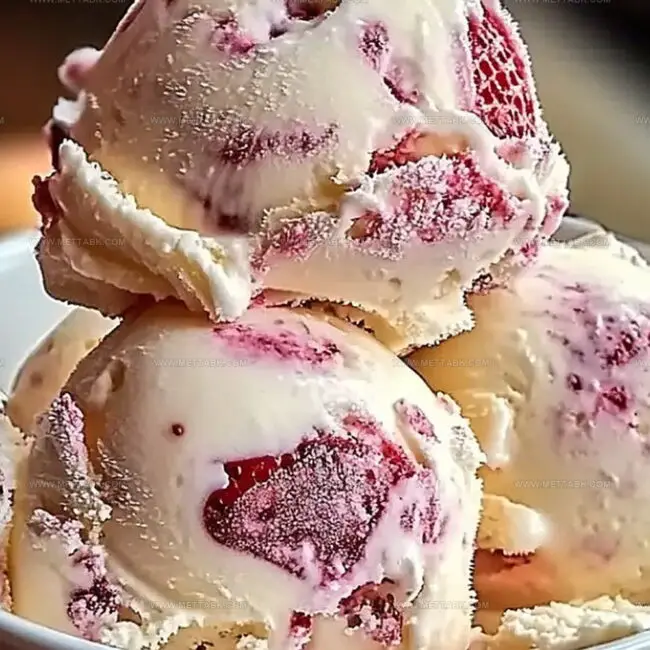
Dreamy Homemade Strawberry Vanilla Bean Ice Cream Recipe
Cold summer days call for creamy strawberry vanilla bean ice cream that delivers pure bliss in every spoonful.
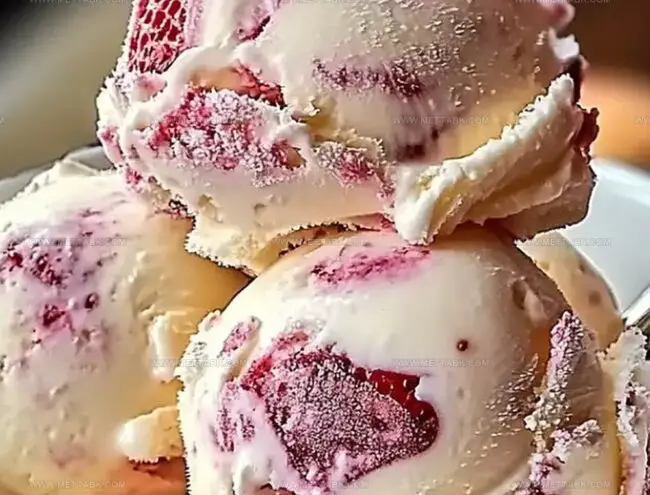
Ripe, ruby-red strawberries dance with delicate vanilla bean specks to create a dessert that melts hearts.
Sweet berries burst with natural sweetness, complementing the rich, smooth cream base.
Each ingredient tells a story of pure indulgence and seasonal delight.
The homemade touch transforms simple ingredients into a luxurious treat that beats any store-bought version.
Fresh strawberries and premium vanilla beans elevate this classic dessert to an irresistible masterpiece.
Prepare to savor a scoop of pure summer magic that promises to delight your taste buds.
Homemade Strawberry Vanilla Bean Ice Cream You’ll Crave
What You Need to Make Homemade Strawberry Vanilla Bean Ice Cream
Dairy Base:Sweeteners:Egg Components:Fruit Component:Flavor Enhancers:How to Prepare Homemade Strawberry Vanilla Bean Ice Cream

Step 1: Transform Strawberries
Dice fresh strawberries and sprinkle with sugar. Let them rest and release their sweet juices for half an hour, creating a vibrant fruity base that will burst with flavor in your ice cream.
Step 2: Create Creamy Infusion
Combine cream, milk, sugar, salt, and vanilla bean seeds in a saucepan. Warm the mixture gently, coaxing out the rich vanilla essence until it nearly reaches a boil.
Remove from heat to preserve its delicate flavor profile.
Step 3: Blend Egg Mixture
Whisk egg yolks with remaining sugar until silky smooth.
Carefully stream the hot cream mixture into the eggs, stirring constantly to create a luxurious, smooth custard base without scrambling the eggs.
Step 4: Cook Custard to Perfection
Return the mixture to the pan, cooking slowly over low heat.
Stir continuously until the custard thickens enough to coat the back of a spoon, reaching a temperature of 170-175°F. This step transforms liquid ingredients into a rich, creamy foundation.
Step 5: Prepare for Chilling
Strain the custard through a fine-mesh sieve to ensure ultimate smoothness. Stir in vanilla extract and transfer to a container.
Refrigerate for at least 4 hours or overnight, allowing flavors to meld and develop.
Step 6: Churn Ice Cream Magic
Remove vanilla bean pod from the chilled custard.
Pour into an ice cream maker and churn according to manufacturer’s instructions. In the final moments of churning, fold in the macerated strawberries for a burst of fruity freshness.
Step 7: Freeze and Set
Transfer the freshly churned ice cream to an airtight container. Freeze for 2-4 hours until it reaches the perfect scoopable consistency.
The waiting is the hardest part, but trust me, it’s worth every moment!
Tips for Smooth and Creamy Homemade Ice Cream
Flavor Variations to Try with Strawberry Vanilla Bean Ice Cream
Best Pairings for Strawberry Vanilla Bean Ice Cream
How to Keep Strawberry Vanilla Bean Ice Cream Fresh
FAQs
You can use frozen strawberries, but thaw and drain them completely before macerating. Fresh strawberries will provide the best flavor and texture for this homemade ice cream.
An ice cream maker helps create a smooth, creamy texture, but you can make no-churn ice cream by whipping heavy cream and condensed milk together and folding in the strawberries before freezing.
Adding sugar, alcohol (like vodka), or corn syrup helps prevent ice crystal formation. The fat content from heavy cream and egg yolks also contributes to a smoother texture.
Print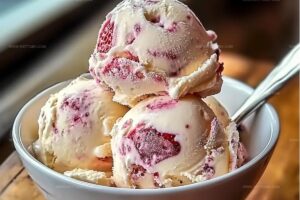
Homemade Strawberry Vanilla Bean Ice Cream Recipe
- Total Time: 1 hour
- Yield: 6 1x
Description
Creamy homemade strawberry vanilla bean ice cream beckons with summer’s sweetest promise, blending fresh berries and rich vanilla into a luscious dessert. Smooth, cool spoonfuls will transport you straight to delightful moments of pure indulgence.
Ingredients
Dairy:
- 2 cups (473 milliliters) heavy cream
- 1 cup (237 milliliters) whole milk
- 6 large egg yolks
Flavoring:
- 1 vanilla bean, split and seeds scraped
- 1 teaspoon pure vanilla extract
- 3/4 cup (150 grams) granulated sugar
- Pinch of salt
Fruit:
- 1 cup (150 grams) fresh strawberries, hulled and diced
- 2 tablespoons (25 grams) sugar (for strawberries)
Instructions
- Macerate strawberries by sprinkling sugar over diced fruit and allow to rest for 30 minutes, releasing natural sweetness and juices.
- Create a creamy base by combining cream, milk, half the sugar, salt, and vanilla bean seeds in a saucepan, heating until just reaching a gentle boil, then immediately remove from heat.
- Whisk egg yolks with remaining sugar until silky smooth, then gradually incorporate hot milk mixture while continuously stirring to prevent egg curdling.
- Return combined mixture to saucepan, cooking on low heat and stirring consistently until custard reaches 170-175°F, achieving a thick, coating consistency.
- Strain custard through fine-mesh sieve into a bowl, incorporate vanilla extract, then refrigerate for minimum 4 hours until thoroughly chilled.
- Remove vanilla bean pod and churn custard in ice cream maker according to manufacturer’s instructions, folding macerated strawberries during final churning minutes.
- Transfer freshly churned ice cream to airtight container and freeze for 2-4 hours until firm and scoopable.
Notes
- Enhance strawberry flavor by roasting the diced berries before macerating, which intensifies their natural sweetness and concentrates their taste.
- Use a digital thermometer for precise custard temperature to prevent overcooking and ensure a silky-smooth texture.
- Create a vegan version by substituting heavy cream with full-fat coconut milk and using cornstarch mixed with plant-based milk instead of egg yolks for thickening.
- For a lower-sugar option, replace granulated sugar with monk fruit sweetener or stevia, adjusting quantities to maintain the right consistency and sweetness level.
- Prep Time: 45 minutes
- Cook Time: 15 minutes
- Category: Desserts
- Method: Simmering
- Cuisine: American
Nutrition
- Serving Size: 6
- Calories: 392 kcal
- Sugar: 38 g
- Sodium: 75 mg
- Fat: 32 g
- Saturated Fat: 20 g
- Unsaturated Fat: 10 g
- Trans Fat: 1 g
- Carbohydrates: 25 g
- Fiber: 1 g
- Protein: 5 g
- Cholesterol: 160 mg
Clara Bennett
Contributing Recipe Developer & Food Writer
Expertise
Baking and Pastry Development, Gluten-Free and Allergy-Friendly Recipe Creation, Culinary Storytelling and Food Journalism, Recipe Testing and Standardization, Southern Comfort Foods and Modern Twists
Education
Sullivan University – National Center for Hospitality Studies
Associate Degree in Culinary Arts
Focus: Baking and Pastry Arts, Recipe Testing, and Culinary Journalism.
Clara specialized in crafting desserts that blend classic Southern comfort with modern techniques, while developing strong writing skills to tell the story behind every dish.
Lane Community College (Certificate Program)
Certificate in Food Writing and Photography
Focus: Culinary storytelling, recipe formatting, food styling, and visual presentation.
Clara’s love of baking started young, powered by homemade pies, biscuits, and stories passed around the family table.
After earning her degree at Sullivan University and a food writing certificate at Lane Community College, she turned her passion into a craft: sharing recipes that are simple, soulful, and always full of heart.
She’s big on bold flavors, flexible ideas, and creating sweets that fit any table (yes, even if you’re gluten-free). When she’s not baking, you’ll find her wandering farmers’ markets, styling food for the next photo shoot, or working on her ever-growing recipe journal.