Homemade Jam Drops (Thumbprint Cookies) Recipe That Melts Hearts
Sweet memories dance through my kitchen whenever I bake these delightful jam drops that connect childhood nostalgia with delicious simplicity.
Grandmothers across generations have perfected this classic cookie design.
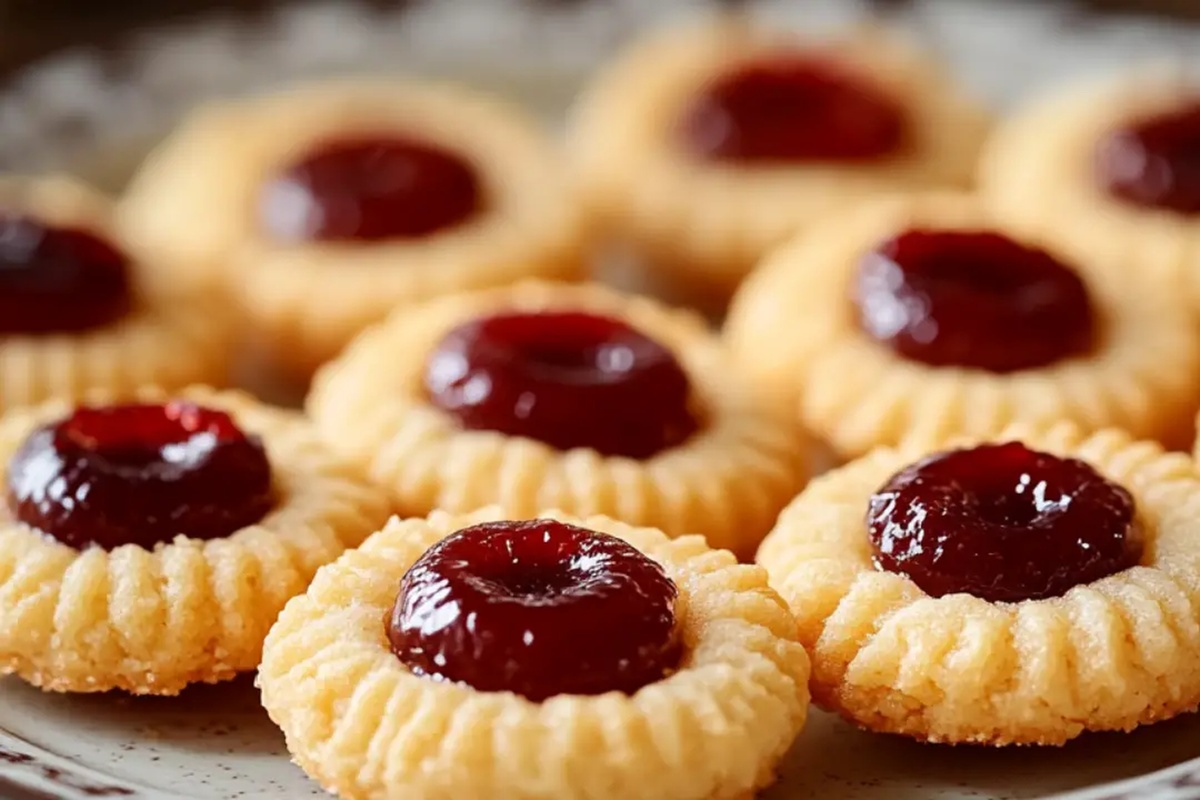
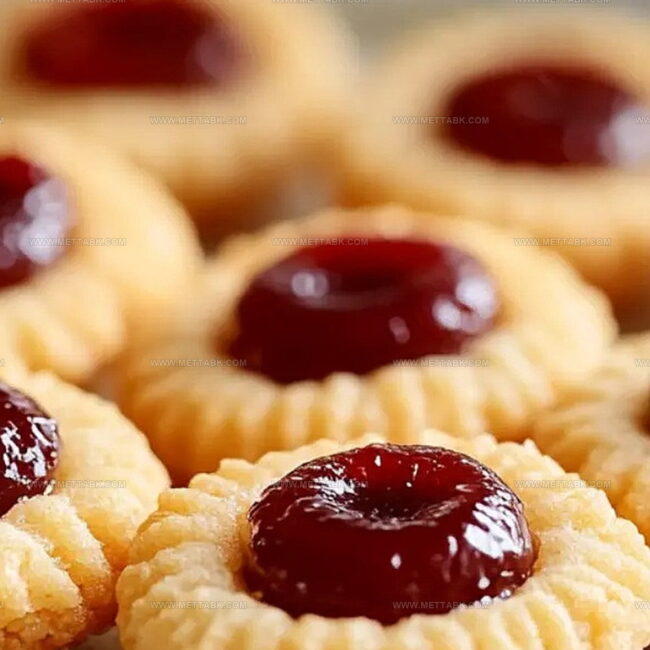
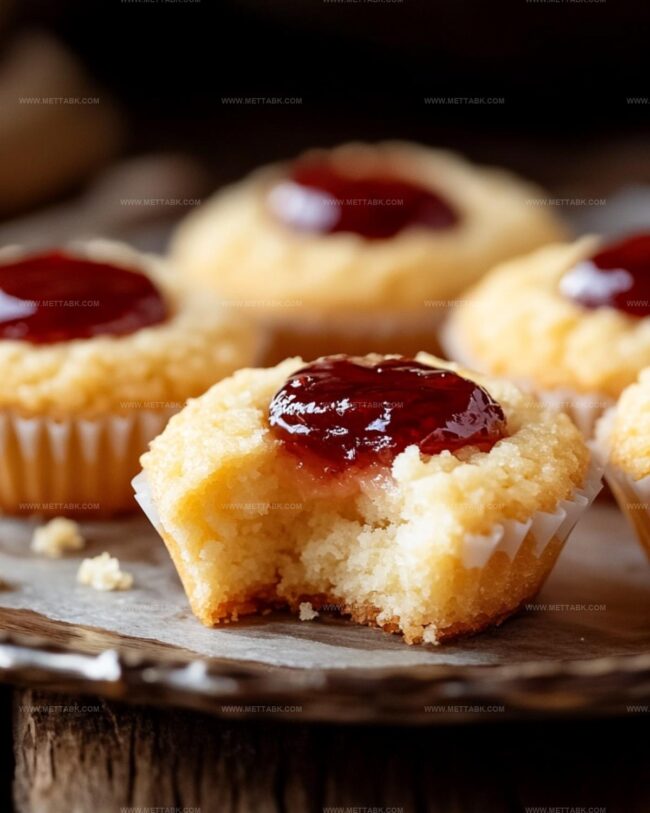
Soft butter cookies with bright fruit centers create a magical treat everyone adores.
Small indentations filled with vibrant jam make these cookies look incredibly charming.
Each bite carries warmth and comfort from a treasured family recipe.
Mixing ingredients takes just minutes, promising delectable results that spark joy.
Jam Drops Thumbprint Cookies That Bring Nostalgia
Ingredients for Classic Jam Drops Cookies
For the Base:For the Moisture and Flavor:For the Topping:Stepwise Instructions for Jam Drops Cookies
Step 1: Prepare Baking Station
Warm up your oven to 180C/350F. Line two baking trays with parchment paper, creating a perfect landing spot for your soon-to-be-delicious cookies.
Step 2: Whip Butter and Sugar
Grab your electric mixer and transform butter and sugar into a creamy, dreamy mixture. Beat them together until they become light and fluffy, creating the perfect cookie base.
Step 3: Blend Wet Ingredients
Introduce vanilla, egg, and salt to your butter mixture. Give everything a quick beat until all ingredients dance together smoothly.
Step 4: Form Cookie Dough
Gently fold in flour, mixing until the dough becomes slightly crumbly. Don’t overmix – you want a tender, melt-in-your-mouth texture.
Step 5: Shape Cookie Bases
Roll the dough into small balls, about the size of a tablespoon. Flatten each ball into a disc and create a gentle thumbprint in the center of each cookie.
Step 6: Fill with Fruity Goodness
Nestle a small dollop of jam into each cookie’s center. Choose your favorite flavor – strawberry, raspberry, or apricot work wonderfully.
Step 7: Arrange on Baking Trays
Place cookies on prepared trays, leaving some breathing room between each one. They’ll need space to spread their delicious wings.
Step 8: Bake to Golden Perfection
Slide trays into the oven and bake for 14 minutes. Rotate the trays halfway through to ensure even, golden-brown edges.
Your kitchen will smell like a bakery paradise.
Step 9: Cool and Enjoy
Let cookies rest on the tray until completely cool.
The jam will set, creating a beautiful, glossy center. Grab a cookie, take a bite, and savor the homemade goodness!
Tips to Perfect Your Thumbprint Cookies

Variations to Personalize Jam Drops
Pairing Suggestions for Cookie Time
Pair Sweet Jam Drops with Complementary Flavors:Proper Storage for Jam Drops Cookies
Store jam drops in an airtight container lined with parchment paper between layers. Keep refrigerated for up to 5 days, ensuring cookies remain fresh and crisp.
Wrap cookies individually in plastic wrap, then place in a freezer-safe container. Freeze for up to 3 months without jam filling. Add jam after thawing to maintain texture.
Place cooled cookies in a sealed container with a tight lid. Keep at room temperature for 3-4 days away from direct sunlight or heat sources.
Warm cookies gently in a preheated oven at 150C for 3-4 minutes. Allow to cool completely before serving to restore original crisp texture.
FAQs
Strawberry, raspberry, or apricot jams are ideal. Choose seedless jams for a smoother texture and more even filling.
Yes, you can prepare the dough in advance and refrigerate for up to 3 days before baking. Just let the dough come to room temperature before shaping.
Make a deeper thumb indent and use a small spoon to carefully add a small amount of jam. Don’t overfill the center.
These Jam Drops are nut-free, making them a safe option for those with nut allergies. Always double-check ingredient labels to ensure complete safety.
Print
Jam Drops (Thumbprint Cookies) Recipe
- Total Time: 34 minutes
- Yield: 24 1x
Description
Sweet and buttery jam drops nestle delightfully in this classic Australian cookie that melts in your mouth. Crumbly shortbread meets fruity jam centers, creating a delectable treat perfect for afternoon tea or sharing with friends.
Ingredients
Main Ingredients:
- 2 1/2 cups (315 grams) plain flour (all-purpose flour)
- 225 grams (2 sticks) unsalted butter, softened
- 1 large egg, at room temperature (50–55 grams/2 ounces)
Sweeteners and Flavoring:
- 3/4 cup (150 grams) caster sugar (superfine sugar)
- 2 teaspoons vanilla extract
Additional Ingredients:
- 1/4 teaspoon cooking salt (kosher salt)
- 1/2 cup strawberry or raspberry jam (or any flavor), mixed well to loosen
Instructions
- Preheat the oven to 180°C/350°F (160°C fan-forced) and prepare two baking trays with parchment paper.
- Using an electric mixer, cream the butter and sugar until light and fluffy, achieving a smooth, pale consistency.
- Incorporate vanilla, egg, and salt into the butter mixture, mixing until thoroughly blended.
- Gently fold in flour, mixing until the dough forms a crumbly texture that holds together when pressed.
- Craft uniform dough balls approximately 3cm in diameter, delicately flattening each into a disc shape.
- Create a gentle thumb impression in the center of each cookie, forming a small well for jam.
- Generously fill each indentation with a slightly heaped portion of jam, ensuring even distribution.
- Arrange cookies on prepared trays, spacing them to allow room for slight spreading during baking.
- Bake for 14 minutes, rotating trays halfway through to guarantee consistent golden-brown edges and pale golden surface.
- Allow cookies to cool completely on the baking tray, enabling them to firm up and develop a delicate, crisp texture.
Notes
- Customize jam flavors by mixing different varieties for unique taste combinations.
- Chill dough for 15 minutes before shaping to prevent sticky handling and maintain cookie shape.
- Use room temperature ingredients to ensure smooth, even mixing and consistent texture.
- Swap wheat flour with gluten-free alternatives like almond or oat flour for dietary restrictions.
- Prep Time: 20 minutes
- Cook Time: 14 minutes
- Category: Desserts, Snacks
- Method: Baking
- Cuisine: British
Nutrition
- Serving Size: 24
- Calories: 143
- Sugar: 7 g
- Sodium: 41 mg
- Fat: 7 g
- Saturated Fat: 4 g
- Unsaturated Fat: 3 g
- Trans Fat: 0 g
- Carbohydrates: 19 g
- Fiber: 0.5 g
- Protein: 2 g
- Cholesterol: 20 mg
Nate Harper
Founder & Recipe Curator
Expertise
Single-Recipe Development, Farm-to-Table Cooking, Seasonal Menu Planning, Culinary Storytelling, Home Kitchen Innovation
Education
Cascade Culinary Institute – Central Oregon Community College
Certificate in Culinary Arts
Focus: Farm-to-table cuisine, sustainable cooking practices, and seasonal recipe creation.
Nate studied under experienced chefs who emphasized local sourcing, minimal waste, and building recipes from fresh, simple ingredients.
Nate Harper is the founder and creative force behind Make, Take, Bake. Raised in the wild beauty of Oregon’s high desert, Nate grew up surrounded by family gardens, farmers’ markets, and home kitchens that celebrated the seasons.
His early love for simple, honest food evolved into a professional passion when he attended Cascade Culinary Institute, where he sharpened his skills in creating recipes that are sustainable, satisfying, and made for everyday life.
Nate’s goal is to make cooking feel accessible, free of fuss, and full of flavor. He believes a single, thoughtfully built dish can stand alone, and sometimes even steal the show.