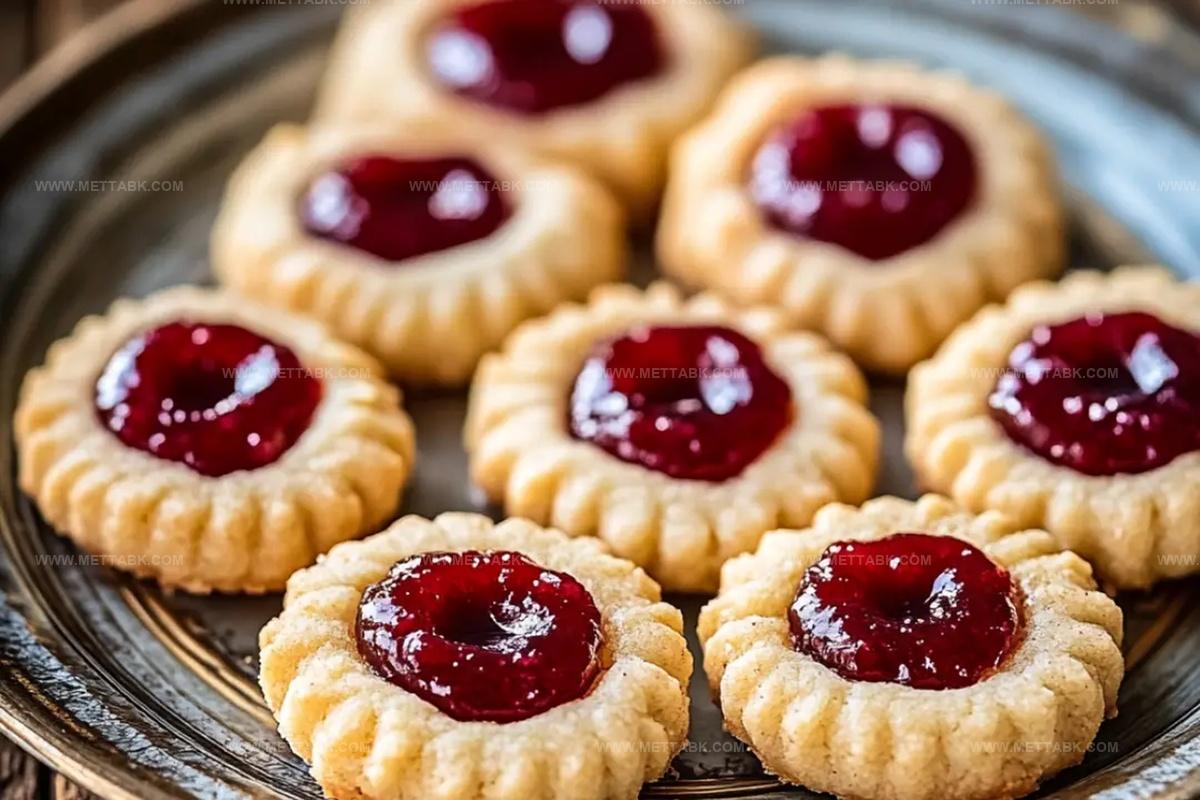
Nostalgic Jam Thumbprint Cookies Recipe: Pure Childhood Bliss
Soft, buttery jam thumbprint cookies transport you back to childhood kitchens where warmth and sweetness collide.
Grandmothers carefully pressed their thumbs into delicate dough, creating perfect wells for vibrant fruity preserves.
Memories flood back with each tender bite of these classic treats.
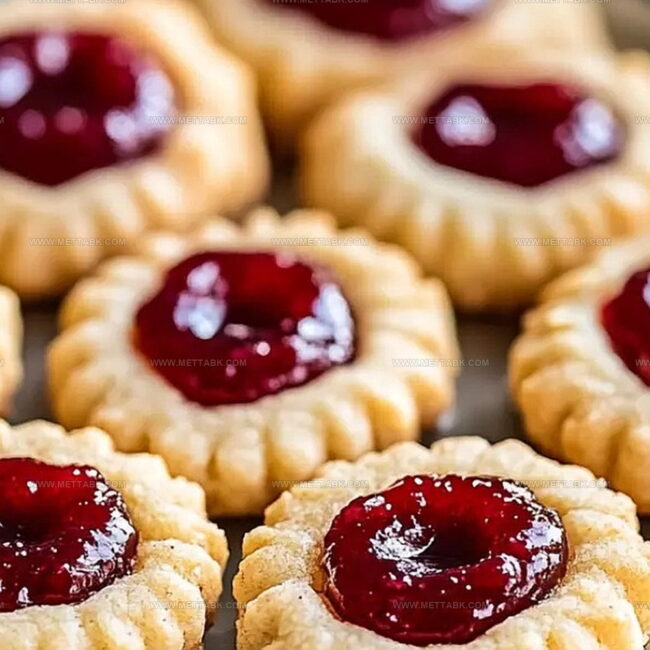
Rich butter and vanilla create a melt-in-your-mouth base that complements sweet raspberry or strawberry centers.
Delicate edges golden and crisp invite you to savor every crumbly moment.
Baking these simple cookies connects generations through shared culinary traditions.
One taste will instantly reconnect you with cherished memories of home and comfort.
Jam Thumbprint Cookies That Bring Nostalgia to Every Bite
Ingredients for Jam Thumbprint Cookies
For the Base:For the Wet Ingredients:For the Topping:Stepwise Instructions to Make Thumbprint Cookies
Step 1: Create Buttery Cookie Base
Whisk together flour, baking powder, and salt in a mixing bowl. In another bowl, cream butter and sugar until they become fluffy and light.
Blend in egg and vanilla extract thoroughly, creating a smooth mixture.
Step 2: Shape Delightful Cookie Domes
Gently combine wet and dry ingredients until just mixed.
Roll dough into small round balls, placing them evenly on parchment-lined baking sheet. Using your thumb, create a gentle indentation in the center of each cookie ball.
Step 3: Add Colorful Jam Centers
Select your favorite fruit jam and carefully spoon it into the thumb-pressed cookie centers. Choose vibrant flavors like strawberry, raspberry, or mixed berry for a burst of fruity goodness.
Step 4: Bake Until Golden Perfection
Place cookies in preheated oven at 350°F (175°C). Bake for 10-12 minutes, watching for edges to turn a beautiful golden brown color.
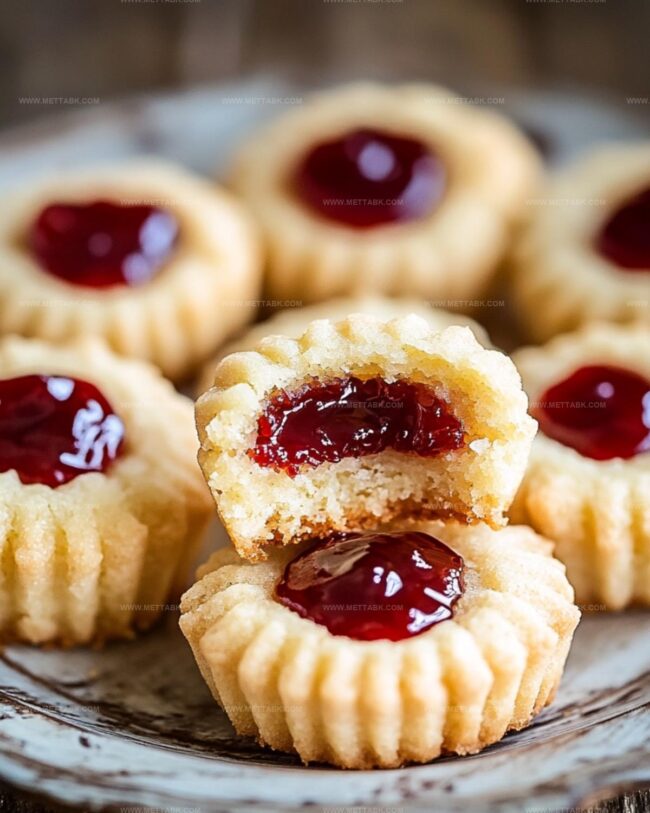
The cookies will develop a delicate, crisp exterior while maintaining a soft interior.
Step 5: Cool and Savor Nostalgic Treats
Remove cookies from oven and let them cool completely on the baking sheet.
The jam centers will set and become wonderfully gooey. Serve these classic treats that remind you of childhood bakery moments.
Tips to Nail Perfect Cookies Every Time
Variations to Customize Your Cookies
Pairing Suggestions to Enjoy With Cookies
How to Store Jam Thumbprint Cookies Properly

Store cooled cookies in an airtight container layered with parchment paper for up to 5 days, keeping them fresh and preventing jam from sticking together.
Wrap individual cookies tightly in plastic wrap, place in freezer-safe container, and store for up to 3 months; thaw at room temperature for 30 minutes before serving.
Warm cookies on a microwave-safe plate for 10-15 seconds to restore softness, being careful not to overheat and melt the jam.
Preheat oven to 300F, place cookies on baking sheet, and warm for 3-5 minutes to restore crisp edges and revive flavor without drying out.
FAQs
Chill the dough for 30 minutes before making thumbprints and use thick, high-quality jam that isn’t too runny.
Absolutely! Choose any seedless jam you love like apricot, blueberry, or peach. Just ensure it’s not too watery.
Avoid overworking the dough and make sure your butter is at room temperature for the perfect cookie texture.
Yes! These thumbprint cookies are delightful for holiday gifts, cookie exchanges, or as a sweet homemade treat for friends and family.
Print
Jam Thumbprint Cookies That Just Channel Nostalgia Recipe
- Total Time: 32 minutes
- Yield: 24 1x
Description
Sweet memories of grandma’s kitchen come alive with these classic jam thumbprint cookies, offering a delightful blend of buttery shortbread and fruity jam centers. Crisp edges and tender middles make these treats perfect for sharing with loved ones during cozy afternoons.
Ingredients
Main Ingredients:
- 1.5 cups all-purpose flour
- 0.5 cup unsalted butter, softened
- 0.5 cup granulated sugar
- 1 large egg
Leavening and Seasoning:
- 0.5 teaspoon baking powder
- 0.25 teaspoon salt
Flavor Enhancers:
- 1 teaspoon vanilla extract
- 0.25 cup fruit jam (strawberry, raspberry, or your choice)
Instructions
- Prepare workstation by lining a baking sheet with parchment paper and heating oven to 350F (175C).
- Combine flour, baking powder, and salt in a mixing bowl, whisking thoroughly to ensure even distribution.
- Cream butter and sugar in a separate bowl until the mixture becomes pale and airy, creating a smooth base.
- Incorporate egg and vanilla extract into the butter mixture, blending until completely integrated.
- Fold dry ingredients into wet ingredients, mixing gently until a uniform dough forms without overmixing.
- Shape dough into compact, uniform 1-inch spheres using gentle rolling motions between palms.
- Arrange cookie balls on prepared baking sheet, leaving adequate spacing between each.
- Create a centered well in each cookie by pressing thumb gently into the middle, forming a clean indentation.
- Carefully spoon preferred fruit jam into each cookie’s depression, ensuring neat and even filling.
- Transfer baking sheet to preheated oven and bake for 10-12 minutes until cookie edges turn a delicate golden brown.
- Remove from oven and allow cookies to cool completely on the baking sheet, allowing jam to set and flavors to stabilize.
- Serve and savor these nostalgic, tender jam-filled delights.
Notes
- Choose jam with vibrant, rich flavors like homemade preserves for an extra special touch that elevates the classic cookie.
- Make gluten-free by substituting regular flour with almond or coconut flour, ensuring those with dietary restrictions can enjoy these delightful treats.
- Chill the dough for 30 minutes before shaping to prevent spreading and maintain the perfect thumbprint shape during baking.
- Experiment with different jam combinations like apricot, mixed berry, or even chocolate spread to create unique flavor profiles that surprise and delight taste buds.
- Prep Time: 20 minutes
- Cook Time: 12 minutes
- Category: Snacks, Desserts
- Method: Baking
- Cuisine: American
Nutrition
- Serving Size: 24
- Calories: 123
- Sugar: 6 g
- Sodium: 54 mg
- Fat: 6 g
- Saturated Fat: 3.7 g
- Unsaturated Fat: 2.1 g
- Trans Fat: 0.1 g
- Carbohydrates: 17 g
- Fiber: 0.3 g
- Protein: 1.4 g
- Cholesterol: 14 mg
Nate Harper
Founder & Recipe Curator
Expertise
Single-Recipe Development, Farm-to-Table Cooking, Seasonal Menu Planning, Culinary Storytelling, Home Kitchen Innovation
Education
Cascade Culinary Institute – Central Oregon Community College
Certificate in Culinary Arts
Focus: Farm-to-table cuisine, sustainable cooking practices, and seasonal recipe creation.
Nate studied under experienced chefs who emphasized local sourcing, minimal waste, and building recipes from fresh, simple ingredients.
Nate Harper is the founder and creative force behind Make, Take, Bake. Raised in the wild beauty of Oregon’s high desert, Nate grew up surrounded by family gardens, farmers’ markets, and home kitchens that celebrated the seasons.
His early love for simple, honest food evolved into a professional passion when he attended Cascade Culinary Institute, where he sharpened his skills in creating recipes that are sustainable, satisfying, and made for everyday life.
Nate’s goal is to make cooking feel accessible, free of fuss, and full of flavor. He believes a single, thoughtfully built dish can stand alone, and sometimes even steal the show.