Magical Little Debbie Christmas Tree Cheesecake Recipe
Winter’s magic comes alive with this Little Debbie Christmas tree cheesecake that transforms ordinary dessert into a nostalgic celebration.
Childhood memories flood back when you see those iconic green tree shapes.
Sweet layers of cream cheese and festive decorations capture holiday cheer perfectly.
Delicate pine tree patterns emerge through carefully crafted cream cheese frosting.
Unexpected details make this recipe shine beyond traditional holiday treats.
Baking becomes an adventure of flavors and festive creativity.
Each slice promises a delightful journey through seasonal comfort and joy.
Little Debbie Christmas Tree Cheesecake Highlights
Ingredients for Little Debbie Christmas Tree Cheesecake
Crust Ingredients:Cheesecake Filling Ingredients:Topping and Decoration Ingredients:How to Prepare Christmas Tree Cheesecake

Step 1: Warm Up the Oven
Get your oven ready by setting it to a cozy 325°F. Grab a springform pan and give it a light butter massage.
Slip a parchment paper circle on the bottom to make your cheesecake’s grand exit super smooth.
Step 2: Create the Crumbly Crust Foundation
Grab graham cracker crumbs and melted butter in a mixing bowl.
Stir them together until they look like damp beach sand. Press this mixture firmly into the pan’s bottom, creating a solid base that’ll make your cheesecake proud.
Step 3: Whip Up the Creamy Filling
In a large bowl, beat cream cheese until it’s silky smooth. Add sugar and flour, mixing until there are no lumps.
Pour in vanilla and heavy cream, blending until everything looks perfectly combined. Gently add eggs one by one, mixing just enough to incorporate.
Tenderly fold chopped Little Debbie Christmas Tree Cakes throughout the mixture.
Step 4: Bake to Perfection
Pour your luscious filling over the crust, smoothing the top with a spatula.
Slide the pan into the oven and bake for 50-60 minutes. You’ll know it’s done when the edges look set but the center still does a little wiggle dance when shaken.
Step 5: Cool Down Gracefully
After baking, turn off the oven and crack the door open. Let the cheesecake hang out inside for 30 minutes.
Transfer to a wire rack and let it cool completely. Wrap it up and send it to the refrigerator for at least 4 hours or overnight.
Step 6: Craft the White Chocolate Drizzle
Warm heavy cream in a small pan until it starts steaming. Pour the hot cream over white chocolate and let it sit for a minute.
Stir until you’ve got a smooth, dreamy ganache that’s ready to cascade over your masterpiece.
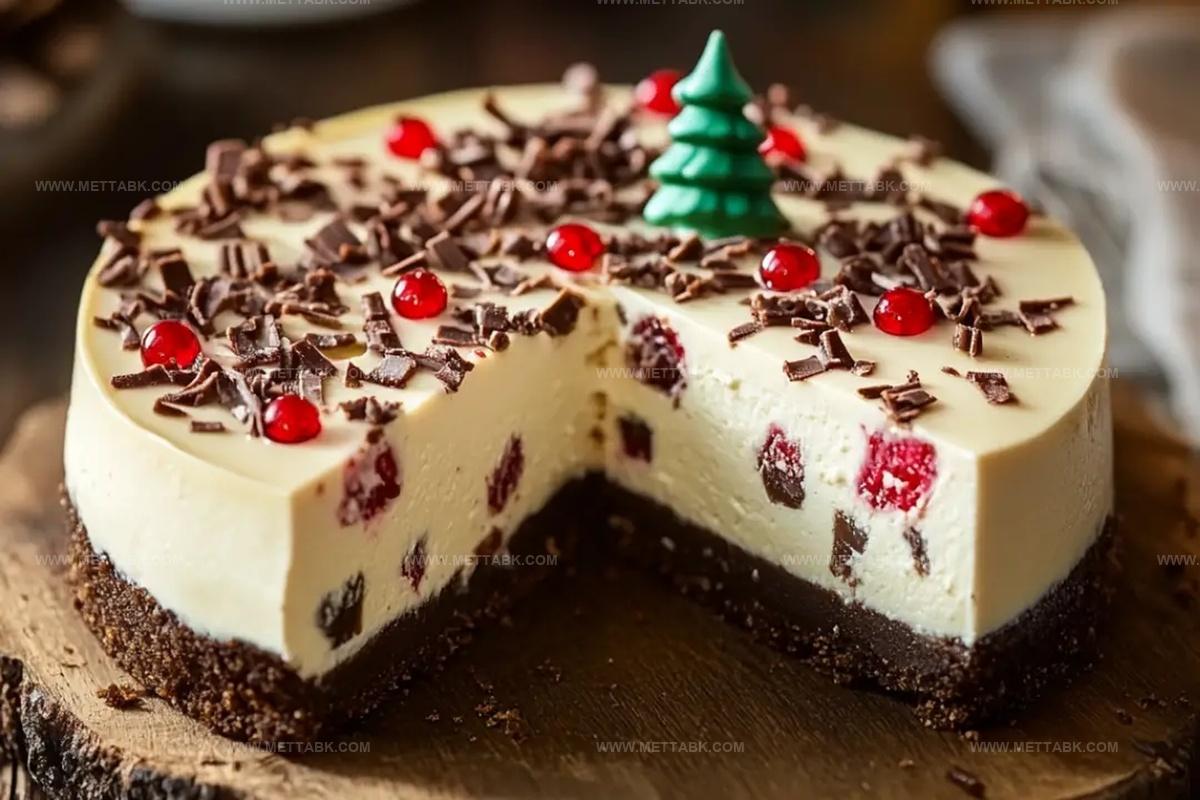
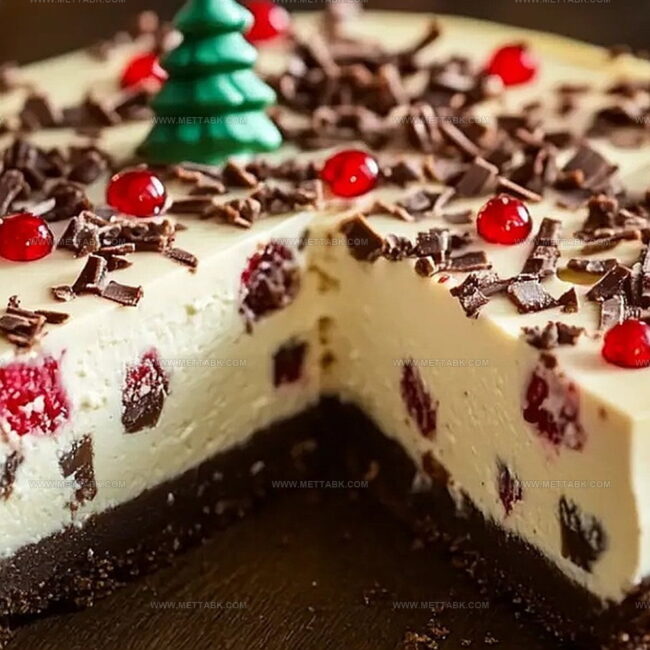
Step 7: Dress Up the Cheesecake
Carefully remove the cheesecake from its pan and place it on a fancy serving platter.
Pour the white chocolate ganache over the top, letting it dramatically drip down the sides. Sprinkle green sparkles and pipe red buttercream frosting to give it that festive Christmas tree magic.
Tips for Festive Christmas Tree Cheesecake
Variations on Christmas Tree Cheesecake
Pairing Suggestions for Christmas Cheesecake
Proper Storage for Christmas Tree Cheesecake
FAQs
Little Debbie Christmas Tree Cakes are seasonal snack cakes shaped like Christmas trees, covered in white frosting and green sprinkles, typically sold during the holiday season.
You can substitute with vanilla or yellow snack cakes, but the unique holiday flavor might be slightly different from the original recipe.
This cheesecake requires some baking skills but is manageable for intermediate home bakers. Following the steps carefully and using a springform pan will help ensure success.
Print
Little Debbie Christmas Tree Cheesecake Recipe
- Total Time: 30 minutes
- Yield: 12 1x
Description
Creamy Little Debbie Christmas Tree Cheesecake brings festive holiday cheer to dessert tables with nostalgic charm. Classic flavors and seasonal spirit combine in this delightful treat perfect for winter celebrations.
Ingredients
Primary Ingredients:
- 3 (8 ounces/226 grams) packs cream cheese, softened
- 7 Little Debbie Christmas Tree Cakes, chopped
- 1½ cups (180 grams) graham cracker crumbs
- 2 large eggs
Sweeteners and Dairy:
- ½ cup (100 grams) granulated sugar
- 6 tablespoons (85 grams) melted butter
- ½ cup (120 milliliters) heavy whipping cream
- ⅓ cup (80 milliliters) heavy whipping cream
Flavoring and Decorative Ingredients:
- 3 tablespoons (23 grams) all-purpose flour
- 1 teaspoon vanilla extract
- 1 cup (170 grams) white chocolate
- Green sprinkles
- Red buttercream frosting
Instructions
- Warm the oven to 325°F and prepare a 9-inch springform pan with parchment paper, ensuring easy cake removal.
- Create a graham cracker crust by mixing crumbs with melted butter until texture resembles damp sand, then press evenly into pan bottom.
- Using an electric mixer, whip cream cheese until silky and smooth at medium speed.
- Incorporate sugar and flour into cream cheese mixture, blending until completely uniform.
- Gently add vanilla extract and heavy whipping cream, mixing thoroughly.
- Introduce eggs one at a time, stirring minimally after each addition to maintain mixture’s delicate texture.
- Carefully fold chopped Little Debbie Christmas Tree Cakes into the filling, distributing evenly.
- Transfer filling into prepared crust, smoothing the surface with a spatula for an even appearance.
- Bake for 50-60 minutes until edges stabilize and center exhibits a subtle wobble when gently shaken.
- Switch off oven, crack the door open, and allow cheesecake to cool gradually for 30 minutes.
- Remove from oven and let cool completely on a wire rack at room temperature.
- Refrigerate, covered, for minimum 4 hours or overnight to achieve optimal setting.
- Warm heavy cream in a saucepan until steaming, then pour over white chocolate.
- Let mixture rest for one minute, then stir until achieving a glossy, smooth consistency.
- Allow ganache to thicken slightly while remaining pourable.
- Release cheesecake from springform pan and position on serving platter.
- Drizzle white chocolate ganache over the top, creating elegant cascading edges.
- Embellish with green sprinkles and pipe festive red buttercream decorations for a holiday-inspired presentation.
Notes
- Customize crust texture by adjusting graham cracker crumb moisture for a perfectly crisp or slightly softer base.
- Prevent cheesecake cracking by avoiding overmixing eggs and using room temperature ingredients for smooth, even incorporation.
- Experiment with alternative cake mix options like chocolate or vanilla Little Debbie cakes for unique flavor variations.
- Create gluten-free version by using gluten-free graham crackers and ensuring all ingredients are certified gluten-free.
- Prep Time: 30 minutes
- Cook Time: 0 minutes
- Category: Desserts
- Method: Baking
- Cuisine: American
Nutrition
- Serving Size: 12
- Calories: 460 kcal
- Sugar: 27 g
- Sodium: 220 mg
- Fat: 33 g
- Saturated Fat: 20 g
- Unsaturated Fat: 10 g
- Trans Fat: 1 g
- Carbohydrates: 32 g
- Fiber: 1 g
- Protein: 6 g
- Cholesterol: 110 mg
Clara Bennett
Contributing Recipe Developer & Food Writer
Expertise
Baking and Pastry Development, Gluten-Free and Allergy-Friendly Recipe Creation, Culinary Storytelling and Food Journalism, Recipe Testing and Standardization, Southern Comfort Foods and Modern Twists
Education
Sullivan University – National Center for Hospitality Studies
Associate Degree in Culinary Arts
Focus: Baking and Pastry Arts, Recipe Testing, and Culinary Journalism.
Clara specialized in crafting desserts that blend classic Southern comfort with modern techniques, while developing strong writing skills to tell the story behind every dish.
Lane Community College (Certificate Program)
Certificate in Food Writing and Photography
Focus: Culinary storytelling, recipe formatting, food styling, and visual presentation.
Clara’s love of baking started young, powered by homemade pies, biscuits, and stories passed around the family table.
After earning her degree at Sullivan University and a food writing certificate at Lane Community College, she turned her passion into a craft: sharing recipes that are simple, soulful, and always full of heart.
She’s big on bold flavors, flexible ideas, and creating sweets that fit any table (yes, even if you’re gluten-free). When she’s not baking, you’ll find her wandering farmers’ markets, styling food for the next photo shoot, or working on her ever-growing recipe journal.