
The Ultimate Loaded Cheese Fries Recipe Everyone Will Love
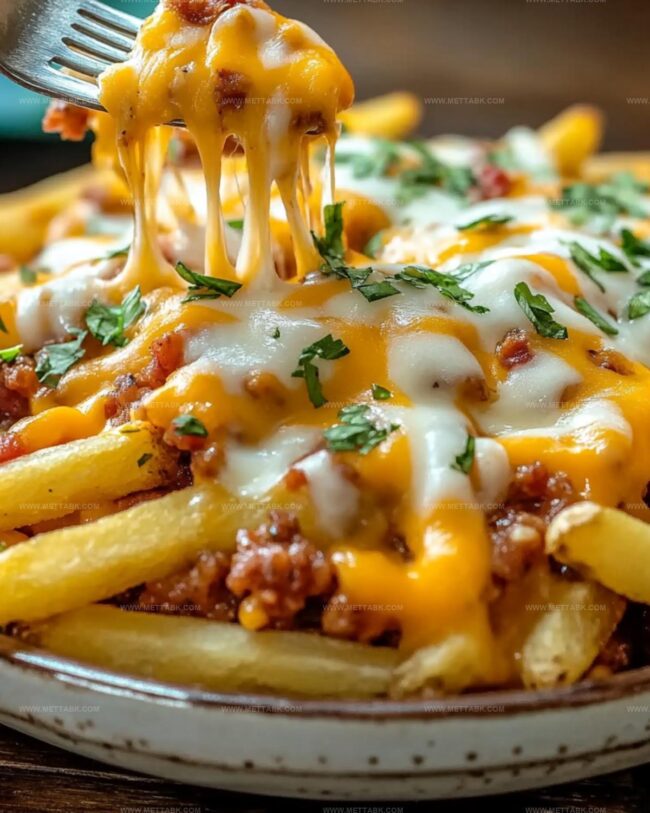
Crispy golden fries smothered in loaded cheese create the ultimate comfort indulgence you’ll absolutely adore.
Melted cheddar cascades over perfectly seasoned potato strips.
Bacon crumbles and green onions add delightful crunch and zesty flavor.
Every bite promises a mouthwatering explosion of textures and tastes.
Hearty and satisfying, this dish transforms simple ingredients into something spectacular.
Prepare to experience a crowd-pleasing treat that will have everyone asking for seconds.
You won’t be able to resist diving into this irresistible cheesy masterpiece.
Reasons to Enjoy Loaded Cheese Fries Today
What Goes Inside These Loaded Cheese Fries
For the Fries:For the Meat Options:For the Meat Seasonings and Aromatics:For the Cheese Sauce:For the Toppings:Steps to Make These Loaded Cheese Fries
Step 1: Prepare Crispy Base
Preheat the oven to 375F. Spread frozen fries evenly on a large baking sheet.
Bake according to package instructions until golden and crispy.
Step 2: Cook Meaty Topping (Option 1 – Taco Beef)
Heat olive oil in a skillet over medium heat.
Add and sauté:Add ground beef and cook, breaking into small pieces until browned. Stir in taco seasoning and water.
Simmer until sauce thickens and meat is fully cooked. Drain excess fat and set aside.
Step 3: Cook Meaty Topping (Option 2 – Italian Sausage)
Heat olive oil in a skillet over medium heat. Add Italian sausage and cook, breaking into crumbles until completely browned.
Set aside.
Step 4: Create Creamy Cheese Sauce
Melt butter in a saucepan over medium heat.
Whisk in flour until bubbly. Slowly pour milk, whisking continuously.
Bring to a gentle simmer and let sauce thicken for 3-5 minutes. Remove from heat.
Add shredded cheese gradually, stirring until smooth. Season with salt and cayenne pepper.
Taste and adjust seasoning as needed.
Step 5: Assemble Loaded Fries
Remove fries from oven.
Top with:Serve immediately and enjoy the delicious creation!
Helpful Notes for Loaded Cheese Fries Success

Creative Takes on Loaded Cheese Fries
Best Sides to Serve With Cheese Fries
Keeping Loaded Cheese Fries Fresh and Crispy
FAQs
Sharp cheddar or a blend of cheddar and monterey jack are perfect. They melt smoothly and provide rich, creamy flavor that coats the fries beautifully.
Yes, substitute regular flour with cornstarch or gluten-free flour blend when making the cheese sauce. Use gluten-free taco seasoning if choosing the ground beef option.
Shred the cheese yourself instead of using pre-shredded cheese, add cheese gradually off the heat, and stir constantly to ensure smooth, creamy consistency. Low and slow melting prevents separation.
The recipe includes optional jalapenos and cayenne pepper, which add heat. You can easily control spice levels by reducing it.
Print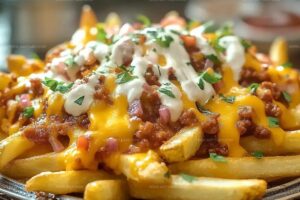
Loaded Cheese Fries Recipe
- Total Time: 45 minutes
- Yield: 6 1x
Description
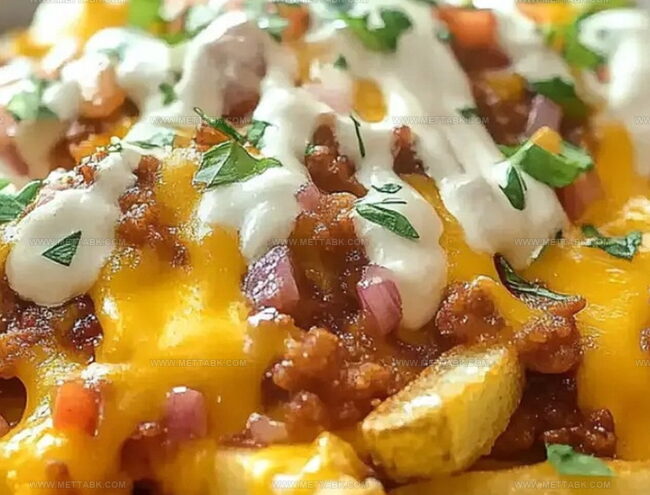
Indulgent Loaded Cheese Fries deliver a mouthwatering explosion of crispy potatoes smothered in melted cheese and savory toppings. Classic comfort food meets gourmet delight, promising you a satisfying crunch with each delectable bite.
Ingredients
Main Ingredients:
- 1 bag (2 pounds) frozen fries
- 1 pound ground beef or 1 pound hot Italian sausage
Meat Seasonings:
- 1 tablespoon olive oil
- 1 onion, diced
- 2 garlic cloves, minced
- 1 package taco seasoning
- 2/3 cup water
Cheese Sauce and Toppings:
- 1/4 cup unsalted butter
- 1/4 cup all-purpose flour
- 2 cups whole milk
- 4 cups shredded cheddar cheese
- 1/2 teaspoon salt
- 1/4 teaspoon cayenne pepper (optional)
- 1 red onion, diced
- 1 jar jalapenos, drained
- 1–2 tomatoes, diced
- Sour cream
- Green onions, diced
Instructions
- Warm the oven to 375°F and arrange frozen fries on a large baking sheet, roasting according to package guidelines until crispy and golden.
- For meat preparation, select either ground beef or Italian sausage option: sauté onions in olive oil until translucent, then add garlic and meat, cooking until completely browned.
- If using ground beef, incorporate taco seasoning and water, simmering until sauce thickens. For sausage, simply cook until fully browned.
- Create the velvety cheese sauce by melting butter in a saucepan, whisking in flour until bubbling and smooth.
- Gradually pour milk into the roux, whisking continuously to prevent lumps, and simmer until sauce thickens approximately 3-4 minutes.
- Remove sauce from heat and gradually fold in cheese, stirring until completely melted and glossy. Season with salt and cayenne pepper, adjusting to taste.
- Extract crispy fries from the oven and generously layer with prepared meat, rich cheese sauce, diced red onions, sliced jalapeños, fresh tomatoes, dollops of sour cream, and sprinkled green onions.
- Serve immediately while fries remain hot and toppings are freshly added, ensuring maximum flavor and texture.
Notes
- For extra crispy fries, pat them dry with paper towels before baking and spread them in a single layer without overcrowding.
- Grate cheese freshly and add it gradually while stirring continuously to prevent clumping and achieve a silky texture.
- Swap ground beef or sausage with shredded chicken, pulled pork, or plant-based meat alternatives for diverse flavor profiles.
- Use gluten-free flour for the cheese sauce, dairy-free cheese alternatives, and low-fat sour cream to accommodate various dietary needs.
- Prep Time: 20 minutes
- Cook Time: 25 minutes
- Category: Snacks, Appetizer
- Method: Baking
- Cuisine: American
Nutrition
- Serving Size: 6
- Calories: 621 kcal
- Sugar: 3 g
- Sodium: 860 mg
- Fat: 44 g
- Saturated Fat: 19 g
- Unsaturated Fat: 22 g
- Trans Fat: 0.5 g
- Carbohydrates: 35 g
- Fiber: 4 g
- Protein: 26 g
- Cholesterol: 85 mg
Clara Bennett
Contributing Recipe Developer & Food Writer
Expertise
Baking and Pastry Development, Gluten-Free and Allergy-Friendly Recipe Creation, Culinary Storytelling and Food Journalism, Recipe Testing and Standardization, Southern Comfort Foods and Modern Twists
Education
Sullivan University – National Center for Hospitality Studies
Associate Degree in Culinary Arts
Focus: Baking and Pastry Arts, Recipe Testing, and Culinary Journalism.
Clara specialized in crafting desserts that blend classic Southern comfort with modern techniques, while developing strong writing skills to tell the story behind every dish.
Lane Community College (Certificate Program)
Certificate in Food Writing and Photography
Focus: Culinary storytelling, recipe formatting, food styling, and visual presentation.
Clara’s love of baking started young, powered by homemade pies, biscuits, and stories passed around the family table.
After earning her degree at Sullivan University and a food writing certificate at Lane Community College, she turned her passion into a craft: sharing recipes that are simple, soulful, and always full of heart.
She’s big on bold flavors, flexible ideas, and creating sweets that fit any table (yes, even if you’re gluten-free). When she’s not baking, you’ll find her wandering farmers’ markets, styling food for the next photo shoot, or working on her ever-growing recipe journal.