Sweet & Gooey Lunch Lady Brownies Recipe That Kids Adore
Memories of cafeteria brownies flood back with this delightful lunch lady brownies recipe that promises nostalgia and pure comfort.
School kitchens always knew how to create magic with simple ingredients.
Sweet chocolate squares would appear on metal trays, promising instant happiness.
Soft, rich textures define these classic treats that connect generations through a single bite.
Grandmothers and students alike cherish these no-fuss chocolate squares that taste like childhood.
Baking these brownies brings warmth to your kitchen and smiles to everyone around.
Lunch Lady Brownies That Take You Back
Ingredients to Bake Lunch Lady Brownies
For the Brownie Base:For the Binding:For the Frosting:How to Make These Classic Brownies
Step 1: Warm Up the Oven
Set your oven to a toasty 350F (175C). This ensures the perfect baking environment for your delectable treat.
Step 2: Create the Brownie Base
In a mixing bowl, blend melted butter and cocoa powder until silky smooth. Then add:Stir until the mixture looks slightly crumbly and well combined.
Step 3: Introduce Moisture and Flavor
Pour in eggs and vanilla extract. Mix thoroughly until the batter transforms into a luxurious, glossy consistency.
Step 4: Prepare the Baking Canvas
Grab a 9×13-inch pan and line it with parchment paper. Spread the brownie batter evenly across the surface, ensuring a smooth top.
Step 5: Bake to Perfection
Slide the pan into the preheated oven. Bake for 20-25 minutes.
Check doneness by inserting a toothpick – it should come out clean.
Step 6: Whip Up the Chocolate Blanket
While brownies bake, craft the luscious frosting by whisking together:Aim for a thick, spreadable texture.
Add milk sparingly if needed to reach ideal consistency.
Step 7: Let the Brownies Rest
After removing from the oven, allow brownies to cool for 15-20 minutes.
Patience rewards you with better texture.
Step 8: Frost with Love
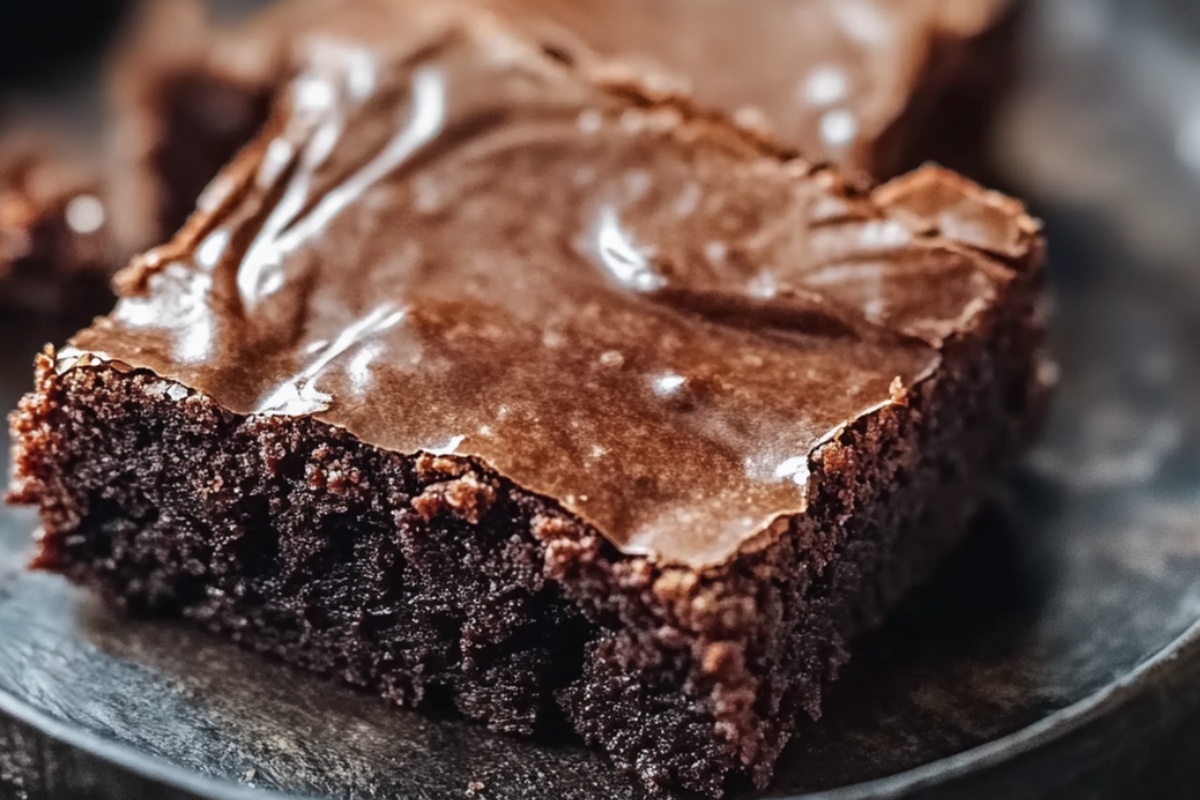
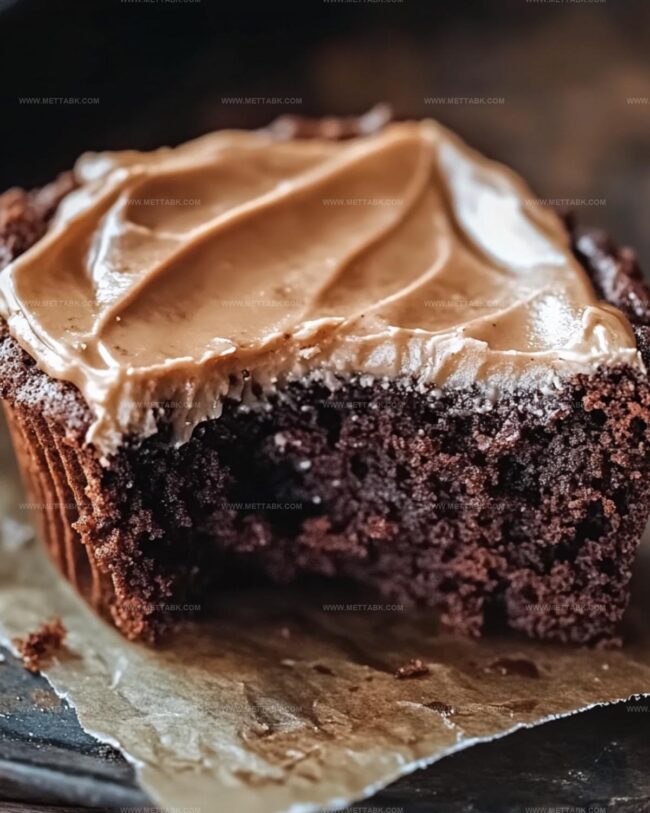
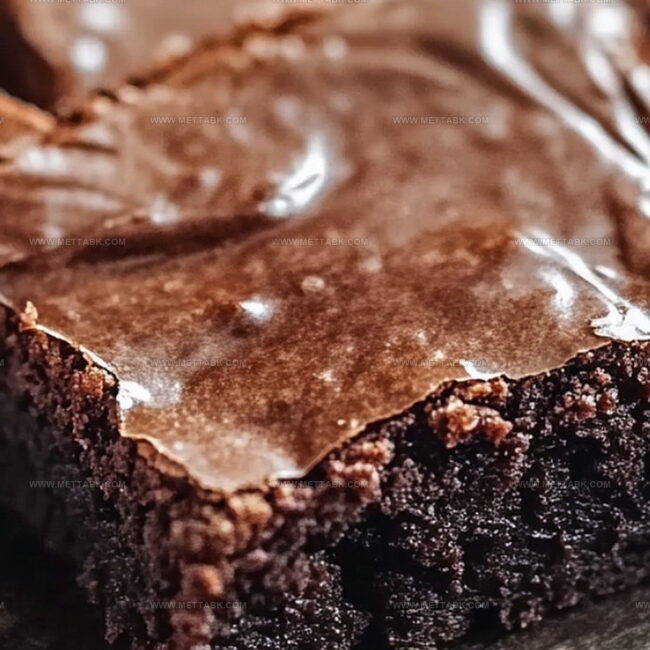
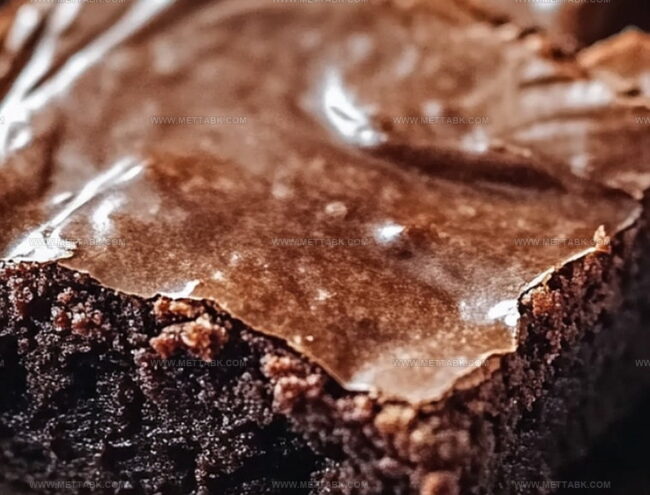
Generously spread the chocolate frosting over the cooled brownies, creating a decadent layer of sweetness.
Step 9: Final Touches
Wait until completely cooled, then slice into squares. Enjoy your nostalgic lunch lady brownie masterpiece!
Tips to Get Perfect Brownies Every Time
Variations to Customize Your Brownies
Pairings That Go Well With Brownies
Proper Storage for Lunch Lady Brownies
Store brownies in an airtight container in the refrigerator for up to 5 days. Cover with plastic wrap or aluminum foil to prevent drying out and absorbing other food odors.
Wrap individual brownies or the entire batch tightly in plastic wrap, then place in a freezer-safe container. Freeze for up to 3 months. Label with the date for easy tracking.
Remove frozen brownies from the freezer and let them thaw at room temperature for 1-2 hours. Avoid microwaving to maintain texture and prevent becoming soggy.
Warm refrigerated or thawed brownies in the oven at 300F for 5-7 minutes. Alternatively, microwave for 10-15 seconds on low power to prevent overheating and preserve moisture.
FAQs
Yes, they’re exactly like the classic lunch lady brownies that many people remember from childhood – rich, chocolatey, and nostalgic with a thick chocolate frosting.
Natural cocoa powder works best for this recipe. Dutch-processed cocoa might alter the texture and rise of the brownies.
These brownies have a signature thick, fudgy texture and a classic chocolate frosting spread directly on top, which is a hallmark of traditional lunch lady brownies.
Print
Lunch Lady Brownies Recipe
- Total Time: 45 minutes
- Yield: 12 1x
Description
Nostalgic lunch lady brownies transport sweet memories straight from school cafeterias to home kitchens. Rich chocolate squares deliver pure comfort with classic homemade goodness you won’t forget.
Ingredients
Main Ingredients:
- 2 cups All-purpose flour
- 2 cups Sugar
- 4 Eggs
- 1 cup Melted butter
- 1/2 cup Unsweetened cocoa powder
Liquid and Flavoring Ingredients:
- 3 tablespoons Vanilla extract
- 1/2 teaspoon Salt
Frosting Ingredients:
- 3 cups Powdered sugar
- 1/4 cup Melted butter
- 1/4 cup Milk
- 1/4 cup Unsweetened cocoa powder
- 1 tablespoon Vanilla extract
Instructions
- Prepare the oven environment by heating to 350F (175C), ensuring an optimal baking temperature for rich, decadent brownies.
- Create a foundational batter by whisking melted butter with cocoa powder until achieving a silky, uniform texture. Gradually incorporate flour, salt, and sugar, stirring until the mixture develops a crumbly consistency.
- Transform the dry mixture into a smooth batter by introducing eggs and vanilla extract, mixing thoroughly until the ingredients integrate seamlessly.
- Optimize baking preparation by lining a 9×13-inch pan with parchment paper, then evenly distributing the brownie batter across the surface.
- Bake the brownies for 20-25 minutes, monitoring for doneness by inserting a toothpick into the center – it should emerge clean, indicating perfectly cooked brownies.
- Simultaneously craft a luxurious frosting by blending melted butter, milk, powdered sugar, cocoa powder, and vanilla extract. Adjust consistency by adding milk incrementally if the mixture appears too dense.
- Allow brownies to rest and slightly cool for 15-20 minutes after removing from the oven, creating an ideal surface for frosting application.
- Generously spread the prepared frosting across the cooled brownie surface, ensuring complete and even coverage.
- Permit the frosted brownies to cool completely before slicing into delectable squares, ready for serving and enjoying.
Notes
- Achieve the perfect brownie texture by carefully measuring ingredients and avoiding overmixing the batter, which can lead to tough, dense brownies.
- Customize the recipe by adding chopped nuts, chocolate chips, or a sprinkle of sea salt on top of the frosting for extra flavor and crunch.
- For gluten-free options, substitute all-purpose flour with a gluten-free flour blend, ensuring the same rich, fudgy consistency.
- Control the sweetness by adjusting the powdered sugar in the frosting or using a dark cocoa powder for a more intense chocolate flavor.
- Prep Time: 20 minutes
- Cook Time: 25 minutes
- Category: Desserts, Snacks
- Method: Baking
- Cuisine: American
Nutrition
- Serving Size: 12
- Calories: 345 kcal
- Sugar: 32 g
- Sodium: 120 mg
- Fat: 20 g
- Saturated Fat: 12 g
- Unsaturated Fat: 8 g
- Trans Fat: 0.5 g
- Carbohydrates: 38 g
- Fiber: 3 g
- Protein: 4 g
- Cholesterol: 70 mg
Nate Harper
Founder & Recipe Curator
Expertise
Single-Recipe Development, Farm-to-Table Cooking, Seasonal Menu Planning, Culinary Storytelling, Home Kitchen Innovation
Education
Cascade Culinary Institute – Central Oregon Community College
Certificate in Culinary Arts
Focus: Farm-to-table cuisine, sustainable cooking practices, and seasonal recipe creation.
Nate studied under experienced chefs who emphasized local sourcing, minimal waste, and building recipes from fresh, simple ingredients.
Nate Harper is the founder and creative force behind Make, Take, Bake. Raised in the wild beauty of Oregon’s high desert, Nate grew up surrounded by family gardens, farmers’ markets, and home kitchens that celebrated the seasons.
His early love for simple, honest food evolved into a professional passion when he attended Cascade Culinary Institute, where he sharpened his skills in creating recipes that are sustainable, satisfying, and made for everyday life.
Nate’s goal is to make cooking feel accessible, free of fuss, and full of flavor. He believes a single, thoughtfully built dish can stand alone, and sometimes even steal the show.