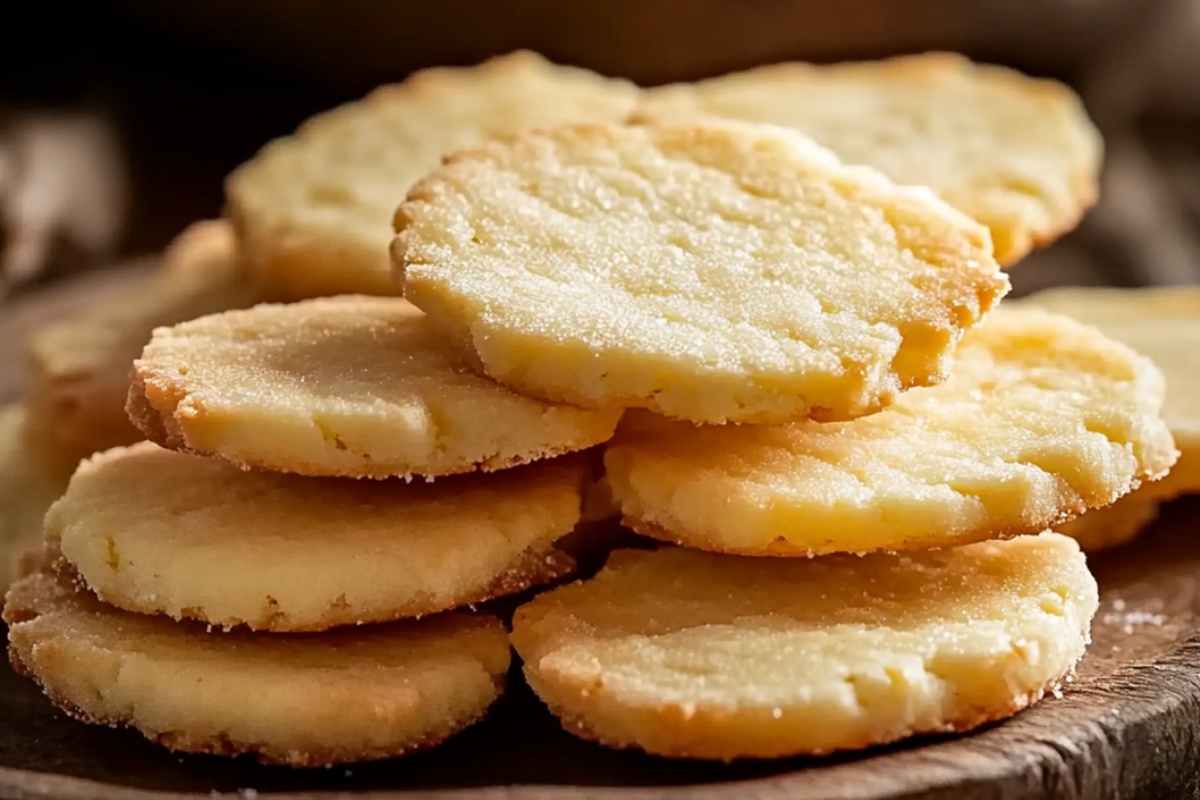
The Dreamiest Melt-In-Your-Mouth Butter Cookies Recipe
Sweet butter cookies with a melt-in-your-mouth texture can transport you to childhood memories faster than anything else.
Memories of grandma’s kitchen often revolve around simple, delectable treats like these.
Each bite promises a delicate crumbly experience that melts perfectly on your tongue.
Soft and rich, these cookies require minimal ingredients but deliver maximum satisfaction.
Butter plays the starring role, creating a luxurious backdrop for pure indulgence.
No fancy equipment needed – just basic pantry staples and a few moments of your time.
You’ll be amazed how quickly these delightful morsels come together, filling your kitchen with an irresistible aroma.
Bake a batch and watch them disappear in record time.
Melt-in-Your-Mouth Butter Cookies Highlights
Butter Cookies Ingredients Breakdown
For the Butter and Sweet Base:For the Dry Ingredients:For the Finishing Touch:Step-by-Step Butter Cookies Instructions

Step 1: Create Creamy Base
In a large mixing bowl, cream together softened butter and powdered sugar until the mixture becomes light, airy, and looks like fluffy clouds. Pour in vanilla extract and blend thoroughly to infuse delightful flavor.
Step 2: Prepare Dry Mixture
Sift the following ingredients together:Slowly incorporate the dry ingredients into the butter mixture, stirring gently until a soft, tender dough develops.
Step 3: Chill and Shape Dough
Roll the dough into a smooth cylindrical log.
Wrap tightly with plastic wrap, ensuring no air pockets remain. Refrigerate for 30 minutes to firm up the dough and enhance its texture.
Step 4: Slice and Bake Cookies
Preheat the oven to 325°F (160°C). Remove dough from refrigerator and slice into thin, uniform rounds.
Arrange cookie slices on a parchment-lined baking sheet, leaving space between each cookie. Bake for 12-15 minutes until edges turn a delicate golden color.
Remove and let cool completely on a wire rack.
Step 5: Enjoy Delicate Treats
Savor these melt-in-your-mouth butter cookies with a cup of tea or share with loved ones for an instant mood lift.
Expert Tips for Butter Cookies
Flavor Variations of Butter Cookies
Pairing Recommendations with Butter Cookies
Storage Guidelines for Butter Cookies
Store cookies in an airtight container for up to 5 days, separating layers with parchment paper to prevent sticking.
Place cookies in a freezer-safe container or ziplock bag, keeping them flat. Freeze for up to 3 months without losing texture or flavor.
Remove frozen cookies and let them sit at room temperature for 15-20 minutes before serving, ensuring they regain their soft, delicate texture.
Warm cookies for 5-10 seconds on low power to restore their fresh-baked warmth without compromising their delicate butter texture.
FAQs
Cornstarch helps create an extra tender, delicate texture that makes these butter cookies literally melt in your mouth. It breaks down the protein in flour, resulting in a softer, more delicate cookie.
No, chilling is crucial. It helps the butter firm up, prevents spreading during baking, and allows the flavors to develop more deeply. Skipping this step will result in flat, less flavorful cookies.
Look for very light golden edges and a set center. The cookies should look slightly underbaked, as they’ll continue to firm up while cooling. Overbaking will make them crisp and lose their signature melt-in-your-mouth texture.
Print
Melt-In-Your-Mouth Butter Cookies Recipe
- Total Time: 1 hour
- Yield: 24 1x
Description
Sweet, crumbly butter cookies from Italian kitchens promise pure deliciousness in every golden bite. Delicate shortbread-style treats melt quickly, delivering rich buttery comfort that beckons you to savor each heavenly morsel.
Ingredients
Main Ingredients:
- 1 cup (226g) unsalted butter, softened
- 1 3/4 cups (220g) all-purpose flour
- 1/2 cup (100g) powdered sugar
Supporting Ingredients:
- 1/4 cup (30g) cornstarch
- 1 teaspoon vanilla extract
- 1/4 teaspoon salt
Finishing Ingredient:
- Granulated sugar (optional, for coating)
Instructions
- Cream softened butter and powdered sugar in a mixing bowl until the mixture becomes airy and pale, incorporating vanilla extract thoroughly.
- Carefully sift flour, cornstarch, and salt together in a separate bowl to ensure smooth texture and eliminate potential lumps.
- Gradually fold dry ingredients into the butter mixture, gently mixing until a cohesive, soft dough forms without overmixing.
- Roll the dough into a uniform cylindrical log, tightly wrap with plastic film, and refrigerate for minimum 30 minutes to firm up and enhance flavor development.
- Preheat oven to 325F (160C) and line a baking sheet with parchment paper for even heat distribution.
- Remove chilled dough log and slice into uniform 1/2-inch thick rounds using a sharp knife, ensuring consistent cookie sizes.
- Arrange cookie slices on prepared baking sheet, spacing them slightly apart to allow proper heat circulation.
- Bake for 12-15 minutes, monitoring closely until cookie edges turn delicately golden and tops remain pale.
- Remove from oven and let cookies cool on the baking sheet for 5 minutes before transferring to a wire rack to complete cooling process.
Notes
- Softening butter at room temperature ensures smooth, even mixing and prevents a lumpy dough texture.
- Sifting dry ingredients eliminates clumps and creates a more delicate, tender cookie with consistent texture.
- Chilling the dough helps cookies maintain their shape and develops a richer, more concentrated flavor during baking.
- For gluten-free options, substitute all-purpose flour with almond or coconut flour, adjusting liquid content slightly to maintain dough consistency.
- Prep Time: 45 minutes
- Cook Time: 15 minutes
- Category: Desserts, Snacks
- Method: Baking
- Cuisine: American
Nutrition
- Serving Size: 24
- Calories: 140
- Sugar: 3 g
- Sodium: 35 mg
- Fat: 8 g
- Saturated Fat: 5 g
- Unsaturated Fat: 3 g
- Trans Fat: 0.2 g
- Carbohydrates: 15 g
- Fiber: 0.3 g
- Protein: 1 g
- Cholesterol: 22 mg
Nate Harper
Founder & Recipe Curator
Expertise
Single-Recipe Development, Farm-to-Table Cooking, Seasonal Menu Planning, Culinary Storytelling, Home Kitchen Innovation
Education
Cascade Culinary Institute – Central Oregon Community College
Certificate in Culinary Arts
Focus: Farm-to-table cuisine, sustainable cooking practices, and seasonal recipe creation.
Nate studied under experienced chefs who emphasized local sourcing, minimal waste, and building recipes from fresh, simple ingredients.
Nate Harper is the founder and creative force behind Make, Take, Bake. Raised in the wild beauty of Oregon’s high desert, Nate grew up surrounded by family gardens, farmers’ markets, and home kitchens that celebrated the seasons.
His early love for simple, honest food evolved into a professional passion when he attended Cascade Culinary Institute, where he sharpened his skills in creating recipes that are sustainable, satisfying, and made for everyday life.
Nate’s goal is to make cooking feel accessible, free of fuss, and full of flavor. He believes a single, thoughtfully built dish can stand alone, and sometimes even steal the show.