
Dreamy Mini Easter Egg Cheesecake Bites Recipe for Spring Joy
Crafting these mini easter egg cheesecake bites brings pure delight to any springtime celebration.
Sweet memories of childhood egg hunts dance through my kitchen.
Pastel colors and creamy textures create a playful dessert experience.
Light cream cheese blends perfectly with chocolate egg pieces.
Each tiny bite packs incredible flavor and nostalgic charm.
Small yet spectacular, these mini treats will spark joy at your gathering.
Mini Easter Egg Cheesecake Bites Everyone Will Love
Key Ingredients for Mini Easter Egg Cheesecake Bites
Base:Filling:Topping:How to Prepare Mini Easter Egg Cheesecake Bites
Step 1: Warm Up the Oven
Crank the oven to a cozy 325°F. Grab your muffin tin and line it with cute paper cups that will cradle your adorable cheesecake bites.
Step 2: Create the Crunchy Base
Grab a mixing bowl and combine graham cracker crumbs with melted butter. Use your fingers or a spoon to press this mixture firmly into the bottom of each muffin cup, creating a delightful crispy foundation.
Step 3: Whip Up the Creamy Filling
In a separate bowl, start beating the cream cheese until it becomes silky smooth. Gradually introduce sugar, sour cream, and vanilla extract, mixing until the mixture transforms into a dreamy, velvety cream.
Step 4: Fill and Bake
Carefully spoon the luscious cream cheese mixture over the graham cracker base in each muffin cup. Leave a tiny bit of space at the top to prevent overflow.
Slide the tin into the preheated oven and bake for 15-20 minutes. You’ll know they’re perfect when the centers have a gentle, seductive jiggle.
Step 5: Decorate with Chocolate Eggs
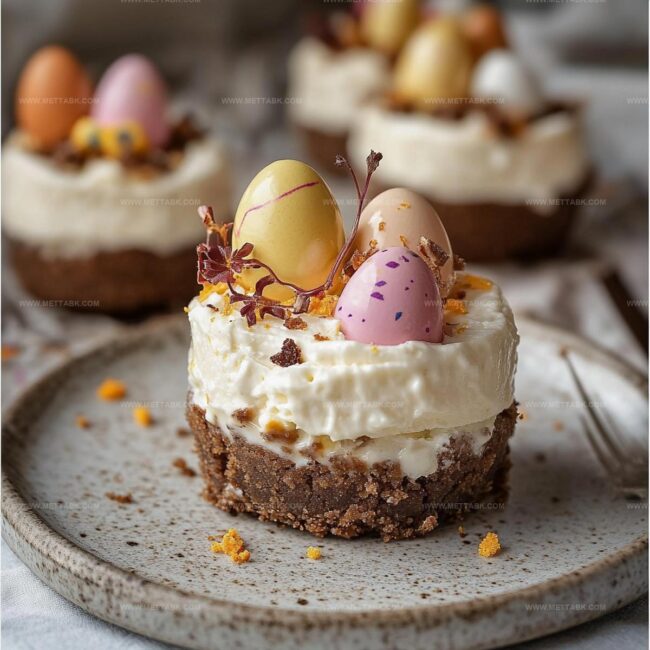
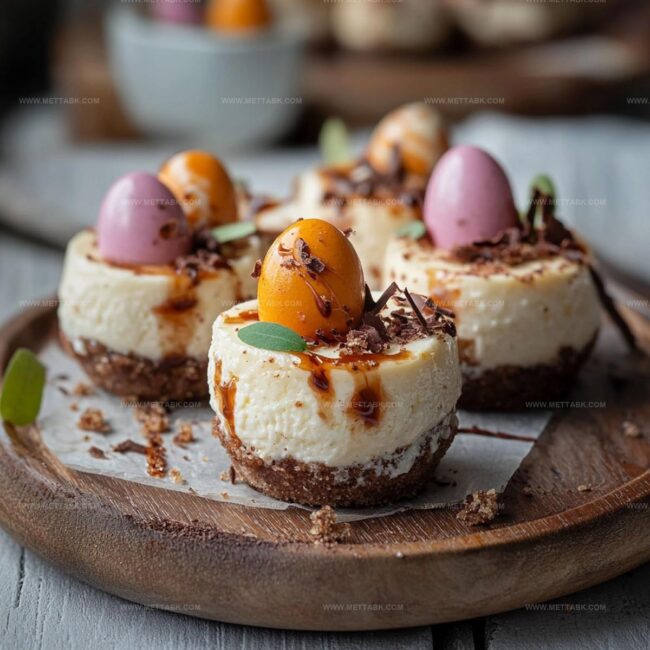
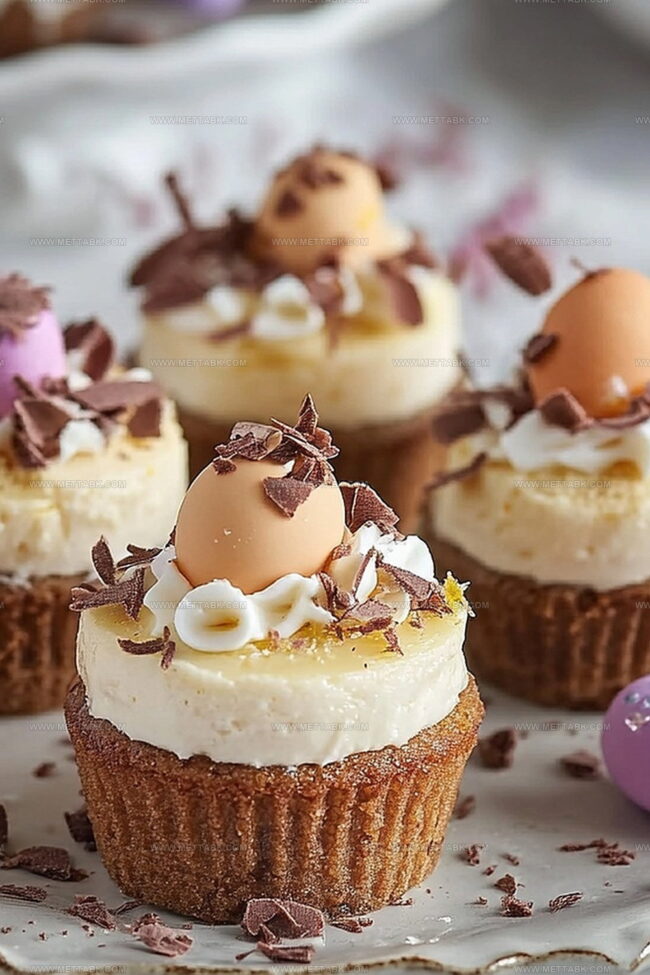
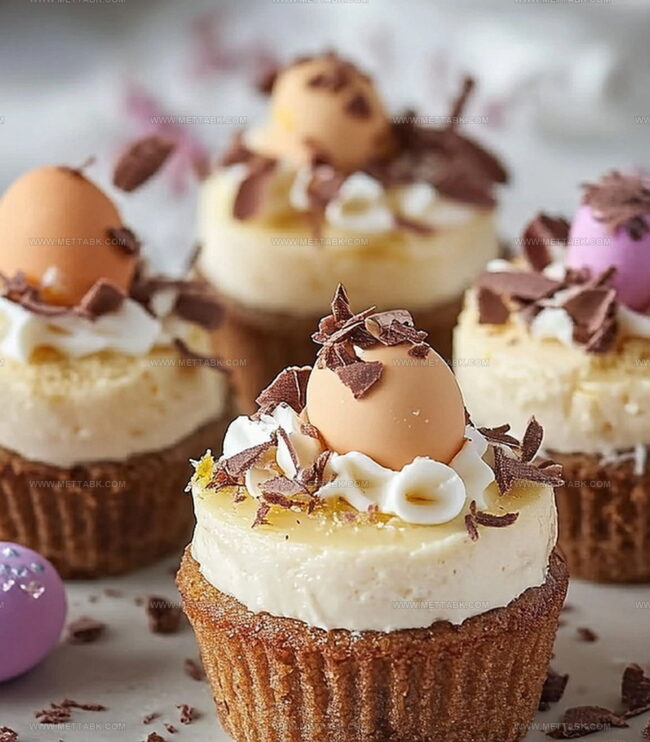
Fresh out of the oven, while the cheesecake bites are still warm, gently nestle mini chocolate eggs into the surface of each bite. Let them cool completely before serving, allowing the eggs to set and the flavors to mingle.
Tips to Nail Mini Easter Egg Cheesecake Bites
Creative Twists on Mini Easter Egg Cheesecake Bites
Pairings That Enhance Mini Easter Egg Cheesecake Bites
Storage Tips for Mini Easter Egg Cheesecake Bites
FAQs
Mini chocolate eggs are pressed into the warm cheesecake bites, creating a festive Easter-themed dessert.
Graham cracker crumbs work best, but you can substitute with crushed digestive biscuits or vanilla cookie crumbs for a similar texture.
Avoid overmixing the batter and don’t overbake. Remove from the oven when the center is still slightly jiggly to ensure a smooth, creamy texture.
Yes, these mini cheesecake bites are easy to make and require minimal baking skills, making them perfect for novice bakers looking to create a cute Easter dessert.
Print
Mini Easter Egg Cheesecake Bites Recipe
- Total Time: 40 minutes
- Yield: 12 1x
Description
Delightful mini Easter egg cheesecake bites blend creamy indulgence with festive charm. Chocolate lovers will savor these bite-sized treats that promise a sweet celebration of seasonal delight.
Ingredients
- 8 oz (226 g) cream cheese, softened
- 1/2 cup (100 g) granulated sugar
- 1/4 cup (60 ml) sour cream
- 1 cup (120 g) graham cracker crumbs
- 4 tbsp (57 g) unsalted butter, melted
- 1 tsp vanilla extract
- 1/2 cup (100 g) mini chocolate eggs
Instructions
- Prepare the oven at 325°F and arrange paper liners in a muffin tin for uniform cheesecake bites.
- Combine graham cracker crumbs with melted butter, creating a cohesive mixture that will form the base of each mini cheesecake.
- Firmly press the crumb mixture into each muffin cup, ensuring an even and compact crust that will support the creamy filling.
- Using an electric mixer, whip cream cheese until smooth and velvety, eliminating any potential lumps.
- Gradually incorporate sugar, sour cream, and vanilla extract into the cream cheese, blending until the mixture achieves a silky, consistent texture.
- Carefully distribute the cheesecake filling over the prepared crusts, leaving a small margin at the top to prevent overflow during baking.
- Slide the muffin tin into the preheated oven and bake for 15-20 minutes, watching for a slightly wobbly center that indicates perfect doneness.
- While the cheesecakes are still warm, delicately nestle mini chocolate eggs into the surface of each bite, creating a festive Easter-themed decoration.
- Allow the cheesecake bites to cool completely at room temperature, which will help them set and develop a smooth, creamy consistency.
- Refrigerate before serving to enhance flavor and ensure a firm texture.
Notes
- Choose room temperature ingredients to ensure smooth, lump-free cheesecake filling that blends effortlessly.
- Avoid overmixing the cream cheese batter to prevent air bubbles that can cause cracking during baking.
- Line the muffin tin with high-quality paper liners for easy removal and a neat presentation of your mini cheesecakes.
- For a gluten-free version, swap graham cracker crumbs with almond flour or gluten-free cookie crumbs to accommodate dietary restrictions.
- Prep Time: 20 minutes
- Cook Time: 20 minutes
- Category: Desserts, Snacks
- Method: Baking
- Cuisine: American
Nutrition
- Serving Size: 12
- Calories: 193 kcal
- Sugar: 14 g
- Sodium: 104 mg
- Fat: 12 g
- Saturated Fat: 7 g
- Unsaturated Fat: 4 g
- Trans Fat: 0.3 g
- Carbohydrates: 18 g
- Fiber: 1 g
- Protein: 3 g
- Cholesterol: 40 mg
Clara Bennett
Contributing Recipe Developer & Food Writer
Expertise
Baking and Pastry Development, Gluten-Free and Allergy-Friendly Recipe Creation, Culinary Storytelling and Food Journalism, Recipe Testing and Standardization, Southern Comfort Foods and Modern Twists
Education
Sullivan University – National Center for Hospitality Studies
Associate Degree in Culinary Arts
Focus: Baking and Pastry Arts, Recipe Testing, and Culinary Journalism.
Clara specialized in crafting desserts that blend classic Southern comfort with modern techniques, while developing strong writing skills to tell the story behind every dish.
Lane Community College (Certificate Program)
Certificate in Food Writing and Photography
Focus: Culinary storytelling, recipe formatting, food styling, and visual presentation.
Clara’s love of baking started young, powered by homemade pies, biscuits, and stories passed around the family table.
After earning her degree at Sullivan University and a food writing certificate at Lane Community College, she turned her passion into a craft: sharing recipes that are simple, soulful, and always full of heart.
She’s big on bold flavors, flexible ideas, and creating sweets that fit any table (yes, even if you’re gluten-free). When she’s not baking, you’ll find her wandering farmers’ markets, styling food for the next photo shoot, or working on her ever-growing recipe journal.