
Irresistible Mixed Berry Cobbler Recipe for Sweet Summer Joy
Sweet summer memories often bloom with a magical mixed berry cobbler that captures sunshine in every delightful bite.
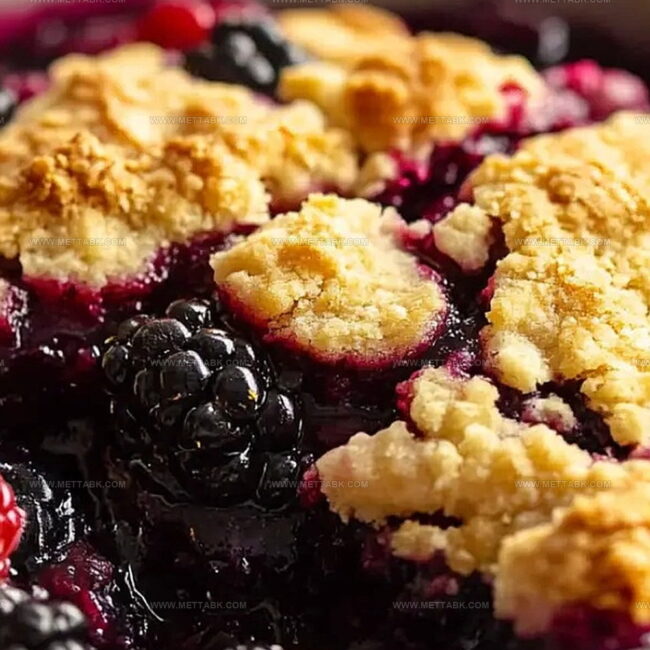
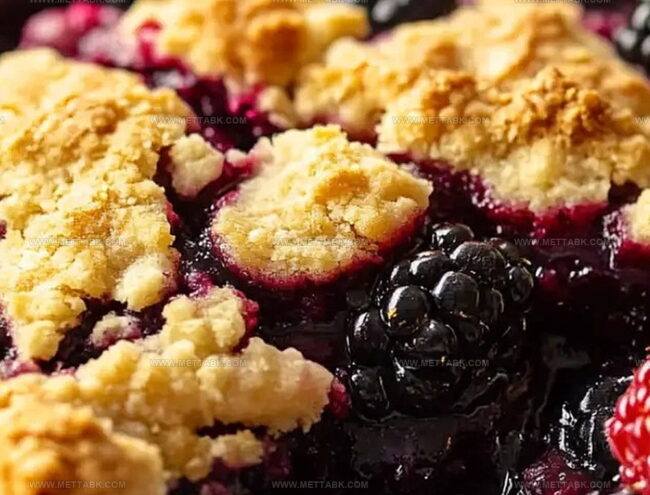
Ripe berries nestled beneath a golden, buttery crust create pure comfort on any plate.
Juicy strawberries, plump blueberries, and tart raspberries dance together in delectable harmony.
Seasonal produce becomes a canvas for culinary creativity when you combine fresh ingredients with simple techniques.
Fragrant aromas will drift through your kitchen, promising pure deliciousness that feels like a warm embrace.
Generations of home cooks have perfected this classic dessert, making it a timeless favorite for gatherings and quiet moments alike.
Prepare to fall in love with a dessert that celebrates the vibrant essence of fresh berries.
Sweet and Juicy Mixed Berry Cobbler Magic
Ingredients Needed for the Cobbler
For the Berry Filling:For the Cobbler Topping:For the Garnish and Baking:Step-by-Step Cobbler Baking Instructions
Step 1: Warm Up The Oven
Get your oven ready by heating it to 375F (190C). Grab a 9×13-inch baking dish or 9-inch pie dish and give it a light coating of grease to prevent sticking.
Step 2: Create Berry Magic
Grab a mixing bowl and toss together:Gently mix the ingredients until they’re well combined. Pour this vibrant mixture into your prepared baking dish.
Step 3: Craft Fluffy Cobbler Topping
In another bowl, whisk together:Now add:Stir until ingredients are just combined. Don’t overmix or your topping will become tough.
Step 4: Build and Bake Your Dessert
Dollop spoonfuls of the cobbler topping over the berry mixture, leaving some spaces between each dollop. Sprinkle almond flakes across the top for extra crunch.
Slide the dish into the preheated oven and bake for 40-45 minutes. You’ll know it’s done when the topping turns golden and the berry filling starts bubbling.
If the top browns too quickly, loosely cover with aluminum foil during the last half of baking.
Step 5: Serve and Enjoy
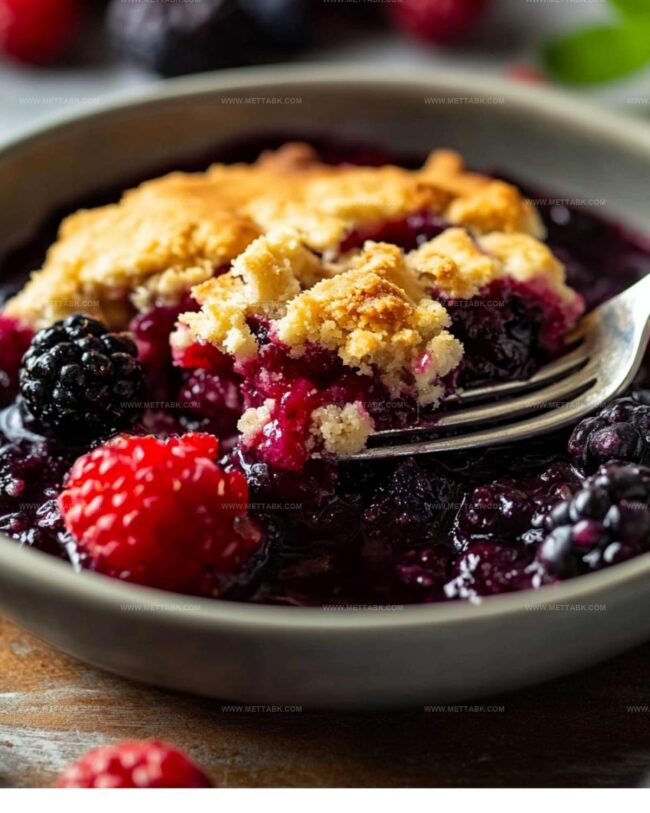
Let the cobbler rest for 15 minutes after removing from the oven.
Serve warm with a scoop of vanilla ice cream, a dollop of whipped cream, or a spoonful of creamy mascarpone.
Tips to Achieve the Perfect Cobbler
Variations for Berry Lovers
Sides That Work Great With Cobbler
Keeping Cobbler Fresh for Later
FAQs
Yes, frozen berries work perfectly. Just thaw and drain excess liquid before using to prevent a watery filling.
The topping should be golden brown and slightly crisp on the edges. When a toothpick inserted comes out clean, it’s ready.
You can make a quick substitute by adding 1 tablespoon of lemon juice or white vinegar to 1 cup of milk and letting it sit for 5 minutes.
Avoid overmixing the batter. Stir just until the ingredients are combined to keep the topping light and fluffy.
Print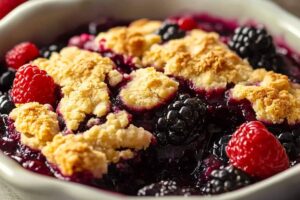
Mixed Berry Cobbler Recipe
- Total Time: 1 hour 5 minutes
- Yield: 6 1x
Description
Sweet summer memories come alive with Mixed Berry Cobbler, a delightful dessert that blends juicy berries and buttery crumble. Warm from the oven, this classic treat invites you to savor each spoonful of homemade comfort.
Ingredients
Main Ingredients:
- 4 cups (620 grams / 21.9 ounces) mixed berries (blueberries, raspberries, strawberries, blackberries)
- 1 cup (125 grams / 4.4 ounces) all-purpose flour
- 3/4 cup (150 grams / 5.3 ounces) granulated sugar
- 3/4 cup (180 milliliters / 6.1 fluid ounces) buttermilk
Wet Ingredients:
- 6 tablespoons (90 grams / 3.2 ounces) unsalted butter, cold & cubed
- 1/4 cup (60 grams / 2.1 ounces) melted butter
- 1 tablespoon lemon juice
- 1 teaspoon vanilla extract
Supplementary Ingredients:
- 2 tablespoons (20 grams / 0.7 ounces) cornstarch
- 1 teaspoon baking powder
- 1/2 teaspoon salt
- Zest of 1 lemon
- Zest of 1 orange
- 2 tablespoons almond flakes
Serving Options:
- Vanilla ice cream
- Whipped cream
- Mascarpone cream
Instructions
- Prepare the oven to 375F (190C) and coat a 9×13-inch baking dish with cooking spray or butter to prevent sticking.
- Combine fresh mixed berries with granulated sugar, cornstarch, fresh lemon juice, and vanilla in a mixing bowl, gently tossing to ensure even coating without crushing the delicate fruits.
- Transfer the berry mixture into the prepared baking dish, spreading it evenly to create a consistent base for the cobbler.
- In a separate bowl, blend flour, sugar, baking powder, and salt for the cobbler topping, creating a dry ingredient foundation.
- Pour buttermilk, melted butter, vanilla extract, lemon zest, and orange zest into the dry ingredients, stirring until just incorporated without overmixing to maintain a light texture.
- Carefully dollop the cobbler topping over the berry filling, allowing small gaps between spoonfuls to create a rustic appearance and enable proper baking.
- Sprinkle sliced almonds across the surface for added crunch and visual appeal.
- Bake for 40-45 minutes, watching for a golden-brown topping and bubbling berry filling; if the top browns too quickly, loosely tent with aluminum foil.
- Remove from the oven and allow the cobbler to rest for 15 minutes, which helps the filling set and makes serving easier.
- Serve warm, accompanied by a scoop of vanilla ice cream, dollop of whipped cream, or creamy mascarpone for an indulgent dessert experience.
Notes
- Choose berries at peak ripeness for maximum flavor and natural sweetness.
- Adjust sugar levels based on the tartness of your selected berries, tasting the filling before baking.
- Frozen berries work perfectly when fresh aren’t available, just don’t thaw them before mixing.
- Swap buttermilk with Greek yogurt or regular milk mixed with a splash of vinegar for a quick substitute.
- Create a gluten-free version by using alternative flour like almond or coconut flour.
- Prevent soggy bottom by placing the baking dish on the middle oven rack for even heat distribution.
- Customize the topping with added spices like cinnamon or cardamom for extra warmth.
- Prep Time: 20 minutes
- Cook Time: 45 minutes
- Category: Desserts
- Method: Baking
- Cuisine: American
Nutrition
- Serving Size: 6
- Calories: 334 kcal
- Sugar: 39 g
- Sodium: 158 mg
- Fat: 14 g
- Saturated Fat: 7 g
- Unsaturated Fat: 6 g
- Trans Fat: 0.2 g
- Carbohydrates: 49 g
- Fiber: 4 g
- Protein: 3 g
- Cholesterol: 34 mg
Nate Harper
Founder & Recipe Curator
Expertise
Single-Recipe Development, Farm-to-Table Cooking, Seasonal Menu Planning, Culinary Storytelling, Home Kitchen Innovation
Education
Cascade Culinary Institute – Central Oregon Community College
Certificate in Culinary Arts
Focus: Farm-to-table cuisine, sustainable cooking practices, and seasonal recipe creation.
Nate studied under experienced chefs who emphasized local sourcing, minimal waste, and building recipes from fresh, simple ingredients.
Nate Harper is the founder and creative force behind Make, Take, Bake. Raised in the wild beauty of Oregon’s high desert, Nate grew up surrounded by family gardens, farmers’ markets, and home kitchens that celebrated the seasons.
His early love for simple, honest food evolved into a professional passion when he attended Cascade Culinary Institute, where he sharpened his skills in creating recipes that are sustainable, satisfying, and made for everyday life.
Nate’s goal is to make cooking feel accessible, free of fuss, and full of flavor. He believes a single, thoughtfully built dish can stand alone, and sometimes even steal the show.