
Sweet Holiday Magic: Mom’s Christmas Jello Balls Recipe
Crafting delightful mom’s christmas jello balls brings back warm memories of holiday gatherings.
Festive treats like these spark joy and connection around the table.
Sweet memories dance through each colorful bite of these classic desserts.
Generations have treasured this simple yet magical recipe passed down with love.
Cheerful colors and playful shapes make these jello balls irresistible to kids and adults alike.
Delicate and fun, they promise to brighten any holiday celebration.
You’ll want to start mixing these delectable morsels right away!
Mom’s Classic Christmas Jello Balls
Ingredients for Mom’s Christmas Jello Balls
Main Ingredients:
Cream: A rich, thick base that provides a smooth and creamy texture to the Jello balls.
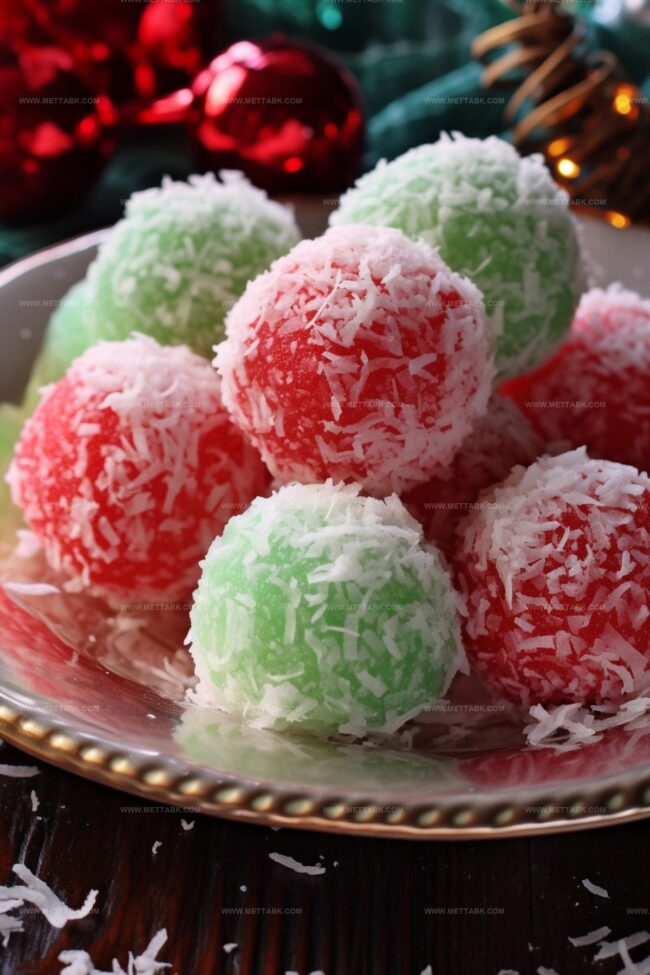
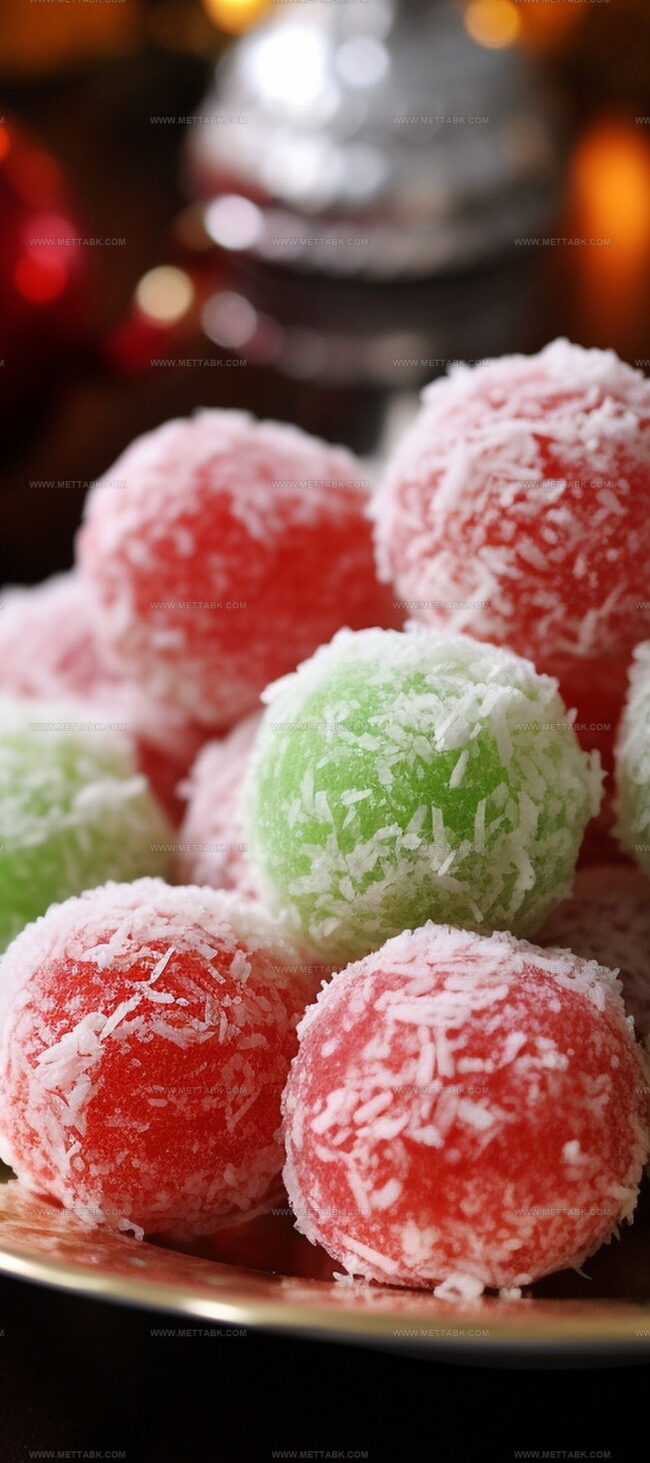
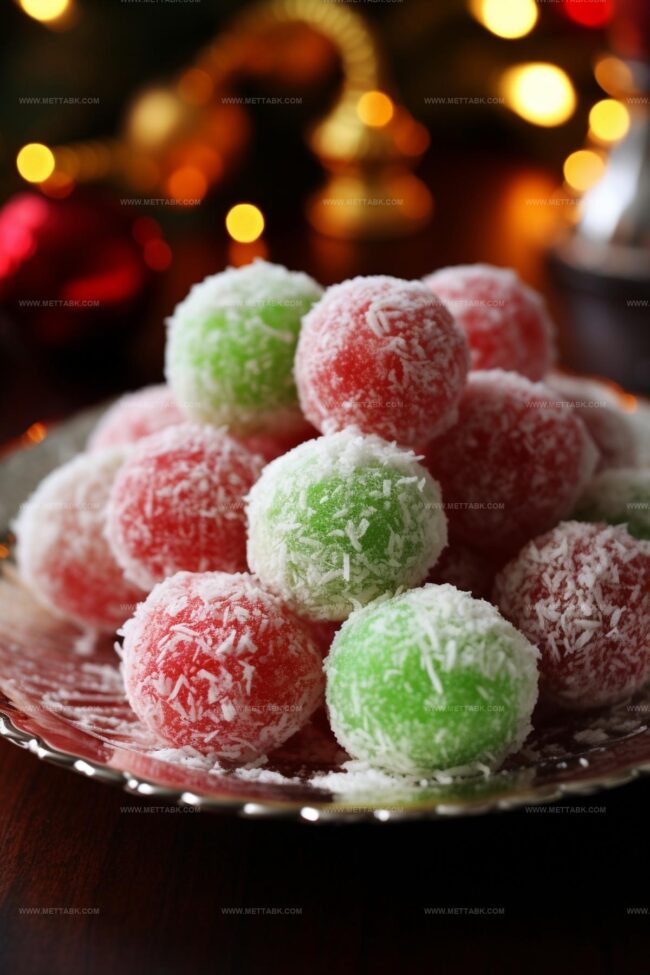
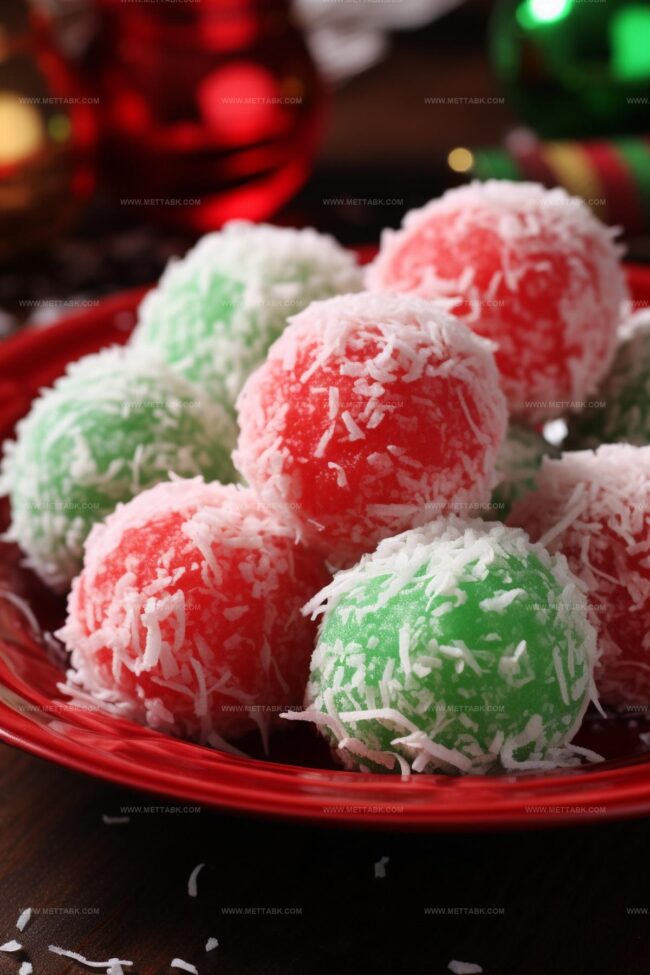
Red Jello: A vibrant, flavored gelatin powder that adds color and fruity taste to the dessert.
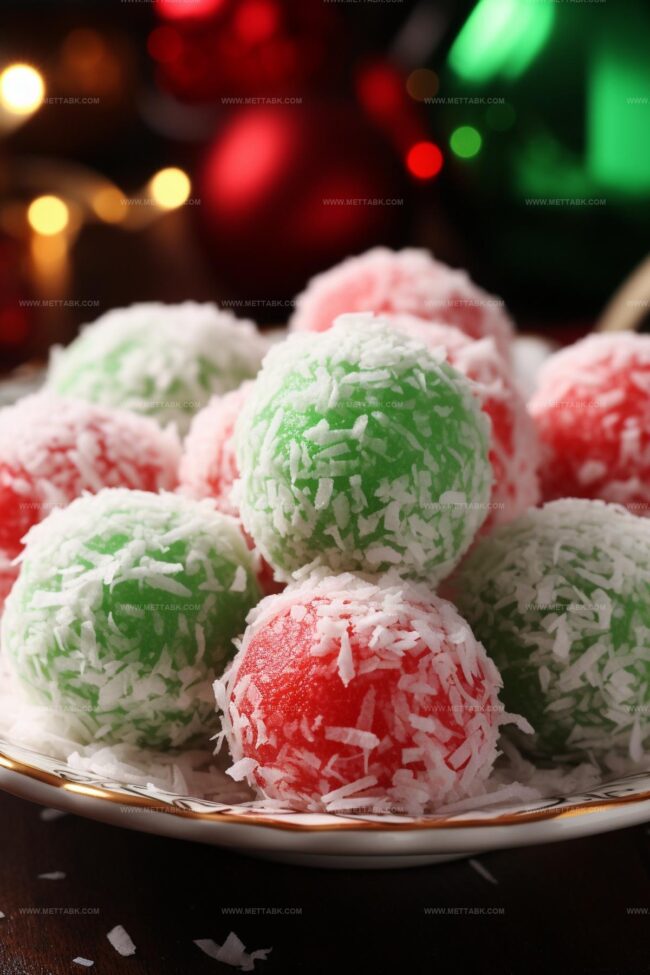
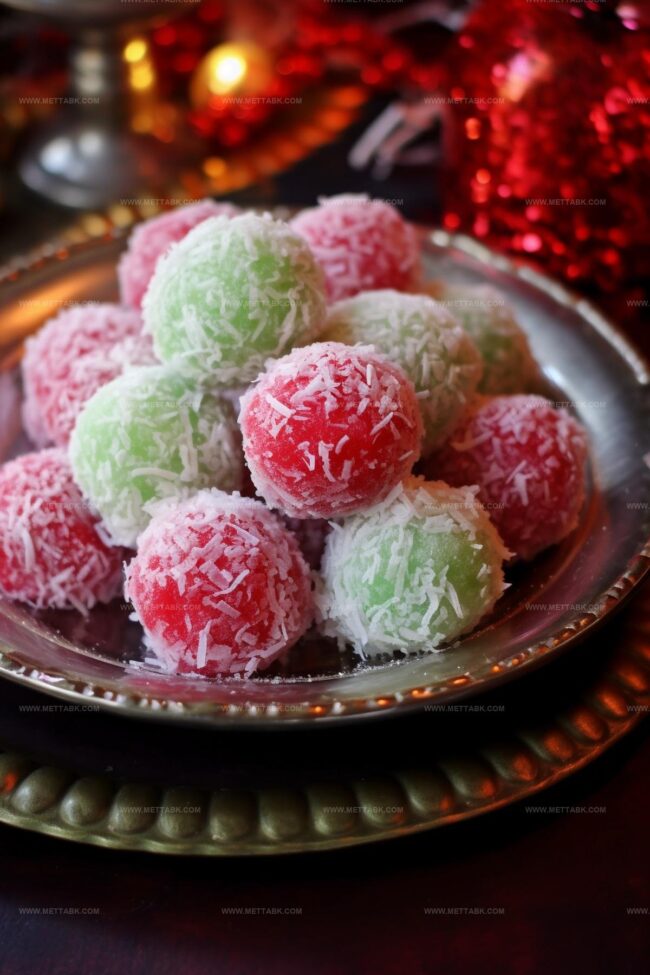
Desiccated Coconut: A dry, finely grated coconut that adds texture, flavor, and a delightful coating to the Jello balls.
Preparation Ingredients:Optional Coating:How to Make Mom’s Christmas Jello Balls
Step 1: Whip Up Creamy Jello Base
Grab a mixing bowl and pour in the thick cream. Sprinkle the entire red Jello package into the cream.
Grab a spoon and mix everything together with enthusiasm. Stir until the Jello powder completely dissolves, creating a vibrant and smooth mixture that looks like a festive sunset.
Step 2: Fold in Coconut Magic
Add the desiccated coconut into the creamy Jello mixture. Gently fold and mix the ingredients until the coconut is evenly distributed.
Make sure no dry coconut clumps remain, creating a perfectly blended treat.
Step 3: Shape Delightful Coconut Spheres
Use a tablespoon to scoop out portions of the mixture.
Roll each portion between your palms, creating smooth, round balls. Aim for consistent size and shape, making each ball look like a perfect little snowball.
Step 4: Roll and Chill Coconut Treasures
Spread the remaining coconut on a plate. Carefully roll each Jello ball in the coconut, ensuring a complete and even coating.
Place the coated balls on a baking sheet or tray. Pop the tray into the refrigerator and let the treats chill for at least 2 hours.
This helps them set and develop a delightful, firm texture that melts in your mouth.
Pro Tips for Mom’s Christmas Jello Balls
Variations to Try on Mom’s Christmas Jello Balls
Pairing Ideas for Mom’s Christmas Jello Balls
Storage Advice for Mom’s Christmas Jello Balls

FAQs

Yes, you can substitute the red Jello with any flavor you prefer. Just ensure the color and taste complement the dessert.
While coconut is a key ingredient, you could replace it with crushed graham crackers or finely chopped nuts for a similar texture.
Lightly wet your hands with cold water before rolling to prevent the mixture from sticking to your palms.
Absolutely! Kids can help mix ingredients and roll the balls, making it a fun family activity. Just supervise them during the process.
Print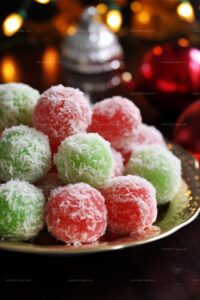
Moms Christmas Jello Balls Recipe
- Total Time: 2 hours 20 minutes
- Yield: 12 1x
Description
Festive Mom’s Christmas Jello Balls blend nostalgia with sweet holiday cheer. Creamy gelatin treats sparkle with seasonal joy, offering families a delightful dessert that brings warmth to winter gatherings.
Ingredients
- 1 (3 oz) package red jello
- 2 cups unsweetened desiccated coconut (finely grated)
- 170 mL (3/4 cup) high-fat content cream (Fussell’s or Carnation brand)
Instructions
- Blend thick cream and red Jello powder in a mixing bowl, stirring until the powder completely dissolves and creates a uniform crimson mixture.
- Fold in desiccated coconut, mixing thoroughly to ensure even distribution throughout the creamy base, eliminating any dry or uneven patches.
- Utilize a tablespoon to portion out the mixture, carefully rolling each scoop between palms to create smooth, consistent spherical shapes approximately one tablespoon in size.
- Prepare a separate plate with remaining desiccated coconut for coating. Gently roll each formed ball through the coconut, ensuring complete and uniform coverage on all surfaces.
- Arrange coconut-coated balls on a clean tray, maintaining slight separation between each piece to prevent sticking.
- Refrigerate the prepared Jello balls for 2 hours at 40°F, allowing them to firm up and develop a compact, chilled texture. The cold environment will help maintain their shape and enhance their refreshing quality.
Notes
- Chill your hands briefly under cold water before rolling the Jello balls to prevent sticking and create smoother, more uniform spheres.
- Use full-fat cream for richer texture and better binding of the Jello mixture, ensuring the balls hold their shape perfectly.
- For a gluten-free version, double-check that the Jello powder is certified gluten-free and use alternative coconut brands if needed.
- Experiment with different Jello flavors like strawberry or raspberry to create vibrant color variations and unique taste experiences.
- Prep Time: 20 minutes
- Cook Time: 2 hours
- Category: Snacks, Desserts
- Method: Blending
- Cuisine: American
Nutrition
- Serving Size: 12
- Calories: 263
- Sugar: 13 g
- Sodium: 35 mg
- Fat: 24 g
- Saturated Fat: 21 g
- Unsaturated Fat: 3 g
- Trans Fat: 0 g
- Carbohydrates: 9 g
- Fiber: 5 g
- Protein: 1 g
- Cholesterol: 38 mg
Clara Bennett
Contributing Recipe Developer & Food Writer
Expertise
Baking and Pastry Development, Gluten-Free and Allergy-Friendly Recipe Creation, Culinary Storytelling and Food Journalism, Recipe Testing and Standardization, Southern Comfort Foods and Modern Twists
Education
Sullivan University – National Center for Hospitality Studies
Associate Degree in Culinary Arts
Focus: Baking and Pastry Arts, Recipe Testing, and Culinary Journalism.
Clara specialized in crafting desserts that blend classic Southern comfort with modern techniques, while developing strong writing skills to tell the story behind every dish.
Lane Community College (Certificate Program)
Certificate in Food Writing and Photography
Focus: Culinary storytelling, recipe formatting, food styling, and visual presentation.
Clara’s love of baking started young, powered by homemade pies, biscuits, and stories passed around the family table.
After earning her degree at Sullivan University and a food writing certificate at Lane Community College, she turned her passion into a craft: sharing recipes that are simple, soulful, and always full of heart.
She’s big on bold flavors, flexible ideas, and creating sweets that fit any table (yes, even if you’re gluten-free). When she’s not baking, you’ll find her wandering farmers’ markets, styling food for the next photo shoot, or working on her ever-growing recipe journal.