Quick & Crispy Muffin Tin Pizza Bombs Recipe for Fun Family Meals
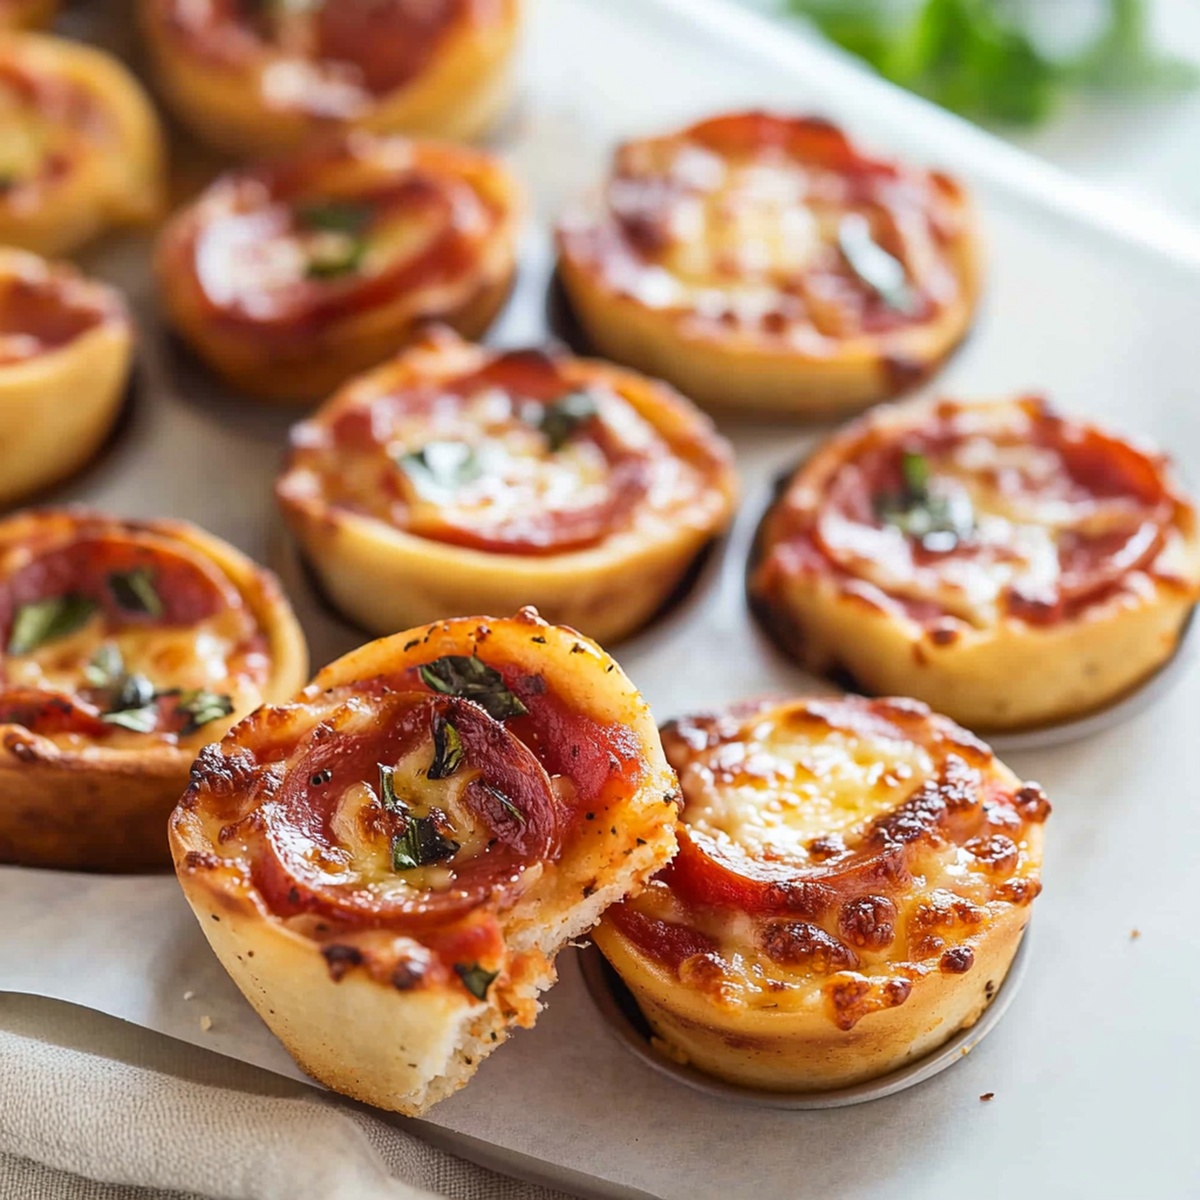
Pizza lovers, these muffin tin pizza bombs bring explosive flavor right to your plate!
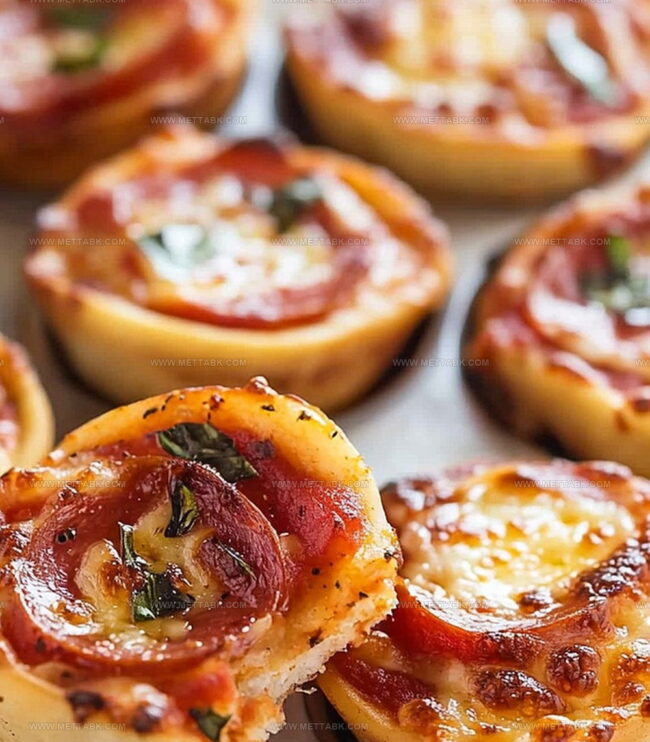
Crispy edges and gooey cheese make this handheld treat irresistible.
Compact and perfect for snacking, each bite delivers maximum deliciousness.
Stuffed with classic pepperoni or customized with vegetables, these mini pizzas suit every palate.
Kids and adults alike will devour these portable morsels in seconds.
Weekend gatherings demand something fun and tasty like these crowd-pleasing bites.
Whip up a batch and watch everyone’s faces light up with pure culinary joy.
Muffin Tin Pizza Bombs That Are Party Favorites
Ingredients for Mini Muffin Tin Pizza Bombs
Dough Base:Filling Ingredients:Preparation Ingredients:How to Bake Muffin Tin Pizza Bombs Easily
Step 1: Warm Up the Oven
Crank the oven to a toasty 375°F to get ready for some delicious pizza magic.
Step 2: Prepare the Muffin Tin
Give your muffin tin a quick spray of cooking spray to prevent any sticky situations.
Step 3: Roll and Shape the Dough
Grab your pizza dough and roll it out on a lightly floured surface until it’s about 1/4 inch thick. Slice the dough into neat squares that’ll become your tasty pizza bombs.
Step 4: Create Flavor Pockets
For each dough square, add your yummy fillings:Step 5: Wrap and Seal the Goodies
Gather up the corners of each dough square and pinch them together super tight. Make sure no cheesy goodness can escape!
Step 6: Bake to Perfection
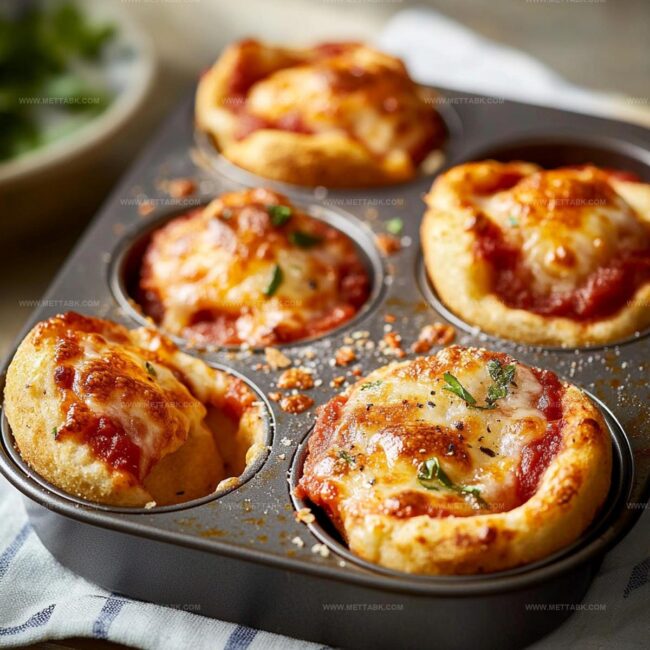
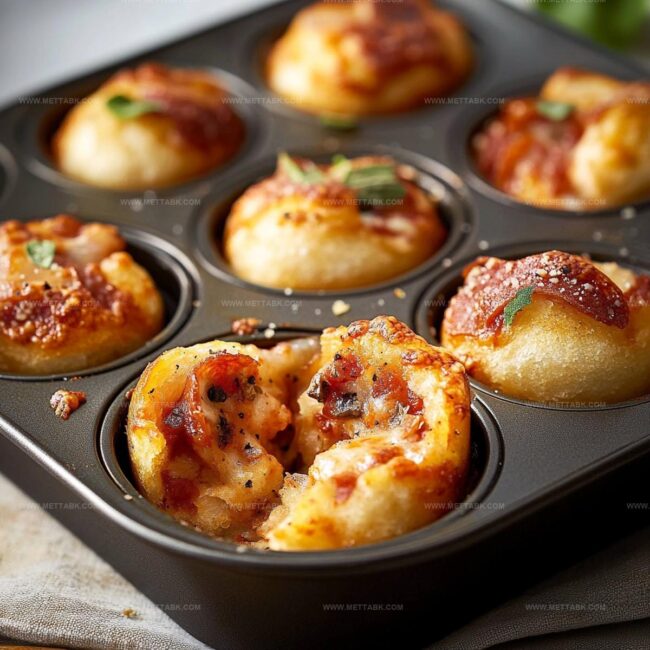
Nestle your sealed pizza bombs into the muffin tin. Pop them in the oven and bake for 15-18 minutes until they turn a gorgeous golden brown.
The cheese will be melty, the edges crispy, and your kitchen will smell amazing!
Tips for Crispy and Cheesy Muffin Tin Pizza Bombs

Flavorful Twists on Muffin Tin Pizza Bombs
Pairings That Complement Muffin Tin Pizza Bombs
Storage Tips for Muffin Tin Pizza Bombs
FAQs
You’ll need pizza dough, mozzarella cheese, pepperoni slices, pizza sauce, and cooking spray. Optional extras include Italian seasoning or garlic powder for extra flavor.
Absolutely! While mozzarella works best, you can substitute with cheddar, provolone, or a blend of cheeses. Just ensure it melts well and complements the pepperoni.
Yes, they’re perfect for kids! They’re small, easy to eat, and packed with flavors children love. Kids can even help assemble them, making it a fun cooking activity.
Print
Muffin Tin Pizza Bombs Recipe
- Total Time: 38 minutes
- Yield: 6 1x
Description
Delightful Pizza Bombs bake classic Italian flavors into handheld snacks perfect for quick meals. Crispy dough pockets filled with melted cheese and savory toppings will satisfy hungry appetites everywhere.
Ingredients
- 1 can (13.8 oz/392 g) pizza dough
- 1 cup (240 ml/240 g) shredded mozzarella cheese
- 20 slices pepperoni
- 1/2 cup (120 ml/120 g) pizza sauce
- 1 tsp (5 ml) Italian seasoning
- Cooking spray
Instructions
- Warm the oven to 375°F, ensuring a consistent heat for optimal baking.
- Generously coat the muffin tin with non-stick cooking spray to prevent sticking.
- Dust a clean work surface with flour and gently roll the pizza dough into a thin, even layer approximately 1/4 inch thick.
- Slice the dough into uniform squares, creating a consistent base for each pizza bomb.
- Distribute shredded mozzarella cheese at the center of each dough square, placing a pepperoni slice on top.
- Add a small, precise dollop of pizza sauce to enhance the flavor profile of each bundle.
- Carefully lift the edges of the dough square, gathering and pinching the corners tightly to create a secure seal around the filling.
- Position the sealed dough balls into the prepared muffin tin, ensuring they are evenly spaced.
- Transfer the muffin tin to the preheated oven and bake for 15-18 minutes, watching for a golden-brown exterior that indicates perfect doneness.
- Remove from the oven and allow the pizza bombs to cool slightly before serving to prevent burning.
Notes
- Experiment with different cheese types like cheddar, provolone, or goat cheese for unique flavor profiles.
- Create vegetarian versions by replacing pepperoni with diced bell peppers, mushrooms, or spinach.
- Seal the dough edges completely to prevent cheese leakage during baking, using a gentle pinching technique.
- Brush the top of each pizza bomb with garlic butter or olive oil before baking for extra golden and crispy texture.
- Prep Time: 20 minutes
- Cook Time: 18 minutes
- Category: Lunch, Dinner, Appetizer, Snacks
- Method: Baking
- Cuisine: American
Nutrition
- Serving Size: 6
- Calories: 290 kcal
- Sugar: 3 g
- Sodium: 580 mg
- Fat: 16 g
- Saturated Fat: 7 g
- Unsaturated Fat: 7 g
- Trans Fat: 0.2 g
- Carbohydrates: 22 g
- Fiber: 1.5 g
- Protein: 14 g
- Cholesterol: 35 mg
Clara Bennett
Contributing Recipe Developer & Food Writer
Expertise
Baking and Pastry Development, Gluten-Free and Allergy-Friendly Recipe Creation, Culinary Storytelling and Food Journalism, Recipe Testing and Standardization, Southern Comfort Foods and Modern Twists
Education
Sullivan University – National Center for Hospitality Studies
Associate Degree in Culinary Arts
Focus: Baking and Pastry Arts, Recipe Testing, and Culinary Journalism.
Clara specialized in crafting desserts that blend classic Southern comfort with modern techniques, while developing strong writing skills to tell the story behind every dish.
Lane Community College (Certificate Program)
Certificate in Food Writing and Photography
Focus: Culinary storytelling, recipe formatting, food styling, and visual presentation.
Clara’s love of baking started young, powered by homemade pies, biscuits, and stories passed around the family table.
After earning her degree at Sullivan University and a food writing certificate at Lane Community College, she turned her passion into a craft: sharing recipes that are simple, soulful, and always full of heart.
She’s big on bold flavors, flexible ideas, and creating sweets that fit any table (yes, even if you’re gluten-free). When she’s not baking, you’ll find her wandering farmers’ markets, styling food for the next photo shoot, or working on her ever-growing recipe journal.