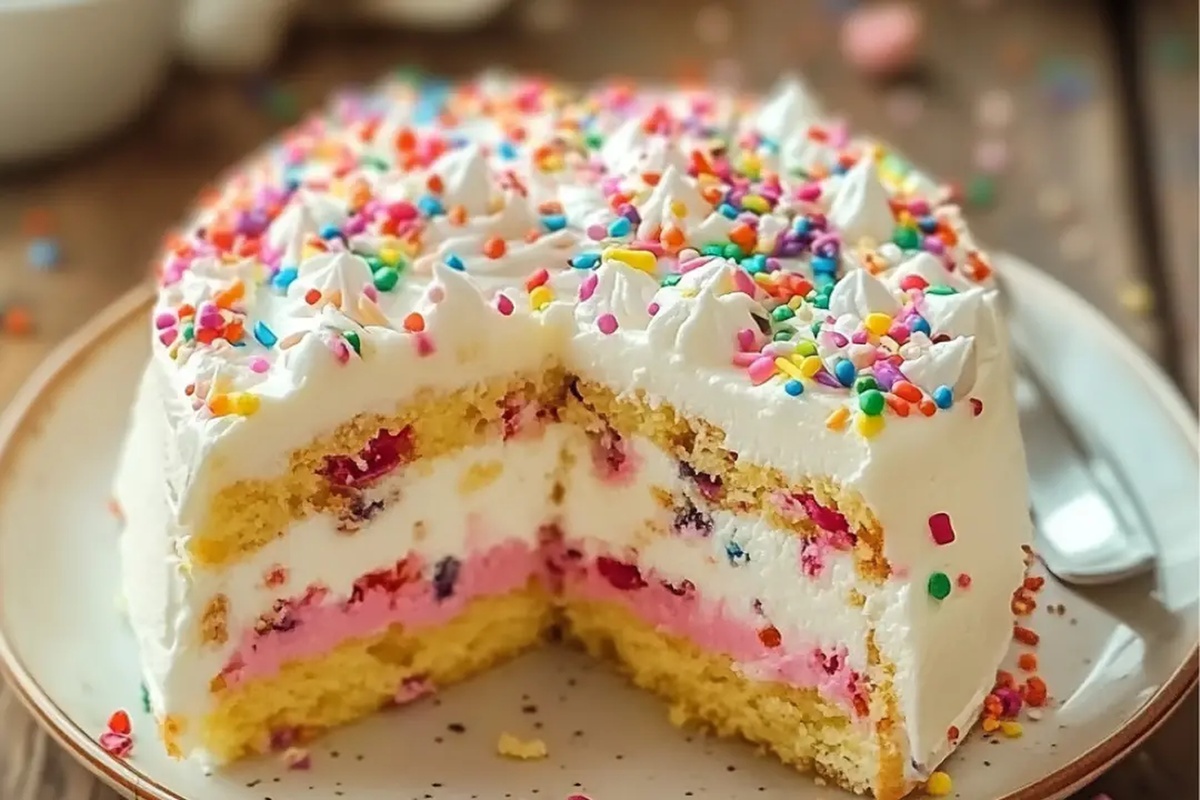
The Joyful No-Bake Birthday Cake Delight Recipe for Everyone
Sweet tooths go crazy for this no-bake birthday cake delight that brings pure magic to dessert tables everywhere.
Creamy layers promise to make any celebration spectacular without turning on the oven.
Rich vanilla cream and colorful sprinkles create a dreamy texture that melts in your mouth.
Minimal ingredients mean maximum enjoyment for anyone wanting a quick and impressive treat.
Soft graham cracker base provides the perfect foundation for this crowd-pleasing dessert.
Whipping up this recipe takes less than thirty minutes, making it ideal for spontaneous parties or last-minute cravings.
You won’t believe how simple it is to create such a stunning, delectable dessert that looks like it came from a professional bakery.
No-Bake Birthday Cake Delight to Celebrate Anytime
Ingredients for Easy No-Bake Cake Delight
For the Crust:For the Cheesecake Layer:For the Pudding Layer and Topping:How to Assemble No-Bake Birthday Cake
Step 1: Crush Cookie Base
Grab your favorite vanilla sandwich cookies and transform them into a crumbly foundation. Use a food processor or place cookies in a sealed plastic bag and crush with a rolling pin until they become fine, sandy crumbs.
Mix the cookie crumbs with melted butter until they stick together perfectly.
Step 2: Create Crust Foundation
Press the buttery cookie mixture into a 9×13-inch dish, creating an even, compact layer.
Use the back of a spoon or your fingers to smooth the surface. Pop the dish into the refrigerator to let the crust firm up while you prepare the next delicious layer.
Step 3: Whip Cheesecake Filling
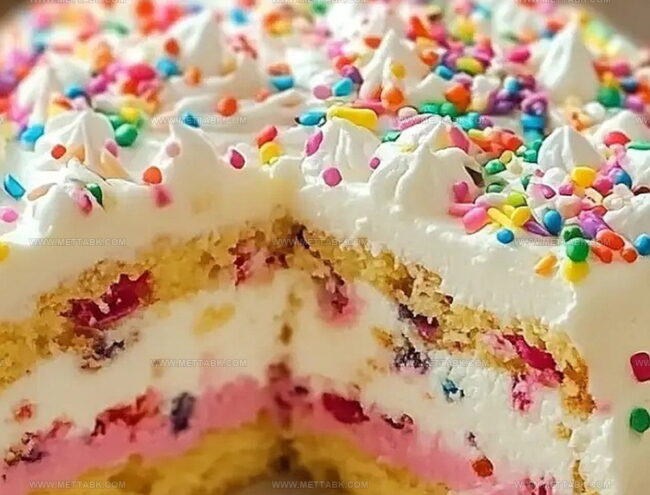
In a large mixing bowl, blend cream cheese until silky smooth. Add:Blend everything until the mixture becomes light and fluffy.
Spread this dreamy layer evenly over the chilled cookie crust.
Step 4: Craft Pudding Layer
In a separate bowl, mix vanilla pudding mix with milk until it transforms into a thick, creamy consistency.
Gently fold in Cool Whip to create an extra luscious texture. Pour this layer carefully over the cheesecake filling, creating a beautiful, smooth surface.
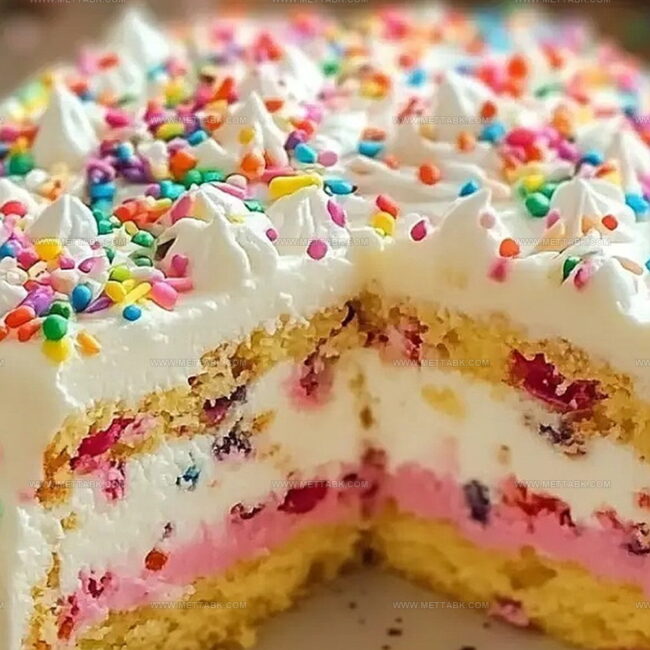
Step 5: Decorate and Chill
Top the dessert with remaining Cool Whip and shower it with extra rainbow sprinkles. Slide the dish into the refrigerator and let it rest for at least 4 hours or overnight.
This waiting time allows all the layers to set and meld together perfectly.
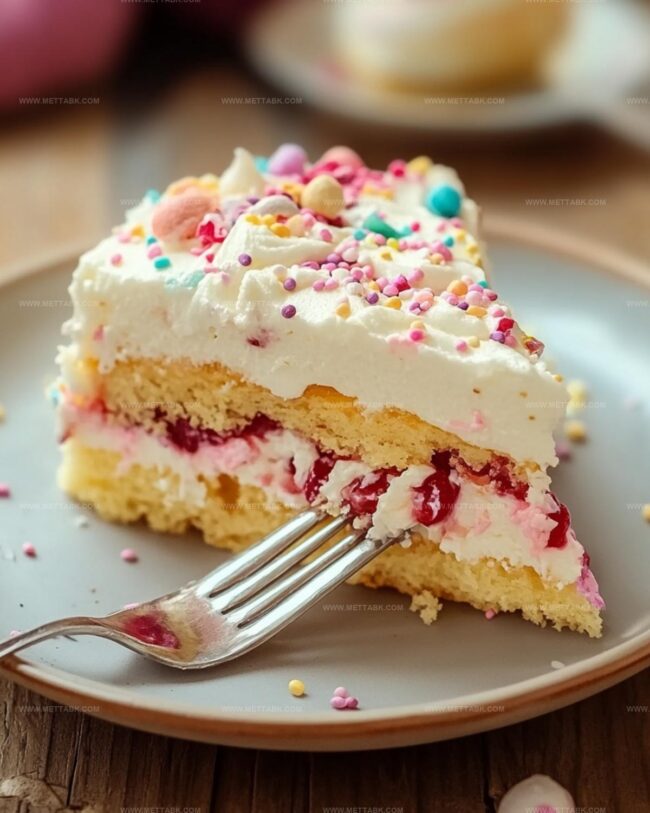
Step 6: Slice and Celebrate
Remove the chilled dessert from the refrigerator.
Cut into squares and serve. Each bite promises a burst of birthday cake flavor without turning on the oven!
Tips for Perfect No-Bake Cake Texture
Variations to Change Up Your Cake
Pairing Ideas for Birthday Cake Dessert
Proper Storage for No-Bake Cake
Store the no-bake birthday cake delight in an airtight container in the refrigerator for up to 5 days. Cover tightly with plastic wrap or a lid to prevent absorption of other food odors.
Wrap the dessert securely in plastic wrap, then place in a freezer-safe container. Freeze for up to 2 months. Thaw overnight in the refrigerator before serving.
Cut the dessert into slices, wrap each separately in plastic wrap, and store in the refrigerator. This method helps maintain freshness and makes grabbing a quick treat easier.
Since this is a no-bake, chilled dessert, avoid microwaving or heating. Simply remove from the refrigerator 10-15 minutes before serving to soften slightly and enjoy at the perfect cool temperature.
FAQs
Yes, graham crackers or Oreo cookies work great as alternatives to vanilla sandwich cookies. Just crush them finely and mix with melted butter.
Absolutely! It’s a kid-friendly dessert with no raw eggs and simple ingredients. The colorful sprinkles make it extra fun for children.
The dessert should be firm and hold its shape when you cut a slice. Chilling for at least 4 hours or overnight ensures perfect layering and texture.
Definitely! You can prepare this No-Bake Birthday Cake Delight up to 2 days ahead and keep it refrigerated, which actually helps the flavors meld together.
Print
No-Bake Birthday Cake Delight Recipe
- Total Time: 4 hours 30 minutes
- Yield: 12 1x
Description
Creamy no-bake birthday cake delight promises sweet celebration without oven stress. Sprinkled with colorful confetti and rich vanilla essence, this dessert delivers pure joy you’ll savor with each delectable bite.
Ingredients
Main Ingredients:
- 14.3 ounces (405 grams) vanilla sandwich cookies
- 16 ounces (454 grams) cream cheese
- 16 ounces (454 grams) frozen whipped topping
- 6.8 ounces (193 grams) vanilla-flavored instant pudding mix
- 2 cups (480 milliliters) whole milk
Liquid and Binding Ingredients:
- 6 tablespoons (90 milliliters) salted butter
- 3/4 cup (180 grams) powdered sugar
Flavor and Decoration Ingredients:
- 1 teaspoon vanilla extract
- 1/4 cup (45 grams) rainbow sprinkles
Instructions
- Craft the foundation by pulverizing vanilla sandwich cookies into delicate crumbs using a food processor or crushing technique with a rolling pin.
- Incorporate melted butter into cookie crumbs, ensuring complete and uniform coating for structural integrity.
- Transfer the buttery crumb mixture into a greased 9×13-inch dish, pressing firmly to create a compact, even base layer.
- Chill the crust while preparing subsequent components to maintain structural stability.
- Whip cream cheese with powdered sugar and vanilla extract until achieving a silky, aerated texture with no lumps.
- Gently incorporate Cool Whip and rainbow sprinkles into the cream cheese mixture, maintaining a light, consistent blend.
- Carefully spread the creamy cheesecake layer across the chilled crust, ensuring smooth, even coverage.
- Prepare vanilla pudding by whisking mix with milk until reaching a thick, luxurious consistency.
- Fold remaining Cool Whip into pudding, creating a light, voluminous texture.
- Distribute pudding layer evenly atop the cheesecake layer, maintaining clean, precise edges.
- Crown the dessert with remaining Cool Whip, generously scattering additional rainbow sprinkles for vibrant decoration.
- Refrigerate for minimum 4 hours or ideally overnight, allowing layers to set and flavors to meld.
- Slice and serve directly from the chilled dish, revealing the playful, festive layers.
Notes
- Crumble cookies with a food processor for ultra-fine, smooth texture that helps crust bind perfectly.
- Soften cream cheese at room temperature beforehand to ensure silky, lump-free cheesecake layer.
- Fold sprinkles gently to prevent color bleeding and maintain vibrant, festive appearance.
- Experiment with gluten-free sandwich cookies or dairy-free alternatives for dietary restrictions, keeping dessert accessible for everyone.
- Prep Time: 30 minutes
- Cook Time: 4 hours
- Category: Desserts
- Method: Refrigerating
- Cuisine: American
Nutrition
- Serving Size: 12
- Calories: 318
- Sugar: 21 g
- Sodium: 164 mg
- Fat: 19 g
- Saturated Fat: 11 g
- Unsaturated Fat: 7 g
- Trans Fat: 0.5 g
- Carbohydrates: 30 g
- Fiber: 1 g
- Protein: 4 g
- Cholesterol: 50 mg
Nate Harper
Founder & Recipe Curator
Expertise
Single-Recipe Development, Farm-to-Table Cooking, Seasonal Menu Planning, Culinary Storytelling, Home Kitchen Innovation
Education
Cascade Culinary Institute – Central Oregon Community College
Certificate in Culinary Arts
Focus: Farm-to-table cuisine, sustainable cooking practices, and seasonal recipe creation.
Nate studied under experienced chefs who emphasized local sourcing, minimal waste, and building recipes from fresh, simple ingredients.
Nate Harper is the founder and creative force behind Make, Take, Bake. Raised in the wild beauty of Oregon’s high desert, Nate grew up surrounded by family gardens, farmers’ markets, and home kitchens that celebrated the seasons.
His early love for simple, honest food evolved into a professional passion when he attended Cascade Culinary Institute, where he sharpened his skills in creating recipes that are sustainable, satisfying, and made for everyday life.
Nate’s goal is to make cooking feel accessible, free of fuss, and full of flavor. He believes a single, thoughtfully built dish can stand alone, and sometimes even steal the show.