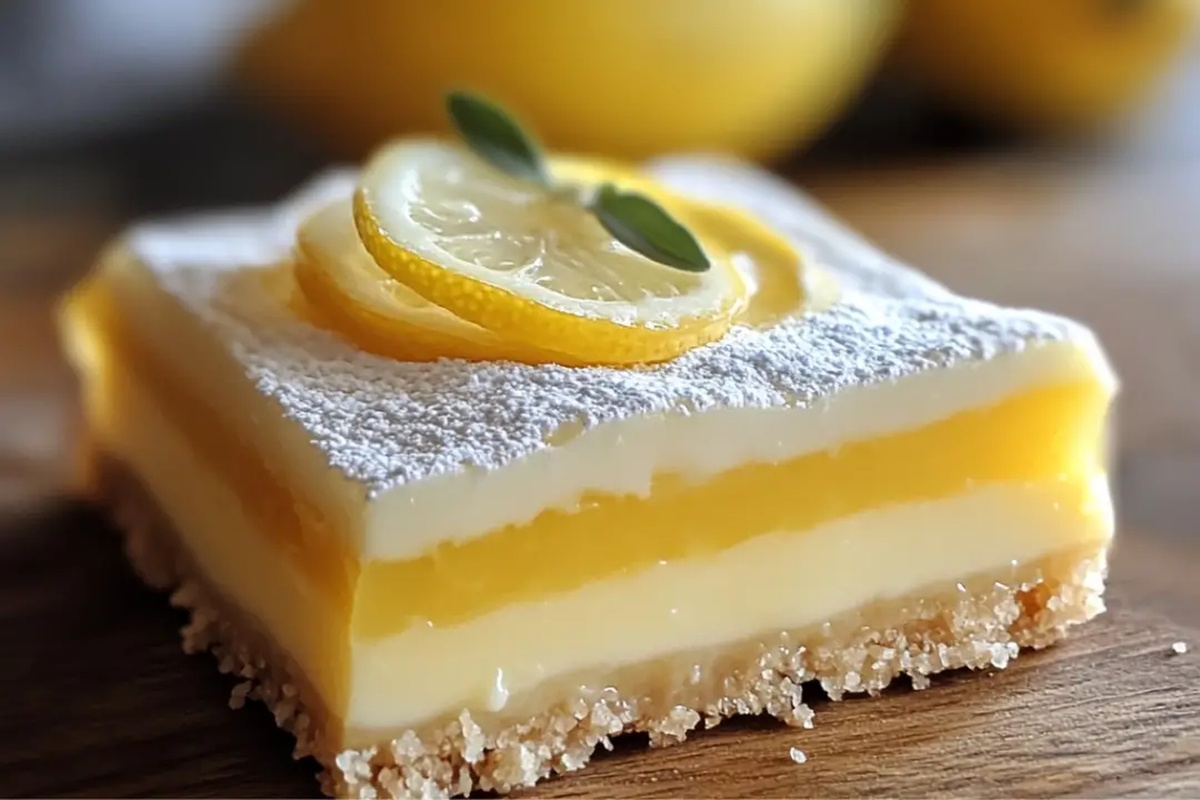
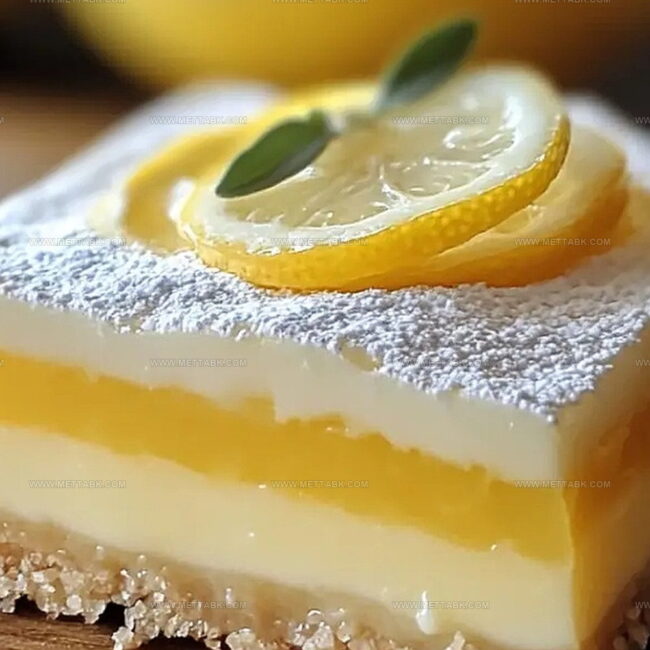
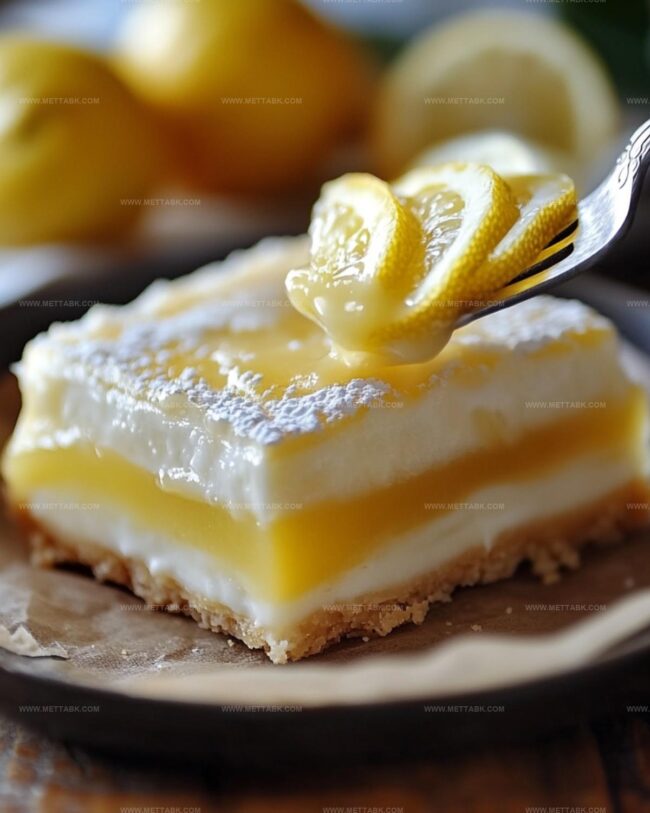
Dreamy No-Bake Lemon Curd Slice Recipe for Zesty Sweetness
Crafting a delightful no-bake lemon curd dream slice brings pure sunshine to your dessert table.
Zesty citrus notes dance through each creamy layer, promising a refreshing experience.
Sweet and tangy flavors meld together with incredible smoothness.
Minimal effort creates maximum impact in this simple yet elegant treat.
Cool kitchen temperatures become your ally when assembling this delectable dessert.
Silky textures and bright lemon essence will captivate anyone who takes a bite.
You won’t believe how easily this recipe comes together with just a few ingredients.
Prepare to fall in love with this irresistible no-bake sensation that screams summer comfort.
Dreamy No-Bake Lemon Curd Slices to Enjoy
Ingredients for Tangy Lemon Curd Slices
For the Crust:For the Filling:For the Garnish and Preparation:How to Make No-Bake Lemon Curd Delight
Step 1: Create Crumbly Crust Base
Mix crushed graham crackers with melted butter in a bowl. Press the mixture firmly into the bottom of a greased 9×9-inch pan, creating an even and compact foundation for your dessert.
Step 2: Whip Creamy Cloud Topping
Beat heavy cream with powdered sugar and vanilla extract using an electric mixer. Whip until soft, billowy peaks form that hold their shape when the beater is lifted.
Step 3: Fold Zesty Lemon Magic
Gently incorporate lemon curd and fresh lemon zest into the whipped cream mixture. Use a spatula to fold ingredients together, maintaining the light and airy texture of the cream.
Step 4: Layer Dreamy Filling
Spread the luscious lemon cream mixture evenly over the graham cracker crust. Use an offset spatula or the back of a spoon to create a smooth, elegant surface.
Step 5: Chill and Set
Place the dessert in the refrigerator for at least 4 hours or overnight. This allows the filling to firm up and the flavors to meld together beautifully.
Step 6: Slice and Serve
Remove the chilled dessert from the refrigerator. Cut into neat squares using a sharp knife.
Serve directly from the pan, keeping the slices chilled until ready to enjoy.
Tips for Silky Smooth Lemon Curd Slices

Variations on No-Bake Lemon Curd Slices
Pairing Suggestions to Brighten Lemon Slices
Proper Storage for Lemon Curd Slices
Store leftovers in an airtight container in the refrigerator for up to 3-4 days. Cover tightly with plastic wrap or lid to prevent absorption of other food odors.
Wrap individual slices in plastic wrap, then place in a freezer-safe container. Freeze for up to 2 months. Thaw overnight in the refrigerator before serving.
Remove from refrigerator 10-15 minutes before serving to soften slightly and enhance flavor. Use a clean, sharp knife to slice cleanly.
Avoid reheating, as the delicate cream and lemon curd will separate and lose their smooth texture. Enjoy chilled for best taste and consistency.
FAQs
Yes, store-bought lemon curd works perfectly fine in this recipe. Just ensure it’s good quality and has a bright, tangy flavor.
The dessert can be stored in the refrigerator for up to 3-4 days when covered tightly with plastic wrap or in an airtight container.
Absolutely! Simply substitute graham crackers with gluten-free graham-style crackers or crushed gluten-free cookies to create a similar crust.
Print
No-Bake Lemon Curd Dream Slice Recipe
- Total Time: 4 hours 20 minutes
- Yield: 8 1x
Description
Luscious lemon curd dream slice whisks creamy tangy flavors into a chilled dessert paradise. Cool citrus layers melt effortlessly on palates, promising refreshing bliss with each silky smooth bite you’ll savor.
Ingredients
Base:
- 100 grams (3.5 ounces) graham crackers, crushed
- 113 grams (4 ounces) unsalted butter, melted
Filling:
- 250 grams (8.8 ounces) lemon curd
- 240 grams (8.5 ounces) heavy cream
- 30 grams (1 ounce) powdered sugar
- 5 grams (0.18 ounces) vanilla extract
Garnish:
- Zest of 1 lemon
Instructions
- Crush graham crackers into fine crumbs and blend thoroughly with melted butter until well-integrated.
- Transfer the crumb mixture into a 9×9-inch pan, pressing firmly and evenly across the bottom to create a compact, uniform crust layer.
- Whip heavy cream with powdered sugar until soft, cloud-like peaks emerge, maintaining a light and airy texture.
- Introduce lemon curd and freshly grated zest into the whipped cream, gently folding to create a harmonious, swirled consistency without deflating the cream.
- Carefully spread the lemon-infused cream mixture over the prepared graham cracker base, using a spatula to achieve a smooth, level surface.
- Chill the dessert in the refrigerator for a minimum of 4 hours, allowing the layers to set and flavors to meld together.
- Once completely firm, remove from refrigerator and slice into neat, uniform squares using a sharp knife.
- Serve directly from the chilled pan, garnishing with additional lemon zest or a light dusting of powdered sugar if desired.
Notes
- Ensure graham crackers are finely crushed for a smooth, compact crust that holds together perfectly when sliced.
- Use room temperature ingredients, especially cream and lemon curd, to help them blend more smoothly and create a lighter texture.
- For a gluten-free version, swap graham crackers with gluten-free cookies or ground nuts like almonds for a delicious alternative base.
- Enhance lemon flavor by adding an extra pinch of lemon zest or a splash of fresh lemon juice to intensify the citrusy tang.
- Prep Time: 20 minutes
- Cook Time: 4 hours
- Category: Desserts
- Method: Blending
- Cuisine: British
Nutrition
- Serving Size: 8
- Calories: 348kcal
- Sugar: 21g
- Sodium: 105mg
- Fat: 29g
- Saturated Fat: 18g
- Unsaturated Fat: 10g
- Trans Fat: 0.3g
- Carbohydrates: 22g
- Fiber: 0.5g
- Protein: 2g
- Cholesterol: 78mg
Nate Harper
Founder & Recipe Curator
Expertise
Single-Recipe Development, Farm-to-Table Cooking, Seasonal Menu Planning, Culinary Storytelling, Home Kitchen Innovation
Education
Cascade Culinary Institute – Central Oregon Community College
Certificate in Culinary Arts
Focus: Farm-to-table cuisine, sustainable cooking practices, and seasonal recipe creation.
Nate studied under experienced chefs who emphasized local sourcing, minimal waste, and building recipes from fresh, simple ingredients.
Nate Harper is the founder and creative force behind Make, Take, Bake. Raised in the wild beauty of Oregon’s high desert, Nate grew up surrounded by family gardens, farmers’ markets, and home kitchens that celebrated the seasons.
His early love for simple, honest food evolved into a professional passion when he attended Cascade Culinary Institute, where he sharpened his skills in creating recipes that are sustainable, satisfying, and made for everyday life.
Nate’s goal is to make cooking feel accessible, free of fuss, and full of flavor. He believes a single, thoughtfully built dish can stand alone, and sometimes even steal the show.